Showing posts with label tomatoes. Show all posts

Wednesday, June 6, 2012

Penne Rosa


Well, it's another rainy day at the beach. Bummer as far as my vacation fun goes, but at least I'm getting lots of blog posts done, right? We just got rid of cable at our house, so my kids are fascinated at having Cartoon Network again, so at least they're happy being cooped up inside. The sun came out briefly this morning but then quickly got rainy and then windy. I just washed, dried, and flat ironed my hair (a whole lot of good that did with this humidity, let me tell you...note snarky tone in that) in the hopes that it would help bring out the sun because then I'd want to swim but would have to sacrifice my hair to do so. Does that make sense? Basically I'm hoping that my hairstyling will have control over the weather somehow.

With that note, on to my post.

I love me a creamy pasta dish, but since I'm pretty conscious of my calorie intake and eating healthy, creamy pasta sauces are something I tend to avoid unless I'm being really indulgent. So I was pretty excited when I saw this recipe on Pinterest for a creamy pasta sauce that used Greek yogurt for the creamy aspect of it. If you haven't discovered Greek yogurt yet, you need to try it! It's super tasty and very high in protein, which I love. The husband and I go through it like there's no tomorrow. Thankfully Costco sells it for super cheap! We both like it for a fast, high-protien breakfast or snack, plain with a little honey drizzled on the top, or it's delicious with fruit mixed in as well. And you can use it in place of all sorts of things. It's fantastic!! I even used it to make boxed mac and cheese recently when I was out of milk, and the result was amazing.

Now, I'll step down off my Greek yogurt soapbox and get on with my blog post.

Penne Rosa
Source: Back to Her Roots blog via Pinterest.com

12 ounces whole wheat penne
1 tablespoon olive oil
4 cloves garlic, minced
1 pinch crushed red pepper flakes
8 ounces button mushrooms, sliced
2 medium tomatoes (about 1/2 lb.) chopped
Salt and pepper, to taste
4 cups fresh spinach
1/2 cup marinara sauce
1/3 cup 0% plain Greek yogurt
1/4 cup grated parmesan cheese


Cook penne according to package directions, omitting salt and fat. Drain and set aside.

In a large skillet with a lid, heat olive oil over medium-low heat. Add in garlic and red pepper flakes, cook for 2 minutes or until garlic begins to soften.

Add in mushrooms, tomatoes, salt and pepper. Cook for 5 minutes, or until mushrooms begin to release their water. Remove from heat, add in spinach and cover skillet. Let spinach wilt for 2 minutes.

Remove lid and place skillet back over low heat. Add the penne, Greek yogurt and pasta sauce. Stir until sauce is mixed well and all pasta and veggies are coated. Heat until just warmed through. Divide into pasta bowls and serve topped with parmesan cheese.

*****

The original recipe called for shrimp, but I left that out because I didn't have any, and my kids don't really like it anyway, plus I thought we needed a vegetarian meal because we hadn't had one in awhile. Wow that was a long sentence. That was the only modification I made. This was a pretty big hit all around with my family. I think it would be delicious with the shrimp the original post used,k but it was good on its own with just the vegetables. It's definitely something I'd make again, especially when I want a creamy pasta fix!


Mmmm...sauce.


Monday, January 16, 2012

Chicken and Spinach Pasta Bake


Ah, a quiet Monday afternoon. The husband and Boy #1 are off at a hockey game, Boy #2 is upstairs watching Dumbo, I took a power nap on the couch, rolled out some king cake dough, and decided to update my blog. I wanted to get laundry put away and clean up our toy room a bit, but since the boy is upstairs watching a movie I've decided to put all that off and deal with it later to enjoy some peace and quiet downstairs. Ahhh. I have to revel in it now because I know it won't last long!!

This was another new recipe we had for dinner this past week. I had limited grocery money to use, but I had a lot of the items for this on hand already. It came from (surprise, surprise) Pinterest. I love a good casserole and this one sounded really tasty. Pasta, chicken, spinach, and cheese? Sounds scrumptious! Oh, Pinterest, where would my life be if I hadn't discovered you. If my husband were answering that question I'm sure he'd come up with some witty comment about how our house would be clean, laundry would be done, and we'd eat dinner on time every night. But, he's not, so I'll go on with my Pinterest obsession fascination.

Chicken and Spinach Pasta Bake
Source: Adapted from Saving Money Living Life blog (found via Pinterest)

8 oz uncooked whole wheat rotini pasta
1 T olive oil
1 c chopped onion
1 (10 oz) pack frozen spinach, thawed
3 c cubed, cooked chicken breasts
1 (14 oz) can Italian-style diced tomatoes, drained
1 (8 oz) container Philadelphia chive & onion cream cheese
1 cup ricotta cheese
½ t salt
½ t pepper
1½ c shredded mozzarella cheese

Prepare pasta according to package directions. Spread oil on bottom of 9x13 baking dish; add onion in a single layer. Bake at 375 for 15 minutes or just until tender. Transfer onion to large bowl, set aside.

Drain chopped spinach well. Stir pasta, spinach, chicken, & next 5 ingredients into onion in bowl. Spoon mixture into dish & sprinkle evenly with shredded mozzarella cheese. Bake uncovered at 375 for 30 minutes.

*****

I only changed up the original recipe slightly. It called for rigatoni, but I like whole wheat pasta, but my grocery stores don't carry whole wheat rigatoni, so I used rotini instead. I also added in the ricotta because 1) I was worried it wasn't going to be creamy enough, and 2) I had some in the fridge that needed to be used up. Plus we're all about extra cheeses here at my house. The original recipe also called for baking it covered for 30 minutes and then uncovered for 15. I didn't want to wait that long to eat, and I really didn't see the point in it since all the parts were cooked already and it just had to combine and heat up. It worked out fine that way. if I had more time I might try it the original way to see how it compared.

This was a total hit with everyone in my family. The husband and I especially dug it, and Boy #2 had more than one serving. Boy #1 I guess was more lukewarm about it now that I think back to dinner that night, but he still ate most of his and didn't complain. No complaining about a dinner, I take that as a win. This is definitely something I would make again. The husband and I really enjoyed the leftovers for lunch the next couple days, too.


By the way, I calculated this to be 279 calories per serving, assuming seven servings (based on the portions I served myself and the husband).


Monday, December 5, 2011

Slow Roasted Pork Shoulder


I am finally, FINALLY done with P90X!! There has been much rejoicing from me today, let me tell you. I need to have the husband take after pics of me so I can compare with the before pics to see how I improved. I'll post them on my fitness/weight loss blog once I have them. So now my afternoons are free to do things around the house (I'm fairly certain I've accomplished more in the hour Boy #2 has been napping than I have on most days total while doing P90X) and update my blog. Again, much rejoicing!

In one of my many recent catch-up posts, I once again professed my love for the Meal Planning 101 blog. As I was scouring it for recipes at one point I saw this one for a pork shoulder. Conveniently soon there after I found a pork shoulder on sale, so I figured I'd buy it and try this out. I had never been steered wrong from there before...don't you love finding blogs like that?!

Slow Roasted Pork Shoulder
Source: Meal Planner 101 blog

4 to 5 pound pork shoulder, bone-in
1 tbsp brown sugar
2 tsp cumin
1 1/2 tsp smoked paprika
1/2 tbsp salt
1 tsp pepper
1 tbsp olive oil
1 medium yellow onions, peeled and cut into wedges
4 cloves of garlic, peeled
1 28 oz. can of diced tomatoes
1 12 oz beer (use chicken stock or water here if you prefer, but we used a brown ale and it was perfect)

Preheat oven to 325 degrees

If the pork shoulder has any thick layers of fat you want to trim that off. Mix together the cumin, paprika, brown sugar, salt and pepper and rub it all over the pork shoulder. Let it rest with the spice mixture on for about 30 minutes.

Once the pork has rested, heat up a dutch oven with the olive oil over medium high heat. Place the pork inside and brown on all sides. Once it has a nice brown crust all over, remove from the pot and add the onions, garlic, tomatoes and beer. This is the part where you scrape up all the delicious bits off the bottom. Place the pork back in the dutch oven, cover and slow roast for 3 1/2 to 4 hours until the pork is extremely tender and pulls apart with a fork.

Remove the pork roast from the dutch oven to a cutting board. Using two forks, shred the meat and place on a platter. Remove any bits of fat. Serve the pork with mashed potatoes and steamed carrots and spoon the delicious sauce over the top. You can also puree the beer/tomato/onion mixture to get rid of any big chunks...it becomes a beautiful thick gravy that is just delicious. Enjoy every bite of this incredible roast.

*****

I had never cooked a pork shoulder before, so I was a little excited to try something new. This was super easy to put together, too. Mix rub, rub on meat, walk away and do something else. Heat oil, throw in roast, put away some dishes, turn roast in pot, put away some more dishes, turn roast in pot, put dirty dishes in dishwasher, turn roast in pot, finish loading dishwasher, finish roast steps. I'm all about multitasking.

This smelled AMAZING while it was cooking, I could not wait for dinner. And, folks, let me tell you, this did not disappoint. Oh man...it was so good! We all really loved it. It yielded quite a lot of meat, too, so we had pulled pork sandwiches with it later in the week. The meat was so tender from the slow roasting, it literally just fell apart once I started shredding it.

One of my local grocery stores had these on sale recently so I picked up another and can't wait to have this again, although the husband just got a smoker and wants to smoke it, which I would probably be okay with too. He can have part of it, and I'll slow roast the other.

Monday, November 28, 2011

Mary's Tortilla Soup


Last year when my dad passed away, my BFF Jen Clementine set up meal support for my family, which was a huge lifesaver. Honestly it's the only way my kids were going to get fed because I was not functioning at all. My friend Mary brought us this soup one night, and it was so good. My vegetarian brother was tempted to give up his non-meat eating ways to have some, he thought it looked and smelled so good. I was really excited to make it again, but given my family's soup aversion I never had. Plus it always seems weird to me to make soup in the summer in Phoenix. Who wants to eat soup when it's over 110 degrees outside?! But, after the Ham and Beans was decently received, I figured it was worth making. Our Wednesday and Thursday nights for the past month and half have been crazy busy with my bible study group meeting at our house on Wednesday nights and Boy #1 having soccer practice on Thursday nights, so I have been on the lookout for crockpot meals to make my life easier.

Mary's Tortilla Soup


Chicken Tortilla Soup

3-4 chicken breasts (frozen ok)
2 cans corn
2 cans chicken broth (14oz)
1 pkg taco seasoning
1 can stewed tomatoes
1 can cream of potato soup
1 can green chilies
1 cup cheddar cheese, grated
1 can tomato sauce (8oz)
16 oz sour cream (I use the light)
1 handful of cilantro

Put it all (except sour cream and cilantro) in the crock pot on low for 6 hours or high for 3 hours. Take out the chicken and shred it, then add back in. Add the tub of sour cream (you need to temper it so it doesn't curdle). Garnish with cheese, avocados and chips.

*****

I'm not sure if the husband had any of this last year when Mary brought it over since he wasn't that hip on soup, but he LOVED it this time. He requested this be the only tortilla soup I ever make again. Boy #1 thought it was okay, Boy #2 devoured it and asked for seconds. Woo hoo! It was really so easy to make, especially being able to just throw frozen chicken breasts in with everything else. I also added in a can of black beans because I had them on hand and thought they'd be a nice addition. I used regular tomato sauce, but I bet using El Pato sauce instead would be tasty as well. Hmmm...I'll have to try that next time.

I picked up some ciabatta rolls the same day we were having this, sliced them in half and put them under the broiler to brown them a bit, then spread with butter and sprinkled on some shredded cheddar cheese and put back under the broiler to melt the cheese. I figured Boy #1 wouldn't be that excited about the soup, so I wanted there to be something with the soup that he'd like. He thought the cheese rolls were the best thing ever. He kept saying, "Mom this cheese bread is just too good!" Ah, bless him.

This soup will probably be in high rotation in our house this winter. Thanks, Mary, for such a great recipe!

Oh, and the amazing cheese bread:

Thursday, September 8, 2011

Grilled Shrimp and Sausage Skewers with Smoky Paprika Glaze

I was cleaning out some stuff from my nightstand recently and happened across an issue of Bon Appetit magazine (or as the husband likes to call it, Bone Ape Tit) from last summer that had a tasty looking shrimp skewer on the cover. I love a good skewer, but my kids aren't big on shrimp, so I figured this would make a great dinner for the husband and me some Friday night.

Grilled Shrimp and Sausage Skewers with Smoky Paprika Glaze
Source: Bon Appetit, June 2010 issue

3/4 cup olive oil
4 large garlic cloves, pressed
2 tablespoons chopped fresh thyme
5 teaspoons smoked paprika
4 teaspoons Sherry wine vinegar
3/4 teaspoon salt
1/2 teaspoon freshly ground black pepper
1/2 teaspoon dried crushed red pepper
12 uncooked extra-large shrimp (13 to 15 per pound), peeled, deveined
12 1-inch-long pieces andouille or other fully cooked smoked sausages (such as linguiƧa; about 16 ounces)
12 cherry tomatoes
12 2-layer sections of red onion wedges
Nonstick vegetable oil spray

Whisk oil, garlic, thyme, smoked paprika, Sherry wine vinegar, salt, black pepper, and crushed red pepper in medium bowl to blend for glaze. Transfer half of glaze to small bowl and reserve for serving.

Alternately thread shrimp, sausage pieces, cherry tomatoes, and sections of onion wedges on each of 6 long metal skewers. Arrange skewers on large rimmed baking sheet. DO AHEAD Can be made up to 6 hours ahead. Cover and chill skewers and bowls of glaze separately.

Coat grill rack with nonstick spray and prepare barbecue (medium-high heat). Brush skewers on both sides with glaze from 1 bowl. Grill until shrimp are opaque in center, turning and brushing occasionally with more glaze, 6 to 8 minutes.

Arrange skewers on platter. Serve with remaining bowl of glaze.

*****

I absolutely love grilled cherry tomatoes. Regular cherry tomatoes I can really take or leave, but when they're grilled...oh man. This dinner came together really fast which was great. I've discovered something about paprika, too. It's worth the money to buy good quality paprika, not just whatever is the cheapest spice at the store. I really don't like the flavor of cheap paprika, but this was fantastic! The glaze had a great smokey quality to it from the paprika and a kick as well from the red pepper. The husband and I both gobbled this up. It was so good! It's definitely something I'd make for another date night dinner.

Glazed and ready to go on the grill

Mmmm...skewers

Tuesday, August 9, 2011

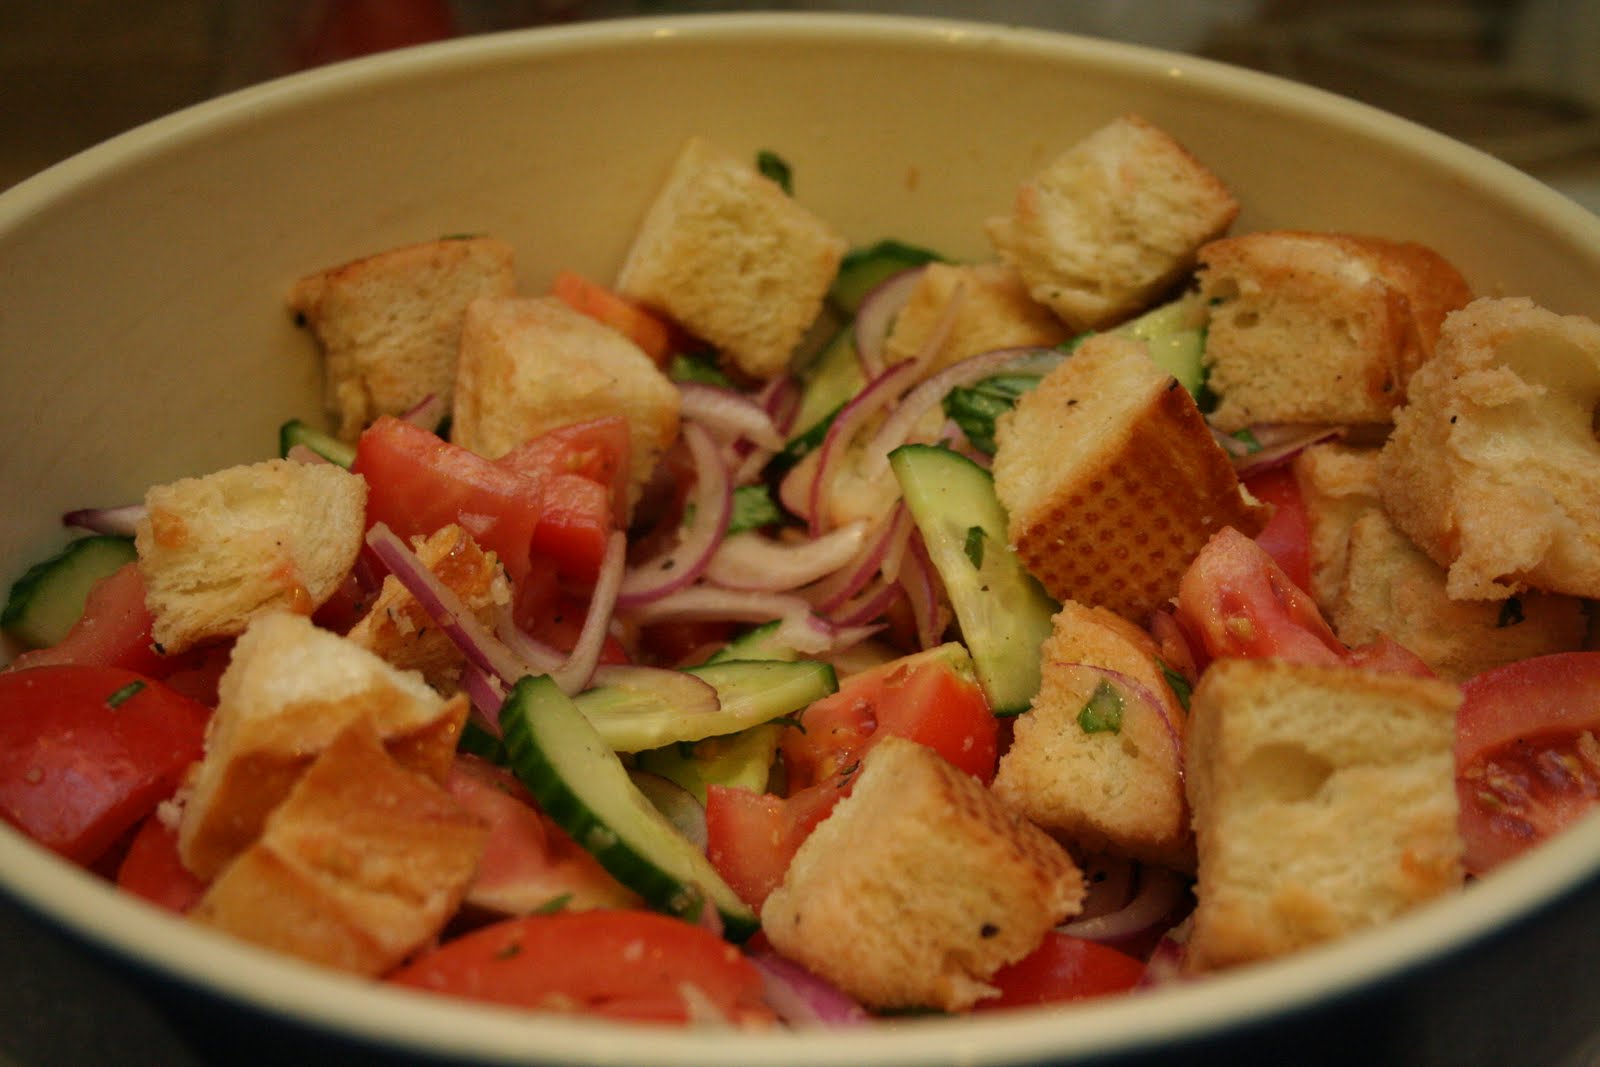
Panzanella

I've somehow found myself with another night to myself. The husband and his buddy went to a baseball game, my kids are in bed. Woo hoo! More blog updating! And Spotify listening. A friend of mine had mentioned Alison Krauss in a Facebook status today, and I'd never heard of her. I pulled her up on there and am grooving to her amazing voice!

I was pretty pleased to get three blog posts knocked out the other night, but I still have seven on my list. Yikes! I'd better get to focusing. I tried to use some of my lesser used cookbooks when meal planning recently. One I pulled off the shelf was Ellie Krieger's So Easy. I find Ellie Krieger recipes to be kind of hit or miss. Sometimes they're good, sometimes they're just "eh" and still other times if I change them up a bit we really like them.

This recipe was basically for the panzanella, although the official title was "Panzanella With Chicken Sausage." Since it didn't require you actually make your own chicken sausage, I'm just going with panzanella. I had some sausages in the freezer from a grill pack I bought over 4th of July weekend. I was really excited to try panzanella because I'd never had it before, much less made it. Plus I love a good salad in the summer!!

Panzanella
Source: So Easy by Ellie Krieger, Copyright 2009

8 medium ripe tomatoes, cut into wedges (about 1-1/2 pounds)
1 small English cucumber, cut into half moons
1/2 medium red onion, thinly sliced into half moons
3 tablespoons olive oil
1 tablespoon red wine vinegar
1/2 teaspoon salt
1/4 teaspoon freshly ground black pepper
1 small whole-grain baguette or other crusty bread (preferably day-old; about 8 ounces), cut into 3/4-inch chunks
1/3 cup basil leaves, coarsely chopped

In a large bowl, toss together the tomatoes, cucumber, onion, oil, vinegar, salt, and pepper. Add the bread chunks and basil and toss well so all the bread is well moistened.

*****

I couldn't find a whole grain baguette, so I just got a regular, grocery store bakery baguette. I bought it a few days before I needed it, but somehow it was still soft when I went to use it. I won't discuss how mildly grossed out I was about that. Shouldn't bread get stale when it sits out for a few days? Anyway...I cut the bread up into chunks, then threw all the pieces onto a cookie sheet and toasted them for a bit, just so they weren't super soft and would get all soggy in the salad.

This was one of the Ellie Krieger recipes that I didn't have to modify at all. It was so tasty!! I kept taking bites out of the salad bowl once I'd assembled the salad. The tomatoes (oh this would have been amazing with either fresh, local tomatoes or with heirlooms), cukes, onion, vinegar and basil would soak into the bread a little--not so much that it was soggy, just enough to infuse some flavor into the bread--and it was this amazing bite of summer in my mouth. Yum! Wow that sounds dorky and overly poetic. But it was so good! In the summer I generally have all of the ingredients except the baguette on hand for this. I'm so excited to make it again!


Monday, September 27, 2010

Tomato and Pesto Pizza

I wasn't going to post this because it was ridiculously easy, but my friend Jen said since I liked it so much I should document it so I remember it. She probably has a point, but I wouldn't be surprised at all if she was saying it so she remembers to make it at some point. ;)

I'm finally out of Phase 1 of the South Beach Diet (down 12 pounds!!), so I'm starting to incorporate some good carbs back into my diet. I had an apple this morning on the way to pick up my oldest from school (I don't think an apple has ever tasted so good), and then I made pizza crust with whole wheat flour for dinner. I'm still kind of timid to add carbs back in a whole lot since I had such great success with taking them out of my diet. For the first week or so I'm going to take it pretty easy and probably do something similar to what I did today--a little bit of fruit and some whole grains. Anyway, this should probably go on my weight loss blog instead of here.

I've been dying to have pizza for some reason while I was carb-free. Normally I can really take or leave pizza, but I think just not being able to eat it has made it more enticing. I was going to make a margherita pizza and a cheese pizza, but upon taking my basil out I realized the stems were fuzzy. Yuck. So, not wanting to feed my family moldy basil (or eat it myself), I had to do some quick pizza thinking. This is what I came up with.

Claire's Tomato and Pesto Pizza

1 recipe homemade pizza dough, made using all whole wheat flour
1/4 cup pesto (homemade or store bought)
3 heirloom tomatoes, sliced thin
Mozzarella cheese

On rolled out dough, spread pesto to completely cover dough. Arrange tomato slices in a single layer. Top with mozzarella cheese. Bake at 450 for 15-20 minutes.

*****

I'm sad I didn't take a picture. I thought about it before I put the cheese on because it really looked awesome with the green pesto and the various colored heirloom tomatoes. Have I mentioned that heirloom tomatoes are my new BFF? Okay, not really, but I do like them a lot. When I picked these ones out at Whole Foods today I could tell that heirloom tomato time is coming to an end. Most of the ones I picked up were pretty mushy and over-ripe. Sad. I kind of freaked out a little when I discovered my basil wasn't good anymore because I had already sliced the tomatoes, and there was no way I would let them go to waste. I was pleased with my quick thinking and coming up with what turned out to be an awesome pizza!

Wednesday, September 15, 2010

South Beach Stuffed Peppers

I love stuffed peppers. The husband used to not like green peppers (I don't know, he may still not like them, but I love them so he's forced into eating them), so I never had them. I'd buy the Stouffer's frozen peppers and take in my lunch to work or keep on hand at home for when I was on my own for dinner. I've made stuffed peppers a few times (my friend Jen has a really good stuffed peppers recipe), so I was excited to see a recipe for them that didn't have rice or pasta as part of the stuffing.

South Beach Stuffed peppers
From Food.com

4 bell peppers
olive oil
1 lb ground turkey
1 stalk celery, chopped with top
1 -2 garlic clove, minced
1 small onion, chopped
1 tablespoon minced fresh parsley
1 tablespoon Worcestershire sauce
1 teaspoon spike all purpose seasoning (for zest)
28 ounces ground peeled tomatoes
1/2 cup shredded cheese (or more)

Wash the peppers, cut the tops off, and place in oiled glass dish. Cover and microwave the peppers for 5 minutes.

Saute the veggies and ground turkey with a dollop of olive oil. (I chop up the usable remainders of the pepper tops as well). Add the tomatoes and cook for 3-4 minutes to evaporate some of the liquid.

Stuff the peppers and top with cheese. Bake at 350 for 10 minutes or until the peppers are soft and the cheese is toasted.

Add Ins: you could add cooked rice or stir in extra cheese to the mixture before baking.

*****

I didn't make any changes, other than using different colored peppers. I made five peppers and used yellow, orange, and red peppers. I used reduced fat sharp cheddar for my cheese.

These were some of the easiest peppers I've ever made. I love the idea of cooking the peppers slightly in the microwave first...10 minutes of cooking time at the end is fantastic! Our friend Steve was over for dinner, and we all really liked these. My kids shared one, the adults each had one, but I don't think any of us finished our entire peppers. I had enough filling for another pepper. It's actually still in my fridge because I figured it would be easy enough to just heat up a pepper, stuff it, and bake it in my toaster oven for a hearty lunch. Perhaps that will be my lunch for tomorrow!

I'll definitely make this one again, too...diet or no diet! (Don't you love finding diet food like that?!)

Sunday, July 18, 2010

Pesto Pasta Salad with Grilled Chicken

It's definitely summer here in Phoenix, with temperatures reaching up to 115 this past week. Ugh. I keep telling myself that I don't live here for the summer, just a few more months and it will be nice again. Meanwhile I'm trying to stay in the a/c as often as much as I can since even our swimming pool isn't refreshing when it's this hot. I'm trying to find light dinners that don't require a lot of heating up my kitchen...things that I can make early in the day, crockpot recipes, or grilled recipes are high on my list right now.

I recently came across a magazine from America's Test Kitchen (you know, the people that publish my beloved Cook's Illustrated magazine?) called "30-Minute Suppers." The salad pictured on the front was enough to get me to buy it, then when I flipped through it more in-depth I was so happy with my purchase. I'd say I want to make 90% of the recipes in the magazine. And since it's a summer edition a lot of the recipes meet my summer cooking criteria mentioned above.

This is one that jumped out at me right away. After reading through the recipe I figured it was something that could be served hot, room temperature, or cold. Fantastic!! And it has flavors that my whole family will eat which is another plus because I hate dinnertime struggles!

Pesto Pasta Salad with Grilled Chicken
From America's Test Kitchen 30-Minute Suppers Summer 2010 Special Issue

1/2 cup toasted pine nuts
1/2 cup grated Parmesan cheese
1 garlic clove, minced
1/2 cup chopped fresh basil
2 Tbsp juice from 1 lemon
2/3 cup plus 1 tablespoon extra virgin olive oil
2 boneless skinless chicken breasts (about 3/4 pound)
1 pound fusilli
1 pint cherry tomatoes, halved
3 ounces (about 4 1/2 cups) baby arugula

Bring 4 quarts water to boil in large pot. Combine pine nuts, cheese, garlic, basil, and lemon juice in food processor and process until smooth, about 10 seconds. With processor running, slowly pour in 2/3 cup olive oil and process until smooth.

Brush chicken with reamining oil and season with salt and pepper. Grill over hot fire until browned and cooked through, about 5 minutes per side. Transfer to plate and tent with foil. Wehn cool enough to handle, shred chicken.

Meanwhile, add 1 tablespoon salt and fusilli to boiling water and cook until al dente. Reserve 1/2 cup cooking water, drain fusilli, and rinse fusilli with cold water. Transfer cooked fusilli to large bowl.

Toss pesto, chicken, tomatoes, and arugula with fusilli, adding reserved cooking water as needed. Season with salt and pepper to taste. Serve.

*****

This was so easy to throw together!! I didn't make my own pesto because I had some jarred in the fridge, and I used spinach instead of arugula. I had meant to grill my chicken earlier in the day but got caught up in other things. This is definitely something that could be thrown together early in the day so dinner was ready to go whenever.

By the way, don't forget to keep a bit of the cooking water out to add in to the salad. I remembered once it was too late (i.e. I had poured the pasta out into a colander already), but I think it was fine without it. Next time I'll be sure to keep some of it to see how it compares.

Saturday, June 19, 2010

Pioneer Woman's Pico de Gallo

This will be my second time making PW's pico de gallo recipe, although apparently I didn't post it before. I really, really love pico de gallo...the chunky vegetables, the combination of fresh flavors...yum. And of course I have yet to go wrong with a PW recipe!!

Pioneer Woman's Pico de Gallo

5 whole Plum (roma) Tomatoes
1/2 whole Large (or 1 Small) Onion
3 whole Jalapeno Peppers
Cilantro
Lime Juice
Salt To Taste

Chop jalapenos, tomatoes and onions into a very small dice. (Leave seeds in your jalapenos for a hotter pico). Adjust amount of jalapenos to your preferred temperature. Next, chop up a nice-sized bunch of cilantro. Just remove and discard the long leafless stems before chopping. No need to remove the leaves from the stems completely. Place all of these ingredients together in a bowl and give it a good stir.

Squeeze the juice of half of one lime into the bowl. Add salt to taste and stir again.

*****

Yum. That's all I have to say about that.

Wednesday, April 28, 2010

Eggplant Pasta Sauce

I mentioned in a previous post that my father-in-law came to visit recently to go see some hockey playoff games (Red Wings vs. Coyotes) with the husband. I wanted a crockpot dinner for one of the nights so we'd be sure to eat dinner before they had to leave for the game. I'd received an eggplant in my produce co-op the week before and needed to be using it. I found a pasta sauce recipe in one of my slow cooker cookbooks that used eggplant, so I thought it would be a great choice.

Eggplant Pasta Sauce

1 lb. eggplant, cut into 1-inch cubes
3/4 cup chopped onion
1/2 cup chopped green bell pepper
2 14-oz cans Italian diced tomatoes (with garlic, oregano, and basil), undrained
1 6-oz can Italian tomao paste with roasted garlic
1/2 cup sliced fresh mushrooms
1 tsp minced garlic
1-1/2 tsp sugar
1 Tbsp red wine vinegar
1/4 cup water
1-1/2 tsp Italian seasoning
4 cups hot cooked penne

Spray inside of slow cooker with cooking spray. Combine all ingredients except pasta and cheese in slow cooker and mix. Cover and cook on low heat for 7-8 hours or high heat for 3.5-4 hours. Serve over hot, cooked pasta and top with parmesan cheese if desired.

*****

I didn't have any mushrooms on hand, so instead I added in some diced zucchini. I also thought two cans of tomatoes didn't look like it was going to be saucy enough, so I added in a third. None of them were the Italian style, so I just added in more of the Italian seasoning to compensate for it.

This worked out perfectly to make for that night! We ended up being gone most of the afternoon, so I wouldn't have had much time to get something together for dinner. This way all I had to do was boil some water, throw in the pasta, and dish it up. I made Barefoot Contessa's Garlic Ciabbata Bread to go along with it. This sauce was really good, and I loved all the vegetables in it to make it chunky and give it a nutritional boost. Everyone really enjoyed the sauce--my kids even ate it up! This was a great crockpot spaghetti sauce that I'll definitely make again!

(Note: This made quite a bit, so I froze about half the sauce. It was definitely better the first time around...it lost a lot of the flavor and the vegetables didn't really hold their texture once frozen. It wasn't bad, but it was definitely better when it was fresh.)


Thursday, April 1, 2010

Rick Bayless' Zucchini-Musrhoom Tacos with (or without) Chorizo

It makes me sad that this was already two weeks ago that I made this, and I'm just now posting it. This was worthy of posting as soon as I was done eating. I was goign to say while I was eating, but I wouldn't have stopped eating for anything in the world. But now I'm getting ahead of myself.

I had some zucchinis and Mexican squash I needed to use from the produce co-op in which I participate (how's that for wording it so I don't end the sentence with a preposition!!) and stumbled upon this recipe in Rick Bayless' Mexican Everyday cookbook when looking for zucchini recipes. I still had some homemade queso fresco from my cheese making class, so all I needed was chorizo and mushrooms.

Darn it, I can't find this recipe online already (although I really didn't look that hard), so I guess I'll type the beast out myself.

Zucchini-Mushroom Tacos with (or without) Chorizo
Copyright 2005, Rick Bayless' Mexican Everyday

4 ounces fresh Mexican chorizo sausage, casing removed (about 1/2 cup)
1-1/2 Tbsp vegetable or olive oil, if needed
1 medium white onion, sliced 1/4 inch thick
3 ounces mushrooms (shiitake, oyster, portobello or the like), stemmed and sliced about 1/2 inch thick
1 15-ounce can diced tomates in juice (preferably fire-roasted), drained
1 canned chipotle chile en adobo, seeded
1-1/2 tsp chipotle canning sauce
2 medium zucchini, cut into 1/2-inch cubes
salt
1/2 to 3/4 cup crumbled Mexican queso fresco or other fresh cheese
12 warm corn tortillas
Hot sauce, for serving

If using chorizo, lay it in a very large skillet and set over medium heat. Cook, stirring regularly and breaking up clumps, until cooked through, about 4 minutes.

If the chorizo has rendered considerable fat, tip off and discard all but enough to lightly coat the pan; if it has rendered very little--or if you're not using the chorizo--add the oil to the skillet and raise the heat to medium-high. Add the onion and cook, stirring regularly, until beginning to soften, about 2 minutes. Add the mushrooms and cook about 2 minutes more, stirring regularly, until their liquid has evaporated and the mushrooms are beginning to brown.

While the mushrooms are cooking, pour the tomatoes into a food processor or blender. Add the chipotle chile and its canning sauce and process until smooth.

When the mushrooms are ready, add the tomato mixture and cook, stirring regularly, until the mixture has thickened to the consistency of canned tomato sauce, about 3-4 minutes. Add the zucchini and continue to cook, stirring every once in awhile, until the zucchini is cooked through but still a little crisp, 8-10 minutes. Taste and season with salt, usually about 1/2 teaspoon (more if not using chorizo).

Scoop into a bowl and garnish with the crumbled cheese. Serve with the warm tortillas and hot sauce for everyone to make soft tacos.

*****

Wow. Wow. WOW!!! These tacos were phenomenal. They smelled amazing while they were cooking, but man alive did they ever taste good. Our friend Steve was over that night and had dinner with us, and we all (him, the husband, and I) LOVED these. They were so spicy my lips were tingling--but in a good way. I really wasn't sure at first how all the flavors were going to come together, but they were so good. I made my own corn tortillas to go with them. Oh man, just thinking about these tacos makes me want to have them again. The only change I made was slicing zucchini instead of cubing.

I just read the intro to this recipe in the cookbook and it ends with:

"A quick saute, starting with the rousing flavor of Mexican chorizo and dolled up with smoky chipotle chile, shows off the sexier side of zucchini."

Bow chicka bow wow...sexy zucchini indeed!!


Monday, March 8, 2010

Baked Orzo with Fragrant Lamb

Man alive, did we have a crazy weekend!! Our realtor called Saturday with some houses she wanted to show us, so my mom ended up coming over to stay with the kids while we went looking at houses. Some were okay, some were horrible. We're still holding out hope that the one we put the offer on will come back approved from the bank. The waiting game sucks!! We should have an answer in four weeks or so at least, so we just have to hang in there. Anyway, the boy and husband went to a hockey game Saturday night, so the baby and I didn't really do anything special for dinner.

Yesterday was just about as crazy. Church, taking lunch to and visiting my friend Jen and her new babies. The boys were both melting down when we left, so we came home for naps. The husband went grocery shopping for me while I took a much needed siesta, then the husband and boy went to get haircuts, the husband went shooting, I made dinner, we ate, kids went to bed, husband and I watched a movie. Man! Not much time in there for updating the blog here. But I'm just a day late so I don't feel that bad.

Awhile back I found some ground lamb on manager's special at the grocery store and scooped it up. I didn't know what I wanted to do with it, but it was a good deal and I thought it would be something new to try. I checked one of my Weight Watchers cookbooks and found this recipe that used ground lamb--perfect! I was really excited to try something new, and this sounded really easy.

Baked Orzo with Fragrant Lamb

1/2 pound orzo
6 ounces lean ground lamb
1 onion, chopped
1/4 cup chopped fennel bulb
2 garlic cloves, minced
1 tsp dried mint
1/2 tsp dried oregano
1 14-ounce can crushed tomatoes
3 Tbsp tomato paste
1/2 tsp ground cinnamon
3 ounces reduced fat feta, crumbled
2 Tbsp grated parmesan cheese

Preheat oven to 350. Spray an 8-inch square baking dish with nonstick spray; set aside.

Bring a large pot of salted water to a boil. Add the orzo and cook according to package directions. Drain and transfer to a large bowl.

Heat a large nonstick skillet over medium high heat. Add the lamb and cook, stirring to break up the meat until browned, 3-4 minutes. Remove lamb with a slotted spoon and transfer to the bowl with the orzo.

Add the onion, fennel, garlic, mint, and oregano to the same skillet. Cook, stirring until onion begins to soften, 3-4 minutes. Add the tomatoes, tomato paste, and cinnamon; cook until mixture thickens, 6-8 minutes.

Combine the tomato mixture with the orzo and lamb. Stir in the feta and mix well. Pour mixture into the baking pan. Sprinkle top with the parmesan. Bake until hot, 25 minutes.

Points Value: 6 (makes 6 servings)

*****

So, I had a bit of a mishap. The baby was standing next to me while I opened the package of lamb, and I checked the baby's diaper because the air smelled pretty gross. It wasn't him, it was the lamb. I was a bit skeptical of using it but went ahead and defrosted it and started cooking it. Then I called my mom to see if she knew if ground lamb was supposed to smell like a baby's dirty diaper. She didn't know, but we both agreed it probably wasn't a good sign. At this point the smell of it was making me want to puke, so I decided to scrap it. Luckily I had some ground veal in the freezer--the only other ground meat I had on hand--and quickly defrosted it and browned it. So, that was substitution #1. I ended up using the whole pound of veal because I needed to be using it up and really had no other ideas for what I could do with it. To compensate for the additional meat I added in more crushed tomatoes (conveniently I bought a 28 ounce can of tomatoes instead of 14) so it was a bit saucier. I also used fresh mint instead of dried.

I took a bite of it all mixed together before I put it in the baking dish and LOVED IT. I wasn't really sure how the cinnamon would play in when I was adding it, but it really accented the flavor of the tomatoes and feta. Who knew! Honestly I took quite a few bites before putting it in the baking dish...I couldn't stop eating it. Even once it was all heated up and baked it was so good!!! We all really liked this. I think it could easily be made with ground beef or turkey, which I would probably do in the future since it's pretty rare for me to have ground veal on hand. This was really so easy and tasty!! I'm glad I tried it--and I'm glad I had the lamb mishap. :)

Friday, March 5, 2010

Rick Bayless' Chipotle Meatballs (Sandwich Style)

Oh man...words do not express how freakin' excited I am to try this dinner tonight!!! Months and months ago when I was holding the Rick Bayless Mexican Everyday cookbook hostage from the library I saw this chipotle meatball recipe in it. Sounded good and then I thought, "Hmmm...you could probably make a Mexican version of a meatball sandwich with those." And then the idea just had to sit in my brain for a long, long time. I don't know why I haven't made this sooner given my excitement for it!!

So, first I'll post the recipe from his cookbook and then how I'm doing my sandwich take on it after the recipe.

Rick Bayless' Chipotle Meatballs
Copyright 2005, Rick Bayless' Mexican Everyday

3 slices bacon, cut into 1-inch pieces
3 garlic cloves, peeled (divided use)
2 large eggs
1/2 cup dried bread crumbs (3/4 cup if they're the coarse-textured panko)
Salt
1-1/4 pounds ground pork
1/2 cup (loosely packed) coarsely chopped mint leaves, plus extra leaves for garnish if you wish
1 28-ounce can diced tomatoes in juice (preferably fire-roasted)
1-2 canned chipotle chiles en adobo, stemmed and seeded
1-2 Tbsp chipotle canning sauce
1 tsp dried oregano, preferably Mexican
About 1-1/2 cups beef or chicken broth

Turn on the oven to 450 degrees. In a food processor, combine the bacon and 1 garlic clove. Process until finely chopped. Add the eggs, bread crumbs, and 1 teaspoon salt. Pulse several times to combine thoroughly, then add the pork and mint. Pulse the machine a ew more times until everything is well combined--but not at all processed into a paste. Remove the blade.

With wet hands, form the meat into 16 plum-size spheres, spacing them out in a 13x9 inch baking dish. Bake until lightly browned (they'll be browned more underneath than on top), about 15 minutes.

While the meatballs are baking, combine the tomatoes, with their juice, chipotles, canning sauce, oregano, the remaining 2 garlic cloves (cut in half) and 1/2 teaspoon salt in a blender or food processor. Process to a smooth puree.

When the meatballs are ready, spoon off any rendered fat from the baking dish, then pour on the tomato mixture, covering the meatballs evenly. Bake until the sauce looks like tomato paste, 15 to 20 minutes.

Microwave the broth for about a minute to heat it (or heat in a small saucepan). Divide the meatballs among four dinner plates, leaving most of the sauce behind. Stir enough broth into the sauce to give it an easily spoonable consistency. Taste and season with additional salt if you think the sauce needs it. Spoon the sauce over the meatballs, decorate with extra mint leaves, if you wish, and serve.

*****

My mouth started to water a bit there while I was typing out the recipe. Rick has yet to do me wrong, so I cannot wait to try this! The only substitution I'm making is to use ground beef instead of pork. I have 1.5 pounds of ground beef left in my freezer, and I gave the husband a couple options that I could do with it, and this is what he chose. We're trying to get back to no (or very little) red meat, so we won't be having anything like this for awhile.

So, now my sandwich take on them. These sounded really similar to meatballs in marinara my friend Laura makes and then uses for meatball sandwiches. So I thought why couldn't I do a Mexican version, using this sauce instead of marinara, and queso fresco instead of mozzarella. So that's what we're having for dinner tonight! I was telling my friend Jen about these last night when I talked to her, and she thought they sounded awesome, too. She suggested putting avocado or guacamole on them, too. I do have an avocado that needs to be used up, so I might try that and see how it is.

I can't wait to report back to you on how these turn out!!

*****

Oh man...oh MAN!!! I've said it before, and I'll say it again. Rick Bayless is a god among men, or at least when it comes to food. These meatballs were AMAZING. The sandwiches were so-so, but I think that's mostly because I forgot to toast or somehow heat up the sandwich rolls before assembling. Oops. They were so filling, too. Neither of us finished the sandwich.

I ended up using one chipotle pepper and a few spoonfuls of the canning sauce because I didn't want it to end up too spicy. I figured better to start with less and then go from there if I needed to, but I think that was just the right amount for our taste. Smokey with a little heat but not overpowering.

I loved the hint of bacon and mint in the meatballs. The flavor was fantastic and captivating. The smokey sauce really added to them as well. This is something I will definitely make again, although since we're giving up ground beef for awhile I may try them with ground turkey, or I'm hoping to get a food grinder attachment for my Kitchenaid mixer for my birthday, so if I do I could grind up a lean cut of pork and make them that way. As it was I used 93% lean ground beef, and they turned out fine. Oh, my food processor was not going to be big enough to add the meat with the bacon/bread crumbs/egg/garlic mixture, so I added the mint in with all that and then combined that mixture with the ground beef in a bowl and mixed it by hand.

Just thinking about them makes me want to go over to the fridge and have one cold!

(I took pictures, but they're on my phone, so I'll upload them later.)

Tuesday, March 2, 2010

Quinoa Stuffed Peppers

Awhile back (okay, it was September so it was quite awhile ago I guess) I made up the filling for qunioa stuffed peppers (the link will be below). The husband thought it looked gross, so instead we ended up having some vegetarian lasagna that had been in the freezer. I couldn't let it go to waste, so I put the filling in the freezer. Once it all came together it tasted good, but by that point the lasagna was already heating up. I'd kept it in the back of my head that the filling was still in the freezer, and when I saw red peppers at Costco last Friday I decided it was time to break this out and have it. Although honestly now knowing it's been in the freezer for almost six months I'm a little hesitant. I'll have to see how it's doing once I defrost it...I may need a last minute dinner back-up plan.

Quinoa Stuffed Peppers

Strangely enough there was a stuffed peppers recipe I came across in my Weight Watchers magazine I was reading at the gym yesterday, so maybe if this isn't going to work out I'll go with that instead.

Monday, March 1, 2010

Veggie Pesto PIzza

I realized I forgot to mention a couple other recent happenings around here that have contributed to my lack of blog posting. I finally had Lasik done!!! I was beginning to wonder if I was not meant to ever get it because I had to change from my original date so we could go to a seminar at church (that totally wasn't worth it), then both my kids got pink eye and they wouldn't let me get it done in case I ended up getting it too (which I did). So Friday was the day, and I have to say my life has been changed!!! It was definitely creepy--reminded me entirely too much of this scene from "A Clockwork Orange"--but so worth it in the end!

The other exciting happening is that my friend Jen had her twin baby girls on Friday!!! I guess it really has nothing to do with my lack of blogging, but it's very exciting!! I got to spend a good chunk of the day at the hospital with them yesterday, and aside from my own kids, they are some of the cutest babies ever!! Warning: snuggling with two cute newborn baby girls that have red bows in their hair WILL induce baby fever. And if it doesn't, there might be something wrong with you.

Anyway, I figured Jen would come home from the hospital today or tomorrow, so I slated this dinner in case they wanted me to bring some to them, as I know it's one of their favorites as well. Jen's mom is coming to stay with them for awhile, and Jen thought she'd probably want to make them dinner, but I kept it on the menu for tonight just in case. I'm really excited to have it!! It's been awhile, and lately all we've had is pepperoni or cheese pizza, so a good, homemade, veggie pizza will be fantastic!!

Veggie Pesto Pizza

Ranch Chicken Panini

Man, it has been a crazy couple weeks here at my house. The boy turned four, so we had his birthday party, my brother came to visit for the weekend for that, and somewhere in the middle of all of that we decided to buy a new house, so we've been busy pouring over real estate listings online and going out to look at houses with our realtor. We put an offer on one, and the seller accepted it, now we're just waiting on the bank to approve it since it's a short sale. What a long, drawn out process!! Blogging hasn't been very high on my to do list lately, and when I've been menu planning I've been sticking with things I've made before and not really branching out at all. This week, though, I have mostly new things planned, and I'm hoping to get back to posting on a regular basis.

I think it was last Monday I was over at my mom's. Yeah, because my brother was still here visiting. She had recently come home from a trip to California, and on her way home bought 25 avocados for $5. She generously shared the wealth with me and sent me home with a huge bag of avocados. Want to know something interesting? I used to hate avocados. When I was pregnant with the boy there was one on a veggie sandwich I got for lunch one day and the texture of it almost made me puke. But after he was born, I loved them!! Who can explain it. Anyway, some of them were already pretty ripe, so I wanted to use them up quick. We had been saying recently that we hadn't had paninis for dinner in awhile, so I swung by the store on the way home from my mom's and picked up some ciabatta rolls. Other than that I had no ideas. I'm pretty pleased with the recipe I came up with--we really liked these sandwiches!!

Claire's Ranch Chicken Paninis

2 chicken breasts, pounded thin and cut in half
2 avocados, peeled and sliced
4 slices cheese of your choice (I used provolone)
2 tomatoes, sliced
Ranch dressing (I made The Pioneer Woman's Ranch Dressing because I cannot find any store bought ranch dressing that does not contain MSG)
4 ciabatta rolls (or panini bread of your choice)

Using grill or grill pan, cook chicken breasts until done. Slice rolls in half. Spread each half with ranch dressing (be pretty liberal with it). Place chicken breasts on bottom half of roll, top with avocado and tomato, finish with cheese (so it holds everything together). Place top half of roll on rest of sandwich. Throw them on your panini grill (or press, whatever) until cheese is melted.

*****

Mmmmmm...these were so good!! I was wishing I had some bacon to fry up and add to them. It all came together pretty fast, too, especially with having pounded the chicken out so it was thinner.

I have to say that PW's ranch dressing was AWESOME. FANTASTIC. MAGICAL. WONDERFUL. The boy likes ranch dressing on his salads, and we were almost out of the bottle we had on hand. I was reading ingredient lists on all the different brands at the grocery store--seriously, ALL the brands--and every single one had MSG as one of the ingredients. I couldn't believe it. I knew the packets of the dry mix had it as an ingredient, but I hadn't ever checked the bottled stuff before, which is weird in itself because I always read ingredients before buying something. Anyway, I remembered reading PW's recipe when she first posted it, so I quickly pulled it up on my phone when we got to the store so I could get the necessary ingredients. Turned out all I needed were chives, so that was easy. And I have to tell you that this was the best ranch dressing I have ever had!! It was super easy to put together, too, and I love knowing what goes into it and not having a bunch of crazy weird things in it that I can't even pronounce. I'm trying to do away with bottled salad dressings in general, and this is a great step in that direction as ranch was really the last dressing hold out.

Sorry the picture is lacking in quality, I had to resort to taking it with my phone.

Thursday, February 4, 2010

Tomato Sauce with Onion and Butter

Two posts in two days--are you shocked?! I tell you, sick kids give you more computer time. The boy seems to be on the mend--he was well enough to go on his preschool field trip today--but now I think the baby might have gotten pink eye. Ugh!! Not cool for a mommy that's supposed to get Lasik done on Saturday!

When I posted about my insanely huge onion asking what I should do with it, and someone named Stephanie--sorry, the Blogger profile was unavailable so I have nothing else to go on--suggested this pasta sauce that had recently been posted on SmittenKitchen.com. I went and checked it out and thought it looked quite tasty and simple. Although I had forgotten it was Smitten Kitchen and instead went to Steamy Kitchen and was so perplexed that I was all the way back in October in the archives and hadn't seen it. Then I checked back on the comment and realized I was on the wrong blog. Oops!

I didn't end up using the giant onion for this--I need to do my post about that still--but I liked the idea of the sauce and it sounded really good. I thought about doing it last night when I needed to come up with a dinenr plan, but I prefer to give my kids pasta sauce like this on bath nights. The baby tends to get quite into his food.

Tomato Sauce with Butter and Onions
From SmittenKitchen.com

28 ounces (800 grams) whole peeled tomatoes from a can (San Marzano, if you can find them)*
5 tablespoons (70 grams) unsalted butter
1 medium-sized yellow onion, peeled and halved
Salt to taste

Put the tomatoes, onion and butter in a heavy saucepan (it fit just right in a 3-quart) over medium heat. Bring the sauce to a simmer then lower the heat to keep the sauce at a slow, steady simmer for about 45 minutes, or until droplets of fat float free of the tomatoes. Stir occasionally, crushing the tomatoes against the side of the pot with a wooden spoon. Remove from heat, discard the onion, add salt to taste (you might find, as I did, that your tomatoes came salted and that you didn’t need to add more) and keep warm while you prepare your pasta.

Serve with spaghetti, with or without grated parmesan cheese to pass.

*****

How easy is that?! Mine is simmering away on the stove. I love me a dinner that takes less than five minutes to throw together (not counting pasta cooking time). I had exactly five tablespoons of butter in the fridge which worked out perfect, so I just unwrapped that and tossed it in a pan, opened the tomatoes, peeled an onion and sliced it in half, and voila!!

It's especially nice since it looks like I may need to take the baby to urgent care about this eye issue. Ugh!!

*****

Okay, this was REALLY good and REALLY easy!! I made a little too much pasta, so when I dumped the pasta into the sauce it wasn't quite saucy enough but it was still good. I ended up taking the baby to a Cigna clinic down the street once the husband got home. Good thing I did--poor guy has pink eye AND double ear infections. :( The upside was walking back into our house when we got home, and it smelled amazing!! The smell reminded me of a vodka tomato sauce I used to make but haven't made in years. In hindsight I shouldn't have mixed the pasta in with the sauce so it would have been a little saucier, but that's the only thing I'd change. I ended up using a rotini pasta because my kids have a hard time with spaghetti noodles. This is something I will definitely make again--especially since the ingredients are all things I normally have on hand.

I took pictures, just need to upload them to the camera. Since it looks like we'll mostly be homebound again tomorrow, look for picture updates to be added then!

Thursday, January 14, 2010

Crockpot Tamale Pie

One of the cookbooks I got for Christmas was Stephanie O'Dea's Make It Fast, Cook It Slow. If you don't recognize her name, you might recognize her blog--A Year of Slow Cooking. I've been to her blog several times, and I can't believe how many of her recipes I want to try.

I was flipping through it and saw this one and thought it sounded great--healthy, vegetarian, and I had everything on hand for it. The husband and I are both going to Bible study groups on Wednesday nights, and they both start at 6:30. So it's going to be crockpot dinners for awhile on Wednesday nights.

Crockpot Tamale Pie

1 can drained and rinsed black beans
1 can fire roasted tomatoes
1 can drained corn
1 T chili powder
1 t cumin
1/2 t paprika
1/4 cup diced onion
1/2 cup shredded cheddar cheese
1 package corn bread mix (plus ingredients required for mix...milk and egg)

Spray your crockpot with cooking spray. Dump in the filling ingredients--cheese, too!-- and stir well to distribute the spices. You will not be able to stir this again, so please check to see that the spices aren't in a clump anywhere.

In a separate bowl, mix together the cornbread topping. When finished, pour evenly over the filling, spreading with a spatula if needed.

Cover and cook on low for 4-7 hours or on high for 2-4.

*****

Her actual recipe included making your own corn bread topping, but I had some mix in the pantry and figured there was no point reinventing the wheel, so to speak. And I skipped the onion and just used onion powder instead because I was feeling lazy.

So, she's not kidding when she says to spray the crockpot with cooking spray. I didn't really spray mine enough and some of the edges of the cornbread stuck to the sides. I think mine cooked for a little too long because it was a bit dry. It was still good, but had I checked on it sooner it would have been better. I think I like my normal Tamale Pie recipe better than this version, but this was still good and easy.

The golden top in the crockpot before we dug in:


(I really wish I had better lighting in my kitchen!!)

Thursday, September 24, 2009

Sloppy Joes

I'm really not very excited about tonight's dinner, but I couldn't come up with anything different to make that didn't involve a trip to the store. And I first had lentil tacos slated for tonight, and this does sound slightly better than that. I think my first week on WW I should have stuck with recipes I know and have made before instead of trying all new ones.

Sloppy Joes

4 tsp olive oil
2 onions, finely chopped
1 celery stalk, finely chopped
1/2 carrot, finely chopped
1/2 green bell pepper, finely chopped
1/2 tsp dried oregano
1 pound lean ground beef
1 cup canned diced tomatoes
2 Tbsp tomato paste
1 Tbsp worcestershire sauce
2 tsp red wine vinegar
1/4 tsp hot red pepper sauce
Salt and freshly ground pepper, to taste
4 rolls or hamburger buns

In a medium nonstick saucepan, heat the oil. Saute the onions, celery, carrot, and bell pepper until the onions are translucent, 10-12 minutes. Stir in the oregano and thyme, then add the beef and cook, breaking it apart until no longer pink, 5-7 minutes.

In a small bowl, combine the tomatoes, tomato paste, and 2 Tbsp water; add to the beef mixture and cook 1 minute. Stir in the worcestershire sauce, vinegar, pepper sauce, salt and pepper; bring to a boil. Reduce the heat and simmer, stirring occasionally, until the mixture thickens, about 10 minutes. Serve on the rolls/buns.

*****

I usually really like sloppy joes, so I don't know why I'm so lukewarm about this. I think we'll have baked potatoes on the side and some kind of mixed vegetable blend.

*****

These were just okay. I like my usual Sloppy Joe recipe a lot better and will probably stick with that going forward. None of us were overly fond of this recipe.