Wednesday, December 26, 2012

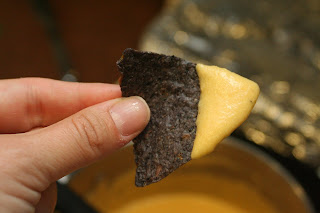
Crockpot Cheesy Spinach Artichoke Dip


Merry Christmas, everyone!! Did you have a nice time celebrating? Ours was pretty fantastic, although the days leading up to Christmas were pretty stressful, to the point where I didn't even care about Christmas and wasn't excited at all. But I had a nice, long, nine mile run on Christmas Eve that cleared my head a little and lots of family here with us for church and dinner on Christmas Eve. And with two little boys, it's hard to not catch their excitement. We were all very spoiled by my family, and now today the boys and I are hanging out at home playing with all our new toys while the husband has to go to work.

We went to my mom's house for Christmas "dinner" last night. We had our usual Christmas "dinner" spread of tons of appetizers. I had four I planned on making, but I ended up whittling it back to two. One of them I made to take to a party last Friday, and while they were tasty, they were time consuming, and I didn't want to deal with them. Then another I decided to skip after seeing how much food there was already, plus I was tired of being in the kitchen and wanted to hang out and drink my wine. It sounds like a super tasty dip, so I will make it at some point.

When I was deciding what I'd make this year I perused my Snacks board on Pinterest and got really, really overwhelmed. So many good appetizers! But I knew I wouldn't want to be in the kitchen slaving away either here or at my mom's, so the fact that this was a slow cooker recipe appealed to my lazy nature. I ended up changing it a bit because of time constraints and lack of ingredients, so there will be a link to the original recipe, but the one below is how I ended up making it.

Crockpot Cheesy Spinach Artichoke Dip
Source: Adapted from Cooking Light

1 (14-ounce) can quartered artichoke hearts, drained and coarsely chopped
1 (10-ounce) package frozen chopped spinach, thawed, drained, and squeezed dry
1 (8-ounce) block light cream cheese, softened
1 (8-ounce) carton low-fat sour cream
3/4 cup grated Parmesan cheese
1/2 cup (2 ounces) crumbled reduced-fat feta cheese
1/2 cup diced onion
1/2 cup mayonnaise
1 tablespoon white wine vinegar
1/4 teaspoon freshly ground pepper
2 garlic cloves, crushed

Place all ingredients in a 3 1/2-quart electric slow cooker; stir well. Cover with lid; cook on low-heat setting 2 hours or until cheese is melted and dip is heated through. Serve warm with toasted pita wedges or tortilla chips.

*****

The original recipe called for 3/4 cup milk. I debated calling my mom to see if she had milk because sometimes she doesn't. But I figured she would. Then she didn't. My uncle and husband both offered to run to the gas station to get some for me, but I opted to not. I figured I'd see how it turned out and if it needed some liquid, I'd come up with a solution of some sort. After it cooked for awhile, I checked on it and found the consistency of it was perfect! I was so glad I had skipped the milk; it would have been way too runny with that added to it. I had bought tortilla chips to serve with this because I have the hardest time finding pita chips at my Safeway store, and I just didn't want to go to other stores in the days leading up to Christmas. This was a super tasty dip, and it's one I will definitely make again. Tasty and easy are two of my favorite combinations!!

Do you like my festive nail polish? It was one of my gifts from Boy #1. I heart that kid!

Saturday, November 24, 2012

Kung Pao Chicken Tacos


I absolutely LOVE Chinese food. If given a choice of cuisine, it's usually one of my top picks. Maybe from growing up in Seattle? I don't know. I haven't played around with cooking too much of it on my own (even though a few years ago I did invest in a pretty heavy duty Chinese cookbook). I was excited when I saw this recipe in October's Cooking Light because Kung Pao Chicken is one of our favorite Chinese take-out dishes. Since it has a little kick to it I decided to make it for a date night dinner for the husband and me since my kiddos don't like spicy.

Kung Pao Chicken Tacos
Source: Cooking Light magazine, October 2012

6 skinless, boneless chicken thighs, cut into bite-sized pieces
3 tablespoons lower-sodium soy sauce, divided
1/4 cup plus 1 1/2 teaspoons cornstarch, divided
1/4 teaspoon kosher salt
2 tablespoons canola oil, divided
1 1/2 tablespoons honey
1 tablespoon dark sesame oil
2 teaspoons rice vinegar
1 teaspoon sambal oelek (ground fresh chile paste)
1 large garlic clove, minced
3 tablespoons coarsely chopped dry-roasted peanuts
3/4 cup diagonally sliced celery (about 2 stalks)
8 (6-inch) corn tortillas
1/3 cup sliced green onions
1/2 medium red bell pepper, thinly sliced
4 lime wedges

1. Place chicken in a large zip-top plastic bag. Add 1 tablespoon soy sauce to bag; seal. Marinate at room temperature for 30 minutes. Remove chicken from bag; discard marinade. Place 1/4 cup cornstarch in a shallow dish. Sprinkle the chicken evenly with salt. Add chicken to cornstarch in dish, and toss chicken to thoroughly coat. Shake off excess cornstarch.

2. Heat a large skillet over medium-high heat. Add 1 tablespoon canola oil to pan; swirl to coat. Add half of coated chicken; sauté for 6 minutes or until done, turning to brown. Remove chicken from pan using a slotted spoon; drain on paper towels. Repeat the procedure with remaining 1 tablespoon canola oil and coated chicken.

3. Combine remaining 1 1/2 teaspoons cornstarch, remaining 2 tablespoons soy sauce, honey, and next 3 ingredients (through sambal oelek) in a microwave-safe bowl, stirring with a whisk until smooth. Microwave at HIGH for 1 1/2 minutes or until slightly thick, stirring twice. Stir in garlic. Combine soy sauce mixture, chicken, peanuts, and celery; toss to coat chicken.

4. Toast tortillas under broiler or on a griddle until lightly blistered, turning frequently. Place 2 tortillas on each of 4 plates; divide chicken mixture evenly among tortillas. Top each taco with green onions and bell pepper strips; serve with lime wedges.

*****

I used chicken breasts instead of thighs because it's what I had on hand. That was my only change, though. We LOVED the taste of the chicken, but we did not like it in the tortillas. I had even bought fresh corn tortillas from a nearby Hispanic market, and we just didn't like it in the tortillas. The actual Kung Pao Chicken was FANTASTIC. There were no leftovers--we devoured every single bite, it was that good. This is definitely something I'll be making again, but I'll skip the tortillas in the future!


Sunday, November 18, 2012

Coconut Chicken Satay


My baby boy turns four tomorrow. I just cannot believe it. I say it every year, but I really just can't believe it. I've been running around like a madwoman for the past few weeks getting stuff ready for his party that we had yesterday. I don't know how I always end up busy lately. My brother and his girlfriend are in town for the weekend, and they went on a hike this morning, the husband took Boy #1 out for some quality daddy time, so it's just Boy #2 and me hanging out while he plays with his loot of toys from his friends yesterday. So I thought it was a perfect time to work on my blog.

I know I'm so far behind (hey, but at least I won't go a whole month without posting!), so I will work my way backwards I guess. Mostly because the most recent new recipe I tried was awesome and worthy of sharing.

Boy #2's preschool teacher emailed me recently that she'd stumbled across my blog and wanted to let me know about a website she loves, 100 Days of Real Food. I had seen it before, but I had forgotten about it and certainly didn't have it in my food blog rotation that I usually check when I'm looking for new ideas. So I decided to see what all I could find on there. Turns out there was a ton, and I think after Thanksgiving we are going to start with the 10 day challenge and see how it goes. Shouldn't be too hard because we already don't eat many processed foods, but I'm excited for the challenge to see what more we can give up. This was one of the meals I chose from it for last week's meal plan.

Coconut Chicken Satay
Source: 100 Days of Real Food website

1 lb chicken breasts, preferably locally and/or organically raised
1/2 cup peanut butter
1/2 cup unsweetened whole coconut milk
1 tablespoon + 1 teaspoon fresh-squeezed lime juice
1 tablespoon rice wine vinegar
1 tablespoon honey
3 cloves garlic
1/2 fresh jalapeno, seeds & stem removed (use the other half to make some overnight refried beans…yum!)
1/8 teaspoon chili powder
1/3 cup unsweetened shredded coconut, lightly toasted (note: coconut can burn quickly and needs to be stirred/checked frequently while toasting…we do ours in the toaster oven for no more than 2 or 3 minutes)
Also need: skewers and foil lined baking sheet


Preheat the oven broiler on high. Soak skewers in water if you don’t want them to cook/burn in the oven.

Cut the chicken breasts into strips and thread them onto about a dozen skewers. Place the prepared skewers on a foil-lined baking sheet and set aside.

In a food processor or blender puree the peanut butter, coconut milk, lime juice, vinegar, honey, garlic, jalapeno, and chili powder together. Remove 1/4 cup of the peanut mixture and drizzle/brush it over the raw chicken skewers.

Place chicken under the broiler to cook. After 4 – 5 minutes take the baking sheet out, turn the skewers over, drizzle another 1/4 cup peanut sauce on top, and cook for 4 or 5 more minutes or until cooked all the way through.

Once the chicken is done take it out, drizzle on the remaining peanut sauce (or serve it as extra dipping sauce on the side), and sprinkle the toasted coconut on top. Serve warm and enjoy!

*****

We had this on a Wednesday night, which is when we lead a Bible study group for our church. I ended up getting a late start on it, so I didn't get to eat with my family because I had to go pick up our babysitter. The husband texted me that it was fantastic and they all loved it. I ate it when I got home, and it was super tasty! It was really easy to do and came together fast, which was great. I think my boys enjoyed the novelty of eating dinner off a stick. I skipped the jalapeno in the sauce because my kids don't like spicy, and I thought it still had good flavor without that. I did add a little extra chili powder to compensate for the missing jalapeno. I ended up having another skewer as a snack the next day. This is definitely going into my meal rotation since it was a hit with all of us!

Oh, I should note that I had an awful time finding unsweetened coconut. I finally found it at Fry's, which is a Kroger grocery store for those of you out of state, but it was tucked behind a display for something else. Sheesh. Hopefully you don't have such an awful time getting ahold of some!


Saturday, October 20, 2012

Jam Stuffed Biscuits


Normally I try to avoid buying processed foods and stick with foods that I can easily pronounce all of the ingredients, but I'm a sucker for a few things that I will buy on occasion. Like Grands biscuits. I can't help it, they're so flaky and delicious. My grocery store recently had them on sale for super cheap, so I bought quite a few. Well, I think I bought three. But that seemed like quite a few. I didn't really know what I was going to do with all of them, so I looked on the Pillsbury website for ideas. I saw this recipe and thought my kids would love it and it would be a quick breakfast. I love quick breakfasts...I'm not not a morning person, but I definitely prefer things to be easy in the morning so we can get out the door and take Boy #1 to school.

Jam Stuffed Biscuits
Source: Pillsbury.com


1 can (16.3 oz) can Pillsbury® Grands!® Flaky Layers refrigerated biscuits
1/2 cup jam or preserves of your choice
1/2 cup butter, melted
1/2 cup sugar

Heat oven to 400°F. Spray large cookie sheet with cooking spray.

Separate dough into 8 biscuits. Gently separate each biscuit halfway into 2 layers. Spoon 1 tablespoon jam into center of each biscuit. Pinch edges to seal.

Dip each biscuit into melted butter; dip each in sugar. Place on cookie sheet. Bake 14 to 16 minutes or until golden brown around edges.

*****

These were a huge hit at my house. My kids loved them and so did the husband. I used homemade peach jam inside this biscuits, and it was super tasty. I'd definitely make these again. They were even easy for a school morning!


Green Chile Pork Stew


There's quite a back story on this recipe. Well, maybe not. That makes it sound a lot more dramatic than it actually is. When Boy #1 was six months old I joined a local chapter of MOMS Club. I'm sure I've talked about it before. It was a huge lifesaver for me for many reasons. I was definitely a workaholic before he was born and then quit to be a stay at home mom when my maternity leave was done. We had moved to a different part of Phoenix when I was pregnant, so all of my friends with kids lived at least 30 minutes away, and everyone else I knew worked. It was a rough transition A friend on the east coast suggested I look into finding a MOMS Club chapter near me to meet other mamas. So I did. And I found one. There were several other women with babies around Boy #1's age, plus a lot of moms with older kids who gave great advice and knew exactly what I was going through. I had a lot of my identity in my career and what I had done, so it was a HUGE change to not have that define me anymore.

This is a lot more deep than I intended to get...sorry about that. The whole point was that one of the monthly activities was a cooking club, where the coordinator would pick a theme and everyone would bring a dish that fit the theme. There was a sandwich one, one to bring something with apples, cookies, and a soup one. I know there were more, but those are the ones that stick out. My friend Aimee brought a delicious green chile pork stew to the soup cooking club, and I've thought about it ever since then. Keep in mind the boy was maybe seven or eight months old at this point, and he'll be seven this coming February. I'm not lying when I say I've thought about it for years. I don't know why I never made it. Then recently I found pork stew meat on sale for super cheap...and of course I couldn't find the recipe. So I posted on her Facebook wall. Our mutual friend Mary saw it and found the recipe and sent it to me (God bless her!). I happened to have some roasted Hatch chilies in my freezer that I wanted to be using, so obviously all signs pointed towards me making this stew.

Wow, that was a really long explanation for a pretty simple soup recipe!

Green Chile Pork Stew
Source: Adapted from my friend Aimee

2 teaspoons olive oil
1/2 pound pork loin -- cut into 1/2-inch chunks and remove all visible fat
3 small garlic cloves -- finely minced
1 red onion -- finely chopped (optional)
2 tablespoons flour -- preferably masa flour
2 tablespoons cornstarch
4 tablespoons water
28 oz. New Mexican chiles -- roasted, peeled, seeded, and finely chopped
1-2 tablespoons chopped jalapeno pepper -- optional and preferably fresh
1 teaspoon cumin
1/8 teaspoon salt
1/8 teaspoon white pepper
2-3/4 cup chicken broth
2 large fresh tomatoes -- pureed (or peeled and chopped)

In dutch oven, heat olive oil over medium-high heat. Saute pork until all pink is gone (about 5 minutes). Move meat aside and add garlic and onion. As soon as garlic sizzles, stir together with pork.

In a small bowl, make thickener by adding water to flour and cornstarch. (Add another tablespoon of cornstarch and a tablespoon of water if you prefer a thicker sauce, but wait until later in the cooking to decide if the texture is what you want, or you may accidentally make it too thick.) Add mixture to dutch oven.

Add chiles, spices, chicken broth to pot. Bring to a low boil, then reduce heat and add tomatoes. (puree the tomatoes if you like a very smooth sauce; peel and chop 'em if you like more texture). Simmer on very low heat, covered, for at least 1 hour.

(Makes 4 good-sized servings) Freezes very well.

*****

The original recipe called for using the crockpot, but I think I ran out of time to do it...or figured if I was already dirtying pans, why dirty the crockpot too. The husband and I thought this was fantastic. I didn't bother having my kids try it because it was really spicy, and I knew they wouldn't like it. This was really easy to throw together, especially since I had pork stew meat, so I didn't even have to cut up the meat. I would definitely make this again for the husband and me to eat!


Tuesday, October 2, 2012

Shrimp and Grits


We have been having a ton of tasty new dishes lately, but I just haven't had a chance to sit down and post about them! Everyone else in my house is sleeping, so I'm trying to get some cleaning and blogging done while I have some alone time! This is actually the most recent thing we've had, and I'll admit I feel a little guilty not posting something older, but this was so incredibly good I didn't want to wait.

A few years ago we went on vacation to Myrtle Beach, SC with my mom and aunt. Boy #2 was only an itty bitty baby! While we were there we drove down to see Fort Sumter and Charleston for a day. The husband is a good ol' Southern boy and loved seeing such an integral site in the "war of northern aggression." We found a place for dinner before heading back to Myrtle Beach, and the husband had shrimp and grits. They were AMAZING. I came home wanting to make some, saved a recipe on Food.com and then proceeded to never, ever make it. Now fast forward to a week or so ago, and I was flipping through Cooking Light from a couple months ago and saw a recipe for crawfish and grits. Crawfish are hard to come by here in the desert, but I knew that shrimp was on sale, so I figured I could switch it up a bit. Grits proved slightly easier to find than crawfish, but it was still not an easy search. Or rather, non-instant grits proved difficult to find, but as everyone knows (or everyone who's seen "My Cousin Vinny") no self-respecting southerner (or self-respecting wife of a southerner) would ever make instant grits. So if you want non-instant grits, head to Trader Joe's, not Safeway. FYI. ;)

Shrimp and Grits
Adapted from Saucy Crawfish With Whole Corn Grits from Cooking Light, August 2012

Grits:
3 1/2 cups 2% reduced-fat milk, divided
1 1/2 cups fresh corn kernels
1 chipotle chile, canned in adobo sauce
1 1/2 cups water
1/2 teaspoon kosher salt
1 cup uncooked regular grits
2 ounces reduced-fat shredded cheddar cheese (about 1/2 cup)
3 tablespoons light sour cream

Shrimp:
1 1/2 tablespoons all-purpose flour
2 teaspoons olive oil
1/4 cup finely chopped andouille sausage or kielbasa (about 1.5 ounces)
2/3 cup chopped onion
2/3 cup chopped green bell pepper
1 tablespoon minced garlic
2 teaspoons chopped fresh thyme
1/4 teaspoon kosher salt
2 teaspoons tomato paste
12 ounces shrimp
1 cup 2% reduced-fat milk
1/4 cup light sour cream
1/4 cup chopped fresh chives, divided


1. To prepare grits, combine 1/2 cup milk, corn, and chipotle chile in a blender; process until the corn is coarsely chopped.

2. Combine remaining 3 cups milk, 1 1/2 cups water, and 1/2 teaspoon salt in a medium saucepan; bring to a simmer over medium-high heat. Gradually add grits, stirring with a whisk. Cover, reduce heat, and simmer 11 minutes or until thick, stirring frequently. Add corn mixture; cook an additional 3 minutes, stirring frequently. Remove from heat; add cheese and 3 tablespoons sour cream, stirring until cheese melts. Keep warm.

3. To prepare shrimp, place flour in a large nonstick skillet over medium heat; cook 4 minutes or until lightly browned, stirring frequently. Remove flour from pan; set aside. Wipe pan clean.

4. Return pan to medium heat. Add oil and sausage to pan; cook 3 minutes, stirring occasionally. Add onion, bell pepper, garlic, thyme, and 1/4 teaspoon salt; cook 3 minutes, stirring occasionally. Add reserved flour, tomato paste, and shrimp; cook until shrimp are pink, stirring frequently. Stir in 1 cup milk; bring to a simmer, and cook 2 minutes or until sauce thickens, stirring frequently. Remove from heat. Stir in 1/4 cup sour cream. Sprinkle 1 tablespoon chives over shrimp mixture. Stir 3 tablespoons chives into grits; serve with shrimp mixture.

*****

Since I was a grits cooking novice, the husband stepped in and helped me out a bit with them. He used to be a master grill operator at the Waffle House, so he knows a thing or two or twenty about cooking grits. I should add that I didn't really follow the grit cooking directions above. I did at first, but after 11 minutes my grits hadn't thickened at all, so I turned the heat back up and kept the cover off my pot. That worked much better, and the husband said he didn't know why you'd cover it and turn the heat down in the first place.

This was simply amazing and delicious and fantastic and tasty. I went a little overboard plating grits, but it worked out. They were so tasty with the added kick of the chipotle pepper in there and the fresh corn and creamy from the cheese and sour cream. The little chunks of andouille sausage mixed in with the shrimp was fantastic too. If you're not a fan of spicy, this dish probably isn't for you, but we loved it. I probably wouldn't serve this to my kiddos because they'd complain about too many aspects of it, but it's definitely something I'd make for the husband and me again!!


Tuesday, September 18, 2012

Pantry Reorganization

My baby boy started preschool this year, so I have four afternoons a week to myself. It's pretty glorious. Although I envisioned having all sorts of house projects completed at this point and a lot of lounging in our pool by myself. Sadly neither has really happened. I mostly use the time for cleaning house and running errands alone. Do you know how fantastic it is to run errands alone? Do you know how fast I can be in and out of my car and a store without having to deal with car seats? It's kind of like this. I really wanted to post the picture, but it was too big across, and I don't know how to fix that. Sorry. But if you have kids and run errands with them, you will probably find it amusing.

Anyway, one of the projects I wanted to get done was to reorganize my pantry. It was in a complete state of chaos. It had gotten so bad that I had resorted to putting things in there all willy-nilly instead of their normal spots. It made it very difficult to find things I needed. So I decided one day last week that it was time to bite the bullet and do it. So I pulled everything out before I took Boy #2 to school with the intention of organizing and putting everything back while he was at school. Let me tell you what happens when you leave in the middle of a project like that. You come home and think your kitchen has been overtaken by an episode of Hoarders. It was nuts. I suggest you do it sometime just so you can see how much crap you have in your pantry (or whatever room/closet/storage area you need to clean out). It's a great motivator.

After almost 2.5 hours I was left with a lovely, clean, organized pantry. And somehow I have significantly more space than I did before. I did throw out a few things, and I moved our alcohol to a little buffet cabinet in our living room that was previously home to my fine china and crystal (that gets used maybe once a year, and the husband deemed it was taking up valuable storage real estate and the cabinet could be put to better use as a liquor cabinet while all my pretty things could be stored in a box in a closet. He had a valid point once I thought about it.), so that freed up quite a bit of space. I couldn't decide if I wanted to take a "during" picture of my Hoarders-esque kitchen, but I opted not to. I did take a picture of all my spices stacked up on a chair because it was a bit overwhelming.


So, here are my before and after pictures. I have to say I am loving my new, clean pantry!!


Wednesday, August 22, 2012

Red Velvet Poke Cake


I may be in the minority here, but I had never heard of a poke cake before. The husband LOVES red velvet cake, so when I saw this on Pinterest I figured it was worth a try. And it sounded super easy, which I totally dig when it comes to making desserts. My desserts board on Pinterest is pretty ridiculous, considering I don't like to bake. When I just went to get the link for it, I saw it contains 287 pins. See? Ridiculous.

I had wanted to make this for a bible study party we had a few weeks ago, but I wasn't going to have enough time. We were out at my mom's for the day, and I did my grocery shopping out there. By the time we'd get home from her house I knew there wasn't enough time for it to set. But, then we had another bible study party a few weeks later (hey, we're a fun group! Wednesday nights at my house if you're interested!) and I figured I could make it for that.

Red Velvet Poke Cake
Source: Adapted from The Country Cook via Pinterest.com

1 box Red Velvet cake mix
ingredients needed to make cake (eggs, oil & water)
2 (3.4 oz.) boxes instant Cheesecake-flavored pudding
4 cups milk
1 (8 oz.) tub frozen whipped topping, thawed

Prepare cake mix according to package directions for a 9x13 cake. Once cake comes out of the oven, allow it to cool for just a couple of minutes. Then, with a wooden spoon handle or some other similarly-sized object, begin poking holes in the warm cake.

You want the holes to be fairly big so that the pudding has plenty of room to get down in there. Be sure to poke right down to the bottom of the cake.

In a medium bowl, prepare instant pudding. Whisk together pudding mix with 4 cups of milk. Whisk until all the lumps are gone. Pour pudding over cake. Taking care to get right into the holes as much as possible. Spread it all out and using the back of the spoon, gently push pudding down into the holes. Put the cake into the fridge to set and cool (about 2 hours). If you have anything hanging out in your fridge that is stinky, be sure to cover your cake.

Once your cake has completely cooled, spread on whipped topping. Spread it out evenly over the pudding layer.

This cake needs to be kept refrigerated.

*****

The original recipe called for crushed Oreos on top, but I've never had Oreos on red velvet cake, so I left them off. Plus having Oreos in my house would be a very dangerous thing. And I just don't buy junk food like that, even though I do love them. Anyway, it also took me a few minutes to find the cheesecake pudding. At my grocery store, it was down on the bottom shelf with cheesecake making kits instead of with the puddings. Same section, just not with the other pudding, if that makes sense. Just trying to save you the hassle of having a minor freakout that you can't find the right pudding and what kind should you use instead. :) I'm nothing if not helpful.

This cake was DELICIOUS. It was a huge hit at our bible study party, and there was not a whole lot left, which was a good thing considering how delicious it was. In fact, Boy #2 tried to grab a chunk out of the pan with his hand. Thankfully one of our friends was there to witness it and stopped him. Sheesh...it's like he's related to me or something. The husband and I may have taken a fork to what was left in the pan the next day. Maybe. There's no proof that we did or did not do that. This was a super easy and super tasty cake to make...it's one I will definitely make again!


Saturday, August 11, 2012

Shrimp Salad Rolls


My mom is retired and has the luxury of spending a month out of each summer traveling around to cooler climates. She's so lucky! This summer she spent a week at her time share at a lake in eastern Washington, then some time in Seattle visiting my brother, then a week on the Oregon coast and finally finishing up her trip with a few days in Portland before she drove home. Sounds nice, doesn't it? Especially when it means she's escaping the 100+ degree temperatures we have in Phoenix. Oh, I can't wait until I can do the same!! Anyway, while she was in Oregon she got a smokin' deal on fresh Oregon bay shrimp and she was nice enough to bring some home to me. Woo hoo!! I had so many ideas what I could do with it that I got overwhelmed and stuck it all in the freezer. Then I was looking through the most recent issue of Cooking Light and saw a recipe for shrimp salad rolls. I knew that would be a use for one of my pounds of shrimp!

Shrimp Salad Rolls
Source: Adapted from Cooking Light, August 2012

1 pound Oregon bay shrimp, cooked
1/4 cup canola mayonnaise
1 teaspoon grated lemon rind
1 tablespoon fresh lemon juice
2 teaspoons chopped fresh parsley
1-2 teaspoons Old Bay seasoning
1/2 teaspoon freshly ground black pepper
1/4 teaspoon kosher salt
2 hot dog buns
4 romaine lettuce leaves

Combine chopped shrimp, mayonnaise, and next 6 ingredients (through salt) in a large bowl.

Open buns without completely splitting; arrange, cut sides up, on a baking sheet. Broil 1 minute or until toasted. Place 2 lettuce leaves in each bun; top each serving with 1/2 cup shrimp mixture.

*****

If you look at the original recipe you'll see I made a few modifications. It called for larger, raw shrimp and then to chop it. Since the shrimp I had were little already, I skipped that. It also called for fresh tarragon, which I didn't have, so I used some Old Bay instead. I might have thrown a little Tony Chachere's in there, too, for good measure. Rarely can you go wrong with adding a little Tony's to something. And the original said this made four sandwiches, but I love me some shrimp, so I only made two. My kids aren't big seafood fans, and I wasn't about to waste these yummy shrimps on them, so the husband and I had them for a date night dinner one night after the kiddos were in bed.

These were fantastic. I've only ever had lobster rolls once, when we were back east for my cousin's wedding a few years ago, but these sandwiches really reminded me of those. These were a great, light, easy summer dinner. I'll definitely make them again, even without the delicious Oregon shrimp!


Tuesday, July 31, 2012

Man Pleasing Chicken

Our back to school countdown has progressed to only six days. I've let my blog fall to the wayside as we're trying to get in as much fun as possible before Boy #1 starts first grade and Boy #2 starts his first year of preschool. Plus we just did a month of swim lessons that were at 11:00 every day, so that really messed with our days. We're actually on our last day of a staycation at a super fun resort, so while the husband is still sleeping (he has no idea how lucky he is...or maybe he does), and I'm hanging out with the kids while they watch some cartoons I figured I'd get a post done.

So, the name of this chicken totally cracked me up when I came across it. It was, of course, a Pinterest recipe. I don't always have chicken thighs on hand, but I happened to recently and also had all the other ingredients, so I figured I'd give it a go. Plus it sounded really easy which I love!

Man Pleasing Chicken
Source: Witty In The City via Pinterest

1/2 cup dijon mustard
1/4 cup maple syrup
1 Tbsp rice wine vinegar
1.5 to 2 pounds chicken thighs

Preheat your oven to 450ºF. Then, mix together dijon mustard, maple syrup, and 1 tablespoon of rice wine vinegar. 

Put chicken thighs into a foil-lined, oven-proof baking dish. Pour your maple mustard mixture over them, turning the thighs in the mixture so they are fully coated. Put the chicken thighs into the oven, and let them bake for 40 minutes or until a meat thermometer reads 165ºF. 

Baste the tops of the chicken with more sauce half way through. Let the chicken rest for 5 minutes before serving. Plate the chicken, making sure to spoon some extra sauce over the top.

*****

See? Super easy. And I kind of dug the longer cooking time because it meant I was able to hang out in the pool with my family while it cooked. Actually the first time I made this my BFF Jen and her son were over for swimming and dinner, and everyone really liked this. We had it again recently and Boy #1 gave it one thumb up and one sideways thumb and dubbed it an A-, so from him that's a pretty high rating. That kid is a tough critic. This has become one of my go-to chicken thigh recipes, especially since it's so easy and we all love it so much!

Oops...apparently I didn't take a picture of it. I'll make a mental note to get one next time I make this!

Saturday, July 7, 2012

Bacon Guacamole Grilled Cheese Sandwich


It should come as no surprise to those of you who read my blog that, given my family's obscene love for cheese, we also love grilled cheese sandwiches. Because of this, I am always on the lookout for fancy, delicious-sounding grilled cheese. Our love of cheese is probably only rivaled by our love of bacon. Seriously, this family of mine can go through some bacon! So, a grilled cheese with bacon?! Awesome! Add in some creamy guacamole, and it sounds freakin' amazing! I used to not like guacamole or avocados. My parents LOVED them, and I never saw the appeal of the weird, squishy food. I was never a vegetable hater (or is an avocado a fruit?), but avocados just never did it for me. When I was pregnant with Boy #1 I had a veggie sandwich for lunch one day and almost threw up when I tasted the avocado and it's squishyness in my sandwich. Yuck. But then somehow after he was born, I embraced the avocado and LOVED it. Go figure...pregnancy does weird things to you. So, anyway, when I saw this sandwich on Pinterest I had to try it!!

Bacon Guacamole Grilled Cheese Sandwich
Source: closetcooking.com via Pinterest
Ingredients listed are for one sandwich

2 slices bacon
2 slices sour dough bread
1 tablespoon butter, room temperature
1/2 cup jack and cheddar cheese, shredded
2 tablespoons guacamole, room temperature
1 tablespoon tortilla chips, crumbled (optional)

Cook the bacon until crispy and set aside on paper towels to drain.

Butter one side of each slice of bread, sprinkle half of the cheese onto the unbuttered side of one slice of bread followed by the guacamole, bacon, tortilla chips, the remaining cheese and finally top with the remaining slice of bread with the buttered side up.

Grill over medium heat until golden brown and the cheese has melted, about 2-3 minutes per side.

*****

This sandwich definitely delivered!! I loved the addition of the tortilla chips in the sandwich for a little bit of crunch. I'm not normally a chip-in-sandwich-eater (except when I'm pregnant...which I'm not, I'm just saying I did it when I was pregnant), but this was pretty tasty. I love making my own guacamole, and if you've never tried it, you really should. It's so easy--mash up an avocado or two or ten (you know, depending on how much you need), add in a little salsa (homemade or from a jar, whatever floats your boat), salt, and maybe a squeeze of lime juice, and you're good to go. My only complaint was that I think I had too much guac and not quite enough cheese for the amount of guac I had used. But, like I said, this was super tasty, and we will definitely have it again!


Sunday, June 24, 2012

Italian Beer Bread with Sun Dried Tomato Butter


This was my final contribution to my grandma's happy hour birthday party. Back when Boy #1 turned six in February, he requested Little Ceasar's pizza for his family birthday dinner. Since no one other than my two kids are big fans of that, I made an executive decision to have a happy hour type party for him, so he could still have his pizza, but the rest of us wouldn't be forced to eat it. My brother and his girlfriend came down from Seattle for the party, but she ended up getting really sick while they were visiting, which meant no one wanted to touch our house with a 10 foot pole, meaning my family didn't end up coming over for his birthday dinner. Instead we had our best friends over to celebrate with us. I had this bread recipe slated to make for it, so I went ahead and made it. We all liked it so much I decided to make it again so my family could actually try it!

Italian beer bread and sun dried tomato butter
Source: SnappyGourmet.com via Pinterest

Bread:
3 1/2 cups (15oz.) all-purpose flour
1/2 cup granulated sugar
1/2 cup grated parmesan cheese
1 tablespoon baking powder
1 tablespoon Italian seasoning
1 teaspoon salt
1/2 teaspoon garlic powder
1/4 teaspoon onion powder
1/4 teaspoon black pepper
12 oz. beer
2-3 tablespoons unsalted butter, melted (optional)

Butter:
1/2 cup unsalted butter, softened
1/4 cup sundried tomatoes in oil, chopped
1/4 teaspoon salt
1/8 teaspoon pepper

Preheat oven to 350 degrees F. Spray a 9×5 inch bread pan with nonstick cooking spray.
In a large bowl, whisk together flour, sugar, cheese, baking powder, Italian seasoning, 1 teaspoon salt, garlic powder, onion powder, 1/4 teaspoon pepper until well combined. Pour in beer and stir until just combined.

Place dough in prepared bread pan. Spoon 2-3 tablespoons of butter on top of bread if desired.

Bake bread for about 50-70 minutes or brown and crispy around edges. Cool slightly then remove from pan.

Meanwhile, place 1/2 cup butter, sundried tomatoes, 1/4 teaspoon salt, and 1/8 teaspoon pepper in food processor and process until smooth. Serve with bread.

Notes
SNAPPY TIPS: Be sure to cook the bread until is browned and crispy around edges so that it’s cooked through the middle. If you don’t add butter to the top of the bread, you can cover the bread halfway through the cooking time to help prevent overbrowning before the bread is cooked through.

*****

Like I said above, I had already made this before, so I knew it was a winner. I love a good quick bread recipe, and this comes together really easily. The sun dried tomato butter is tasty, too, although it is really hard to spread if you keep it in the fridge. This is a relatively easy appetizer to make, and I know it's one that I'll make a lot in the future.


Greek Yogurt Queso Dip


When I was working up what I'd make for my grandma's birthday party, Boy #1 requested cheese dip. I had pinned this queso dip on Pinterest and thought I'd give it a try. If you remember, I love Greek yogurt, so I was excited to give this a try.

Greek Yogurt queso
Source: littlebittybakes.com via Pinterest

2 tablespoons unsalted butter
2 tablespoon all-purpose flour
12 ounces plain Greek yogurt
8 ounces mild cheddar cheese, shredded or cubed
2 tablespoons grated parmesan cheese
1/4 teaspoon chili powder
Dash of cayenne
Salt & pepper, to taste

In a medium saucepan, melt the butter over low heat.  Stir in the flour, using a wire whisk to stir until smooth.  Add the yogurt; stir until smooth.  Add the remaining ingredients; stir constantly until cheese is completely melted and smooth.
Serve warm with tortilla chips and/or fresh vegetables.  (you can keep it on the stove on very low heat, or put it in a crock pot on warm, until serving).

Nutrition stats per 2 tablespoons: 90 calories, 6g fat (4g sat), 130 mg sodium, 1g sugar, 6g protein

*****

Since we had an event to attend before the party, I mixed this up at home before we left and then reheated it once it was time for the party. I really love party food that can be made ahead of time so I'm not having to run around like a crazy woman getting everything ready right before a party. Ha! Who am I kidding?! I'm generally doing that anyway! This was really easy to put together, and I loved the extra zip/tang the Greek yogurt provided. Boy #1 ended up not really being a fan of it, but I loved it and thought it was great. I'd definitely make it again! Actually I bet if it was thinned out a bit with some milk, it would be a great sauce for mac and cheese!


Baked Brie in Bread Bowl


This was another recipe I made for my grandma's 94th birthday party. If you're on Pinterest, it's entirely possible you saw this recipe because it definitely made the rounds. I normally do some kind of baked brie for the party, and this looked awesome. I'm a sucker for a bread bowl--be it clam chowder, spinach dip or whatever--so this appealed to me on many levels!! Plus warm, melty cheese INSIDE bread?! Yes please!

Baked brie in bread bowl
Source: McCormick website via Pinterest

1 1/2 teaspoons McCormick® Chili Powder
1/2 teaspoon McCormick® Garlic Powder
1/2 teaspoon McCormick® Mustard, Ground
1/2 teaspoon sugar
1 loaf round sourdough bread (about 1 pound)
1 tablespoon butter, softened
1 round (8 ounces) Brie cheese

1. Preheat oven to 350°F. Mix spices and sugar in small bowl. Set aside. Place bread on baking sheet. Cut circle in top of bread and remove bread center to make room for the Brie. 

2. Spread butter on bread. Sprinkle with 2 teaspoons of the spice mixture. With knife, make 2-inch cuts at 1-inch intervals around edge of bread. Remove rind from Brie and place in bread. Sprinkle Brie with remaining spice mixture. Replace top of bread. 

3. Bake 20 to 30 minutes. To serve, remove bread top and break into bite size pieces. Dip bread pieces in hot Brie.

per serving
Calories: 263
Fat: 11 g
Carbohydrates: 30 g
Cholesterol: 32 mg
Sodium: 545 mg
Fiber: 2 g
Protein: 11 g

*****

I gotta say, I was most excited for the bottom layer of this, the bottom of the bread bowl that would be coated with melty brie. Kind of like the best part of a clam chowder bread bowl is the bottom of the bowl that's soaked with chowdery goodness. It was pretty awesome having cubes of bread along the side of the brie to just tear off and smear with cheese. Oh, cheese, how I love thee! This was dedfinitely a cool take on baked brie. Not sure if I like this or the typical brie-wrapped-in-puff-pastry baked brie better. The puff pastry version is faster/easier, but this one is awesome having bread right there to dip in it.


Giada's Stuffed Baby Peppers


We are on vacation once again, however I don't have an internet connection (what kind of rental house in this day and age doesn't offer wifi?!), so I'm just typing this up and saving it and will upload once we're home at the end of the week. We're on the opposite coast this time, spending a week on the Central Coast area of CA with my husband's family. Once again, it's cloudy. At least in CA the clouds usually burn off, although the past two days they sadly have not. THe husband and I are spending the day wine tasting in Paso Robles while his lovely sister watches our kids for us, so that's probably a sure sign the sun will be shining on the beach all day. Oh well, I'll be tasting wine with the love of my life, so I can't complain too much.

You may remember that every year for my grandma's birthday, she likes to have a happy hour birthday party where we feast on all sorts of appetizers and wine. I always spend weeks trying to figure out what my contributions will be. I had seen these in a Giada cookbook when I was searching for dinner ideas and thought they'd be a great contribution. I don't think I've ever gone wrong with a Giada recipe.

Giada's Stuffed Baby Peppers
Source: FoodNetwork.com

Vegetable oil cooking spray
2 tablespoons olive oil
3 ounces thinly sliced pancetta, chopped into 1/4-inch pieces
1/2 medium onion, finely chopped
3/4 cup ricotta cheese
1/3 cup grated Parmesan
1/2 cup frozen petite peas, thawed
Kosher salt and freshly ground black pepper
24 (2 to 3-inch long) sweet baby peppers

Place an oven rack in the center of the oven and preheat to 350 degrees F. Spray a baking sheet with vegetable oil cooking sprayand set aside.

In a medium skillet, heat the oil over medium-high heat. Add thepancetta and cook, stirring frequently, until brown and crispy, about 5 to 7 minutes. Using a slotted spoon, remove the pancetta anddrain on paper towels. Add the onion to the pan and cook until translucent and soft, about 5 minutes. Set aside to cool for 10 minutes.
In a medium bowl, combine the onion, pancetta, cheeses, and peas. Season with salt and pepper, to taste.

Using a paring knife, cut 1/2-inch from the stem-end of the peppers. Remove the seeds and veins. Using a small dessert spoon, fill each pepper with the ricotta mixture. Place the filled peppers on the prepared baking sheet and bake for 15 to 18 minutes until the peppers begin to soften. Remove from the oven and cool for 10 minutes.
Arrange the peppers on a platter and serve.

*****

We had an event for the husband's work before we went to my mom's for the party, so I assembled the peppers ahead of time and just kept them in a cooler while we were at the event. When it was party time, I put them on a cookie sheet and popped them in the oven. Super easy to get them prepped ahead of time!

These were really tasty, and they're low carb which I need to keep in mind for when we're having low carb weeks, or just to take to things where I know it will be a carb-fest. Let me tell you something about petite peas though--they're a scam!! I stood at the freezer case of my grocery store looking for petite peas. There was one brand that sold them--at three times the cost of a bag of regular peas. But, it was for my grandma's 94th birthday so I figured I'd splurge. You know what? They were the same freakin' size as regular peas. Well played, Birds Eye Vegetables, well played. So save yourself some money and use regular peas.

I will definitely be making these again. There were quite a few leftover (there's always a ton of food at this party), and the husband and I liked eating them cold even. He took them as a side in his lunch for a couple days after the party. Thanks, Giada, for another great recipe!!


Wednesday, June 6, 2012

Penne Rosa


Well, it's another rainy day at the beach. Bummer as far as my vacation fun goes, but at least I'm getting lots of blog posts done, right? We just got rid of cable at our house, so my kids are fascinated at having Cartoon Network again, so at least they're happy being cooped up inside. The sun came out briefly this morning but then quickly got rainy and then windy. I just washed, dried, and flat ironed my hair (a whole lot of good that did with this humidity, let me tell you...note snarky tone in that) in the hopes that it would help bring out the sun because then I'd want to swim but would have to sacrifice my hair to do so. Does that make sense? Basically I'm hoping that my hairstyling will have control over the weather somehow.

With that note, on to my post.

I love me a creamy pasta dish, but since I'm pretty conscious of my calorie intake and eating healthy, creamy pasta sauces are something I tend to avoid unless I'm being really indulgent. So I was pretty excited when I saw this recipe on Pinterest for a creamy pasta sauce that used Greek yogurt for the creamy aspect of it. If you haven't discovered Greek yogurt yet, you need to try it! It's super tasty and very high in protein, which I love. The husband and I go through it like there's no tomorrow. Thankfully Costco sells it for super cheap! We both like it for a fast, high-protien breakfast or snack, plain with a little honey drizzled on the top, or it's delicious with fruit mixed in as well. And you can use it in place of all sorts of things. It's fantastic!! I even used it to make boxed mac and cheese recently when I was out of milk, and the result was amazing.

Now, I'll step down off my Greek yogurt soapbox and get on with my blog post.

Penne Rosa
Source: Back to Her Roots blog via Pinterest.com

12 ounces whole wheat penne
1 tablespoon olive oil
4 cloves garlic, minced
1 pinch crushed red pepper flakes
8 ounces button mushrooms, sliced
2 medium tomatoes (about 1/2 lb.) chopped
Salt and pepper, to taste
4 cups fresh spinach
1/2 cup marinara sauce
1/3 cup 0% plain Greek yogurt
1/4 cup grated parmesan cheese


Cook penne according to package directions, omitting salt and fat. Drain and set aside.

In a large skillet with a lid, heat olive oil over medium-low heat. Add in garlic and red pepper flakes, cook for 2 minutes or until garlic begins to soften.

Add in mushrooms, tomatoes, salt and pepper. Cook for 5 minutes, or until mushrooms begin to release their water. Remove from heat, add in spinach and cover skillet. Let spinach wilt for 2 minutes.

Remove lid and place skillet back over low heat. Add the penne, Greek yogurt and pasta sauce. Stir until sauce is mixed well and all pasta and veggies are coated. Heat until just warmed through. Divide into pasta bowls and serve topped with parmesan cheese.

*****

The original recipe called for shrimp, but I left that out because I didn't have any, and my kids don't really like it anyway, plus I thought we needed a vegetarian meal because we hadn't had one in awhile. Wow that was a long sentence. That was the only modification I made. This was a pretty big hit all around with my family. I think it would be delicious with the shrimp the original post used,k but it was good on its own with just the vegetables. It's definitely something I'd make again, especially when I want a creamy pasta fix!


Mmmm...sauce.


Tuesday, June 5, 2012

Creamy Poblano Chicken Over Cornbread Waffles


Well, we've been forced inside for awhile due to a torrential downpour, so while we're stuck inside I thought I'd do another blog update. It does not look pretty outside, so I may do a couple posts...who knows!

I felt recently in my meal planning that I needed to break away from using Pinterest for my meal planning, so I pulled out a cookbook my mother-in-law gave me for Christmas a few years ago. She was a teacher at a Christian school in San Antonio, and one of the high school classes put together a cookbook for a fund raiser. I pulled the cookbook out for something else recently and decided to flip through it for some meal planning ideas. This jumped out at me, and I had some random peppers in my fridge already, so I thought it was worth a go. Then lo and behold, when I did a search for cornbread waffles, it turns out the recipe is from an old issue of Southern Living because the first search result took me to this exact recipe!

Creamy Poblano Chicken Over Cornbread Waffles
Source: San Antonio Christian School cookbook and Southern Living

3 tablespoons butter or margarine
1 large sweet onion, chopped
2 poblano chile peppers, seeded and diced
3 garlic cloves, minced
8 skinned and boned chicken breast halves, cut into bite-size pieces
1 teaspoon salt
1/2 teaspoon pepper
1 (10 3/4-ounce) can cream of chicken and mushroom soup, undiluted
1 (8-ounce) container sour cream
1 (8-ounce) package shredded sharp Cheddar cheese
Cornbread Waffles (recipe below)

Melt butter in a Dutch oven. Add onion, chile pepper, and garlic; sauté 5 minutes. Add chicken, salt, and pepper; cook, stirring often, 8 to 10 minutes or until chicken is done. Stir in soup and sour cream until smooth. Add cheese, and cook 7 to 8 minutes or until cheese is melted.

Serve over Cornbread Waffles.

Cornbread Waffles
1 1/2 cups cornmeal
1/2 cup all-purpose flour
2 1/2 teaspoons baking powder
2 tablespoons sugar
3/4 teaspoon salt
1 large egg
1 1/2 cups milk
1/4 cup butter or margarine, melted
1 1/2 cups frozen white shoepeg corn, thawed

Stir together first 5 ingredients in a large bowl. Stir together egg and next 3 ingredients; add to cornmeal mixture, stirring just until dry ingredients are moistened.

Bake in a preheated, oiled waffle iron just until crisp.

*****

There were mixed reviews on this meal at my house (and from my BFF who was over briefly after dinner. I loved this. The husband was confused by the cornbread waffles because he expected them to taste like regular waffles would. Once he told himself to expect cornbread instead of waffles, he liked it a little better. Boy #1 wasn't home, Boy #2 ate it okay. I really liked it, but only if the bites were really saucy. Jen thought it was okay when she stopped by. We decided it might be better as a pot pie filling instead of served over the waffles. Or over biscuits. The husband thought it could be spicier, and I agreed. I wasn't sure what kind of peppers I was using or how hot they'd be. Someone at the husband's work had brought in peppers from their garden that he brought home, but we had no idea what they were. They were too small to be Anaheims, they were too big to be jalapenos. I still have no idea what they were. But I could have used another one or two for a bit more oomph.

I don't know if I'd make it again...I really liked the flavor, but since everyone else in my house that ate it was pretty indifferent about it, I don't know if it will come into rotation in our house again. Maybe in a different form, but probably not like this. But, I thought it was tasty!!


Sunday, June 3, 2012

Buffalo Turkey Burgers with Blue Cheese Coleslaw


I'm on vacation in Florida right now with my two kiddos, my mom, and some extended family. We're spending a week pool and beachside with three of her cousins and their families. It's a blast so far!! My boys were in the pool for over six hours today before we pulled them out to go to the dollar store to get some beach toys. Boy #2 fell asleep in the car on the way there and is still snoozing (so I volunteered to stay back here with him), and Boy #1 is back at it, either swimming or going to play on the beach, I'm not sure.

We had a four hour plane ride yesterday, and I was alone with my kids. In my mind, they'd spend the entire flight enthralled with various new movies I'd purchased for the trip and basically leave me alone except for the occasional DVD switch or another snack (you have no idea how much food I take along on an airplane ride...it stems from a mantra of "when in doubt, feed them" from when we traveled with our boys when they were babies). While they were busy being fixated with movies I was going to spend the flight updating my blog, be one of those people typing away on my laptop on the plane. Now, if you have kids you're probably shaking your head at me right now, and I don't blame you. I should have known better. No one wanted to watch a movie for more than 10 minutes, and I was constantly picking up a backpack so they could find something else to do or trying to come up with something to entertain them. My laptop stayed packed away in my backpack in the overhead compartment the whole trip.

Sigh.

But, I'm at least hoping to get caught up on some entries while on vacation. I mean, I can't spend an entire week laying by the pool or on the beach eating tasty food and having delicious adult beverages, right? Ha! Who am I kidding? That sounds awesome, so this may very well be the only post I do. We'll see. I can't let Boy #2 sleep too long or he'll never go to bed tonight.

So...

I recently found ground turkey on sale for BOGO, which I love. And then a day or two later I happened to see this recipe on skinnytaste.com and thought it would be a perfect addition to my meal plan for the week. I wasn't sure about the coleslaw on the burger but figured it was worth a shot. Plus I don't think I've ever been disappointed with a recipe I've made from her website! And one more thing, we really love anything deemed "buffalo" so it was worth a shot!

Buffalo Turkey Burgers with Blue Cheese Coleslaw
Source: skinnytaste.com
1 1/2 cups broccoli slaw
1/4 cup skinny blue cheese dressing (recipe below)
1.25 lbs 93% lean ground turkey
2/3 cup grated carrots (grate in food processor) 
1/4 cup seasoned whole wheat breadcrumbs 
1 clove garlic, grated 
1 tbsp red onion, grated
1/4 cup Franks Hot Sauce
salt and fresh pepper
oil spray
5 slices reduced fat cheddar
5 whole wheat burger buns (I used Martin's 100 calorie Potato Whole Wheat Buns)

Directions: In a medium bowl combine broccoli slaw and skinny blue cheese dressing. Set aside. In a large bowl, combine ground turkey, carrots, breadcrumbs, garlic, onion, hot sauce, salt and pepper.

Makes 5 equal patties, 5.5 oz each. Servings: 5 • Size: 1 Burger  
Calories: 358 • Fat: 15 g • Protein: 38.3 g • Carb: 22.7 g • Fiber: 5.6 g • Sugar: 5.9

Low Fat Creamy Blue Cheese Dressing
1/2 cup crumbled blue cheese
6 oz fat free Greek yogurt
1 tbsp light mayonnaise
1 tbsp lemon juice
1 tbsp white wine vinegar
1/8 teaspoon garlic powder
salt and freshly ground black pepper

In a small bowl, mash blue cheese and yogurt together with a fork. Stir in mayonnaise, lemon juice, vinegar, and garlic powder until well blended. Season to taste with salt and pepper. Makes 1 cup.

Servings: 8  • Serving Size: 2 tablespoons •  Calories: 46.8 • Fat: 3.0 g • Protein: 2.8 g • Carb: 2.2 g • Fiber: 0.3 g 

*****

As I've mentioned before, my children are very anti-spicy food, so before adding in the Frank's I pulled out enough of the mixture for a burger patty each for them and set it aside. I was pretty liberal with the Frank's, but I really could have put more in it. Oh, and I skipped the garlic and onion and instead went for a bit each of garlic powder and onion powder. I'm lazy, and neither was enough of an amount to deal with using the real thing. We loved these burgers!! I will warn you, with the slaw on top they were very messy, but they were oh-so tasty. I would have eaten another if we'd had it, I loved it so much. The slaw on top was a great addition, too. Mellowed out the tang and heat of the Frank's and added an interesting texture. I think if you weren't a fan of blue cheese (which I just don't understand) you could easily substitute ranch dressing for the blue cheese dressing when mixing up the slaw. My kids were happy with their normal burgers, the husband and I were happy with our tasty buffalo burgers, so it was a win-win all over!!

Tuesday, May 8, 2012

I'll be returning shortly!

I was scrolling through my blog archives recently searching for a recipe and realized just how few posts I've been doing recently. I make awesome new recipes all the time, I just haven't taken the time to sit down and post them. I'm not sure why--I really do love updating my blog. I think for one thing training for the triathlon I have this coming weekend has really taken a lot of my time (along with driving back and forth to the gym). Since this week is a taper week, I've decided it's time to organize my office. My office tends to be the dumping ground for our house, and I never fully unpacked and/or organized it when we moved in to this house two years ago. It is time. So, please hang with me a bit longer and I promise I'll be back soon to regularly scheduled (okay, probably not scheduled) blog postings!!

Tuesday, April 17, 2012

Maple Chicken and Waffles


Recently I was looking all around my office for a cookbook I wanted to use for meal planning. I couldn't find it anywhere. Then I realized I don't actually own it, I've just always borrowed it from the library and kept it a long time when I've borrowed it. I promptly ordered it right then and there. And since I needed a little more to qualify for free shipping, I figured I'd get Pioneer Woman's new cookbook while I was at it. Let me tell you the bliss of getting two brand new cookbooks in the same package. Heaven!!!

It's a little random how I came to find out about this cookbook. I have an online friend named Kristy. We met on Facebook, which I'll admit is kind of weird for two grown women. I've known her husband since elementary school, and she was also FB friends with someone I grew up going to Sunday school with and a friend from college. Small world, huh? So we became Facebook friends. She has lost over 100 pounds and is completely dedicated to exercise and a healthy lifestyle. She mentioned this cookbook awhile back, so I checked it out. And I loved it! So, thank you, Kristy, for the great recommendation!

My birthday was last month, and one of my gifts was a waffle maker. It's pretty awesome. I'd been dying for an occasion to make waffles and bust out my new toy, but making breakfast like that on a school morning stresses me out, and our Saturdays have been crazy recently with the husband and I both training for a triathlon next month, and Sunday mornings are a bit chaotic, too, because of church. So I was super excited to see this recipe for chicken and waffles and get to use my new toy at dinner time.

Maple Chicken and Waffles
Source: Pretty Delicious by Candice Kumai, Copyright 2011

Chicken:
1/2 cup low-fat buttermilk
1/4 cup maple syrup, plus more for serving
2 pounds boneless, skinless chicken breasts
1/2 cup panko bread crumbs
1/4 tsp ground cinnamon
1/4 tsp freshly grated nutmeg
1/4 tsp sea salt

Waffles:
1 1/2 cups whole wheat flour
2 Tbsp brown sugar
1 1/2 tsp baking soda
1/2 tsp sea salt
3/4 tsp ground cinnamon
1/4 tsp freshly ground nutmeg
1 cup low-fat buttermilk
2 large eggs

To make the chicken: Whisk the buttermilk and 1/4 cup of the maple syrup together in a medium bowl. Add the chicken and turn to coat. Cover the bowl with plastic wrap and refrigerate for 1 hour or overnight.

Preheat the oven to 400. Line a rimmed baking sheet with foil and lightly coat the foil with cooking spray.

Stir together the panko, cinnamon, nutmeg, and salt in a medium bowl. Remove the chicken from the marinade, letting the excess drip back into the bowl. Place the chicken breasts in the bread crumbs and turn to coat so each side is evenly covered with seasoned panko. Set the chicken on the baking sheet and bake until the coating is golden and crispy and the chicken is cooked through, about 30 minutes. Leave the oven on, but reduce the temperature to 250. When the chicken is cool enough to handle, slice crosswise into thin strips.

To make the waffles: Whisk the flour, brown sugar, baking soda, salt, cinnamon, and nutmeg together in a large bowl. Whisk the buttermilk and eggs together in a medium bowl. Add the buttermilk mixture to the flour mixture, and stir together until just combined.

Heat a waffle iron according to the manufacturer's instructions. Coat the iron with cooking spray and then add enough batter to fill tghe holes without overflowing once the iron is closed. Cook until gorgeous and browned. As the waffles are made, place them on a baking sheet and place in thed 250 oven to stay warm while you cook the rest.

To serve, stack 1 or 2 waffles on a plate. Criss-cross the chicken strips over the waffles, drizzle with a little of the maple syrup and serve extra on the side.

*****

I had never made chicken and waffles before, and this was pretty easy. I had to rearrange my meal plan because the night I originally planned on making it, I didn't have enough time to thaw the chicken, let it marinate in the buttermilk, and get it cooked. Boy #1 was really disappointed because he was so excited to have this. I'll admit I was disappointed too. When we finally had it, it received rave reviews from my whole family. I'll definitely make this again, and this may end up being my go-to waffle recipe. The only thing I'd change would be to spray the chicken with some nonstick spray before putting it in the oven so it would end up a little browned, but that's purely cosmetic.


Mmmm...waffley goodness!

Monday, April 9, 2012

Honey Sesame Chicken


Lately my afternoons have been starting out with me camped out on the floor outside Boy #2's room waiting for him to fall asleep for his nap. Otherwise he constantly gets out of bed and I'm constantly coming upstairs to put him back in bed. I think he's heading towards dropping his nap, but so far he still takes one most days, thankfully. Some days I sit here for a very long time. Other days he falls asleep pretty quickly. Normally I have my phone with me and do something like catch up on Scrabble or Words With Friends or Draw Something, but today I brought my laptop up and decided to do a blog post. I just uploaded our Easter pictures and that included some dinner pics from recently. It was a tough choice which one to do because we've had some tasty things, but I figured I'd start with this one. I tend to be somewhat against cooking chicken in the crockpot because it ALWAYS seems to turn out dry. Dry chicken is not delicious, and personally I like to eat delicious food. This one sounded tasty and since there was a sauce with it, I thought that maybe it would be okay...because sometimes dry chicken can at least be masked with enough sauce.

Honey Sesame Chicken
Source: Adapted from Table For Two blog via Pinterest

1 to 1.5 lb. boneless, skinless chicken breasts
Salt and pepper
3/4 cup of honey
1/2 cup of low sodium soy sauce
1/2 cup ketchup
2 tbsp. vegetable oil
1/2 tsp garlic powder
1 tsp onion powder
1/4 tsp. red pepper flakes
Cornstarch
Sesame seeds

Place the chicken breasts in the crockpot insert and sprinkle salt and pepper on both sides.
In a medium sized bowl, combine honey, soy sauce, ketchup, oil, garlic powder, onion powder, and red pepper flakes. Stir to combine well. Pour over the chicken in the crockpot.

Cook on low for 3-4 hours or high for 1 1/2-2 1/2 hours.

When done, remove chicken and cut into chunks. Prior to putting the chicken back in the stockpot, combine some cornstarch in water and whisk it into the crockpot to thicken up the sauce a bit. Throw the chicken back in and stir around to recoat the chicken in the sauce.
Serve hot over a bed of white rice or quinoa (optional) and sprinkle some sesame seeds on top.

*****

The original recipe called for chicken thighs, but I only had chicken breasts. And the original recipe had more honey and less ketchup and real garlic and real onion, but I didn't have enough honey, I accidentally used too much ketchup, and I was too lazy to chop up garlic and onion. Hey, at least I'm honest. Also, since I'm being honest, I forgot to get this started when I had planned, so I had to throw my chicken into the crockpot frozen and say a prayer and cross my fingers it was done in time for dinner. Thankfully it was. And you know what? It wasn't dried out!!! Perhaps using frozen chicken and checking the chicken when you think it might not be cooked yet are the keys? Maybe I've just been leaving it in the crockpot for too long all these years. I don't know. But, I do know that this was DELICIOUS and my whole family really liked it. I opted to serve it with quinoa instead of rice because I only had brown rice and not enough time for it to cook, plus I love the nutritional content of quinoa over rice.

This is definitely something we'll have again, especially since most of the ingredients are things I always have on hand.