Showing posts with label cheese. Show all posts

Monday, November 7, 2022

Southwest Tater Tot Casserole


I should have known that once I got the ol' blog up and running again and was enjoying writing posts that life would happen and get in the way.  At least I'm getting this post in under the two month mark from the last one!  I feel like we've just been swamped, although a good chunk of it was fun.  In the last two months my husband and I have taken a trip to Louisville, KY for a music festival and spent a weekend in NYC to see one of our favorite people get married.  Then I fractured my ankle hiking and came down with a cold.  Plus throw in there all the day-to-day stuff like working and managing kid activities and attending said kid activities, and life is just busy.  

Basically this meme is my life...


Anyway, my oldest is in Milwaukee, WI this weekend for a choral festival, so while he's gone I was trying to come up with meals he doesn't particularly like that the rest of us do.  This Southwest Tater Tot Casserole was the first one to pop in my head.  

In the summer of 2019 we were going to housesit for some friends in the Seattle area while they went on the trip of a lifetime to China.  My youngest and I made a road trip out of it on the way there and stopped in Boise to visit my lifelong BFF and her family for a few days.  We've been friends since our ages were single digits which is pretty incredible because we are both solidly in our 40s now.  We of course had a blast with them, and I loved that our kids played together like they've known each other forever.  Our last night at their house she made this for dinner.  I absolutely love tater tot casserole and have literally been eating it since I was a kid, and my kids love it, too, so Miles and I were super excited to try this version.  Once we were back home I made it for my family and was shocked when Will didn't like it.  What the heck, man?!  So now I make it if Will isn't going to be here for dinner, although sometimes he has to suck it up and have it because it's what I want to make for dinner.

The website where the recipe originally came from isn't up anymore, so luckily I had printed off the recipe at some point.  I've changed it up a little from the recipe I printed to adjust to how my family likes it.

Southwest Tater Tot Casserole

1 package ground turkey (I buy mine at Costco in packages of four)

1 can corn

1 can black beans, drained and rinsed

1 packet taco seasoning

1 large can green enchilada sauce, heat level of your choice (we like medium heat)

1-2 cups shredded cheese of your choice (Mexican blend, colby jack, cheddar, pepper jack...whatever)

1 bag frozen tater tots

Salt and pepper to taste


Preheat oven to 425.  Brown ground turkey in an ovenproof skillet sprayed with nonstick spray, seasoned with salt and pepper.  

Once the turkey is no longer pink, add in corn, black beans, taco seasoning, and 1/2 to 2/3 of the can of enchilada sauce.  Sitr to combine and let simmer on medium heat for 10-12 minutes so the flavors combine.  This will also help the enchilada sauce cook down a little.  If it looks or gets too dry, add in more enchilada sauce.

Turn off the burner and top the mixture with shredded cheese.  Arrange tater tots on top of cheese.

Move the skillet into the oven and bake for 25 minutes or until cheese is melted and tots are crispy.

Note: if you don't have an ovenproof skillet, you can use a 9x13 or 11x7 casserole dish.  Spray dish with nonstick spray and transfer skillet mixture to the casserole dish before topping with cheese.  Top with cheese then tater tots and bake as directed.


Jefferson is keeping a close eye on the skillet mixture.


Topping with tots. My husband makes fun of my symmetrical tot placement, but how else are you supposed to do it?  Throw on tots all willy-nilly?!


Monday, September 5, 2022

Binging with Babish's Deluxe Grilled Cheese

 Wow, it has been a MINUTE since I've done this!  Thank you, Blogger, for simply having a "new post" link when I go to my blog to make it easy on me.

I recently created an Instagram account for our little dog because he is constantly hovering by anyone preparing food in our kitchen, so I decided to combine cooking and recipes with dog pics.  I'm still working on how to best provide links for the recipes I show, so while I get that figured out I thought the easiest way to start would be directing anyone interested here, and I can provide a link (or the recipe) to whatever the post is.

Interested in following along with this new endeavor?  Give us a follow on Insta at Sous Chef Jeff!

Here's Jefferson aka Sous Chef Jeff in all his cuteness...


So, with all of that being said and introduced, here we go!  My 16 year old son recently introduced me to a YouTube channel, Binging With Babish, and I've kind of been watching it incessantly, sometimes with my son and sometimes on my own.  He had seen this grilled cheese video and thought we should try it sometime.  He was going to make it with me, but high school life got in the way, so I was on my own.

Instead of copying and pasting, I'm just giving you the links.


Binging with Babish: Grilled Cheese Deluxe inspired by Regular Show on the Babish website

This was definitely a tasty grilled cheese and one I would make again for sure.  I did make a few mistakes I would change next time...
  • On the video he puts the cheese into a ramekin to solidify and cool.  The recipe calls for spreading it on a cookie sheet to make slices.  I was having a struggle with plastic wrap for the cookie sheet, so I opted for a container.  I recommend using a cookie sheet if you want the cheese to set faster...basic science stuff here, but it took awhile for the big chunk o' cheese in the container to cool because it was so dense...which meant we actually had these the next night for dinner because the cheese wasn't set in time.  I would have prepped it earlier in the day to avoid this, but at the time I thought my son was going to help me with it, so I was waiting for him to get home from school and sports practice.
  • Once the cheese was cool, and I took it out to slice it, I ended up slicing it way too thick.  Thinner is better if you want an epic cheese pull when you cut the sandwich.
  • I used brioche bread because I thought that would be delicious, but I think next time I'd stick with a regular white sandwich bread, like Pepperidge Farm's.  That's my go-to white bread for sandwiches that require white bread (really white bread is the only option for things like pimento cheese and meatloaf sandwiches, don't you think?).  The brioche was still good, just not what I was looking for with this.  The end result actually reminded me a lot of a Sonic grilled cheese, which by no means was a bad thing.
Here's my cheese blob after I took it out of the container for slicing.  I cut it in half widthwise and then cut slices from the smaller pieces.


And the finished sandwich!


Thursday, August 15, 2013

Baked Hawaiian Ham Sandwiches


So chances are good that if you're on Pinterest, you've seen this recipe and/or pinned it.  We had these last night, and I couldn't believe they weren't on my blog because I've made them several times, and they're completely easy and delicious.

I've always loved the http://www.kingshawaiian.com/products/">King's Hawaiian breads
, and it seems that now they're a whole lot easier to find than they were many years ago.  It used to be a big treat to find them, now pretty much every grocery store has them.  And I love them.  That was selling point number one for these sandwiches.  Although it just occurred to me that I've never looked at the ingredient list.  Sigh.  I probably should, but I'm fairly certain that means I won't want to buy them anymore.  Do you ever run into this conundrum if you try and mainly eat real food?  I suppose I could find a recipe to make my own...surely there's one out there.  But I digress...
I also love sandwiches.  I'd say who doesn't love them, but I do know of someone that doesn't.  She doesn't like mixing her food together, which I understand I guess, but man alive is she missing out!  I can see not wanting your mashed potatoes and peas to mingle together on your plate, but a sandwich is something completely different.  These sounded super easy when I first saw the recipe, and I'm always up for an easy to prepare dinner!  Especially if it's a delicious sandwich.

Baked Hawaiian Ham Sandwiches

One 12-count package http://www.kingshawaiian.com/products/rolls-12-pack/">King's Hawaiian sweet dinner rolls
3 sticks butter
3 Tbsp dijon mustard
1-1/2 tsp worcestershire sauce
1 Tbsp poppy seeds
1 onion, somewhere between finely chopped and diced
1 pound thin sliced ham
6 slices Swiss cheese

Preheat oven to 350.

In a medium saucepan, melt butter and add in mustard, worcestershire, poppy seeds, and onion.  Let simmer 5-7 minutes.

Slice entire package of rolls in half horizontally, so you have 12 bottoms and 12 tops.  Keep them connected--don't break them apart into separate rolls.

Place bottom halves of rolls into a foil-lined 9x13 baking dish.  Brush 1/3 to 1/2 butter mixture on rolls.  Place ham on top, layering evenly across rolls.  Lay cheese slices in single layer on top of ham.  Place top halves of rolls over the cheese and brush remaining butter mixture on the top of the rolls.

Cover with foil.  Bake approximately 15 minutes.  Remove foil cover and bake another 5-7.  Slice into individual rolls and serve.

*****

Obviously you can probably tell from my initial comments that these are a huge hit at my house.  My kids don't like the pieces of onion on theirs that inevitably end up on the top of the roll, so they just push them off and have a little onion pile on their plate, which is okay by me.  I'm not sure how many times I've made them, but last night I actually doubled the recipe so there'd be leftovers because we'll eat a whole batch in one meal.  But then of course today, Boy #1 wanted to buy lunch at school, and the husband had an all day meeting with lunch being served, so there's a whole pan of them just sitting in my fridge now.  Good thing it's leftover clean-up for dinner tonight!

By the way, does anyone know of a ham that is free of nitrates and nitrites?  Try as I might, I cannot find one.  I'm starting to think unless I get a fresh ham and cook it myself, it's not going to happen.  And if that's the case, I'll either stick with the nitrites or do away with ham altogether.

Who am I kidding...I would never do away with ham.

Speaking of ham...check out Boy #2 posing with the sandwiches!


Wednesday, June 19, 2013

Ham and Artichoke Sandwich


So I was just looking up my dinner recipe for tonight on my blog (Crockpot Beer Chicken Fajitas, if you're curious) and saw I've only done nine blog posts for the whole year.  Nine!  And it's June!  Yowza.  I need to get back to blogging.  I promptly opened my "cooking blog" photos folder and scoured for something to post.  I'll be honest, when I saw these pictures I couldn't remember exactly what it was, until I saw the artichoke hearts and then remembered.

Every January (well, this year and last year anyway) we go up north to Flagstaff, AZ with my mama the last weekend of winter break.  I love Flagstaff.  It reminds me a lot of where I went to college, and in the summer it's a great escape from the Phoenix heat, and in the winter it's a great place to go get a bit of winter. When the husband and I were there one time years and years ago we stumbled upon a brewery that we fell in love with, now we always make it a point to go there when we're visiting.  Beaver Street Brewery.  Awesome beer (they have a scotch ale which also reminds me of my favorite brewery where I went to college), great food, good place to take kids.  We actually went twice this past trip...once on a date night dinner while my mom kept the boys and then with my mom for lunch one day.  The husband and I always get pizza when we go for dinner (actually he might have gotten pizza again for lunch this trip), but for lunch I wanted to try something new.  This sandwich sounded fantastic (and it was), so I tried to recreate it once we were home.

Ham and Artichoke Sandwich
Source: adapted from Beaver Street Brewery's Wood Fired Ham and Artichoke Sandwich

1 French roll
Few slices of ham
2 slices provolone cheese
Marinated artichoke hearts

Split roll in half lengthwise and toast.  Place ham slices on bottom half of roll.  Top with marinated artichoke hearts and place cheese on top of artichoke hearts.  Place sandwiches (but not the top half of roll) on a cookie sheet and heat under the broiler until cheese melts.  Top sandwich with top half of roll and serve.

*****

Obviously the ingredients above are for one sandwich, so adapt as necessary to fit your needs.  This was a tasty sandwich but not nearly as good as the one at Beaver Street.  I used real ham for mine, not just deli ham, because it's what I had but either would work.  Next time I would brush some of the marinade from the artichoke hearts onto the rolls to give it a little extra boost of flavor.  For those of you that have an aversion to ham, I bet it would be tasty with chicken as well.


Saturday, July 7, 2012

Bacon Guacamole Grilled Cheese Sandwich


It should come as no surprise to those of you who read my blog that, given my family's obscene love for cheese, we also love grilled cheese sandwiches. Because of this, I am always on the lookout for fancy, delicious-sounding grilled cheese. Our love of cheese is probably only rivaled by our love of bacon. Seriously, this family of mine can go through some bacon! So, a grilled cheese with bacon?! Awesome! Add in some creamy guacamole, and it sounds freakin' amazing! I used to not like guacamole or avocados. My parents LOVED them, and I never saw the appeal of the weird, squishy food. I was never a vegetable hater (or is an avocado a fruit?), but avocados just never did it for me. When I was pregnant with Boy #1 I had a veggie sandwich for lunch one day and almost threw up when I tasted the avocado and it's squishyness in my sandwich. Yuck. But then somehow after he was born, I embraced the avocado and LOVED it. Go figure...pregnancy does weird things to you. So, anyway, when I saw this sandwich on Pinterest I had to try it!!

Bacon Guacamole Grilled Cheese Sandwich
Source: closetcooking.com via Pinterest
Ingredients listed are for one sandwich

2 slices bacon
2 slices sour dough bread
1 tablespoon butter, room temperature
1/2 cup jack and cheddar cheese, shredded
2 tablespoons guacamole, room temperature
1 tablespoon tortilla chips, crumbled (optional)

Cook the bacon until crispy and set aside on paper towels to drain.

Butter one side of each slice of bread, sprinkle half of the cheese onto the unbuttered side of one slice of bread followed by the guacamole, bacon, tortilla chips, the remaining cheese and finally top with the remaining slice of bread with the buttered side up.

Grill over medium heat until golden brown and the cheese has melted, about 2-3 minutes per side.

*****

This sandwich definitely delivered!! I loved the addition of the tortilla chips in the sandwich for a little bit of crunch. I'm not normally a chip-in-sandwich-eater (except when I'm pregnant...which I'm not, I'm just saying I did it when I was pregnant), but this was pretty tasty. I love making my own guacamole, and if you've never tried it, you really should. It's so easy--mash up an avocado or two or ten (you know, depending on how much you need), add in a little salsa (homemade or from a jar, whatever floats your boat), salt, and maybe a squeeze of lime juice, and you're good to go. My only complaint was that I think I had too much guac and not quite enough cheese for the amount of guac I had used. But, like I said, this was super tasty, and we will definitely have it again!


Sunday, June 24, 2012

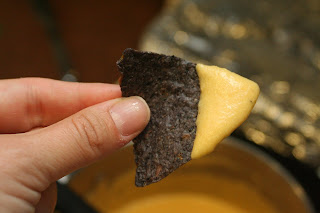
Greek Yogurt Queso Dip


When I was working up what I'd make for my grandma's birthday party, Boy #1 requested cheese dip. I had pinned this queso dip on Pinterest and thought I'd give it a try. If you remember, I love Greek yogurt, so I was excited to give this a try.

Greek Yogurt queso
Source: littlebittybakes.com via Pinterest

2 tablespoons unsalted butter
2 tablespoon all-purpose flour
12 ounces plain Greek yogurt
8 ounces mild cheddar cheese, shredded or cubed
2 tablespoons grated parmesan cheese
1/4 teaspoon chili powder
Dash of cayenne
Salt & pepper, to taste

In a medium saucepan, melt the butter over low heat.  Stir in the flour, using a wire whisk to stir until smooth.  Add the yogurt; stir until smooth.  Add the remaining ingredients; stir constantly until cheese is completely melted and smooth.
Serve warm with tortilla chips and/or fresh vegetables.  (you can keep it on the stove on very low heat, or put it in a crock pot on warm, until serving).

Nutrition stats per 2 tablespoons: 90 calories, 6g fat (4g sat), 130 mg sodium, 1g sugar, 6g protein

*****

Since we had an event to attend before the party, I mixed this up at home before we left and then reheated it once it was time for the party. I really love party food that can be made ahead of time so I'm not having to run around like a crazy woman getting everything ready right before a party. Ha! Who am I kidding?! I'm generally doing that anyway! This was really easy to put together, and I loved the extra zip/tang the Greek yogurt provided. Boy #1 ended up not really being a fan of it, but I loved it and thought it was great. I'd definitely make it again! Actually I bet if it was thinned out a bit with some milk, it would be a great sauce for mac and cheese!


Tuesday, June 5, 2012

Creamy Poblano Chicken Over Cornbread Waffles


Well, we've been forced inside for awhile due to a torrential downpour, so while we're stuck inside I thought I'd do another blog update. It does not look pretty outside, so I may do a couple posts...who knows!

I felt recently in my meal planning that I needed to break away from using Pinterest for my meal planning, so I pulled out a cookbook my mother-in-law gave me for Christmas a few years ago. She was a teacher at a Christian school in San Antonio, and one of the high school classes put together a cookbook for a fund raiser. I pulled the cookbook out for something else recently and decided to flip through it for some meal planning ideas. This jumped out at me, and I had some random peppers in my fridge already, so I thought it was worth a go. Then lo and behold, when I did a search for cornbread waffles, it turns out the recipe is from an old issue of Southern Living because the first search result took me to this exact recipe!

Creamy Poblano Chicken Over Cornbread Waffles
Source: San Antonio Christian School cookbook and Southern Living

3 tablespoons butter or margarine
1 large sweet onion, chopped
2 poblano chile peppers, seeded and diced
3 garlic cloves, minced
8 skinned and boned chicken breast halves, cut into bite-size pieces
1 teaspoon salt
1/2 teaspoon pepper
1 (10 3/4-ounce) can cream of chicken and mushroom soup, undiluted
1 (8-ounce) container sour cream
1 (8-ounce) package shredded sharp Cheddar cheese
Cornbread Waffles (recipe below)

Melt butter in a Dutch oven. Add onion, chile pepper, and garlic; sauté 5 minutes. Add chicken, salt, and pepper; cook, stirring often, 8 to 10 minutes or until chicken is done. Stir in soup and sour cream until smooth. Add cheese, and cook 7 to 8 minutes or until cheese is melted.

Serve over Cornbread Waffles.

Cornbread Waffles
1 1/2 cups cornmeal
1/2 cup all-purpose flour
2 1/2 teaspoons baking powder
2 tablespoons sugar
3/4 teaspoon salt
1 large egg
1 1/2 cups milk
1/4 cup butter or margarine, melted
1 1/2 cups frozen white shoepeg corn, thawed

Stir together first 5 ingredients in a large bowl. Stir together egg and next 3 ingredients; add to cornmeal mixture, stirring just until dry ingredients are moistened.

Bake in a preheated, oiled waffle iron just until crisp.

*****

There were mixed reviews on this meal at my house (and from my BFF who was over briefly after dinner. I loved this. The husband was confused by the cornbread waffles because he expected them to taste like regular waffles would. Once he told himself to expect cornbread instead of waffles, he liked it a little better. Boy #1 wasn't home, Boy #2 ate it okay. I really liked it, but only if the bites were really saucy. Jen thought it was okay when she stopped by. We decided it might be better as a pot pie filling instead of served over the waffles. Or over biscuits. The husband thought it could be spicier, and I agreed. I wasn't sure what kind of peppers I was using or how hot they'd be. Someone at the husband's work had brought in peppers from their garden that he brought home, but we had no idea what they were. They were too small to be Anaheims, they were too big to be jalapenos. I still have no idea what they were. But I could have used another one or two for a bit more oomph.

I don't know if I'd make it again...I really liked the flavor, but since everyone else in my house that ate it was pretty indifferent about it, I don't know if it will come into rotation in our house again. Maybe in a different form, but probably not like this. But, I thought it was tasty!!


Thursday, April 5, 2012

Twice-Baked Cauliflower


We're going to my mom's house for Easter dinner this year. Well, we generally always go to her house for dinner. I asked what I could bring, and she said we're having ham and turkey, so I said I could either make funeral potatoes or this twice baked cauliflower dish I made when we were doing low carb awhile back. She said either would be fine, so I decided I'd go with the cauliflower because it's healthier and something different. Then I realized I had never posted it on my blog! So, if you're looking for a side dish for Easter dinner, consider this! It's super tasty. We originally had it with Pimento Cheese Stuffed Chicken Breasts and the flavors complimented each other really well! And they shared a lot of the same ingredient which made preparing them at the same time a total breeze.

Twice Baked Cauliflower
Source: Kalyn's Kitchen blog
Serves 6-8

1 large head cauliflower
4 oz. low fat cream cheese (do not use fat free)
1/2 cup low fat sour cream (do not use fat free)
1/4 cup minced green onions
1/4 cup freshly grated Parmesan cheese (If you only have finely grated Parmesan, use a bit less)
6 slices bacon, cooked until very crisp, fat blotted with paper towel and then crumbled
1 cup reduced fat sharp cheddar cheese


Preheat oven to 350F/180C. Cut out stem and core from cauliflower, and cut into small pieces. Cook in large pot of boiling salted water until cauliflower is tender, but not overly soft. Drain well and mash with potato masher, leaving some chunks. Mix in light cream cheese, light sour cream, green onion, Parmesan, and 3/4 of the crumbled bacon.

Spread evenly in a medium-sized glass casserole dish. Sprinkle with low-fat cheddar cheese and reserved bacon. Bake 30-35 minutes, or until hot and bubbly.

*****

I mostly followed the recipe except I steamed the cauliflower instead of boiling it because I've always read that it's a better way to cook vegetables (so they keep more of their nutrients)--especially with cauliflower. I think we'll have 11 people at Easter dinner, so I think I'm going to double this. Plus it's so tasty I really don't mind having leftovers. My mom loves cauliflower, so I hope she likes this.

This is a great substitute for potatoes if you're doing no or low carb. Don't get me wrong, I love potatoes, but the bite of the cauliflower really adds a lot to this, and cauliflower is lower in calories (significantly!) and carbs (even more significantly!) than potatoes Plus Boy #1 doesn't like potatoes (I know, it's weird!), and he loved this.

Mashed cauliflower!

Please excuse the half eaten chicken breast, I forgot to take a picture before we started eating!

Tuesday, March 20, 2012

Turkle Burgles


We were on a spring break trip in CA last week, and the husband pointed out that I hadn't updated my blog in awhile. I knew he was right, so today I decided to make blog updating a priority. and then I got distracted by Pinterest and going through my picture folders to see what exactly I wanted to blog about, so now I only have time to do one post instead of the two or three I had planned. Oh well! I was amazingly efficient today, so let's hope that carries over to tomorrow. Of course, it helps that Boy #2 is being entertained by an alphabet/phonics video.

This isn't anything we've had recently, but it's super yummy, and Boy #1 keeps talking about them, so I figured I should write a post about them. I have no idea where the name of this came from, but it's something my family has always eaten, especially with leftover Thanksgiving turkey. The sandwiches are so easy to put together, and really tasty! Hey, if my six year old asks for them repeatedly, you know it has to be something good! he even took them for his lunch, cold!

Turkle Burgles
Serves 4

4 hamburger buns or sandwich rolls (I use Oroweat Sandwich Thins)
8 slices cooked bacon
8 slices turkey (or enough for four sandwiches)
4 slices cheese
Thousand Island salad dressing (or homemade with mayo, ketchup, and relish)

Heat broiler. Toast hamburger buns. Place bottom half of buns on a cookie sheet. Top with 2 slices of turkey, 2 strips of bacon (I tore mine in half to get more bacon coverage), and slice of cheese. Place under broiler until cheese begins to melt. Spread dressing on top half of bun and top sandwich.

*****

Seriously, the hardest part of these was mixing up my own Thousand Island dressing. We had these a couple nights in a row when we had leftover turkey after the holidays because 1) they're so easy to put together, and 2) we all loved them. I'm sure they could be made using turkey lunchmeat, too, if you didn't have any leftover turkey meat, I've just always had them with leftover turkey.

Typing this out and looking at the pictures almost makes me want to find a turkey to cook...almost!


Wednesday, February 22, 2012

Pimento Cheese Stuffed Chicken Breasts


I was going back through the pictures for my blog to see what I hadn't posted about yet and couldn't believe I hadn't done this one! This came from our no carb week a few weeks ago. I found it on Pinterest.com and thought it looked awesome--and low carb! I'm pretty much a sucker for anything pimento cheese, so I knew we had to have it. Oh yeah, and it had bacon in it. Sign me up!

Pimento Cheese Stuffed Chicken Breasts
Source: Weight-Watchers-Recipes.net via Pinterest.com

1 slice applewood-smoked bacon
3/4 cup shredded cheddar cheese
2 tablespoons minced green onions
1 1/2 tablespoons diced pimientos
1 tablespoon canola mayonnaise
2 teaspoons fresh lemon juice
1/2 teaspoon hot sauce
1/2 teaspoon salt, divided
4 (6-ounce) skinless, boneless chicken breast halves
1/2 teaspoon black pepper
1 tablespoon canola oil

Directions:

1. Preheat oven to 350°.

2. Cook bacon in a large ovenproof skillet until crisp. Remove bacon, reserving drippings in pan; crumble bacon. Combine bacon, next 6 ingredients, and 1/4 teaspoon salt. Cut a 1-inch-wide slit into the thick end of each breast half; carefully cut down to the center of chicken to form a deep pocket. Divide cheese mixture evenly among pockets. Secure with wooden picks. Sprinkle chicken with 1/4 teaspoon salt and pepper.

3. Heat pan over medium-high heat. Add oil to drippings. Add chicken to pan; saute 4 minutes. Turn chicken over. Bake at 350° for 12 minutes; let stand for 5 minutes.

Makes 4 Servings

Nutritional Info Per Serving: Calories 204, Carbs 20 g, Fat 11 g, Fiber 3 g, Protein 7 g

*****

I changed this up just slightly, like by adding more bacon. Actually I was making another dish that used bacon, so I cooked up quite a bit to be included in both dishes. I love cooking things in bacon grease. I'm sure it's a fast track to a heart attack, but it's so delicious. This recipe worked out great with the dish I had planned to go with it because there were a lot of similar components. Don't you love when that happens?!

This was something we all really loved, and I will definitely make it again. Ooey, gooey cheese and bacon and bacon drippings?! Hells yeah!

Thursday, January 12, 2012

Mexican Lasagna


Happy New Year, everyone!! Are you excited about what 2012 has in store for you? I'm hoping it has more blogging in it for me. I've kind of decided to just go forward with my blog here and potentially not go back and fill in the missing posts I had wanted to do. I don't know...I can't decide. I figure I'll start current and then when I have some time I'll add in old ones here and there. Otherwise I just get too overwhelmed and don't do anything.

My childhood best friend posted on Facebook recently about calories for a Mexican lasagna she makes. I asked her for the recipe because it sounded tasty just from the title. She sent it to me, and I had most everything on hand already, so I put it into my meal plan for the week. Worked out great because I was low on grocery money this week. I was excited to try it--and that it was low cal! 2011 was the year I got fit, so now I'm really focusing on staying that way, so tasty and low-cal recipes that come highly recommended are fantastic!

Mexican Lasagna
Source: Adapted from my friend Sarah (who has a really funny blog about Jason Segel)

1.25 pounds ground turkey
1/2 onion, chopped
Salt
Pepper
Taco seasoning
28 oz can enchilada sauce
1 medium zucchini, shredded
1 red bell pepper, diced
1 package frozen spinach, thawed and drained
1 can refried beans
4 whole wheat tortillas
2 cups shredded Mexican blend cheese

Preheat oven to 400 degrees.

Brown ground turkey and onion in skillet with salt, pepper, and taco seasoning (no more than one packet...use however much you like to taste...or throw in random taco seasoning spices like chili powder, cumin, garlic powder, oregano, and paprika if you don't have actual taco seasoning). Pour enchilada sauce into skillet and add in vegetables (you can use others, too, whatever floats your boat or what you have on hand). Simmer.

In separate pan, heat can of refried beans.

Coat a 9x13 dish with cooking spray. Spread half of the turkey and vegetable mixture in the bottom of the pan. Top with half of the refried beans, spreading to cover as best you can. Top with two whole wheat tortillas, then half of cheese. Repeat layers.

Bake at 400 for 15 minutes. Cut into eight servings.

*****

I didn't change this a whole lot from how Sarah sent it to me, just added in more veggies and used flour tortillas instead of corn. I had intended on using corn originally, but I ran out of time to make them like I'd planned and didn't have any on hand, so whole wheat flour tortillas is what I ended up using. It worked out fine...I probably could have used a couple more so the tortilla layers were thicker, but no one complained.

This was super easy to put together and SO GOOD. Well, the husband and I both thought so. My kids weren't really fans. Boy #2 ate his up once I mixed some Greek yogurt (in lieu of sour cream, which we didn't have on hand) in it to cut the spice a bit. Boy #1 picked at his even with the yogurt mixed in, but he did end up eating a decent amount of his serving. I will definitely make it again.

Oh, and I calculated it to only be 310 calories per serving! Not bad at all--and it was so filling!


Monday, November 28, 2011

Mary's Tortilla Soup


Last year when my dad passed away, my BFF Jen Clementine set up meal support for my family, which was a huge lifesaver. Honestly it's the only way my kids were going to get fed because I was not functioning at all. My friend Mary brought us this soup one night, and it was so good. My vegetarian brother was tempted to give up his non-meat eating ways to have some, he thought it looked and smelled so good. I was really excited to make it again, but given my family's soup aversion I never had. Plus it always seems weird to me to make soup in the summer in Phoenix. Who wants to eat soup when it's over 110 degrees outside?! But, after the Ham and Beans was decently received, I figured it was worth making. Our Wednesday and Thursday nights for the past month and half have been crazy busy with my bible study group meeting at our house on Wednesday nights and Boy #1 having soccer practice on Thursday nights, so I have been on the lookout for crockpot meals to make my life easier.

Mary's Tortilla Soup


Chicken Tortilla Soup

3-4 chicken breasts (frozen ok)
2 cans corn
2 cans chicken broth (14oz)
1 pkg taco seasoning
1 can stewed tomatoes
1 can cream of potato soup
1 can green chilies
1 cup cheddar cheese, grated
1 can tomato sauce (8oz)
16 oz sour cream (I use the light)
1 handful of cilantro

Put it all (except sour cream and cilantro) in the crock pot on low for 6 hours or high for 3 hours. Take out the chicken and shred it, then add back in. Add the tub of sour cream (you need to temper it so it doesn't curdle). Garnish with cheese, avocados and chips.

*****

I'm not sure if the husband had any of this last year when Mary brought it over since he wasn't that hip on soup, but he LOVED it this time. He requested this be the only tortilla soup I ever make again. Boy #1 thought it was okay, Boy #2 devoured it and asked for seconds. Woo hoo! It was really so easy to make, especially being able to just throw frozen chicken breasts in with everything else. I also added in a can of black beans because I had them on hand and thought they'd be a nice addition. I used regular tomato sauce, but I bet using El Pato sauce instead would be tasty as well. Hmmm...I'll have to try that next time.

I picked up some ciabatta rolls the same day we were having this, sliced them in half and put them under the broiler to brown them a bit, then spread with butter and sprinkled on some shredded cheddar cheese and put back under the broiler to melt the cheese. I figured Boy #1 wouldn't be that excited about the soup, so I wanted there to be something with the soup that he'd like. He thought the cheese rolls were the best thing ever. He kept saying, "Mom this cheese bread is just too good!" Ah, bless him.

This soup will probably be in high rotation in our house this winter. Thanks, Mary, for such a great recipe!

Oh, and the amazing cheese bread:

Creamy Beef Taquitos


I know I've shared my love of the Meal Planning 101 blog before. I don't think I've had a single bad recipe from her website, so I go to it a lot when I need meal ideas. My Bff, Jen Clementine had made these awhile ago and really liked them, so I thought I'd give them a try. I'm always game for a new Mexican food recipe.

Creamy Beef Taquitos
Source: Meal Planning 101 blog


1 lb lean ground beef
2 tbsp taco seasoning (homemade or store-bought)
1/3 cup light cream cheese
1/4 cup salsa
1 tbsp lime juice
3 tbsp cilantro, chopped
2 tbsp green onions, chopped
1 cup grated cheese (cheddar, mozzarella or pepperjack)
12 small flour tortillas (can also use corn tortillas)

Heat oven to 425. Line a baking sheet with foil and lightly coat with cooking spray.

In a large frying pan over medium-high heat, brown the ground beef and break it up into crumbles as it cooks. Add the taco seasoning and cook the beef about 8 minutes until cooked through.

Heat cream cheese in the microwave for about 20-30 seconds so it's soft and easy to stir. Add salsa, lime juice, cilantro and green onions and stir to combine. Once the beef is browned, add the beef and cheese and combine well. You can prepare up to this step ahead of time. Just keep the mixture in the fridge.

Place 2-3 tbsp of beef mixture on the lower third of a tortilla, keeping it about 1/2 inch from the edges. Roll it up as tight as you can. If your tortillas are cracking or breaking, you can microwave them for 10-20 seconds with a damp paper towel over top. Once rolled, place seam side down on the baking sheet. Lay all of the taquitos on the baking sheet and make sure they are not touching each other. Spray the tops lightly with cooking spray or brush with a bit of oil and sprinkle some kosher salt on top. Place pan in oven and bake for 15-20 minutes or until crisp and the ends start to get golden brown.

Dip taquitos in salsa, sour cream, guacamole, or Chipotle Ranch dressing.

*****

The only thing I changed up was to use ground turkey instead of ground beef because I had it on hand, and the husband was going through a "let's lay off the red meat" phase for awhile back when I made these.

Like I expected, these were super easy to put together, fast to cook, and really tasty!! Winner winner, taquito dinner! I love those frozen taquitos that you see a lot at parties, but these were so much better. I'll definitely make them again. Actually I'm wishing I had some ground beef or turkey on hand so I could make them this week!

Friday, October 21, 2011

Oven Hot Dogs


We had these for dinner last night, and they were SO GOOD I could not wait to post the recipe. I only kind of found it through Pinterest.com. Something I had pinned took me to foodgawker.com and that's where I discovered this. Let me tell you, foodgawker.com is a pretty cool website too. I could spend hours and hours looking at pictures of tasty food. It actually makes me sad when I think about how many amazing recipes there are out there that I'll never try. Sigh.

Anyway. Even though I know how awful hot dogs are, I can't stop eating them. I know they're full of nastiness, but it's one of the few foods that I don't care what the ingredients are. Okay, it may actually be the only one. I went through a long phase when I was younger of not eating hot dogs. Then I had a grilled one at a barbecue at one point in college I think it was, and I was reeled back in. Why are hot dogs even more awesome when cooked on a grill? I don't know. When I saw this recipe I thought it looked super tasty and definitely worth a try. She has great step by step pictures on the original blog post, too.

Oven Hot Dogs
Source: In The Wabe blog via foodgawker.com

8 hot dogs
8 hot dog buns
1 can of chili
1/2 an onion, diced
cheddar cheese
mayonnaise
mustard
sweet relish

Line inside of hot dog buns with mayonnaise and sweet relish. Evenly add mustard. Fill with hot dogs and squish into a 13×9″ baking pan.

Top hot dogs with chili, cheese, and diced onion. Cover with aluminum foil and bake at 350F for 45 minutes.

Carefully remove from the pan with a spatula.

*****

There were some mixed reactions when my family saw what was for dinner. Boy #1 had soccer practice last night, and the husband is the coach, so they weren't home while I was getting dinner together. The husband was ecstatic when he saw these. Boy #1 was less than enthused to say the least. He said he wasn't going to eat dinner. I told him then he could go to bed. What can I say, sometimes I'm mean mommy like that. He decided he'd just eat the hot dog. When he was done with the hot dog I said he at least needed to try the bread. Wouldn't you know he ended up loving it and eating every bite. Darn kids. So this ended up being an overwhelming hit at our house and definitely something I will be making again. Oh, and since we count calories in our house, in case anyone is curious these worked out to just be 321 each--using whole wheat hot dog buns, turkey hot dogs, turkey chili, and reduced fat cheese. I thought that was a pretty good calorie count for something as decadent as chili dogs!

Now, you'll have to excuse me as I go eat one of the leftover dogs for lunch...

Monday, October 17, 2011

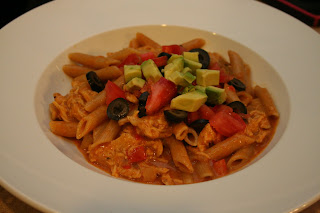
Chicken Enchilada Pasta


I've decided to try a new format and put a picture of whatever I made at the top of the blog post. We'll see how I like it. Let me know via comment if you feel passionately about it one way or the other.

We've been having some amazing dinners lately (thank you, Pinterest.com!), but I just haven't had a chance to update my blog. Normally my blog time would be done in the afternoon while Boy #2 naps, but I've been having to workout then, so my computer time ends up getting considerably shortened. Okay, except for Pinterest because I'm marginally obsessed with it. So as I get some time here and there in the next couple weeks, hopefully I can get a few of these awesome dishes posted!

This is, of course, a recipe I found via Pinterest. It sounded fantastic just from the name and then when I read the blog post about it I knew I had to make it. I had slated it for the husband and I to have for dinner on one of our Friday date nights.

Chicken Enchilada Pasta
Source: Pears, Handcuffs, and Happy Hour blog via Pinterest.com

2-3 chicken breasts, cooked & shredded
2 tbsp. olive oil
2 garlic cloves, minced
1 medium onion, diced
1 red pepper, diced
1 {4 oz.} can diced green chiles
1/2 tsp. salt
2 tsp. chili powder
1 tsp. cumin
2 {10 oz.} cans green chili enchilada sauce
2/3 cups red enchilada sauce
2 cups shredded cheese {I used colby & monterrey jack}
1 cup sour cream
Penne pasta

Optional toppings:
Avocado
Green Onions
Black Olives
Tomatoes
Sour Cream

Cook chicken, drain, and shred. Meanwhile boil pasta according to package and chop the veggies. Heat the olive oil in a deep skillet and cook onions for about 3-5 minutes. Add garlic & red pepper and cook for another 3-5 minutes. Add cooked chicken, green chiles, cumin, chili powder, salt, & enchilada sauces. Let sauce simmer for about 8-10 minutes. Add cheese and stir until the cheese is melted and heated through. Now toss in the sour cream, but whatever you do, DO NOT bring to a boil! Cook on low heat or the sour cream will curdle. Stir until sour cream is well mixed and heated through. Drain pasta & return to pot. Pour sauce over pasta and mix well. Serve and garnish with avocado, tomato, green onion, and a dollop of sour cream.

*****

This was so, so, so, so easy. And it was so, so, so, so tasty! Obviously it made a ton, so we were eating it pretty much all week for lunch, but neither the husband nor I minded. It was that tasty! the only thing I would change would be to maybe add the cheese in before the shredded chicken. The cheese kind of made the chicken stick together in large clumps which was a little annoying.

Oh man, this was so good. Just thinking about it and typing this out makes me want it again. You know that's the sign of a good meal!

Wednesday, September 14, 2011

Pintrest Chicken and Broccoli Casserole

I know I waxed poetic about my love for Pintrest.com recently. I think my addiction is growing...I may need an intervention at some point. There are just so many yummy recipes, crafty projects, neat house ideas, cute outfits. Sigh. Complete time sucker, let me tell you.

Anyway, if you have a Pintrest account, chances are you've seen this recipe. I'm fairly certain everyone I know on Pintrest pinned this at some point in the last couple weeks. I love a good casserole, so I was excited to make it. Plus my brood loves broccoli, and I loved finding a casserole recipe that didn't include cream of something soup. Turns out it's from a blog called Get Off Your Butt and Bake. I haven't checked out many other posts, but I think I probably will. She calls it Chicken Broccoli Supreme. I changed mine up a bit from how the recipe appears on that blog, so the recipe below is how I made it.

Pintrest Chicken and Broccoli Casserole
Source: Adapted from Get Off Your Butt and Bake blog

1 lb. broccoli (steamed slightly if fresh, thawed if frozen)
3 cups cooked chicken breasts – Break up in small pieces
3 cups Grated Cheddar Cheese, divided
1 tube Ritz Crackers
1/2 stick melted butter
1 tablespoon poppy seeds
1 tsp garlic powder
1 tsp onion powder

SAUCE:
1/3 C. Butter melted
1/4 C. Cornstarch, dissolved in 1/2 C. COLD Water
1/3 C. Chicken Broth
1/4 tsp. Salt
1/4 tsp Pepper
2 Cups skim milk
1 1/2 cups of the above Cheddar Cheese

Directions:

In greased 13×9 pan, layer the broccoli and chicken, then set aside. In saucepan over medium heat, combine the sauce ingredients--melted butter, cornstarch dissolved in water, chicken broth, seasonings, and milk. Stir well, and continue stirring until sauce has thickened. Turn heat down to low, and add 1- 1/2 cups grated cheddar cheese. Stir until melted. Pour over the chicken and broccoli. Top with 1- 1/2 cups grated cheddar cheese.

Melt the half stick butter, and add the poppy seeds, garlic and onion powders, and stir well. Crush Ritz crackers in large zip-lock bag with a rolling pin. Don’t crush too small. Add crumbs to the melted butter. Sprinkle crumbs over the top of the grated cheese.

Bake uncovered at 350 degrees for about 30 minutes, or until hot & bubbly.

*****

I used frozen broccoli for mine, so I just threw some in a microwave steamer for a couple minutes so it wouldn't be frozen. I didn't want to completely heat it for fear it would get soggy in the casserole. The original recipe calls for two sleeves of crackers and an entire stick of butter for the topping. I thought that was a bit much (plus my kids are cracker monsters and had eaten all but the one sleeve of crackers I stashed away, so I really didn't have much choice), so I also cut down the amount of butter too. I was worried it was going to be a bit bland, so I threw in the garlic and onion powders to give it a little kick. It really helped. I think next time I would probably season the chicken a little, too. I baked mine earlier in the day and just threw the chicken breasts in a pan into the oven; in hindsight I should have done something to them so there'd be a little more flavor. You could easily add some seasoning to the sauce as well.

All in all, this was a casserole that we really liked. Boy #1 put up a bit of a stink about eating it, but the rest of us all enjoyed it. I think he was just having an off day--chicken, broccoli, and cheese are all things he normally loves. Who knows with five year olds. Am I right?! This is definitely something I'd make again, especially since most of the ingredients (aside from the crackers, which my family just tears through too quickly) are things I normally have on hand.


Wednesday, May 18, 2011

Baked Camembert Pasta

I happened to be grocery shopping with my friend Jen recently and saw a marked down package of camembert cheese in the deli section. I turned to her and said, "Didn't you use camembert for something recently?" To which she replied, "Why yes I most certainly did." Or something along those lines in the way of an affirmative answer. She said it was like a decadent, grown-up mac and cheese. Sold! That was all I needed to hear to throw the package in my cart. I know I've professed my love for mac and cheese before, so I won't bore you with the details of it again.

I'm copying the recipe from Jen's blog but she found it from a Jamie Oliver cookbook.

Baked Camembert Pasta
Source: Food Revolution by Jamie Oliver

a box of Camembert Cheese (250g)
2 cloves of garlic, peeled and finely sliced
1 sprig of fresh rosemary, pick the leaves off the woody stalk
sea salt and freshly ground black pepper
extra virgin olive oil
100g grated Parmesan cheese
400g dried rigatoni
150g fresh spinach

Directions:
1. Open the box of cheese and unwrap it. Place it back to the wooden container.

2. Score a circle into the top of the skin, then lift it off and discard.

3. Lay the garlic slices on top of the cheese, sprinkle some pepper and drizzle a little extra virgin olive oil.

4. Scatter the rosemary leaves over the top and gently pat with your fingers to coat them in the oil.

5. Bake the cheese in a preheated oven of 180C (350F) for about 25 minutes, until golden and melted. (***May take a little longer until the cheese is melted***)

6. When the cheese has 10 minutes left to cook, add the pasta to the pan and cook according to packet instructions.

7. When the pasta is cooked, add the spinach to the pan – it only needs cooking for 10 seconds or so.

8. Drain the pasta and spinach to the pan and let it wilt.

9. Drizzle with a couple of good lugs of extra virgin olive oil and add the grated Parmesan. If the sauce is too thick for you, add a splash of reserved cooking water to thin out a bit. Season with salt and pepper and give it a good stir.

10. Remove the cheese from the oven. Divide the pasta between your serving bowls. Either drizzle the melted Camembert on top or pop cheese on the table and let everyone help themselves to a lovely, gooey spoonful.

*****

I forgot the spinach when I was getting the other ingredients I needed. Oops. And I used whole wheat rotini instead of rigatoni. This was indeed a decadent, grown-up mac and cheese. So much so that I tried to ration the amount of cheese I gave my kids on their pasta so that the husband and I could have more. When I pulled the cheese out of the oven it smelled AMAZING. And the cheese was all gooey and melty with yummy slices of garlic and bits of rosemary on top. Oh man. I seriously could have stood there and eaten it with a spoon.

I don't know how often I'd make this just because camembert is not an inexpensive cheese, so it would have to be a special occasion. Or if I happened to find it marked down again. But if it's in your grocery budget, I say give this a try. But only if you look gooey, melty, awesomeness.

I would advise putting your cheese on a baking sheet of some sort. Just in case something like this happens. It would 1) be a shame to lose the cheese and 2) suck to have to clean that mess up from the bottom of your oven.

Tuesday, May 17, 2011

Mexican Pizza

I'm so far behind on my blog I figure it's easiest to just start with what's current and go back as I have time. Otherwise I'm going to end up overwhelmed and nothing will ever get done. I looked through my pictures today and realized I have been making a lot of new stuff and have a lot of catching up to do. There are nine things on my list that I want to do posts on. Sheesh!

I had a really yummy sounding dinner planned for one night this week, but then it turned out the meat I needed for it wasn't as much on sale as I thought it would be when I went to the store, so I had to come up with a new plan. I was catching up on blogs I follow and went to Meal Planning 101 for some ideas. One of the first posts on there was ideas for ground beef. I recently purchased 10 pounds of ground beef, so I was open to ideas. I saw this taco pizza recipe and had everything on hand for it, so it was a go!

Mexican Pizza
Source: Meal Planning 101 blog

1 lb lean ground beef
1 small onion, diced
1 clove garlic, minced
2 tbsp taco seasoning (homemade or store-bought)
Splash of water

Your favorite pizza crust
1 cup salsa
1 cup sour cream
Grated cheese (cheddar, mozza or Monteray Jack would all work fine)
1-2 plum tomatoes, diced
1 cup lettuce, finely shredded or 2 tbsp fresh basil, finely shredded

Preheat oven to 425 degrees.

In a skillet over medium high heat, brown the beef with the onions and garlic. Add the cumin, chili powder, oregano, salsa spice, salt and pepper (or sub out all these spices for your favorite taco seasoning). Mix and cook for about 30 seconds then add a splash or two of water to let the spices create more of a sauce for the beef. Turn to low and let simmer a couple minutes until the water has evaporated and remove from heat.

Put your pizza crust on a baking sheet or pizza stone. Mix together the salsa and sour cream and spread about 1/3 - 1/2 cup over your pizza crust. Top with the taco seasoned beef and shredded cheese. I bake for 10 minutes at 425 degrees and then broil for 1-3 minutes to get the cheese on top a nice golden brown. You should note that I use the par-baked shells from the bakery, so if you use fresh dough adjust your cooking time and temperature accordingly.

Give the pizza just a moment or two to cool ever so slightly and then top with diced tomatoes and lettuce or basil. Serve with the rest of the salsa sour cream as a dipping sauce.

*****

I didn't have any taco seasoning on hand, so I just threw in some chili powder, cumin, oregano, salt, and pepper. It was definitely a tad under-seasoned, but I didn't want to over do it. I also could have spread more of the sauce on my crust. Overall, though, we really liked this new take on pizza. The kids didn't have any toppings on theirs, but the husband and I both did and really liked it. I'd definitely make this again!!


Sunday, February 6, 2011

Pioneer Woman's Enchiladas

When I saw this recipe in PW's cookbook I knew it had to go on my meal plan for the week, and I knew i needed to slate it for a weekend night because it was going to be time consuming. I originally planned it for Saturday night and then remembered that the husband and i were having a date night, so it got bumped to Sunday. I love good Mexican food, and I was excited to try a new enchilada recipe. this laptop is a pain to type on, so i have to keep it short and sweet. my lack of capitalization is starting to bother me.

Pioneer Woman's Enchiladas
source: The Pioneer Woman Cooks

FOR THE SAUCE:
1 Tablespoon Canola Oil
1 Tablespoon All-purpose Flour
1 can (28 Ounce) Enchilada Or Red Sauce
2 cups Chicken Broth
½ teaspoons Salt
½ teaspoons Ground Black Pepper
2 Tablespoons Chopped Cilantro

FOR THE MEAT:
1-½ pound Ground Beef
1 whole Medium Onion, Finely Diced
2 cans (4 Ounce) Diced Green Chilies
½ teaspoons Salt

FOR THE TORTILLAS:
10 whole (to 14) Corn Tortillas
½ cups Canola Oil

TO ASSEMBLE:
3 cups Grated Sharp Cheddar Cheese
½ cups Chopped Black Olives
1 cup Chopped Green Onions
½ cups Chopped Cilantro

Step #1 – The Sauce
In a large saucepan over medium heat, add oil and flour and whisk together to make a paste, cooking for one minute. Pour in the red sauce, chicken broth, cilantro, salt and pepper. Bring to a boil. Reduce heat and simmer 30-45 minutes.

Step #2 – The Meat
Brown the meat with onions in a skillet. Drain off fat. Stir in 2 cans diced green chilies and seasoned salt. Set aside.

Step #3 – Tortillas
Heat canola oil in a small skillet over medium heat. One by one, using tongs, fry tortillas in oil until soft, not crisp – about 30 seconds per side. Remove to a paper—towel lined plate. Repeat until all tortillas have been fried.

Step #4 – Assembly
Preheat oven to 350 degrees. Pour ½ cup red sauce in bottom of baking pan. Spread to even out. Dip each tortilla into red sauce, then remove to work surface. Spoon meat, a little grated cheese, a little black olives, and green onions in the center of tortilla. Roll up and place, seam down, in baking pan. Repeat until pan is filled. Pour extra red sauce over enchiladas. Top with remaining cheddar cheese.

Bake for 20 minutes or until bubbly. Sprinkle cilantro over enchiladas before serving.

*****

To make this even more time consuming I decided to make my own corn tortillas. I finally figured out how to keep the tortillas from sticking to my tortilla press--spray the wax paper with non-stick spray! Normally I just use wax paper and the dough ends up sticking in one spot and gives me misshapen tortillas. I usually get very frustrated with the process. This time I nearly drove to the store to just buy corn tortillas when I got frustrated, but then my brilliant idea came to me. Since i made my own tortillas, i skipped the step of frying the tortillas to soften them up since i knew mine were soft from having just made them. Everything else I did like PW.

My family watched "Despicable Me" while I made this dinner. I figured I could watch part of it with them, but it took me pretty much the length of the movie to assemble this. It's definitely a labor intensive recipe, BUT it was worth it. These were some tasty enchiladas. The actual rolling and assembly was pretty messy, but they were fantastic and totally worth it. This isn't something I'd make on a regular basis just because of the time factor, but they were definitely tasty and worth the time investment. My oldest (whom I think I will start refering to as Boy #1 and the baby as Boy #2 since he really isn't a baby anymore) thought they were too spicy, but I didn't think they were at all. i even made sure i used mild enchilada sauce so he wouldn't complain. But aside from that, the rest of us really liked these. Way to go, PW...another winner!

Pioneer Woman's Macaroni and Cheese

i love me some macaroni and cheese. When i was little i'd only eat the stuff out of the box, never homemade. Now i much prefer homemade to the blue box. Even though there are several good mac and cheese recipes i've discovered in the past few years, i'm always game to try a new recipe because what if it's the best ever?! So when I saw this recipe in PW's cookbook I figured we'd have it one night during Pioneer Woman Cookbook Week.

Pioneer Woman's Macaroni and Cheese
Source: The Pioneer Woman Cooks

4 cups Dried Macaroni
1 whole Egg Beaten
1/4 cups (1/2 Stick Or 4 Tablespoons) Butter
1/4 cups All-purpose Flour
2-½ cups Whole Milk
2 teaspoons (heaping) Dry Mustard, More If Desired
1 pound Cheese, Grated
1/2 teaspoons Salt, More To Taste
1/2 teaspoons Seasoned Salt, More To Taste
1/2 teaspoons Ground Black Pepper
Optional Spices: Cayenne Pepper, Paprika, Thyme

Cook macaroni until very firm. Macaroni should be too firm to eat right out of the pot. Drain.

In a small bowl, beat egg.

In a large pot, melt butter and sprinkle in flour. Whisk together over medium-low heat. Cook mixture for five minutes, whisking constantly. Don’t let it burn.

Pour in milk, add mustard, and whisk until smooth. Cook for five minutes until very thick. Reduce heat to low.

Take 1/4 cup of the sauce and slowly pour it into beaten egg, whisking constantly to avoid cooking eggs. Whisk together till smooth.

Pour egg mixture into sauce, whisking constantly. Stir until smooth.

Add in cheese and stir to melt.

Add salt and pepper. Taste sauce and add more salt and seasoned salt as needed! DO NOT UNDERSALT.

Pour in drained, cooked macaroni and stir to combine.
Serve immediately (very creamy) or pour into a buttered baking dish, top with extra cheese, and bake for 20 to 25 minutes or until bubbly and golden on top.

*****

I added some Lawry's seasoned salt to mine for some additional flavor. The husband was pretty impressed and intrigued when he saw me making a roux for mac and cheese. What can i say, he's from louisiana...he likes a girl that can make a roux.

i had to sample a bite before putting it in the oven. It was AMAZING. I could have just kept eating it from the pot instead of baking it with additional cheese on top. My whole family loved this. Both my kids had seconds. I had seconds. I was disgustingly full afterwards but it was worth it. My kids had leftovers for lunch the next day...this is the only thing I can think of that they've willingly had leftovers of for lunch the next day. My theory of trying new mac and cheese recipes paid off because i think this is my new favorite!!

better pics are available on PW's original post.