Showing posts with label lemon. Show all posts

Thursday, January 26, 2012

Skillet Rosemary Chicken


I've been lazy about uploading pictures to my computer from my camera, and I finally decided today is the day while Boy #2 is engrossed in watching Cars 2 (or "Cars Soup" as he calls it for some reason). We had this one night last week, and it was amazing. I can't believe that didn't motivate me to get these pics uploaded earlier!

This was another Pinterest recipe, but I'd forgotten about it until my BFF made it recently. I thought it looked delicious, yet familiar, when she posted it on her blog. sure enough, I had it pinned as well. I already had chicken thighs on hand from making gumbo a couple weeks ago. I've wanted a cast iron skillet for awhile and finally put one on my Christmas list this year. My awesome little brother came through and got one for me. It was kind of funny because he also got me a cover for the handle, and they were each wrapped separately. I opened the handle cover first and was really confused, then it all made sense once I opened the skillet. I'd been looking for a way to break it in and decided this was the recipe!

Skillet Rosemary Chicken
Source: Minimally Invasive website via Jen's blog and Pinterest.com

3/4 pound small red-skinned potatoes, halved, or quartered if large
Kosher salt
2 sprigs fresh rosemary, plus 1 1/2 tablespoons leaves
2 cloves garlic, smashed
Pinch of red pepper flakes
Juice of 2 lemons (squeezed halves reserved)
2 tablespoons extra-virgin olive oil
4-6 skin-on, bone-in chicken thighs (6 to 8 ounces each)
10 ounces cremini mushrooms, halved

Preheat the oven to 450. Cover the potatoes with cold water in a saucepan and salt the water. Bring to a boil over medium-high heat and cook until tender, about 8 minutes; drain and set aside.

Pile the rosemary leaves, garlic, 2 teaspoons salt and the red pepper flakes on a cutting board, then mince and mash into a paste using a large knife. Transfer the paste to a bowl. Stir in the juice of 1 lemon and the olive oil. Add the chicken and turn to coat.

Heat a large cast-iron skillet over medium-high heat. Add the chicken, skin-side down, cover and cook until the skin browns, about 5 minutes. Remove chicken from pan; add the mushrooms and potatoes to the skillet, place chicken over mushrooms and potatoes and drizzle with any marinade remaining in the bowl and the juice of the remaining lemon.

Add the rosemary sprigs and the squeezed lemon halves to the skillet; transfer to the oven and roast, uncovered, until the chicken is cooked through and the skin is crisp, 20 to 25 minutes.

*****

I was a little nervous using my cast iron skillet for the first time, but I didn't need to have been. I loved how easy it was to go from the stove top into the oven. Granted I have other pans that can do that, too, but there was just something timeless about using cast iron for this. The chicken browned beautifully, and then the potatoes and mushrooms turned out amazing with the marinade and chicken fat dripping on them. YUM. The husband and I really loved this. Boy #1 freaked out about the chicken being on the bone, but once we took care of that for him he ate all of his dinner. Well, not the potatoes or mushrooms because he doesn't like either of those, but I happily ate them for him. This is definitely something I'll make again! Easy, relatively fast, and super tasty!!

Friday, May 20, 2011

Rocco's Chicken Picatta

A few weeks ago I decided to use Rocco DiSpirito's Now Eat This as my cookbook of the week. One of the dishes I made was his Chicken Picatta recipe. I've always liked picatta dishes...the tangy lemon and capers together...yum! I was excited to find a low cal version of this, and I figured I couldn't go wrong with Rocco.

Rocco's Chicken Picatta
Source: Now Eat This by Rocco DiSpirito

4 skinless, boneless chicken breasts (4 ounces each), pounded thin
Salt and freshly ground black pepper
1/2 cup plus 2 tablespoons whole-wheat flour
1 cup egg substitute
2 tablespoons unsalted butter
4 garlic cloves, minced
1/3 cup fresh lemon juice
2/3 cup water
3 tablespoons drained capers
1/3 cup chopped fresh flat-leaf parsley

1. Heat 2 large nonstick saute pans over medium heat.

2. While pans are heating, season the chicken with salt and pepper to taste. Put the ½ cup flour in one shallow dish and the egg substitute in another shallow dish. Dredge the chicken in the flour, then in the egg substitute, to coat completely.

3. When pans are hot, add ½ tablespoon of the butter to each pan. Allow the butter to melt completely and brown slightly. Then add 2 coated chicken breasts to each pan. Saute the chicken until it is golden brown and just cooked through, about 2 minutes per side. Transfer the chicken to a serving platter, and tent it with foil to keep the chicken warm.

4. Raise the heat under one of the saute pans to high. Add the remaining 1 tablespoon butter to the pan and allow it to melt. Add garlic and sweat for one minute. Whisk the remaining 2 tablespoons flour into the butter. Whisk in the lemon juice and the water; bring to a boil. Reduce the heat to low-and continue to cook the sauce, whisking constantly, until it has thickened, about 2 minutes. Stir in the capers and parsley. Season with salt and pepper to taste, if desired. Spoon the sauce over the chicken, and serve.

Fat 7.4g
Calories 241
Protein 31g
Carbohydrates 12g
Cholesterol 81mg
Fiber 2g
Sodium 459mg

*****

I left the sauce off my kids' pieces because I just didn't know if they'd like it, and I'm all about avoiding potential issues and fights at the dinner table. The husband and I loved it though. The crunchy breading, the lemons and capers...great combination! This is definitely something I'll make again, and since I don't use capers very often a jar lasts me awhile and I pretty much always have them in my fridge.

Thursday, December 23, 2010

Oatmeal Cream Cheese Butterscotch Bars

I've missed my blog, so while my kids are being entertained by a dog-themed Disney Christmas movie I figured I'd post my most recent Christmas treat. My search for new Christmas cookie recipes lead me to the Food Network website a few weeks ago and somehow I stumbled upon this recipe from Anne Burrell. I like her a lot. How could you not with her fun, spiky hair?? Plus she's worked with some great chefs at some great restaurants.

Once I saw this recipe I couldn't wait to make them. I made sure I picked up everything I needed for them the next time I was at the store after seeing the recipe. I decided earlier this week that my mom and I needed a normal day doing normal Christmastime stuff so we should make Christmas cookies. Of course we ended up doing a bunch of stuff around the house and with the kids, so it didn't work out exactly as I'd planned, but I did make these and those peanut butter cookies where you put the Hershey Kiss on top of them when they come out of the oven. Since everyone knows that recipe, I figured this one was more worth sharing, even though you could very easily find it yourself on the Food Network website. I'm just enabling I guess...making it easier for everyone to discover these.

Oatmeal Cream Cheese Butterscotch Bars
Recipe courtesy Anne Burrell, from FoodNetwork.com

2 sticks unsalted butter, at room temperature, cut into pea-sized pieces, plus more for pan
2 cups all-purpose flour
1 1/2 cups old fashioned rolled oats
3/4 cup firmly packed brown sugar
1 teaspoon ground cinnamon
1 (11-ounce) bag butterscotch chips
1 (8-ounce) package cream cheese, at room temperature
1 (14-ounce) can sweetened condensed milk
1 lemon, zested and juiced
1 teaspoon vanilla extract

Preheat the oven to 350 degrees F. Drape a 9 by 13-inch pan with overlapping pieces of aluminum foil, creating handles for easy removal. Butter the paper, and reserve.

In a food processor add the flour, oats and brown sugar and pulse to combine. Add the 2 sticks of butter, the cinnamon and the butterscotch chips. Pulse, pulse, pulse until the mixture forms clumps when pressed between your fingers. Transfer the mixture to a large bowl. Press half of the mixture into the bottom of the prepared pan in an even layer, reserve the other half. Bake in the preheated oven just until slightly golden and set, about 12 to 15 minutes. Remove from the oven and cool completely.

Beat together the cream cheese, condensed milk, lemon zest and juice and vanilla in an electric stand mixer fitted with a paddle, or with an electric hand mixer until no lumps of cream cheese remain. Spread evenly over the baked and cooled oatmeal mixture. Sprinkle the remaining half of the oatmeal mixture over the cream cheese. Bake until the top is golden, about 40 minutes.

Cool and chill before cutting. Run a knife around the edge of the pan, and using the foil handles, transfer the bars to a cutting board. Cut into 2-inch squares with a sharp knife and serve.

Call yourself a superstar!!!

*****

Now, don't be like me and forget the part about buttering the pan and just assume that since there are two sticks of butter it won't be a problem. Really it wasn't too bad, but I did have to yank on the foil to get them out of the pan. The only thing I changed about this was decreasing the amount of lemon zest. I thought with the juice of a lemon and the zest from a lemon, that would give me more lemon flavor than I wanted. So I juiced the lemon and then zested maybe a quarter of a lemon. I'm not a huge lemon fan, so I didn't want there to be too much lemon flavor, especially since I LOVE butterscotch, so I wanted that to stand out more.

These are AMAZING. I'm having a hard time keeping myself from eating the entire batch. My friend Jen ran to my house yesterday and was kind enough to sample these for me. She approved. As do my kids, the husband, my mom, and me. They were really easy to make too. Dry ingredients in the food processor, wet ingredients in the stand mixer. I skipped putting the dry stuff once blended into a separate bowl--why dirty an extra bowl when I could just grab it out of the food processor bowl? These may in fact be my new favorite Christmas cookie. I'm making the husband's favorite today, then we figure we'll have a taste test in case there's a new favorite to be declared in our house.

Dry ingredients. I forgot to take a picture of the wet ingredients or as I was assembling the bars. Cut me some slack...it was 10:00 at night, and I was wrapping Christmas presents.


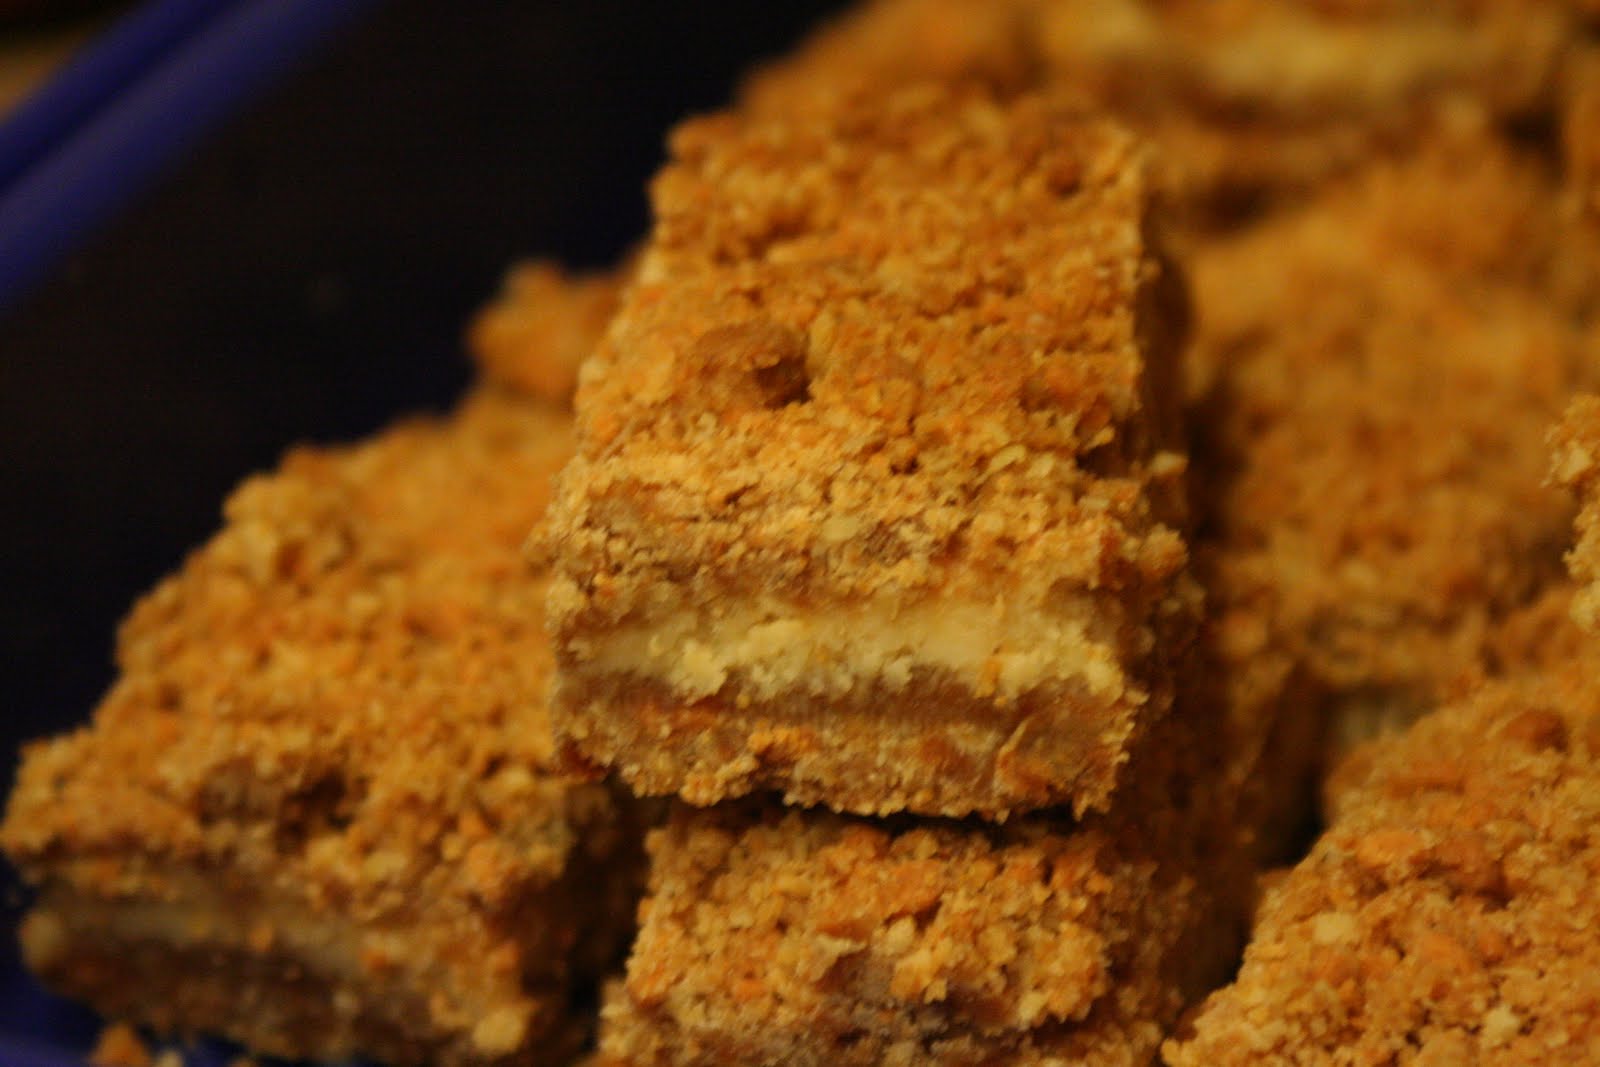
Mmmmm...container of bars!


Mmmmm...close up of bar!

Monday, July 12, 2010

Grilled Whole Trout

We went out of town for the 4th of July weekend with my mom to a cabin up in northern AZ. It was fantastic!! The cabin was right on a pretty big creek, and my boys (including the husband) had a great time playing in it--fishing, shoveling mud, splashing, throwing rocks. It was an amazing, relaxing weekend.

Not far from the cabin was a trout farm. The boy and husband have gone fishing at a park near our house quite a few times, but they've never caught anything. We figured taking the boy to the trout farm would be a great way for him to catch his first fish. And it was! He ended up catching three (with the husband's help, of course) and was so pleased with himself for catching dinner for his family. It was so sweet listening to him tell me how it was going to be the best fish ever and how he was so happy he could get dinner for his family. I heart that boy so much!

I haven't cooked much fish (or rather I always stick to the same kinds because I know what I'm doing), so I had to do some Googling to figure out the best way to cook rainbow trout. I found an article on about.com on grilling them whole and then found a very basic recipe on Cooks.com. I hadn't really thought about grilling the fish and how to do it when we were at the grocery store earlier that day, but thankfully we had a lemon and some butter with us at the cabin.

Grilled Whole Trout

Fresh trout, cleaned with heads & tails left on
Butter
Lemon

Place several pats butter and several slices fresh lemon in trout cavity. Spray aluminum foil with non-stick spray. Wrap trout with foil. Grill 8 to 10 minutes on each side, depending on size of fish.

*****

Our trout weren't very big, so we had some cheese hot dogs to go along with this, as there wasn't enough to feed three adults and two children (one of which generally eats the same amount as an adult). Don't judge us. Thankfully the trout farm folks cleaned the fish for us. The husband had figured he'd do it, which was good because that is not in my skillset. My dad used to always clean the fish I caught. I view it as a man's job.

Anyway, this was a really, easy, simple way to prepare a whole fish, and the fish tasted fantastic!! My boy did a great job picking us three tasty fish for dinner. I assume that the only real time I'll be cooking trout is if he takes another trip to the trout farm, but I would definitely use this again! Make sure you spray the foil with non-stick spray. It would be very, very ugly if you didn't, and there's a good chance you wouldn't get a whole lot of meat from your fish.

And now, some pictures.

The first fish!


Fishing is a patience game, you know.


Our three rainbow trout, ready for the grill.


"Mom, can I touch its eye?"


To change things up a bit...a picture of me grilling the fish. Okay, okay, and opening the package of cheese dogs.


The finished product...after I took out the bones and all that. It was actually really easy to do. I was able to pull up on the spine a little and the whole skeleton came out of the fish. Weird and gross, but convenient.


And, the cheese dogs. I wouldn't want them to feel left out.

Wednesday, September 16, 2009

Easy Sole Meuniere

I'm definitely on a Barefoot Contessa kick lately, as this is another of her recipes. Maybe I should just start cooking my way through all of her books. I was at the grocery store I don't like recently, and they had packages of Dover Sole on manager's special. I rarely see sole in the markets, much less marked down! So, I grabbed two packages because I had remembered seeing this in the Back to Basics cookbook. I already had my meal plan figured out for last week, so I slated it for tonight. I'm so excited to try this!! I got even more excited when last week on Top Chef, one of the sauces they had to prepare was a meuniere sauce.

Easy Sole Meuniere
Copyright 2008, Barefoot Contessa Back to Basics, All Rights Reserved

Ingredients
1/2 cup all-purpose flour
Kosher salt and freshly ground black pepper
4 fresh sole fillets, 3 to 4 ounces each
6 tablespoons unsalted butter
1 teaspoon grated lemon zest
6 tablespoons freshly squeezed lemon juice (3 lemons)
1 tablespoon minced fresh parsley

Preheat the oven to 200 degrees F. Have 2 heat-proof dinner plates ready

Combine the flour, 2 teaspoons salt, and 1 teaspoon pepper in a large shallow plate. Pat the sole fillets dry with paper towels and sprinkle one side with salt.

Heat 3 tablespoons of butter in a large (12-inch) saute pan over medium heat until it starts to brown. Dredge 2 sole fillets in the seasoned flour on both sides and place them in the hot butter. Lower the heat to medium-low and cook for 2 minutes. Turn carefully with a metal spatula and cook for 2 minutes on the other side. While the second side cooks, add 1/2 teaspoon of lemon zest and 3 tablespoons of lemon juice to the pan. Carefully put the fish filets on the ovenproof plates and pour the sauce over them. Keep the cooked fillets warm in the oven while you repeat the process with the remaining 2 fillets. When they're done, add the cooked fillets to the plates in the oven. Sprinkle with the parsley, salt, and pepper and serve immediately.

*****

Sounds simple and delicious!!! I might make a Barefoot Contessa wild rice dish to go with this, but the recipe isn't on the Food Network website, and I'm feeling too lazy to go get the cookbook and type it out. We'll see how I feel about cooking it at dinner time. If I don't make that I think I have a box of Trader Joe's Mushroom Risotto in the pantry I can make, and then some kind of vegetable on the side. Yum! Oooh...I should go put a bottle of white wine in the fridge now so it's ready at dinner time!

Tuesday, June 16, 2009

Grilled Lemon Parsley Chicken Breasts

The stomach bug the boy and I had on Thursday came back to get us on Saturday. Yuck. Thankfully now I think it's all gone. We were feeling mostly better on Sunday, but I still wanted our tummies to take it easy, so I figured some kind of grilled chicken was a safe bet. On Saturday we went as a family to Barnes & Noble, and while we were there I decided to buy the same Cook's Illustrated that Jen B. had bought when we were at Sprouts together. It's actually a special summer grilling issue. There's a lot of stuff in it I'm excited to try, but I had everything on hand for this and thought it sounded nice and mild and easy.

Grilled Lemon Parsley Chicken Breasts
From Cook's Illustrated Summer Grilling

1 teaspoon Dijon mustard
2 tablespoons fresh lemon juice
6 tablespoons olive oil
1 tablespoon minced fresh parsley leaves
1 1/4 teaspoons sugar
table salt
fresh ground black pepper
3 medium garlic cloves, minced
2 tablespoons water
4 (8 ounce) boneless skinless chicken breasts

1. Whisk together mustard, 1 tbsp lemon juice, 3 tablespoons olive oil, parsley, 1/4 teaspoons sugar, 1/4 teaspoons salt, and 1/4 teaspoons pepper in small bowl; set aside.
2. Whisk together remaining tablespoon lemon juice, remainin 3 tablespoons olive oil, remaining teaspoons of sugar, 1 1/2 teaspoons salt, 1/2 tsp pepper, garlic, and water in medium bowl. Place marinade and chicken in gallon-size zipper-lock bag and toss to coat; press out as much air as possible and seal bag. Refrigerate 30 minutes, flipping bag after 15 minutes.
3. Light large chimney starter filled with charcoal (6 qts, about 100 briquets) and allow to burn until coal are fully ignited andpartially covered with thin layer of ash, about 20 minutes. Build modified 2 leverl fire by arranging all coals over half of grill, leaving the other half empty. Position cooking grate over coals, cover grill, and heat grate until hot, about 5 minutes; scrape grate clean. Dip wad of paper towels in oil, holding wad with tongs, wipe cooking grate. Grill is ready when you can hold your hand 5" above grate for 5 minutes.
4. Remove chicken from bag, allowing excess marinade to drip off. Place chicken on cooler side of grill, smooth-side down, with thicker side facin coals. Cover with disposable 9x13" aluminum pan and cook until bottom of chicken just begins to develop light rill marks and is no longer translucent, 6-9 minutes. Using tongs, flip chicken and rotate so that thinner side faces coals. Cover with disposable pan and continue to cook until chicken is opaque and firm to touch and instant read thermometer inserted into thickest part of chicken registers 140 degrees, 6-9 minutes longer.
5. Move chicken to hotter side of grill and cook,uncovered, until dark grill marks appear, 1-2 minutes. Using tongs, flip chicken and cook until dark grill marks appear and instant read thermometer inserted into thickest part of chicken registers 160 degrees, 1-2 minutes linger. Transfer chicken to cutting board, let rest, tented with foil, 5 minutes. Slice each breast on bias into 1/4" thick slices and transfer to individual plates.
6. Drizzle with reserved sauce to serve.
7. On gas grill: Turn all burners to high and heat with lid down until very hot, about 15 minutes. Scrape grill grate with grill brush to clean. Dip wad of paper towels in oil; holding wad with tongs, wipe cooking grate. Leave primary burner turned to high and turn off other burners. Proceed with recipe, grilling with lid down and omitting disposable pan. Increase browning time by 1-2 minutes.

*****

I don't think I remembered to take a picture. I REALLY liked this chicken. The marinade was simple and easy, and the chicken was really flavorful. We have a gas grill, so I followed those instructions. I will definitely make this again--especially since most of the ingredients are things I always have on hand, and it has a pretty short marinating time...which is good since I'm pretty forgetful. ;)

Wednesday, May 27, 2009

Claire's Lemon Chicken Pasta

I needed to go grocery shopping yesterday for everything I had on my meal plan for the week, but I didn't want to take both kids. I much prefer going by myself or with only one kid. The baby is six months old, and I've only taken both kids with me once, and it was a pretty small shopping trip. Anyway, I was once again going to do the Crockpot Chicken Marsala but I realized I had the wrong kind of canned soup. I already had chicken out, so I scanned the pantry for anything else I could do with the chicken. I saw some lemon pepper papparadelle pasta I had bought at Trader Joe's and thought I'd do something with that. I had a couple recipes in mind that I kind of melded together to make this. I have to say I really enjoy coming up with something from scratch like this instead of following a recipe. It's a nice cooking challenge.

Claire's Lemon Chicken Pasta
2 chicken breasts
Salt
Pepper
Oregano
Garlic powder
Onion powder
2 garlic cloves, minced
1-2 Tbsp lemon juice
1 Tbsp flour
1 cup skim milk
4 ounces light cream cheese
1 cup grated parmesan cheese
1 tsp lemon zest
1 package Trader Joe's lemon pepper papparadelle pasta, cooked

Cut chicken breasts into bite-size chunks. Mound in a pile and sprinkle salt, pepper, dried oregano, garlic powder, and onion powder on chicken. Meanwhile heat a small amount of olive oil in a skillet. Once the skillet is hot, add chicken and cook until no longer pink inside. Remove chicken from skillet. Deglaze pan with lemon juice. Add garlic but be careful not to burn it. Combine flour and skim milk, then add to skillet. Add in cream cheese and stir (I used a flat whisk) until cream cheese melts and sauce thickens. Add in parmesan cheese and lemon zest. Return chicken to skillet and stir to coat chicken. Add in cooked pasta and toss until pasta is coated in the sauce as well. Serve with shaved parmesan on top.

*****

This was really good. REALLY good. I added peas into mine, but I didn't like how they tasted with everything else, so I didn't include them in the ingredients. I think next time I'd make this I'd actually increase the sauce ingredients some so it was a little saucier, but the flavor was fantastic. I'm so glad my mad scientist chicken pasta concoction worked out okay!!


These are my new pasta bowls from Crate and Barrel. Aren't they cool? I've been wanting some like this for quite awhile. The only problem is that they're too wide for my dish cabinet. I've yet to come up with a solution, but I will!! I also bought the Parker Bowls because I've been eyeing them for quite some time.


The pasta I used. It was really fragrant (read: somewhat overwhelming lemon scent but in a good way) when I opened the package, but the pasta itself didn't taste super lemony once it was cooked.

Thursday, May 7, 2009

Chicken on the Grill

I'm not really sure what to call this dinner tonight. I'm using my most favorite chicken marinade, but I'm using a whole chicken splayed out in all her glory on the grill. So, "Chicken on the Grill" it is. I got a late start on dinner because we had my MOMS Club Mother's Day party this afternoon, and I was too busy gabbing with friends and feeding the baby to realize what time it was and that we needed to get our butts home to get this chicken on the grill. At least I got it marinating during naptime this afternoon.

We went to Jen B's for dinner one night last summer, and they grilled a chicken like this. My uncle has grilled chicken like this before, too, and I've wanted to try it for awhile. I'm not sure why I haven't before now. I saw a whole chicken in my freezer last week and thought I might as well try it. I wasn't sure how to season it, but I thought this marinade would be good because it's good on chicken breasts. The recipe below is a combination of the marinade recipe and what to do with the chicken. I'm blatantly copying and pasting the directions from Jen's blog. I hope she doesn't mind.

Chicken on the Grill
1 whole chicken (mine was 4 pounds)
1/2 cup oil
1/3 cup lemon juice
1/4 soy sauce
1 or 2 crushed garlic cloves
1 tsp dried ginger
salt and pepper

Remove the giblets (if there are any) from the cavity of the chicken. Flip the chicken onto its breast. Using poultry shears, cut down both sides of the backbone from tail to neck; discard backbone. Or, if you don't have shears, lay the bird on its back, insert a long heavy knife into the body cavity and press down hard with a rocking motion to cut down through both sides of the backbone. Open the bird out onto your work surface, breast side up. Make sure that the legs are turned inward. Using your fist or a mallet, wallop the bird on the breast, hard enough to dislodge the center bones and flatten out the breast. Twist the last joint of the wings up over the breast and then down behind the "shoulders," tucking them in firmly to keep them in place during grilling.

Mix together remaining ingredients. Place chicken in a 9x13 glass pan and pour marinade over the top. Marinate in fridge for a couple hours, turning chicken halfway. Heat one side of a gas grill to medium. If you have a grill with three burners, heat the outer two to medium, leaving the center one off. Or light a charcoal fire and let it burn until the charcoal is covered with white ash and about medium-hot; bank half the coals to one side of the grill, half to the other.

Lay in the center of the grill (it will not be over direct heat). Cook, without turning, basting from time to time with any remaining marinade, until the juices run clear when a thigh is pierced deeply with a fork (an instant-read thermometer should register about 160 degrees when inserted at the thickest part of the thigh), about 45 minutes. If you're cooking over charcoal, you'll want to add more charcoal to the fire after an hour or so - the internal temperature of the grill should stay at about 325 degrees. Remove the chicken to a cutting board. It will lose less juice if you cover it loosely with foil and let it rest for 5 to 10 minutes.

*****

I forgot to add the garlic to my marinade. I can't believe I did that after all the times I've made this. Ugh. Oh well, hopefully it won't make that much difference. I have to say, getting the chicken ready was pretty disgusting. If I hadn't shared it before, I used to have issues eating meat. If it had a bone in it, I couldn't eat it...it reminded me that once upon a time said meat was walking around. I'm slowly getting over it, but cutting out the backbone of the chicken may have made me take a couple steps back. It seemed so inhumane and gross. Jen B. assures me it gets easier to handle and that I'll get over it. We'll see.

*****

Okay, this chicken was tasty. It was so juicy and moist and tender. Jen may be right, and I will get over the grossness of cutting the backbone out of the chicken. This was a really easy way to cook a chicken, too. I just threw it on the grill, checked on it once about halfway through, and that was it. Our grill has four burners, so I turned on the two outside burners and left the two middles ones off. Our grill has a temerature gauge on the top of it, and it stayed between 325 and 350 the whole time. My only complaint was that the marinade didn't really soak into the chicken at all. Next time I might loosen the skin a bit to see if that would help it seep under the skin and get on the meat, since we don't eat the skin (although I did take a few bites because it was super yummy!!). The husband ended up dipping his chicken in barbecue sauce, so I thought next time I might try basting it with barbecue sauce and put some under the skin before putting it on the grill. I'll definitely cook a chicken like this again!

Monday, April 6, 2009

Tom Douglas' Tartar Sauce

I had wanted a Tom Douglas cookbook for awhile now and kept asking for one for holidays but never got one. I happened to be at Sur La Table a few weeks ago and was looking in their clearance section and saw the one I wanted there, Tom's Big Dinners. Needless to say, it jumped into my basket! I had only flipped through it until Saturday afternoon where I sat down on the couch and read each recipe and looked at all the pictures. There's so much goodness in this cookbook, it's ridiculous. I can't wait to try more of the recipes. There's an Asian Feast menu I'm dying to try. I'll have to work that in once potty training is totally complete.

Tom Douglas' Tartar Sauce
Tom's Big Dinners, Copyright 2003
3/4 cup mayonnaise
1 Tbsp chopped capers
3 Tbsp finely chopped cornichons or dill pickles
1 Tbsp plus 1 tsp finely chopped red onion
1 Tbsp minced fresh flat-leaf parsley
2 tsp freshly squeezed lemon juice
2 tsp freshly grated lemon zest
1 tsp worcestershire sauce
1/4 tsp Tabasco sauce or to taste
Kosher salt and freshly ground pepper

Put the mayonnaise in a bowl and stir in remaining ingredients. Season to taste with salt and pepper.

*****

This. Was. Awesome. I will never buy tartar sauce again. I told the husband at dinner that I could just eat it with a spoon. I made it up a few hours before dinner so it would have time to sit and the flavors would combine. Most of the ingredients are things I always have on hand which will make it easy to whip up. Plus I never use an entire bottle of tartar sauce when I buy it before it goes bad, so this is an easy way to make however much I need.

In the cookbook, the tartar sauce is listed with a recipe for Fried Jarlsberg Cheese. Sounds yummy, so I'll have to try that as well. Oh, Tom, how I heart thee.

Monday, September 8, 2008

Lemon Chicken Pasta

It's still pretty hot here in AZ, so my mom invited us over yesterday for swimming and dinner. It was a great day for swimming, although her pool is starting to get a little chilly. And I will never (okay, rarely) pass up a dinner someone else makes for me.

I had originally planned on making this last night but then didn't need to make dinner. It's another recipe from one of my Southern Living cookbooks. I've made it before but not in a really, really, really, really, really long time. I'm excited to have it again.

Lemon Chicken Pasta
Cooking spray
1 tsp olive oil
2 garlic cloves, minced
6 ounces boneless, skinless chicken breast, cut into 1/4-inch wide strips
1/2 cup frozen green peas, thawed
1/3 cup shredded carrot
1/2 cup condensed low-sodium chicken broth, undiluted
2 Tbsp tub-style light cream cheese
2 cups hot cooked farfalle (about 1-1/4 cups uncooked bow tie pasta), cooked without salt or fat
3 Tbsp grated parmesan cheese
1/2 tsp grated lemon rind
1/8 tsp salt
1/8 tsp pepper

Coat a large nonstick skillet with cooking spray; add oil and heat over medium-high heat. Add garlic, saute 15 seconds. Add chicken; saute 1 minute. Add peas and carrot; saute 1 minute. Remove chicken from skillet; set aside.

Add chicken broth and cream cheese to skillet and cook over medium-high heat 3 minutes or until cream cheese melts, stirring constantly with a whisk. Return chicken mixture to skillet. Stir in pasta, parmesan, lemon rind, salt, and pepper. Cook 1 minute. Yield: 2 servings.

*****

I got out two chicken breasts that were both kind of small. I forgot this was a two-serving recipe, but I think there should probably be enough for two adults and one toddler. I'll probably slightly increase the amounts of everything to make sure there's enough.

I remember that the first time I made this the husband had some right when it was ready and thought it was kind of bland. For whatever reason I had dinner after him and thought there was good flavor to it once it had sat for a bit and the flavors had a chance to meld together. Meld...is that a word? I don't know...how about "the flavors had a chance to combine with one another."

I'm not sure what we'll have along with this since there's pasta and vegetables mixed into it already. I'll see if I have some bread we can have along with it, but I may end up making Ghetto Garlic Bread (buttered hamburger buns stuck under the broiler for a few minutes), and we'll probably have salad with it.

Monday, August 25, 2008

Giada's Garlic and Citrus Chicken

A couple months ago I was watching my friend Jen B's son at her house while she got a haircut. While the boys were playing I entertained myself by reading cookbooks she has that I don't. One of them was a Giada one. I know I've expressed my love/hate for Giada before. Her food is so yummy but she's waaaaaaaaaaaaay too skinny for all that goodness she makes. Anyway, I thought this chicken recipe sounded good, but I'm so used to cooking whole chickens in the crockpot I've been hesitant to try it. Finally I said, "Oh get over yourself and just try it." So we're having it tonight. We were going to have it last night, but I forgot to get the chicken out early enough for it to defrost. Oops.

I don't remember which of her cookbooks this was from, but I found it on the Food Network website.

Garlic and Citrus Chicken Recipe
courtesy Giada De Laurentiis

1 (5 to 6-pound) whole roasting chicken, neck and giblets discarded
Salt and freshly ground black pepper
1 orange, quartered
1 lemon, quartered
1 head garlic, halved crosswise, plus 3 garlic cloves, chopped
2 (14-ounce) cans reduced-sodium chicken broth
1/4 cup frozen orange juice concentrate, thawed
1/4 cup fresh lemon juice
2 tablespoons olive oil
1 tablespoon chopped fresh oregano leaves
Kitchen string or butcher twine

Position the rack in the center of the oven and preheat to 400 degrees F.
Pat the chicken dry and sprinkle the cavity with salt and pepper. Stuff the cavity with the orange, lemon, and garlic halves. Tie the chicken legs together with kitchen string to help hold its shape. Sprinkle the chicken with salt and pepper.

Place a rack in a large roasting pan. Place the chicken, breast side up, on the rack in the pan. Roast the chicken for 1 hour, basting occasionally and adding some chicken broth to the pan, if necessary, to prevent the pan drippings from burning. Whisk the orange juice, lemon juice, oil, oregano, and chopped garlic in a medium bowl to blend. Brush some of the juice mixture over the chicken, after it has baked 1 hour. Continue roasting the chicken until an instant-read meat thermometer inserted into the innermost part of the thigh registers 170 degrees F, basting occasionally with the juice mixture and adding broth to the pan, about 45 minutes longer. Transfer the chicken to a platter. Tent with foil while making the sauce (do not clean the pan).

Place the same roasting pan over medium-low heat. Whisk in any remaining broth and simmer until the sauce is reduced to 1 cup, stirring often, about 3 minutes. Strain into a 2-cup glass measuring cup and discard the solids. Spoon the fat from the top of the sauce. Serve the chicken with the pan sauce.

*****

My fingers are crossed it doesn't take forever and a day to cook, as happened with the last whole chicken I tried to cook in the oven instead of the crockpot. I don't know if I'll go to the trouble of making the pan sauce. Sounds time consuming. I'll see how I feel. I think I'm going to make mashed potatoes to go with it and maybe some corn on the side.

Sunday, March 16, 2008

Pan-Fried Tilapia with White Wine and Capers

I've fallen behind again...what else is new. The husband and I have had a date weekend...grandma kept the boy starting Friday afternoon through yesterday evening! It was awesome. I didn't cook Friday night or last night, this was our dinner on Thursday. It's a Weight Watchers recipe since we're still trying to each drop a few pounds. I copied it off the WW website before I quit my membership.

Pan-Fried Tilapia with White Wine and Capers
1/4 cup white wine, dry
1/4 cup tomato(es), seeded and chopped
2 Tbsp fresh lemon juice
2 Tbsp capers, drained
1 medium garlic clove(s), minced
1/2 tsp dried basil
1 1/2 pound raw tilapia, four 6-oz pieces
1/2 tsp table salt
1/4 tsp black pepper, freshly ground
1/4 cup all-purpose flour
1 sprays cooking spray
1 Tbsp olive oil
2 Tbsp light butter
2 Tbsp parsley, chopped
1 medium lemon(s), cut in wedges (optional)

Combine first 6 ingredients, stirring well with a whisk; set aside. Sprinkle fillets with salt and pepper. Dredge fillets lightly in flour, and coat both sides of fillets with cooking spray. Heat oil in a large nonstick skillet over medium-high heat. Add fillets; cook 3 minutes. Reduce heat to medium; turn fillets, and cook 3 minutes or until fish flakes easily when tested with a fork. Remove from pan. Add wine mixture to pan; cook 30 seconds, stirring constantly. Remove from heat; stir in butter until melted. Spoon wine mixture over fillets; sprinkle with parsley. Serve with lemon wedges, if desired. Yield: 4 servings (serving size: 1 fillet and 2 tablespoons sauce).

*****

This was pretty good. I love tilapia because it's a really mild fish, and it's super easy to cook. I liked the sauce for this, but I think next time I'd reduce the amount of capers. The flavor of them kind of overpowered the other components of the sauce. It's one I'd make again. We have tilapia pretty often, so I like to have a good rotation of recipes for it.