Showing posts with label garlic. Show all posts
Thursday, February 2, 2012
Chinese Five Spice Turkey Lettuce Wraps
I'm super multi-tasking this afternoon...sitting here with hair color in my hair (my roots were in a sorry state of affairs), updating my blog, and watching the most recent Glee episode. Oh, how I love me some old school Michael Jackson!! I also love Aggie's Kitchen (how's that for a transition?!) and was excited when she recently posted this recipe. When we did our low carb week last week, this was the first dinner I planned. I love lettuce wraps but hadn't ever made them myself. They fit the low/no carb diet perfectly, though.
Chinese Five Spice Turkey Lettuce Wraps
Source: Aggie's Kitchen website
1 lb ground lean turkey breast
1 medium red onion, chopped small
3 garlic cloves, minced
1 inch piece of ginger, peeled and minced
1 carrot, chopped small
2 tablespoons chopped water chestnuts
1 1/2 teaspoon 5 Spice Powder
2 teaspoons low sodium tamari (or soy sauce)
3 teaspoons rice vinegar
2 teaspoons black bean sauce
1 teaspoon agave or honey
chile garlic or chile sauce (like sriracha), for serving
Boston or iceberg lettuce leaves, washed and dried
shredded slaw mix (optional)
chopped green onions (optional)
Heat a nonstick skillet over medium heat. Coat pan with cooking spray and add onion and carrot. Cook for about 3-4 minutes, add ground turkey. Using a wooden spoon, break up ground turkey and sprinkle 5 spice powder over meat. Continue to cook until cooked through completely, about 7 minutes.
While turkey is cooking, combine tamari, rice vinegar, black bean sauce, agave, ginger and garlic in a small bowl. Add to ground turkey during the last few minutes of cooking and stir until all combined.
To serve scoop ground meat mixture into lettuce leaves, top with slaw mix, green onions and chili sauce.
*****
I couldn't find black bean sauce, so I substituted hoisin sauce. These were super tasty!! My kids got a little frustrated trying to keep the lettuce wrapped around the filling, so they resorted to just eating the filling and lettuce separately. I'm glad I finally made these...they are definitely something we'll eat on a regular basis!
Labels:
carrots,
garlic,
ginger,
ground turkey,
lettuce,
quick,
water chestnuts
Tuesday, October 4, 2011
Chicken and Mushrooms in a Garlic White Wine Sauce
*GASP!*
A blog update?! Can it be true?! We've been having a lot of yummy dishes lately, but I just haven't had time to get on my computer and give my blog some love. I started doing the P90X workout series a few weeks ago (today was Week 4, Day 5, to be exact), and I have to do it during Boy #2's naptime which is when I would normally update my blog. The things I give up for fitness. Using up precious naptime for exercising is starting to get old, but what am I going to do. Tonight I got an early start on the component of dinner that will take the longest, the husband and Boy #2 are watching a show about sharks (or "darsh" as my baby calls them) that my brother sent, and Boy #1 is upstairs showing King Koopa who's boss. I figured it was the perfect chance to get in at least one entry.
So, with that all out of the way, I've wanted to try this recipe for quite awhile, but I always ended up coming across it when I was doing no carbs. I guess technically I could have substituted the wine for chicken broth, but since the wine is part of the title of the recipe, I figured it was pretty necessary. One night last week we opened a bottle of white wine that neither the husband nor I were really excited about, so I figured it was a perfect time to try this. It's from one of my favorite blogs, skinnytaste.com. I don't know why people seem to have the idea that healthy food can't taste good. Goofballs.
Chicken and Mushrooms in a Garlic White Wine Sauce
Source: skinnytaste.com
8 chicken tenderloins, 16 oz total
2 tsp butter
2 tsp olive oil
1/4 cup all purpose flour
3-4 cloves garlic, minced
12 oz sliced mushrooms
1/4 cup white wine
1/3 cup fat free chicken broth
salt and fresh pepper to taste
1/4 cup chopped fresh parsley
Preheat oven to 200°. Season chicken with salt and pepper. Lightly dredge in flour.
Heat a large skillet on medium heat; when hot add 1 tsp butter and 1 tsp olive oil. Add chicken to the skillet and cook on medium heat for about 5 minutes on each side, or until chicken is no longer pink. Set aside in a warm oven.
Add additional oil and butter to the skillet, then garlic and cook a few seconds; add mushrooms, salt and pepper stirring occasionally until golden, about 5 minutes.
Add wine, chicken broth, parsley; stir the pan with a wooden spoon breaking up any brown bits from the bottom of the pan. Cook a few more minutes or until the liquid reduces by half. Top the chicken with the mushroom sauce and serve.
*****
I love a dish that comes together quickly and easily. And it smelled fantastic while it was cooking. My parents always used to saute mushrooms in white wine, so the smell is a fond memory for me. Yum. Boy #1 isn't big on sauces (weird kid...but he's my weird kid, so I can say that), so I just gave him chicken, but the rest of us LOVED the sauce and the mushrooms. Boy #2 couldn't stop eating the mushrooms. he kept trying to steal them off my plate. I didn't have chicken tenderloins to use, so I just used chicken breasts and sliced them thin and into tenderloin-type pieces. This was really fantastic, and it's definitely something I'd make again! It looks really fancy (and tastes fancy), but it was super easy. Those are some of my favorite things!
The original blog post suggested serving this with baked rice and peas, so I gave it a go. I have found my new favorite way of cooking white rice. I don't know if I've shared that I have issues when it comes to cooking white rice, and her method was super easy and really good. Boy #1 isn't usually a rice fan, and even he ate it this way.
(Please forgive my less than stellar pictures...I'm having some issues with the speedlite on my camera that I can't quite figure out, so I haven't been able to use it.)
A blog update?! Can it be true?! We've been having a lot of yummy dishes lately, but I just haven't had time to get on my computer and give my blog some love. I started doing the P90X workout series a few weeks ago (today was Week 4, Day 5, to be exact), and I have to do it during Boy #2's naptime which is when I would normally update my blog. The things I give up for fitness.
So, with that all out of the way, I've wanted to try this recipe for quite awhile, but I always ended up coming across it when I was doing no carbs. I guess technically I could have substituted the wine for chicken broth, but since the wine is part of the title of the recipe, I figured it was pretty necessary. One night last week we opened a bottle of white wine that neither the husband nor I were really excited about, so I figured it was a perfect time to try this. It's from one of my favorite blogs, skinnytaste.com. I don't know why people seem to have the idea that healthy food can't taste good. Goofballs.
Chicken and Mushrooms in a Garlic White Wine Sauce
Source: skinnytaste.com
8 chicken tenderloins, 16 oz total
2 tsp butter
2 tsp olive oil
1/4 cup all purpose flour
3-4 cloves garlic, minced
12 oz sliced mushrooms
1/4 cup white wine
1/3 cup fat free chicken broth
salt and fresh pepper to taste
1/4 cup chopped fresh parsley
Preheat oven to 200°. Season chicken with salt and pepper. Lightly dredge in flour.
Heat a large skillet on medium heat; when hot add 1 tsp butter and 1 tsp olive oil. Add chicken to the skillet and cook on medium heat for about 5 minutes on each side, or until chicken is no longer pink. Set aside in a warm oven.
Add additional oil and butter to the skillet, then garlic and cook a few seconds; add mushrooms, salt and pepper stirring occasionally until golden, about 5 minutes.
Add wine, chicken broth, parsley; stir the pan with a wooden spoon breaking up any brown bits from the bottom of the pan. Cook a few more minutes or until the liquid reduces by half. Top the chicken with the mushroom sauce and serve.
*****
I love a dish that comes together quickly and easily. And it smelled fantastic while it was cooking. My parents always used to saute mushrooms in white wine, so the smell is a fond memory for me. Yum. Boy #1 isn't big on sauces (weird kid...but he's my weird kid, so I can say that), so I just gave him chicken, but the rest of us LOVED the sauce and the mushrooms. Boy #2 couldn't stop eating the mushrooms. he kept trying to steal them off my plate. I didn't have chicken tenderloins to use, so I just used chicken breasts and sliced them thin and into tenderloin-type pieces. This was really fantastic, and it's definitely something I'd make again! It looks really fancy (and tastes fancy), but it was super easy. Those are some of my favorite things!
The original blog post suggested serving this with baked rice and peas, so I gave it a go. I have found my new favorite way of cooking white rice. I don't know if I've shared that I have issues when it comes to cooking white rice, and her method was super easy and really good. Boy #1 isn't usually a rice fan, and even he ate it this way.
(Please forgive my less than stellar pictures...I'm having some issues with the speedlite on my camera that I can't quite figure out, so I haven't been able to use it.)
Saturday, August 6, 2011
Grilled Chicken Salad with Rustic Guacamole, Romaine and Queso Anejo
It seems like forever that I've been away from my blog! Hello, blog...have you missed me? Two weekends ago I went to Tucson, AZ with some friend on a scrapbooking weekend retreat. The last time I really sat down and scrapbooked, I was nine months pregnant with my youngest son (who will be three in November). Yeah, it had been awhile. My house and family were somewhat neglected for probably two weeks leading up to said weekend while I went through years of pictures on my computer to get prints made, planned out what pages I needed/wanted to do, organized my supplies, etc. I had a fantastic time and ended up doing something like 30 pages and made an album for our Santa pictures, so it was definitely productive. Anyway, once I got home from that weekend I was excited to get back into the swing of my blog, but I had a couple weeks' worth of chores to catch up on, so the blog kind of fell to the wayside. Then this past week was Boy #1's last week of summer vacation (my baby is starting kindergarten on Monday...how is that possible?!), so I was trying to cram in one on one time with him and do lots of fun stuff before he starts school.
So here it is Saturday night...the husband is out celebrating a friend's birthday, my kiddos are in bed, and I'm going to get caught up on blog posts. I haveeight nine (forgot about the next Summer Drink Series beverage!) posts to do, which I'm guessing won't all get done tonight, but I'll slog my way through as many as I can. I had meant to start sooner, but I've recently discovered Pintrest.com and have a tendency to get sucked into that since finding out about it.
Anyway, I had a hankering for some Rick Bayless recently while working on my menu plan, and I came across this salad. I'm all about salad in the summer because it's so ridiculously hot here. I knew I couldn't go wrong with something from the Mexican Everyday cookbook, and I was surprised at how many salads were in there!
Grilled Chicken Salad with Rustic Guacamole, Romaine and Queso Anejo
Source: Mexican Everyday by Rick Bayless
DRESSING:
½ cup vegetable or olive oil, plus a little more for onion
4 garlic cloves, peeled and halved
Fresh hot green chiles to taste (I like 2 serranos or 1 large jalapeno), stemmed and halved
½ cup fresh lime juice
¾ cup (loosely packed) cilantro, roughly chopped
Salt
¼ teaspoon ground black pepper
GRILLED CHICKEN SALAD:
4 medium (about 1¼ pounds total) boneless, skinless chicken breast halves
1 medium white onion, cut into ½-half-inch slices
2 ripe avocados
8 cups romaine hearts, sliced crosswise at ½-inch thick
1/3 cup grated Mexican queso anejo or other garnishing cheese (Romano or Parmesan)
Directions:
Heat oil in small skillet over medium heat. Add garlic and chiles; cook, stirring frequently, until garlic is soft and lightly browned (usually 1 to 2 minutes). Pour oil, garlic and chiles into blender jar or food processor. Add lime juice, cilantro, black pepper, and 1 scant teaspoon salt. Process garlic mixture until smooth.
Pour 1/3 of garlic mixture over chicken breasts, spreading it evenly over all sides.
Heat a grill pan or gas grill to medium to medium-high heat (or start a charcoal fire and let it burn until coals are medium hot and covered with white ash). Lightly brush or spray onion slices with oil; sprinkle with salt. Lay chicken and onion on grill pan or grill. Cook until chicken is just cooked through and onion is well browned (3 to 4 minutes on each side). Chop onion into small pieces and scoop into bowl. Set the chicken aside to cool.
Pit and peel avocados, scooping flesh into bowl with onion. Add another 1/3 of garlic mixture, then coarsely mash everything together with old-fashioned potato masher, large fork or back of spoon. Taste and season with salt (usually about ½ teaspoon).
Scoop the sliced romaine into large bowl. Drizzle on remaining 1/3 of garlic mixture and toss to combine. Divide between 4 dinner plates. Scoop a portion of guacamole into center of each plate. Cut each breast into cubes and arrange over guacamole. Sprinkle each plate with garnishing cheese. Serve.
*****
I ended up doing mine a little differently. I had planned on making something different for dinner in the crockpot, but I realized it wasn't going to happen because I had forgotten to put what I needed into the crockpot. So I already had some cooked, shredded chicken on hand, so instead of grilling the chicken in the dressing, I just mixed some into my shredded chicken. I knew this wasn't something my kids would eat, so I only made half the guacamole called for. I loved using the dressing to flavor the guacamole, by the way.
The husband and I thought this was FANTASTIC. The dressing was fresh and spicy and wow! Having it on the chicken, mixed in the guacamole, and as dressing on the salad made sure that you always had some of its spicy kick on your bite. I will definitely make this salad again. Yum!
So here it is Saturday night...the husband is out celebrating a friend's birthday, my kiddos are in bed, and I'm going to get caught up on blog posts. I have
Anyway, I had a hankering for some Rick Bayless recently while working on my menu plan, and I came across this salad. I'm all about salad in the summer because it's so ridiculously hot here. I knew I couldn't go wrong with something from the Mexican Everyday cookbook, and I was surprised at how many salads were in there!
Grilled Chicken Salad with Rustic Guacamole, Romaine and Queso Anejo
Source: Mexican Everyday by Rick Bayless
DRESSING:
½ cup vegetable or olive oil, plus a little more for onion
4 garlic cloves, peeled and halved
Fresh hot green chiles to taste (I like 2 serranos or 1 large jalapeno), stemmed and halved
½ cup fresh lime juice
¾ cup (loosely packed) cilantro, roughly chopped
Salt
¼ teaspoon ground black pepper
GRILLED CHICKEN SALAD:
4 medium (about 1¼ pounds total) boneless, skinless chicken breast halves
1 medium white onion, cut into ½-half-inch slices
2 ripe avocados
8 cups romaine hearts, sliced crosswise at ½-inch thick
1/3 cup grated Mexican queso anejo or other garnishing cheese (Romano or Parmesan)
Directions:
Heat oil in small skillet over medium heat. Add garlic and chiles; cook, stirring frequently, until garlic is soft and lightly browned (usually 1 to 2 minutes). Pour oil, garlic and chiles into blender jar or food processor. Add lime juice, cilantro, black pepper, and 1 scant teaspoon salt. Process garlic mixture until smooth.
Pour 1/3 of garlic mixture over chicken breasts, spreading it evenly over all sides.
Heat a grill pan or gas grill to medium to medium-high heat (or start a charcoal fire and let it burn until coals are medium hot and covered with white ash). Lightly brush or spray onion slices with oil; sprinkle with salt. Lay chicken and onion on grill pan or grill. Cook until chicken is just cooked through and onion is well browned (3 to 4 minutes on each side). Chop onion into small pieces and scoop into bowl. Set the chicken aside to cool.
Pit and peel avocados, scooping flesh into bowl with onion. Add another 1/3 of garlic mixture, then coarsely mash everything together with old-fashioned potato masher, large fork or back of spoon. Taste and season with salt (usually about ½ teaspoon).
Scoop the sliced romaine into large bowl. Drizzle on remaining 1/3 of garlic mixture and toss to combine. Divide between 4 dinner plates. Scoop a portion of guacamole into center of each plate. Cut each breast into cubes and arrange over guacamole. Sprinkle each plate with garnishing cheese. Serve.
*****
I ended up doing mine a little differently. I had planned on making something different for dinner in the crockpot, but I realized it wasn't going to happen because I had forgotten to put what I needed into the crockpot. So I already had some cooked, shredded chicken on hand, so instead of grilling the chicken in the dressing, I just mixed some into my shredded chicken. I knew this wasn't something my kids would eat, so I only made half the guacamole called for. I loved using the dressing to flavor the guacamole, by the way.
The husband and I thought this was FANTASTIC. The dressing was fresh and spicy and wow! Having it on the chicken, mixed in the guacamole, and as dressing on the salad made sure that you always had some of its spicy kick on your bite. I will definitely make this salad again. Yum!
Friday, June 17, 2011
Garlic and Fresh Oregano Grilled Chicken
The husband, boys, and I were all out front recently while the husband and I worked on cleaning up the garage and the boys rode bikes. My friend and neighbor Claudine happened to stop by on her way to work to give me some fresh oregano she had just picked from her garden. Don't you just love neighbors like that?! I heart fresh oregano and was overwhelmed with choices of what I could do with it. Something Greek? Italian? I didn't know. I thought some kind of really fresh, light marinade for chicken would be good, so I did some Googling. I found a couple recipes that sounded tasty and ended up making a modified version of one from about.com.
Garlic and Fresh Oregano Grilled Chicken
Source: Adapted from About.com
1/4 cup olive oil
6 cloves coarsely chopped garlic
1/2 cup coarsely chopped fresh oregano leaves
1 tablespoon Balsamic vinegar
2 tablespoons fresh lime juice
2 tablespoons fresh lemon juice
1 tablespoon honey
2 teaspoon ancho powder
Combine all ingredients in a mixing bowl. Mix until thoroughly combined. Marinate chicken for 6 hours or more. Prepare indirect grill and cook until done. Makes enough marinade for 2 chickens quartered.
*****
The original recipe called for half a cup of garlic. That seemed like waaaaaay too much to me. Plus I didn't have that much garlic. I love me some garlic, but half a cup? Really?! I basically used what I had and called it good. I also went light on the ancho chile powder since Boy #1 isn't a fan of spicy. I used chicken legs as my chicken part of choice and grilled them for close to 30 minutes. I had quite a bit of marinade left over, so I thawed a chicken breast and left it marinating overnight and then grilled it in the morning for the husband to take in his lunch. I warned him he shouldn't get used to freshly grilled meat every morning.
This marinade was good, but it wasn't amazing I didn't think. For chicken breasts I think I like my Saito Chicken better, and we really loved the Marinated Grilled Chicken Legs that we had recently. If you have the ingredients on hand, this is worth making, but I think if Claudine ever graces me with more fresh oregano I'll find something different to make with it.
Garlic and Fresh Oregano Grilled Chicken
Source: Adapted from About.com
1/4 cup olive oil
6 cloves coarsely chopped garlic
1/2 cup coarsely chopped fresh oregano leaves
1 tablespoon Balsamic vinegar
2 tablespoons fresh lime juice
2 tablespoons fresh lemon juice
1 tablespoon honey
2 teaspoon ancho powder
Combine all ingredients in a mixing bowl. Mix until thoroughly combined. Marinate chicken for 6 hours or more. Prepare indirect grill and cook until done. Makes enough marinade for 2 chickens quartered.
*****
The original recipe called for half a cup of garlic. That seemed like waaaaaay too much to me. Plus I didn't have that much garlic. I love me some garlic, but half a cup? Really?! I basically used what I had and called it good. I also went light on the ancho chile powder since Boy #1 isn't a fan of spicy. I used chicken legs as my chicken part of choice and grilled them for close to 30 minutes. I had quite a bit of marinade left over, so I thawed a chicken breast and left it marinating overnight and then grilled it in the morning for the husband to take in his lunch. I warned him he shouldn't get used to freshly grilled meat every morning.
This marinade was good, but it wasn't amazing I didn't think. For chicken breasts I think I like my Saito Chicken better, and we really loved the Marinated Grilled Chicken Legs that we had recently. If you have the ingredients on hand, this is worth making, but I think if Claudine ever graces me with more fresh oregano I'll find something different to make with it.
Labels:
balsamic,
chicken,
garlic,
lemon juice,
lime juice,
marinade,
olive oil,
oregano
Wednesday, June 8, 2011
Beef Bulgogi
Did I mention that we just moved Boy #2 from his crib into a big boy bed? I'm freakin' exhausted. He apparently thinks it means he can get up as many times as he wants at night and come wake me up and get up at the ass crack of dawn in the morning. *yawn* I'm a tired mama. Last night I got 6.5 hours of sleep, one of which was spent laying on the floor of his bedroom. Ugh. I know Boy #1 took awhile to adjust to not being confined when he slept, but I don't remember how long it took. I don't really feel capable of getting anything accomplished around my house today (I changed into jammies after my post-gym shower), so I'm going to update my blog.
By the way, I created a Facebook Page for my little blog here. There's a link over on the right sidebar where you can like it from here or come visit me on there. I don't really know what I'm going to do with it, I'd just been thinking about doing it for awhile and today seemed like a good day.
I've been in a bit of a funk lately, which I'm sure directly correlates to my lack of sleep, and meal planning just wasn't exciting for this week. I pulled a cookbook off my shelf that my mother-in-law had gotten me for Christmas a couple years ago and flipped through it hoping for ideas. She was a teacher at a Christian high school in San Antonio (she just retired!), and it was a fundraising project from the senior class I think. I love cookbooks where people submit their own recipes because who's going to submit something that sucks? This recipe called for flank steak, but London broil was on sale, so I thought it would be good. Bulgogi, according to the recipe intro, is a Korean treatment for steak that has very wide appeal to western palates and is remarkably easy to make. Also sometimes written as Pulgogi, Bulgogi literally means "fire meat" although this refers more to the cooking method than the spiciness of the dish. So there you go. I have no idea how to pronounce it. Bul-go-gee? Bul-gah-gee? Something else entirely?
Beef Bulgogi
2 lb flank steak or sirloin
1/2 c. packed dark brown sugar
3/4 c. soy sauce (preferably low salt)
1 Tbsp sesame oil
Dash of red pepper flakes or ground cayenne
5 or 6 green onions, sliced
2 Tbsp rice vinegar
3 cloves garlic, minced or crushed
For cooking:
3 Tbsp sesame oil
3 Tbsp peanut or vegetable oil
For thickening marinade/sauce:
1 Tbsp cornstarch dissolved in 1 Tbsp water
Trim any visible fat and sinuous tissue from the uncooked steak and wrap the meat in plastic wrap or a Ziploc bag and place in the freezer for half an hour to partially freeze meat. Remove meat from the freezer and slice as thinly as possible across the grain. Lay out meat slices in a single layer in a low, glass or ceramic casserole dish. As you cover the bottom once, crumble some of the brown sugar over the uncooked meat and continue layering meat and brown sugar until all the steak is sliced and the sugar used.
Marinade: In a bowl, mix soy sauce, 1 tablespoon sesame oil, red pepper, onions, rice vinegar, and garlic. Pour marinade over sugared meat and cover to marinate in the refrigerator for at least 2 hours. Can be marinated all day or even overnight if using low sat soy sauce.
Heat a large skillet on medium high heat and mix the remaining sesame oil with the peanut or vegetable oil. Working in small batches to preserve the heat of the pan, use a little of the mixed oils and quickly fry the steak until just cooked medium rare. Remove cooked slices to a warm serving platter and repeat the process until the whole batch of meat is cooked. use more oil if necessary. After meat is cooked, reduce heat to medium and add leftover marinade to skillet. Bring to gentle simmer and stir in cornstarch/water mixture. Stir while thickening and pour over cooked meat.
*****
The marinade smelled fantastic. I love the smell of sesame oil. As I was cooking the meat Boy #1 kept saying, "Mommy dinner smells so yummy!" It ended up being super tasty. I think our meat ended up being more on the medium or medium well side because I wasn't really sure how long to let it cook before flipping it, but it was still good. The sauce on top was really good, too. Since it had raw meat marinating in it, I heated it to boiling just to be safe. We all really liked this. Boy #1 complained at one point that he was getting full and asked if he could just eat half of what was left on his plate. I said sure, but then a couple minutes later he and I realized he'd eaten all of it! We just had the meat with some frozen Asian blend vegetables, but I think the meat would be really good in lettuce wrap form, too. I'll definitely make this again!
Sadly, none of the pictures I took of the cooked meat turned out. :(
By the way, I created a Facebook Page for my little blog here. There's a link over on the right sidebar where you can like it from here or come visit me on there. I don't really know what I'm going to do with it, I'd just been thinking about doing it for awhile and today seemed like a good day.
I've been in a bit of a funk lately, which I'm sure directly correlates to my lack of sleep, and meal planning just wasn't exciting for this week. I pulled a cookbook off my shelf that my mother-in-law had gotten me for Christmas a couple years ago and flipped through it hoping for ideas. She was a teacher at a Christian high school in San Antonio (she just retired!), and it was a fundraising project from the senior class I think. I love cookbooks where people submit their own recipes because who's going to submit something that sucks? This recipe called for flank steak, but London broil was on sale, so I thought it would be good. Bulgogi, according to the recipe intro, is a Korean treatment for steak that has very wide appeal to western palates and is remarkably easy to make. Also sometimes written as Pulgogi, Bulgogi literally means "fire meat" although this refers more to the cooking method than the spiciness of the dish. So there you go. I have no idea how to pronounce it. Bul-go-gee? Bul-gah-gee? Something else entirely?
Beef Bulgogi
2 lb flank steak or sirloin
1/2 c. packed dark brown sugar
3/4 c. soy sauce (preferably low salt)
1 Tbsp sesame oil
Dash of red pepper flakes or ground cayenne
5 or 6 green onions, sliced
2 Tbsp rice vinegar
3 cloves garlic, minced or crushed
For cooking:
3 Tbsp sesame oil
3 Tbsp peanut or vegetable oil
For thickening marinade/sauce:
1 Tbsp cornstarch dissolved in 1 Tbsp water
Trim any visible fat and sinuous tissue from the uncooked steak and wrap the meat in plastic wrap or a Ziploc bag and place in the freezer for half an hour to partially freeze meat. Remove meat from the freezer and slice as thinly as possible across the grain. Lay out meat slices in a single layer in a low, glass or ceramic casserole dish. As you cover the bottom once, crumble some of the brown sugar over the uncooked meat and continue layering meat and brown sugar until all the steak is sliced and the sugar used.
Marinade: In a bowl, mix soy sauce, 1 tablespoon sesame oil, red pepper, onions, rice vinegar, and garlic. Pour marinade over sugared meat and cover to marinate in the refrigerator for at least 2 hours. Can be marinated all day or even overnight if using low sat soy sauce.
Heat a large skillet on medium high heat and mix the remaining sesame oil with the peanut or vegetable oil. Working in small batches to preserve the heat of the pan, use a little of the mixed oils and quickly fry the steak until just cooked medium rare. Remove cooked slices to a warm serving platter and repeat the process until the whole batch of meat is cooked. use more oil if necessary. After meat is cooked, reduce heat to medium and add leftover marinade to skillet. Bring to gentle simmer and stir in cornstarch/water mixture. Stir while thickening and pour over cooked meat.
*****
The marinade smelled fantastic. I love the smell of sesame oil. As I was cooking the meat Boy #1 kept saying, "Mommy dinner smells so yummy!" It ended up being super tasty. I think our meat ended up being more on the medium or medium well side because I wasn't really sure how long to let it cook before flipping it, but it was still good. The sauce on top was really good, too. Since it had raw meat marinating in it, I heated it to boiling just to be safe. We all really liked this. Boy #1 complained at one point that he was getting full and asked if he could just eat half of what was left on his plate. I said sure, but then a couple minutes later he and I realized he'd eaten all of it! We just had the meat with some frozen Asian blend vegetables, but I think the meat would be really good in lettuce wrap form, too. I'll definitely make this again!
Sadly, none of the pictures I took of the cooked meat turned out. :(
Labels:
beef,
brown sugar,
garlic,
green onions,
marinade,
sesame oil,
soy sauce,
steak
Saturday, June 4, 2011
Broccoli with Garlic Butter and Cashews
I know I've mentioned the parenting message board I'm a member of before, The Mamasphere. This recipe was posted by one of the members and got rave reviews from everyone that's tried it. The member's username is AmRo, so it was dubbed AmRo's Broccoli Cashew Yumminess by someone else. We've actually had this several times as a side dish and as a main dish by adding chicken and serving it over quinoa. See, I wasn't kidding about incorporating quinoa more often! I love the flavors of the sauce and the crunch the cashews add to it. Really I'm just a sucker for anything with cashews.
Broccoli with Garlic Butter and Cashews
1 lb of broccoli, cut into bite sized pieces
1/3 cup of butter (I cut this to about 1/4 cup)
1 teaspoon brown sugar
2 tablespoons soy sauce
Several twists of black pepper (to taste)
2 cloves garlic, minced
Chopped cashews, as few or as many as you'd like, but probably no more than 1/3 cup.
1. Steam the broccoli until tender/crisp.
2. Melt the butter in a small saucepan over medium heat. Add the garlic and saute for a minute or so. Mix in the soy sauce, brown sugar, and pepper. Bring to bubbling, then reduce heat to low and simmer for a few minutes to thicken a smidge. Add the cashews, pour the sauce over the broccoli and stir to coat.
*****
Super easy and super tasty!! I've made it with fresh and frozen broccoli and had good results both times. It really comes together quickly, and it's so good. I've toasted the cashews each time I've made it. Plus the ingredients are things I normally have on hand. Well, not always the cashews but everything else.
I forgot to take a picture before I was packing up the leftovers.
Broccoli with Garlic Butter and Cashews
1 lb of broccoli, cut into bite sized pieces
1/3 cup of butter (I cut this to about 1/4 cup)
1 teaspoon brown sugar
2 tablespoons soy sauce
Several twists of black pepper (to taste)
2 cloves garlic, minced
Chopped cashews, as few or as many as you'd like, but probably no more than 1/3 cup.
1. Steam the broccoli until tender/crisp.
2. Melt the butter in a small saucepan over medium heat. Add the garlic and saute for a minute or so. Mix in the soy sauce, brown sugar, and pepper. Bring to bubbling, then reduce heat to low and simmer for a few minutes to thicken a smidge. Add the cashews, pour the sauce over the broccoli and stir to coat.
*****
Super easy and super tasty!! I've made it with fresh and frozen broccoli and had good results both times. It really comes together quickly, and it's so good. I've toasted the cashews each time I've made it. Plus the ingredients are things I normally have on hand. Well, not always the cashews but everything else.
I forgot to take a picture before I was packing up the leftovers.
Friday, May 20, 2011
Marinated Grilled Chicken Legs
I have to say, I'm on a roll with the new Cooking Light recipes I've been trying. So much so that the husband said we should have Cooking Light Month at our house. I gotta say, I'm not opposed to the idea. Three of the six recipes I still need to post about are CL recipes and were all tasty. I don't remember how I came across this one. I think it was an article on their website about 101 ways to cook chicken or something. Boy #1 LOVES chicken legs, and they were on sale last week, so I thought this would be good. It's pretty funny because he calls them "chicken bones." Let me tell you, it took awhile to figure out what he meant when he was asking for chicken bones.
Marinated Grilled Chicken Legs
Source: Cooking Light website
1 cup fresh orange juice
2 tablespoons fresh lemon juice
4 teaspoons low-sodium soy sauce
1 tablespoon dry sherry
1 1/2 teaspoons bottled minced garlic
1 1/2 teaspoons balsamic vinegar
1 1/2 teaspoons basil oil
1 teaspoon onion powder
1 teaspoon dark sesame oil
1/2 teaspoon salt
1/4 teaspoon hot pepper sauce
8 chicken drumsticks (about 2 1/4 pounds), skinned
Cooking spray
Green onion strips (optional)
Combine the first 11 ingredients in a large zip-top plastic bag. Add chicken to bag; seal. Marinate in refrigerator 2 hours, turning bag occasionally.
Prepare grill.
Remove chicken from bag, reserving marinade. Place reserved marinade in a small saucepan; cook over medium heat 3 minutes. Place chicken on grill coated with cooking spray; grill 30 minutes or until chicken is done, turning and basting occasionally with reserved marinade. Garnish with green onion strips, if desired.
Amount per serving (2 drumsticks)
Calories: 215
Calories from fat: 31%
Fat: 7.5g
Saturated fat: 1.8g
Monounsaturated fat: 2.8g
Polyunsaturated fat: 1.8g
Protein: 30g
Carbohydrate: 4.4g
Fiber: 0.1g
Cholesterol: 97mg
Iron: 1.5mg
Sodium: 339mg
Calcium: 18mg
*****
I figure since the nutritional info was there I might as well include in case anyone else is counting calories like we are.
This chicken was REALLY good. The only thing I left out was the basil oil because I don't have any and didn't really want to buy any for the small amount that is used. Although in hindsight I probably could have just bought some fresh basil and made my own. Oh well. I used sriracha for the hot sauce and was worried I'd added too much, but it wasn't spicy at all. Dodged a bullet there because Boy #1 does not like spicy and would have been very disappointed if he couldn't eat the chicken bones.
We all really liked this. I wished I'd thrown a few more legs into the marinade so I could have had another and/or some leftovers. This will definitely be a go to recipe for chicken bones in the future!
Marinated Grilled Chicken Legs
Source: Cooking Light website
1 cup fresh orange juice
2 tablespoons fresh lemon juice
4 teaspoons low-sodium soy sauce
1 tablespoon dry sherry
1 1/2 teaspoons bottled minced garlic
1 1/2 teaspoons balsamic vinegar
1 1/2 teaspoons basil oil
1 teaspoon onion powder
1 teaspoon dark sesame oil
1/2 teaspoon salt
1/4 teaspoon hot pepper sauce
8 chicken drumsticks (about 2 1/4 pounds), skinned
Cooking spray
Green onion strips (optional)
Combine the first 11 ingredients in a large zip-top plastic bag. Add chicken to bag; seal. Marinate in refrigerator 2 hours, turning bag occasionally.
Prepare grill.
Remove chicken from bag, reserving marinade. Place reserved marinade in a small saucepan; cook over medium heat 3 minutes. Place chicken on grill coated with cooking spray; grill 30 minutes or until chicken is done, turning and basting occasionally with reserved marinade. Garnish with green onion strips, if desired.
Amount per serving (2 drumsticks)
Calories: 215
Calories from fat: 31%
Fat: 7.5g
Saturated fat: 1.8g
Monounsaturated fat: 2.8g
Polyunsaturated fat: 1.8g
Protein: 30g
Carbohydrate: 4.4g
Fiber: 0.1g
Cholesterol: 97mg
Iron: 1.5mg
Sodium: 339mg
Calcium: 18mg
*****
I figure since the nutritional info was there I might as well include in case anyone else is counting calories like we are.
This chicken was REALLY good. The only thing I left out was the basil oil because I don't have any and didn't really want to buy any for the small amount that is used. Although in hindsight I probably could have just bought some fresh basil and made my own. Oh well. I used sriracha for the hot sauce and was worried I'd added too much, but it wasn't spicy at all. Dodged a bullet there because Boy #1 does not like spicy and would have been very disappointed if he couldn't eat the chicken bones.
We all really liked this. I wished I'd thrown a few more legs into the marinade so I could have had another and/or some leftovers. This will definitely be a go to recipe for chicken bones in the future!
Wednesday, May 18, 2011
Baked Camembert Pasta
I happened to be grocery shopping with my friend Jen recently and saw a marked down package of camembert cheese in the deli section. I turned to her and said, "Didn't you use camembert for something recently?" To which she replied, "Why yes I most certainly did." Or something along those lines in the way of an affirmative answer. She said it was like a decadent, grown-up mac and cheese. Sold! That was all I needed to hear to throw the package in my cart. I know I've professed my love for mac and cheese before, so I won't bore you with the details of it again.
I'm copying the recipe from Jen's blog but she found it from a Jamie Oliver cookbook.
Baked Camembert Pasta
Source: Food Revolution by Jamie Oliver
a box of Camembert Cheese (250g)
2 cloves of garlic, peeled and finely sliced
1 sprig of fresh rosemary, pick the leaves off the woody stalk
sea salt and freshly ground black pepper
extra virgin olive oil
100g grated Parmesan cheese
400g dried rigatoni
150g fresh spinach
Directions:
1. Open the box of cheese and unwrap it. Place it back to the wooden container.
2. Score a circle into the top of the skin, then lift it off and discard.
3. Lay the garlic slices on top of the cheese, sprinkle some pepper and drizzle a little extra virgin olive oil.
4. Scatter the rosemary leaves over the top and gently pat with your fingers to coat them in the oil.
5. Bake the cheese in a preheated oven of 180C (350F) for about 25 minutes, until golden and melted. (***May take a little longer until the cheese is melted***)
6. When the cheese has 10 minutes left to cook, add the pasta to the pan and cook according to packet instructions.
7. When the pasta is cooked, add the spinach to the pan – it only needs cooking for 10 seconds or so.
8. Drain the pasta and spinach to the pan and let it wilt.
9. Drizzle with a couple of good lugs of extra virgin olive oil and add the grated Parmesan. If the sauce is too thick for you, add a splash of reserved cooking water to thin out a bit. Season with salt and pepper and give it a good stir.
10. Remove the cheese from the oven. Divide the pasta between your serving bowls. Either drizzle the melted Camembert on top or pop cheese on the table and let everyone help themselves to a lovely, gooey spoonful.
*****
I forgot the spinach when I was getting the other ingredients I needed. Oops. And I used whole wheat rotini instead of rigatoni. This was indeed a decadent, grown-up mac and cheese. So much so that I tried to ration the amount of cheese I gave my kids on their pasta so that the husband and I could have more. When I pulled the cheese out of the oven it smelled AMAZING. And the cheese was all gooey and melty with yummy slices of garlic and bits of rosemary on top. Oh man. I seriously could have stood there and eaten it with a spoon.
I don't know how often I'd make this just because camembert is not an inexpensive cheese, so it would have to be a special occasion. Or if I happened to find it marked down again. But if it's in your grocery budget, I say give this a try. But only if you look gooey, melty, awesomeness.
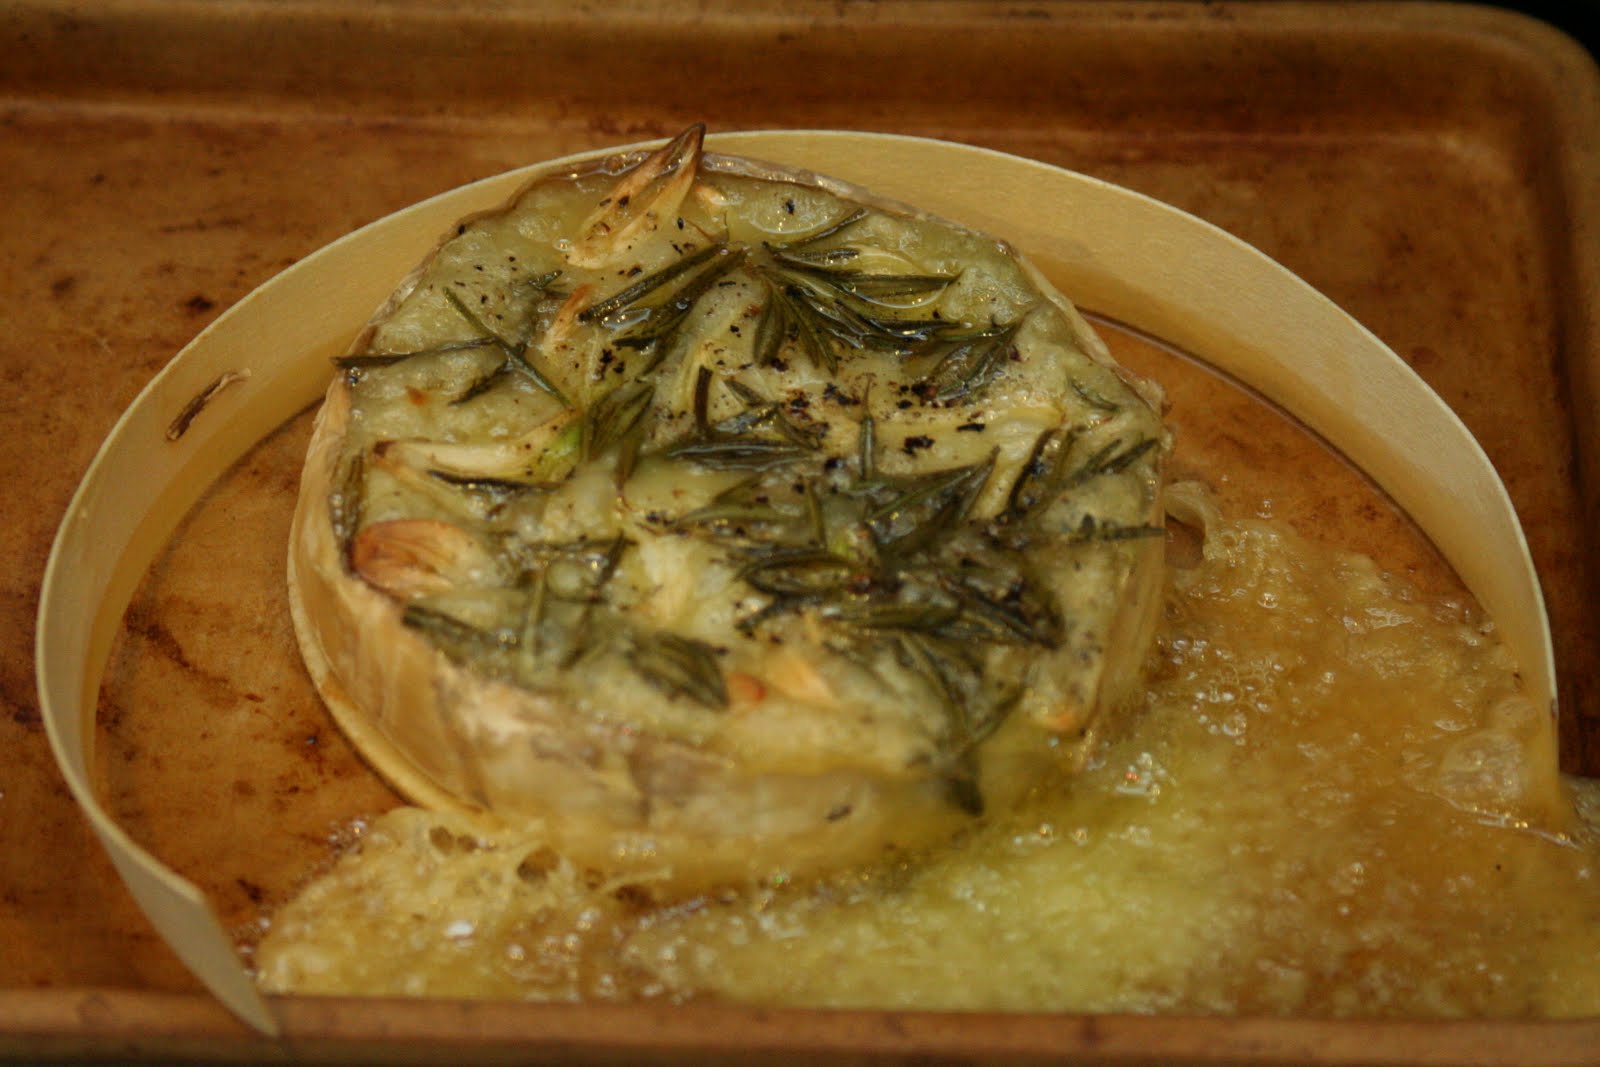
I would advise putting your cheese on a baking sheet of some sort. Just in case something like this happens. It would 1) be a shame to lose the cheese and 2) suck to have to clean that mess up from the bottom of your oven.
I'm copying the recipe from Jen's blog but she found it from a Jamie Oliver cookbook.
Baked Camembert Pasta
Source: Food Revolution by Jamie Oliver
a box of Camembert Cheese (250g)
2 cloves of garlic, peeled and finely sliced
1 sprig of fresh rosemary, pick the leaves off the woody stalk
sea salt and freshly ground black pepper
extra virgin olive oil
100g grated Parmesan cheese
400g dried rigatoni
150g fresh spinach
Directions:
1. Open the box of cheese and unwrap it. Place it back to the wooden container.
2. Score a circle into the top of the skin, then lift it off and discard.
3. Lay the garlic slices on top of the cheese, sprinkle some pepper and drizzle a little extra virgin olive oil.
4. Scatter the rosemary leaves over the top and gently pat with your fingers to coat them in the oil.
5. Bake the cheese in a preheated oven of 180C (350F) for about 25 minutes, until golden and melted. (***May take a little longer until the cheese is melted***)
6. When the cheese has 10 minutes left to cook, add the pasta to the pan and cook according to packet instructions.
7. When the pasta is cooked, add the spinach to the pan – it only needs cooking for 10 seconds or so.
8. Drain the pasta and spinach to the pan and let it wilt.
9. Drizzle with a couple of good lugs of extra virgin olive oil and add the grated Parmesan. If the sauce is too thick for you, add a splash of reserved cooking water to thin out a bit. Season with salt and pepper and give it a good stir.
10. Remove the cheese from the oven. Divide the pasta between your serving bowls. Either drizzle the melted Camembert on top or pop cheese on the table and let everyone help themselves to a lovely, gooey spoonful.
*****
I forgot the spinach when I was getting the other ingredients I needed. Oops. And I used whole wheat rotini instead of rigatoni. This was indeed a decadent, grown-up mac and cheese. So much so that I tried to ration the amount of cheese I gave my kids on their pasta so that the husband and I could have more. When I pulled the cheese out of the oven it smelled AMAZING. And the cheese was all gooey and melty with yummy slices of garlic and bits of rosemary on top. Oh man. I seriously could have stood there and eaten it with a spoon.
I don't know how often I'd make this just because camembert is not an inexpensive cheese, so it would have to be a special occasion. Or if I happened to find it marked down again. But if it's in your grocery budget, I say give this a try. But only if you look gooey, melty, awesomeness.
I would advise putting your cheese on a baking sheet of some sort. Just in case something like this happens. It would 1) be a shame to lose the cheese and 2) suck to have to clean that mess up from the bottom of your oven.
Thursday, September 23, 2010
Chargrilled Oysters Acme Oyster House Style
I know I've mentioned before that the husband grew up in New Orleans. We love to go visit, although it doesn't happen very often since it's not cheap to get there, and it's definitely not cheap once you're there. But when we do go, it's our tradition to head straight to Acme Oyster House. Heaven on a plate, I'm telling you! Well, if you like oysters. Oysters are another food I refused to eat growing up. They just seemed so slimy and gross. My parents loved them and would buy jars of them and have fried oysters. Ugh. The husband finally convinced me to try oysters on the half shell at some point, and I loved them. I know as a Pac Northwest girl at heart I shouldn't say this, but gulf oysters are so much tastier than the oysters you get in Washington. Those oysters are too briny, whereas gulf oysters taste sweet.
Anyway, we were in New Orleans in January for the husband's cousin's wedding, so after we checked into our hotel we headed straight for Acme Oyster House. I don't remember if we saw someone having the Chargrilled Oysters or our waiter told us about them or we just thought they sounded good. They were one of the best things I've ever eaten. EVER. I'm pretty sure I texted, called, or emailed my friend Jen about them as soon as I was done eating. Actually I don't think I got cell service in the restaurant so I had to wait until we were outside. But I digress.
Recently these delectable oysters popped into my head, and I couldn't stop thinking about them. Since a trip to New Orleans is out of the question, I did some Googling and found a recipe on Food.com for Chargrilled Oysters Acme Oyster House Style. You have no idea how elated I was. My mom was keeping the kids for us this past weekend so the husband and I could have a date weekend and a little staycation at home. I wanted to have some awesome yummy snacks for us while the kids were gone, so I decided to make these. We were actually supposed to go out to dinner but ended up staying home and eating these instead.
Chargrilled Oysters Acme Oyster House Style
From Food.com
12 fresh shucked oysters, on the half shell
1/2 lb unsalted butter
1 tablespoon fresh lemon juice
1/2 tablespoon Worcestershire sauce
1 bunch green onions, finely chopped
10 garlic cloves, pureed
1/2 teaspoon crushed red pepper flakes
1 1/2 tablespoons finely chopped fresh thyme
1 1/2 tablespoons finely chopped fresh oregano
1 tablespoon creole seasoning
1 ounce white wine
1/2 cup grated romano cheese
Melt half the butter in a medium sauce pan over medium heat. Add your lemon juice, Worcestershire sauce, green onions and all herbs and seasonings. Cook for 2-3 minutes, then stir in wine. Keep stirring and remove from heat as soon as the green onions wilt. Let cool for 3-4 minutes. Add the rest of the butter and stir until completely incorporated.
Heat grill to to 350°F Place oysters on grill. When the oyster liquor starts to bubble, spoon 1 tablespoon of sauce on top of each, then top with 1 tablespoon of Romano cheese. Let the cheese melt. When oysters begin to slightly brown at the edges, remove from grill and place on a heat proof plate or tray.
Top each oyster with an additional tablespoon of the butter sauce and serve immediately with slices of french bread for dipping.
*****
My mouth started watering just thinking about these. If Whole Foods were closer and the baby wasn't napping, I'd be tempted to run out and get some oysters to make these again. In case you couldn't tell, we LOVED these. The recipe on the website actually calls for four servings, but I halved it. The sauce smelled amazing as it was cooking (although when doesn't butter smell amazing?!).
This was my first time shucking and cooking oysters. I was a little nervous about the shucking, but I looked up how to do it (what did we do before the internet?!). Plus my brother has shucked oysters before, so I figured if he could do it, so could I. It wasn't as hard as I thought. I just held the oyster in a thick kitchen towel, stuck a knife in and twisted it open. There were two that I couldn't open which kind of pissed me off, but I figured it wasn't worth the fight, so I just tossed them.
There isn't anything I would change about this recipe, except I'd make more of it. The butter sauce was so amazing, the husband went scrounging around in the freezer for some ciabatta rolls I thought were there so we could mop up the sauce. He found them, we heated them up and ate every last drop of sauce from our plates. Man alive was this tasty!!! Healthy, no. Tasty, yes!
Lucky for you, I took copious amounts of pictures!
Well, hello, one dozen oysters ready to be shucked...

Oysters are weird looking. But tasty.


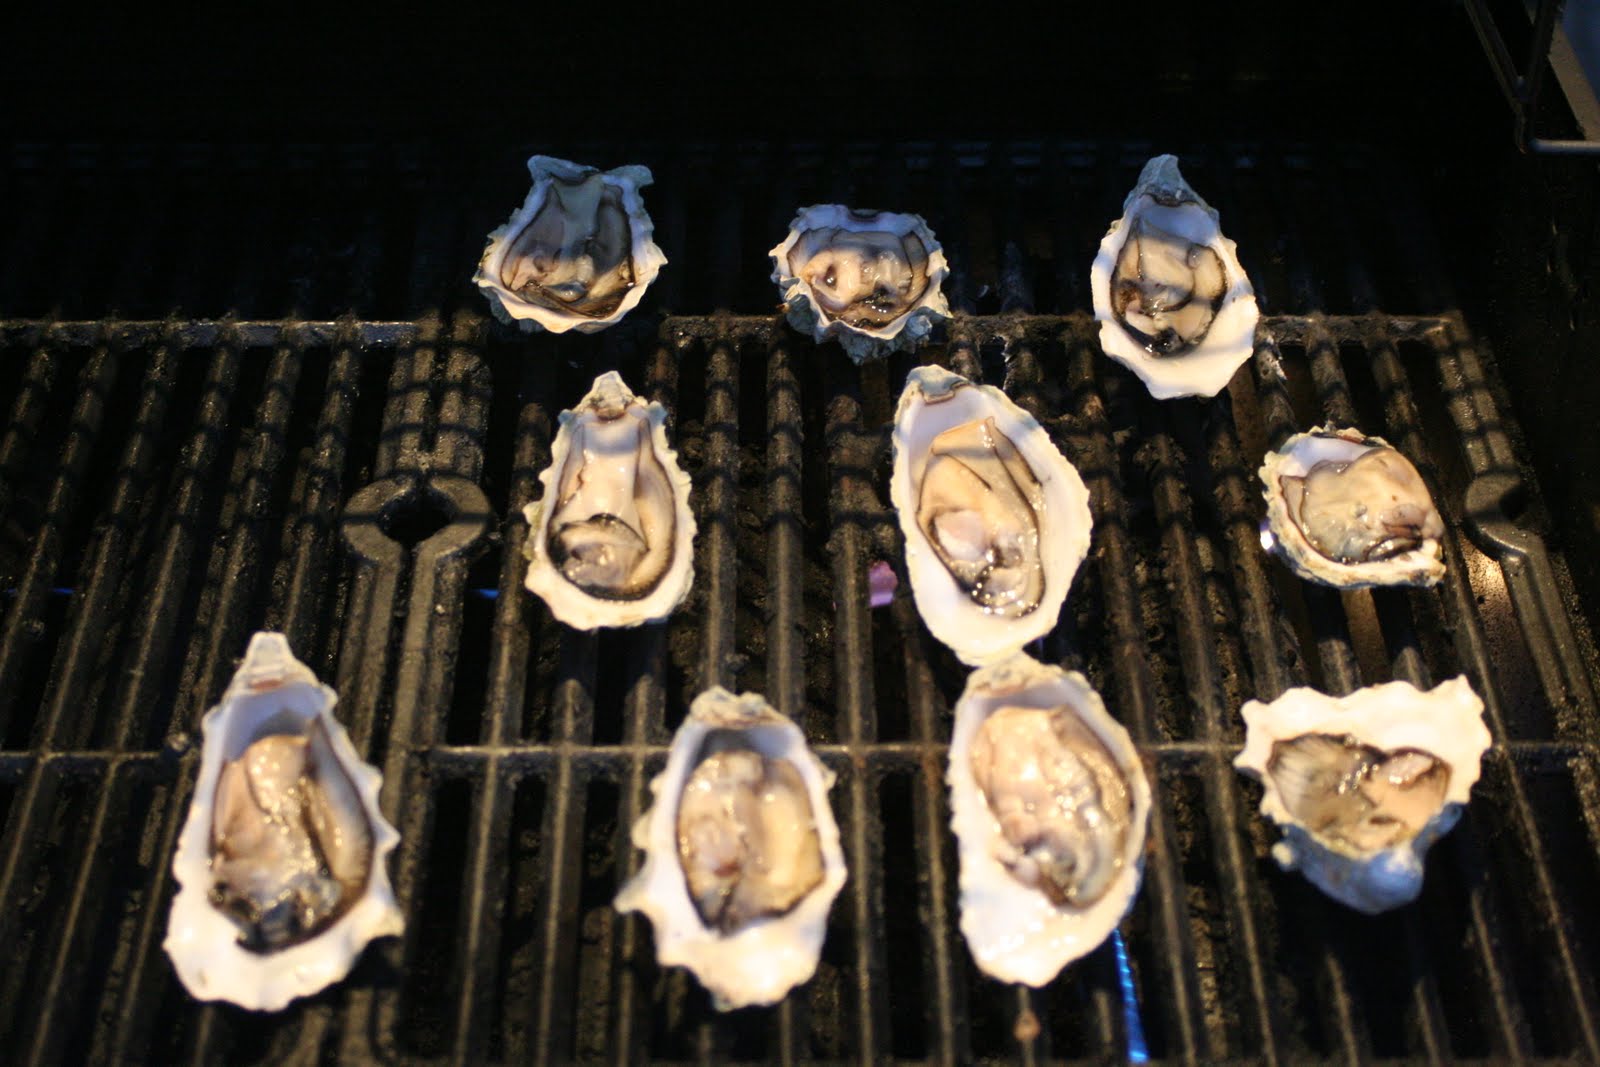
Grill, baby, grill!

Excuse me while I wipe the drool off my keyboard...


Fighting urge to go buy more oysters...
Anyway, we were in New Orleans in January for the husband's cousin's wedding, so after we checked into our hotel we headed straight for Acme Oyster House. I don't remember if we saw someone having the Chargrilled Oysters or our waiter told us about them or we just thought they sounded good. They were one of the best things I've ever eaten. EVER. I'm pretty sure I texted, called, or emailed my friend Jen about them as soon as I was done eating. Actually I don't think I got cell service in the restaurant so I had to wait until we were outside. But I digress.
Recently these delectable oysters popped into my head, and I couldn't stop thinking about them. Since a trip to New Orleans is out of the question, I did some Googling and found a recipe on Food.com for Chargrilled Oysters Acme Oyster House Style. You have no idea how elated I was. My mom was keeping the kids for us this past weekend so the husband and I could have a date weekend and a little staycation at home. I wanted to have some awesome yummy snacks for us while the kids were gone, so I decided to make these. We were actually supposed to go out to dinner but ended up staying home and eating these instead.
Chargrilled Oysters Acme Oyster House Style
From Food.com
12 fresh shucked oysters, on the half shell
1/2 lb unsalted butter
1 tablespoon fresh lemon juice
1/2 tablespoon Worcestershire sauce
1 bunch green onions, finely chopped
10 garlic cloves, pureed
1/2 teaspoon crushed red pepper flakes
1 1/2 tablespoons finely chopped fresh thyme
1 1/2 tablespoons finely chopped fresh oregano
1 tablespoon creole seasoning
1 ounce white wine
1/2 cup grated romano cheese
Melt half the butter in a medium sauce pan over medium heat. Add your lemon juice, Worcestershire sauce, green onions and all herbs and seasonings. Cook for 2-3 minutes, then stir in wine. Keep stirring and remove from heat as soon as the green onions wilt. Let cool for 3-4 minutes. Add the rest of the butter and stir until completely incorporated.
Heat grill to to 350°F Place oysters on grill. When the oyster liquor starts to bubble, spoon 1 tablespoon of sauce on top of each, then top with 1 tablespoon of Romano cheese. Let the cheese melt. When oysters begin to slightly brown at the edges, remove from grill and place on a heat proof plate or tray.
Top each oyster with an additional tablespoon of the butter sauce and serve immediately with slices of french bread for dipping.
*****
My mouth started watering just thinking about these. If Whole Foods were closer and the baby wasn't napping, I'd be tempted to run out and get some oysters to make these again. In case you couldn't tell, we LOVED these. The recipe on the website actually calls for four servings, but I halved it. The sauce smelled amazing as it was cooking (although when doesn't butter smell amazing?!).
This was my first time shucking and cooking oysters. I was a little nervous about the shucking, but I looked up how to do it (what did we do before the internet?!). Plus my brother has shucked oysters before, so I figured if he could do it, so could I. It wasn't as hard as I thought. I just held the oyster in a thick kitchen towel, stuck a knife in and twisted it open. There were two that I couldn't open which kind of pissed me off, but I figured it wasn't worth the fight, so I just tossed them.
There isn't anything I would change about this recipe, except I'd make more of it. The butter sauce was so amazing, the husband went scrounging around in the freezer for some ciabatta rolls I thought were there so we could mop up the sauce. He found them, we heated them up and ate every last drop of sauce from our plates. Man alive was this tasty!!! Healthy, no. Tasty, yes!
Lucky for you, I took copious amounts of pictures!
Well, hello, one dozen oysters ready to be shucked...
Oysters are weird looking. But tasty.
Grill, baby, grill!
Excuse me while I wipe the drool off my keyboard...
Fighting urge to go buy more oysters...
Wednesday, September 15, 2010
South Beach Stuffed Peppers
I love stuffed peppers. The husband used to not like green peppers (I don't know, he may still not like them, but I love them so he's forced into eating them), so I never had them. I'd buy the Stouffer's frozen peppers and take in my lunch to work or keep on hand at home for when I was on my own for dinner. I've made stuffed peppers a few times (my friend Jen has a really good stuffed peppers recipe), so I was excited to see a recipe for them that didn't have rice or pasta as part of the stuffing.
South Beach Stuffed peppers
From Food.com
4 bell peppers
olive oil
1 lb ground turkey
1 stalk celery, chopped with top
1 -2 garlic clove, minced
1 small onion, chopped
1 tablespoon minced fresh parsley
1 tablespoon Worcestershire sauce
1 teaspoon spike all purpose seasoning (for zest)
28 ounces ground peeled tomatoes
1/2 cup shredded cheese (or more)
Wash the peppers, cut the tops off, and place in oiled glass dish. Cover and microwave the peppers for 5 minutes.
Saute the veggies and ground turkey with a dollop of olive oil. (I chop up the usable remainders of the pepper tops as well). Add the tomatoes and cook for 3-4 minutes to evaporate some of the liquid.
Stuff the peppers and top with cheese. Bake at 350 for 10 minutes or until the peppers are soft and the cheese is toasted.
Add Ins: you could add cooked rice or stir in extra cheese to the mixture before baking.
*****
I didn't make any changes, other than using different colored peppers. I made five peppers and used yellow, orange, and red peppers. I used reduced fat sharp cheddar for my cheese.
These were some of the easiest peppers I've ever made. I love the idea of cooking the peppers slightly in the microwave first...10 minutes of cooking time at the end is fantastic! Our friend Steve was over for dinner, and we all really liked these. My kids shared one, the adults each had one, but I don't think any of us finished our entire peppers. I had enough filling for another pepper. It's actually still in my fridge because I figured it would be easy enough to just heat up a pepper, stuff it, and bake it in my toaster oven for a hearty lunch. Perhaps that will be my lunch for tomorrow!
I'll definitely make this one again, too...diet or no diet! (Don't you love finding diet food like that?!)
South Beach Stuffed peppers
From Food.com
4 bell peppers
olive oil
1 lb ground turkey
1 stalk celery, chopped with top
1 -2 garlic clove, minced
1 small onion, chopped
1 tablespoon minced fresh parsley
1 tablespoon Worcestershire sauce
1 teaspoon spike all purpose seasoning (for zest)
28 ounces ground peeled tomatoes
1/2 cup shredded cheese (or more)
Wash the peppers, cut the tops off, and place in oiled glass dish. Cover and microwave the peppers for 5 minutes.
Saute the veggies and ground turkey with a dollop of olive oil. (I chop up the usable remainders of the pepper tops as well). Add the tomatoes and cook for 3-4 minutes to evaporate some of the liquid.
Stuff the peppers and top with cheese. Bake at 350 for 10 minutes or until the peppers are soft and the cheese is toasted.
Add Ins: you could add cooked rice or stir in extra cheese to the mixture before baking.
*****
I didn't make any changes, other than using different colored peppers. I made five peppers and used yellow, orange, and red peppers. I used reduced fat sharp cheddar for my cheese.
These were some of the easiest peppers I've ever made. I love the idea of cooking the peppers slightly in the microwave first...10 minutes of cooking time at the end is fantastic! Our friend Steve was over for dinner, and we all really liked these. My kids shared one, the adults each had one, but I don't think any of us finished our entire peppers. I had enough filling for another pepper. It's actually still in my fridge because I figured it would be easy enough to just heat up a pepper, stuff it, and bake it in my toaster oven for a hearty lunch. Perhaps that will be my lunch for tomorrow!
I'll definitely make this one again, too...diet or no diet! (Don't you love finding diet food like that?!)
Friday, April 16, 2010
Rick Bayless Barbecue Sauce
I think it's really hard to find a reasonably priced bottled barbecue sauce that doesn't have a bunch of unnecessary junk in it like high fructose corn syrup. I've made my own in the past a few times but wasn't ever super impressed with any of the recipes I tried. So I was beyond delighted to see this recipe in the Rick and Lanie cookbook.
Hickory House Barbecue Sauce
Copyright 2004, Rick and Lanie's Excellent Kitchen Adventures
2 garlic cloves
1 cup ketchup
1 Tbsp vinegar (cider vinegar or distilled white vinegar)
2 Tbsp Worcestershire sauce
1/3 cup dark brown sugar
1/2 to 1 tsp barbecue spice (recipe below) or chili powder
1/4 tsp freshly ground black pepper
Salt
Peel garlic and crush through galic press into a small saucepan. Add all the remaining ingredients and 3/4 cup water. Simmer over medium-low heat for 30 minutes. Taste and season with salt if you think necessary. The sauce is ready to use. It can be stored, refrigerated in a sealed jar, for up to a month.
Barbecue Spice
2 large garlic cloves
1/4 cup plain ground chile or paprika
2 tsp ground black pepper
2 tsp sugar
2 tsp dried oregano (preferably Mexican oregano)
1 tsp dried thyme
4 tsp salt
Peel garlic and crush through garlic press into a small bowl. add remaining ingredients. Stir, making sure to thoroughly mix in garlic. If not using right away, store in small jar in refrigerator up to 1 month.
*****
Wowee, wow, wow!! This is definitely some of the best barbecue sauce I have ever had!! It had just a hint of spice from the chile powder and was a great consistency--not too thick, not too thin. Once again, Rick Bayless totally rocked it!
Barbecue spice mix:

Finished barbecue sauce (after I'd taken what I needed for the baked beans):
Hickory House Barbecue Sauce
Copyright 2004, Rick and Lanie's Excellent Kitchen Adventures
2 garlic cloves
1 cup ketchup
1 Tbsp vinegar (cider vinegar or distilled white vinegar)
2 Tbsp Worcestershire sauce
1/3 cup dark brown sugar
1/2 to 1 tsp barbecue spice (recipe below) or chili powder
1/4 tsp freshly ground black pepper
Salt
Peel garlic and crush through galic press into a small saucepan. Add all the remaining ingredients and 3/4 cup water. Simmer over medium-low heat for 30 minutes. Taste and season with salt if you think necessary. The sauce is ready to use. It can be stored, refrigerated in a sealed jar, for up to a month.
Barbecue Spice
2 large garlic cloves
1/4 cup plain ground chile or paprika
2 tsp ground black pepper
2 tsp sugar
2 tsp dried oregano (preferably Mexican oregano)
1 tsp dried thyme
4 tsp salt
Peel garlic and crush through garlic press into a small bowl. add remaining ingredients. Stir, making sure to thoroughly mix in garlic. If not using right away, store in small jar in refrigerator up to 1 month.
*****
Wowee, wow, wow!! This is definitely some of the best barbecue sauce I have ever had!! It had just a hint of spice from the chile powder and was a great consistency--not too thick, not too thin. Once again, Rick Bayless totally rocked it!
Barbecue spice mix:

Finished barbecue sauce (after I'd taken what I needed for the baked beans):
Monday, March 22, 2010
Grilled Vegetable Paninis
Recently I somehow stumbled on a food blog dedicated solely to paninis, PaniniHappy.com. Actually I think I found out from a link on Aggie's Kitchen. We love paninis, and I'm always looking for new variations. After my cheese making class I had some goat cheese (which at some point will be its own post) I wanted to use, so I checked out the panini blog for some ideas. I found a recipe for a Grilled Vegetable Panini that was pretty similar to what I wanted to do, so I used it as a basis. We needed to go to Trader Joe's, so I planned on picking up a bag of their frozen grilled zucchini and eggplant mix, but wouldn't you know they were out of it. So I bought an eggplant and a package of zucchini (really reasonably priced, by the way) and figured I'd grill my own. I still had some TJ panini rolls left in the freezer, so I used those for the sandwiches.
Grilled Vegetable Paninis
1 eggplant, sliced into 1/4-inch rounds
3 small to medium zucchini sliced lengthwise into 1/4-inch slices
4 Tbsp olive oil
3 Tbsp balsamic vinegar
1 tsp dried basil
1 tsp dried oregano
4 cloves garlic, minced
Goat cheese (chevre)
Slices of mozzarella
Panini rolls
Combine eggplant and zucchini slices in a large bowl. In separate small bowl, combine oil, vinegar, basil, oregano, and garlic. Whisk to combine, then pour over vegetables in large bowl and toss to combine. Let marinate at least one hour.
Prepare grill or grill pan. Grill vegetables in batches, approximately 3-4 minutes per side or until grill marks appear. Remove to plate and finish grilling vegetables.
To assemble sandwiches, spread layer of chevre on bottom half of panini roll (or bread of your choosing). Top with layers of vegetables, then a slice of mozzarella. Place top half of sandwich roll on sandwich and place the whole thing in a panini press for 3-4 minutes or until grill lines appear and mozzarella is melted.
*****
Mmmmmmmmm...this was so good!! We had a bit of a grill mishap, so I ended up having to use my grill pan inside. Some of the crazy storms we had this winter kept knocking over our grill, so we need to do a little maintenance on it to get it ready for grilling before we can use it. It worked out okay on the grill pan, just took a lot longer since I had to do smaller batches.
The chevre I used was what I had made at my cheese class. It was really yummy, although it was slightly more work than the other cheeses because you have to let it sit for longer, and it requires a special packet of something. I'll probably have to post about the cheese class tomorrow because I still have two posts left to do today, and the boy is getting antsy being in his room for quiet time.
Anyway, these were super tasty!!! The husband and I loved them. They were really filling, too. I did two layers each of zucchini and eggplant. I would definitely make this again--filling, healthy, vegetarian--love it!! Although I much prefer the convenience of the frozen veggies from Trader Joe's over having to do it myself.
The panini rolls I like:

My vegetables marinating. I tossed them around every now and then during the course of the hour.

Grilling the veggies on my grill pan. God bless the inventor of the grill pan.

Mmmmm...big pile of grilled veggies!!

Even more mmmmmm...cheesy, yummy grilled vegetable panini!!
Grilled Vegetable Paninis
1 eggplant, sliced into 1/4-inch rounds
3 small to medium zucchini sliced lengthwise into 1/4-inch slices
4 Tbsp olive oil
3 Tbsp balsamic vinegar
1 tsp dried basil
1 tsp dried oregano
4 cloves garlic, minced
Goat cheese (chevre)
Slices of mozzarella
Panini rolls
Combine eggplant and zucchini slices in a large bowl. In separate small bowl, combine oil, vinegar, basil, oregano, and garlic. Whisk to combine, then pour over vegetables in large bowl and toss to combine. Let marinate at least one hour.
Prepare grill or grill pan. Grill vegetables in batches, approximately 3-4 minutes per side or until grill marks appear. Remove to plate and finish grilling vegetables.
To assemble sandwiches, spread layer of chevre on bottom half of panini roll (or bread of your choosing). Top with layers of vegetables, then a slice of mozzarella. Place top half of sandwich roll on sandwich and place the whole thing in a panini press for 3-4 minutes or until grill lines appear and mozzarella is melted.
*****
Mmmmmmmmm...this was so good!! We had a bit of a grill mishap, so I ended up having to use my grill pan inside. Some of the crazy storms we had this winter kept knocking over our grill, so we need to do a little maintenance on it to get it ready for grilling before we can use it. It worked out okay on the grill pan, just took a lot longer since I had to do smaller batches.
The chevre I used was what I had made at my cheese class. It was really yummy, although it was slightly more work than the other cheeses because you have to let it sit for longer, and it requires a special packet of something. I'll probably have to post about the cheese class tomorrow because I still have two posts left to do today, and the boy is getting antsy being in his room for quiet time.
Anyway, these were super tasty!!! The husband and I loved them. They were really filling, too. I did two layers each of zucchini and eggplant. I would definitely make this again--filling, healthy, vegetarian--love it!! Although I much prefer the convenience of the frozen veggies from Trader Joe's over having to do it myself.
The panini rolls I like:

My vegetables marinating. I tossed them around every now and then during the course of the hour.

Grilling the veggies on my grill pan. God bless the inventor of the grill pan.

Mmmmm...big pile of grilled veggies!!

Even more mmmmmm...cheesy, yummy grilled vegetable panini!!
Labels:
eggplant,
garlic,
goat cheese,
grill,
mozzarella,
panini,
sandwiches,
zucchini
Friday, March 5, 2010
Rick Bayless' Chipotle Meatballs (Sandwich Style)
Oh man...words do not express how freakin' excited I am to try this dinner tonight!!! Months and months ago when I was holding the Rick Bayless Mexican Everyday cookbook hostage from the library I saw this chipotle meatball recipe in it. Sounded good and then I thought, "Hmmm...you could probably make a Mexican version of a meatball sandwich with those." And then the idea just had to sit in my brain for a long, long time. I don't know why I haven't made this sooner given my excitement for it!!
So, first I'll post the recipe from his cookbook and then how I'm doing my sandwich take on it after the recipe.
Rick Bayless' Chipotle Meatballs
Copyright 2005, Rick Bayless' Mexican Everyday
3 slices bacon, cut into 1-inch pieces
3 garlic cloves, peeled (divided use)
2 large eggs
1/2 cup dried bread crumbs (3/4 cup if they're the coarse-textured panko)
Salt
1-1/4 pounds ground pork
1/2 cup (loosely packed) coarsely chopped mint leaves, plus extra leaves for garnish if you wish
1 28-ounce can diced tomatoes in juice (preferably fire-roasted)
1-2 canned chipotle chiles en adobo, stemmed and seeded
1-2 Tbsp chipotle canning sauce
1 tsp dried oregano, preferably Mexican
About 1-1/2 cups beef or chicken broth
Turn on the oven to 450 degrees. In a food processor, combine the bacon and 1 garlic clove. Process until finely chopped. Add the eggs, bread crumbs, and 1 teaspoon salt. Pulse several times to combine thoroughly, then add the pork and mint. Pulse the machine a ew more times until everything is well combined--but not at all processed into a paste. Remove the blade.
With wet hands, form the meat into 16 plum-size spheres, spacing them out in a 13x9 inch baking dish. Bake until lightly browned (they'll be browned more underneath than on top), about 15 minutes.
While the meatballs are baking, combine the tomatoes, with their juice, chipotles, canning sauce, oregano, the remaining 2 garlic cloves (cut in half) and 1/2 teaspoon salt in a blender or food processor. Process to a smooth puree.
When the meatballs are ready, spoon off any rendered fat from the baking dish, then pour on the tomato mixture, covering the meatballs evenly. Bake until the sauce looks like tomato paste, 15 to 20 minutes.
Microwave the broth for about a minute to heat it (or heat in a small saucepan). Divide the meatballs among four dinner plates, leaving most of the sauce behind. Stir enough broth into the sauce to give it an easily spoonable consistency. Taste and season with additional salt if you think the sauce needs it. Spoon the sauce over the meatballs, decorate with extra mint leaves, if you wish, and serve.
*****
My mouth started to water a bit there while I was typing out the recipe. Rick has yet to do me wrong, so I cannot wait to try this! The only substitution I'm making is to use ground beef instead of pork. I have 1.5 pounds of ground beef left in my freezer, and I gave the husband a couple options that I could do with it, and this is what he chose. We're trying to get back to no (or very little) red meat, so we won't be having anything like this for awhile.
So, now my sandwich take on them. These sounded really similar to meatballs in marinara my friend Laura makes and then uses for meatball sandwiches. So I thought why couldn't I do a Mexican version, using this sauce instead of marinara, and queso fresco instead of mozzarella. So that's what we're having for dinner tonight! I was telling my friend Jen about these last night when I talked to her, and she thought they sounded awesome, too. She suggested putting avocado or guacamole on them, too. I do have an avocado that needs to be used up, so I might try that and see how it is.
I can't wait to report back to you on how these turn out!!
*****
Oh man...oh MAN!!! I've said it before, and I'll say it again. Rick Bayless is a god among men, or at least when it comes to food. These meatballs were AMAZING. The sandwiches were so-so, but I think that's mostly because I forgot to toast or somehow heat up the sandwich rolls before assembling. Oops. They were so filling, too. Neither of us finished the sandwich.
I ended up using one chipotle pepper and a few spoonfuls of the canning sauce because I didn't want it to end up too spicy. I figured better to start with less and then go from there if I needed to, but I think that was just the right amount for our taste. Smokey with a little heat but not overpowering.
I loved the hint of bacon and mint in the meatballs. The flavor was fantastic and captivating. The smokey sauce really added to them as well. This is something I will definitely make again, although since we're giving up ground beef for awhile I may try them with ground turkey, or I'm hoping to get a food grinder attachment for my Kitchenaid mixer for my birthday, so if I do I could grind up a lean cut of pork and make them that way. As it was I used 93% lean ground beef, and they turned out fine. Oh, my food processor was not going to be big enough to add the meat with the bacon/bread crumbs/egg/garlic mixture, so I added the mint in with all that and then combined that mixture with the ground beef in a bowl and mixed it by hand.
Just thinking about them makes me want to go over to the fridge and have one cold!
(I took pictures, but they're on my phone, so I'll upload them later.)
So, first I'll post the recipe from his cookbook and then how I'm doing my sandwich take on it after the recipe.
Rick Bayless' Chipotle Meatballs
Copyright 2005, Rick Bayless' Mexican Everyday
3 slices bacon, cut into 1-inch pieces
3 garlic cloves, peeled (divided use)
2 large eggs
1/2 cup dried bread crumbs (3/4 cup if they're the coarse-textured panko)
Salt
1-1/4 pounds ground pork
1/2 cup (loosely packed) coarsely chopped mint leaves, plus extra leaves for garnish if you wish
1 28-ounce can diced tomatoes in juice (preferably fire-roasted)
1-2 canned chipotle chiles en adobo, stemmed and seeded
1-2 Tbsp chipotle canning sauce
1 tsp dried oregano, preferably Mexican
About 1-1/2 cups beef or chicken broth
Turn on the oven to 450 degrees. In a food processor, combine the bacon and 1 garlic clove. Process until finely chopped. Add the eggs, bread crumbs, and 1 teaspoon salt. Pulse several times to combine thoroughly, then add the pork and mint. Pulse the machine a ew more times until everything is well combined--but not at all processed into a paste. Remove the blade.
With wet hands, form the meat into 16 plum-size spheres, spacing them out in a 13x9 inch baking dish. Bake until lightly browned (they'll be browned more underneath than on top), about 15 minutes.
While the meatballs are baking, combine the tomatoes, with their juice, chipotles, canning sauce, oregano, the remaining 2 garlic cloves (cut in half) and 1/2 teaspoon salt in a blender or food processor. Process to a smooth puree.
When the meatballs are ready, spoon off any rendered fat from the baking dish, then pour on the tomato mixture, covering the meatballs evenly. Bake until the sauce looks like tomato paste, 15 to 20 minutes.
Microwave the broth for about a minute to heat it (or heat in a small saucepan). Divide the meatballs among four dinner plates, leaving most of the sauce behind. Stir enough broth into the sauce to give it an easily spoonable consistency. Taste and season with additional salt if you think the sauce needs it. Spoon the sauce over the meatballs, decorate with extra mint leaves, if you wish, and serve.
*****
My mouth started to water a bit there while I was typing out the recipe. Rick has yet to do me wrong, so I cannot wait to try this! The only substitution I'm making is to use ground beef instead of pork. I have 1.5 pounds of ground beef left in my freezer, and I gave the husband a couple options that I could do with it, and this is what he chose. We're trying to get back to no (or very little) red meat, so we won't be having anything like this for awhile.
So, now my sandwich take on them. These sounded really similar to meatballs in marinara my friend Laura makes and then uses for meatball sandwiches. So I thought why couldn't I do a Mexican version, using this sauce instead of marinara, and queso fresco instead of mozzarella. So that's what we're having for dinner tonight! I was telling my friend Jen about these last night when I talked to her, and she thought they sounded awesome, too. She suggested putting avocado or guacamole on them, too. I do have an avocado that needs to be used up, so I might try that and see how it is.
I can't wait to report back to you on how these turn out!!
*****
Oh man...oh MAN!!! I've said it before, and I'll say it again. Rick Bayless is a god among men, or at least when it comes to food. These meatballs were AMAZING. The sandwiches were so-so, but I think that's mostly because I forgot to toast or somehow heat up the sandwich rolls before assembling. Oops. They were so filling, too. Neither of us finished the sandwich.
I ended up using one chipotle pepper and a few spoonfuls of the canning sauce because I didn't want it to end up too spicy. I figured better to start with less and then go from there if I needed to, but I think that was just the right amount for our taste. Smokey with a little heat but not overpowering.
I loved the hint of bacon and mint in the meatballs. The flavor was fantastic and captivating. The smokey sauce really added to them as well. This is something I will definitely make again, although since we're giving up ground beef for awhile I may try them with ground turkey, or I'm hoping to get a food grinder attachment for my Kitchenaid mixer for my birthday, so if I do I could grind up a lean cut of pork and make them that way. As it was I used 93% lean ground beef, and they turned out fine. Oh, my food processor was not going to be big enough to add the meat with the bacon/bread crumbs/egg/garlic mixture, so I added the mint in with all that and then combined that mixture with the ground beef in a bowl and mixed it by hand.
Just thinking about them makes me want to go over to the fridge and have one cold!
(I took pictures, but they're on my phone, so I'll upload them later.)
Labels:
bacon,
bread crumbs,
chipotle,
eggs,
garlic,
ground beef,
meatballs,
mint,
Rick Bayless,
tomatoes
Tuesday, January 26, 2010
Pappardelle with Quick Bolognese Meat Sauce
I think I have one dinner to post from last week still, but I figured I might as well be current and then go back to that when I have a chance. It was pretty tasty so I definitely want to share it.
I had to do a bit of dinner rearranging this week. The husband and I recently joined a gym, and he suggested we meet there tonight after he left work so I could show him around a bit and we could work out together. I already had a crockpot meal planned for tomorrow night and wasn't sure if I could come up with another with ingredients I had on hand. I remembered a package of Trader Joe's pappardelle pasta in the pantry with a recipe on the back of it that sounded easy, and I had everything on hand. So I decided we'd have that tonight, I'd make it up in the afternoon, then throw it in the crockpot on the warm setting so dinner would be waiting for us when we got home. I'll tell you below whether or not it worked!!
Trader Joe's Egg Pappardelle with Quick Bolognese Meat Sauce
8 oz. TJ's Egg Pappardelle pasta
2 Tbsp olive oil
1/2 lb. ground beef
1/2 cup onion, chopped
2 Tbsp garlic, minced
1/2 cup red wine
2 cups marinara sauce
Salt and pepper to taste
Heat olive oil in a large saute pan over moderate heat. Add beef and saute until lightly browned and crumbly. Add onions and garlic and saute until onions are transparent. Drain fat and return mixture to pan. Add red wine and marinara. Stir and simmer 10-15 minutes to blend flavors. Season to taste with salt and pepper. Meanwhile, cook pasta according to cooking instructions. Drain well, add pasta to sauce. Heat pasta and sauce together on low heat 1-2 minutes. Sprinkle with parmesan.
*****
I kind of broke the Pantry Challenge because I had to go buy wine for this, but I figured that was easier than coming up with a different dinner. Plus we'd drink it anyway, so it's not like I was buying it just to use for this recipe!! I had a jar of TJ's marinara sauce in the pantry which worked out great.
I was kind of hesitant of how this would turn out. When I tasted it before putting it in my slow cooker I wasn't sure about it. The pasta tasted really egg-y to me. It ended up coming out okay. It sat in there on the warm setting for 2.5 hours. There could have been more sauce, but I don't think it was overly saucy to begin with, so it may not have been just from the crockpot drying it out. This worked pretty well for dinner to be ready when we got home, then all we did was heat up some bread, throw some salad mix in bowls, and heat up some frozen broccoli.
I don't think I'd go out of my way to make this again, but it's something I'd make again if I had everything on hand and needed a quick dinner fix, kind of like I needed tonight.
No picture, I was starving by the time we got home and couldn't be bothered with finding a camera. Oh, and can I just say I'm so fortunate that I get to stay home?! I don't know how I'd get dinner on the table at a decent time if the husband and I were both getting home late like we did tonight!
I had to do a bit of dinner rearranging this week. The husband and I recently joined a gym, and he suggested we meet there tonight after he left work so I could show him around a bit and we could work out together. I already had a crockpot meal planned for tomorrow night and wasn't sure if I could come up with another with ingredients I had on hand. I remembered a package of Trader Joe's pappardelle pasta in the pantry with a recipe on the back of it that sounded easy, and I had everything on hand. So I decided we'd have that tonight, I'd make it up in the afternoon, then throw it in the crockpot on the warm setting so dinner would be waiting for us when we got home. I'll tell you below whether or not it worked!!
Trader Joe's Egg Pappardelle with Quick Bolognese Meat Sauce
8 oz. TJ's Egg Pappardelle pasta
2 Tbsp olive oil
1/2 lb. ground beef
1/2 cup onion, chopped
2 Tbsp garlic, minced
1/2 cup red wine
2 cups marinara sauce
Salt and pepper to taste
Heat olive oil in a large saute pan over moderate heat. Add beef and saute until lightly browned and crumbly. Add onions and garlic and saute until onions are transparent. Drain fat and return mixture to pan. Add red wine and marinara. Stir and simmer 10-15 minutes to blend flavors. Season to taste with salt and pepper. Meanwhile, cook pasta according to cooking instructions. Drain well, add pasta to sauce. Heat pasta and sauce together on low heat 1-2 minutes. Sprinkle with parmesan.
*****
I kind of broke the Pantry Challenge because I had to go buy wine for this, but I figured that was easier than coming up with a different dinner. Plus we'd drink it anyway, so it's not like I was buying it just to use for this recipe!! I had a jar of TJ's marinara sauce in the pantry which worked out great.
I was kind of hesitant of how this would turn out. When I tasted it before putting it in my slow cooker I wasn't sure about it. The pasta tasted really egg-y to me. It ended up coming out okay. It sat in there on the warm setting for 2.5 hours. There could have been more sauce, but I don't think it was overly saucy to begin with, so it may not have been just from the crockpot drying it out. This worked pretty well for dinner to be ready when we got home, then all we did was heat up some bread, throw some salad mix in bowls, and heat up some frozen broccoli.
I don't think I'd go out of my way to make this again, but it's something I'd make again if I had everything on hand and needed a quick dinner fix, kind of like I needed tonight.
No picture, I was starving by the time we got home and couldn't be bothered with finding a camera. Oh, and can I just say I'm so fortunate that I get to stay home?! I don't know how I'd get dinner on the table at a decent time if the husband and I were both getting home late like we did tonight!
Labels:
garlic,
ground beef,
onion,
pasta,
quick,
spaghetti sauce,
wine
Thursday, January 14, 2010
Barefoot Bloggers: Indonesian Ginger Chicken
Okay, I really want to go to bed now, but I was so excited to actually be posting my Barefoot Bloggers recipe on the right day that I'm staying up to do so! I'm so dedicated, I know. Okay, not really. I just checked this week to see what the January recipes are that we're going to be making. When I saw the title of this one I thought for sure I'd have to go buy a bunch of fancy ingredients which would totally defeat the Pantry Challenge, so I was pleasantly surprised when all the ingredients are things I have on hand. I even had a whole chicken I could use! Thanks to Todd of A Cooking Dad for choosing an easy and tasty sounding recipe to kick off the new year!
Indonesian Ginger Chicken
1 cup honey
3/4 cup soy sauce
1/4 cup minced garlic (8 to 12 cloves)
1/2 cup peeled and grated fresh ginger root
2 (3 1/2 pound) chickens, quartered, with backs removed
Cook the honey, soy sauce, garlic, and ginger root in a small saucepan over low heat until the honey is melted. Arrange the chicken in 1 layer in a shallow baking pan, skin side down, and pour on the sauce. Cover the pan tightly with aluminum foil. Marinate overnight in the refrigerator.
Preheat the oven to 350 degrees F.
Place the baking pan in the oven and bake for 30 minutes. Uncover the pan, turn the chicken skin side up, and raise the temperature to 375 degrees F. Continue baking for 30 minutes or until the juices run clear when you cut between a leg and thigh and the sauce is a rich, dark brown.
*****
I forgot to get a whole chicken out to defrost, so I decided to just use chicken breasts instead. And I didn't have any fresh ginger on hand, so I just threw in a couple teaspoons of the powder stuff to make up for it. And I missed the part initially about marinating overnight. Oops. I mixed up the marinade and then just poured it over the chicken breasts and let it sit all day. Oh, and I cut all the marinade ingredients in half since I was just using four pieces of chicken instead of two whole ones.
This was FANTASTIC!!! All four of us devoured what was on our plates. The butternut squash mash I made to go with it was not so good, however, so I'm not even going to bother typing it out. None of us ate that. Sad waste of a butternut squash. Anyway, make this chicken! It's easy, it's tasty, and if you have a well-stocked kitchen, you should have everything on hand for it!
Oh, and I also made another side dish from the Make it Fast, Cook it Slow cookbook--rice in the crockpot!! Instead of posting the recipe, here's the link to it on her blog. I don't remember if I've shared before that I'm not good at making rice. Brown rice and basmati I can make okay, but plain ol' white rice always comes out gummy. I was intrigued by making it this way, and honestly...it's the best rice I've ever had!!! Mine took about two hours to cook, maybe a few minutes longer. Then I just turned off the crockpot and kept tasting it every now and then to make sure it wasn't getting gummy--and it didn't!! And it sat for at least 30 minutes. This is definitely my new favorite way to make rice.

Check out my cool retro crockpot! It was my grandma's...I love it!

Indonesian Ginger Chicken
1 cup honey
3/4 cup soy sauce
1/4 cup minced garlic (8 to 12 cloves)
1/2 cup peeled and grated fresh ginger root
2 (3 1/2 pound) chickens, quartered, with backs removed
Cook the honey, soy sauce, garlic, and ginger root in a small saucepan over low heat until the honey is melted. Arrange the chicken in 1 layer in a shallow baking pan, skin side down, and pour on the sauce. Cover the pan tightly with aluminum foil. Marinate overnight in the refrigerator.
Preheat the oven to 350 degrees F.
Place the baking pan in the oven and bake for 30 minutes. Uncover the pan, turn the chicken skin side up, and raise the temperature to 375 degrees F. Continue baking for 30 minutes or until the juices run clear when you cut between a leg and thigh and the sauce is a rich, dark brown.
*****
I forgot to get a whole chicken out to defrost, so I decided to just use chicken breasts instead. And I didn't have any fresh ginger on hand, so I just threw in a couple teaspoons of the powder stuff to make up for it. And I missed the part initially about marinating overnight. Oops. I mixed up the marinade and then just poured it over the chicken breasts and let it sit all day. Oh, and I cut all the marinade ingredients in half since I was just using four pieces of chicken instead of two whole ones.
This was FANTASTIC!!! All four of us devoured what was on our plates. The butternut squash mash I made to go with it was not so good, however, so I'm not even going to bother typing it out. None of us ate that. Sad waste of a butternut squash. Anyway, make this chicken! It's easy, it's tasty, and if you have a well-stocked kitchen, you should have everything on hand for it!
Oh, and I also made another side dish from the Make it Fast, Cook it Slow cookbook--rice in the crockpot!! Instead of posting the recipe, here's the link to it on her blog. I don't remember if I've shared before that I'm not good at making rice. Brown rice and basmati I can make okay, but plain ol' white rice always comes out gummy. I was intrigued by making it this way, and honestly...it's the best rice I've ever had!!! Mine took about two hours to cook, maybe a few minutes longer. Then I just turned off the crockpot and kept tasting it every now and then to make sure it wasn't getting gummy--and it didn't!! And it sat for at least 30 minutes. This is definitely my new favorite way to make rice.

Check out my cool retro crockpot! It was my grandma's...I love it!

Labels:
Barefoot Bloggers,
chicken,
garlic,
ginger,
honey,
Ina Garten,
soy sauce
Tuesday, November 17, 2009
Crockpot Deviled Chicken
Okay, if I'm going to follow this new format I decided on--to post after the fact instead of before--I need to either post right away the next day or at the very least keep my meal plan from the prior week so I can remember what exactly it was that we had. I checked my "Cooking Blog" photo folder, and this was the only new thing in there. I just uploaded pics, so I know there aren't any on the camera that I just forgot to upload. Well, that's not entirely true because I did take pics of last night's dinner that need to get uploaded. Anyway, I guess we had all repeat dinners last week and that's why I didn't take any pictures. I swear before I had kids I had a fantastic memory, but if you have kids you're familiar with both "pregnancy brain" and "mommy brain." I don't know how that woman with 19 kids does it...I'm pretty sure if I had that many kids I'd be walking around with my mouth hanging open and a dazed look on my face.
I don't even remember how I decided to make this. I think I had slated chicken of some sort but wasn't really excited about the recipe I had chosen, so I went to RecipeZaar.com to find something different. Or maybe I just wanted something that could go in the crockpot. Regardless, I searched for crockpot recipes that had chicken. I had everything on hand for this one, and it sounded pretty good...and I had enough time for it to cook!
Crockpot Deviled Chicken
RecipeZaar Recipe #41882
3 lbs skinless chicken breasts or skinless chicken legs or skinless chicken thighs
2-4 tablespoons butter, melted
1/2 cup honey
1/4 cup prepared mustard
3 garlic cloves, minced
1 teaspoon salt
1-2 teaspoon curry powder
Place chicken in slow cooker. Combine all remaining ingredients and pour over chicken. Cook for 4 to 6 hours on high or 6 to 8 hours on low.
*****
I didn't change it around a whole lot. I used chicken drumsticks because I had some in the freezer that needed to be used soon. I used dijon mustard instead of regular, and I went kind of easy on the curry powder because the husband doesn't like curry. So hopefully he doesn't read this and find out there was curry in it. I also went easy on the butter to make it slightly healthier.
This was really tasty, and it was so easy to throw together--especially since all the sauce ingredients are things I always have on hand. A lot of the comments on the recipe said they thickened the sauce and poured it over the chicken, but I didn't bother. They also served it over rice or noodles, but no one in my family is really a rice fan, so I skipped it. Plus I think I was out of rice anyway. Hmmmm...now I remember why I ended up making this. I was going to make a Rick Bayless dish with chicken, rice, and beans, but I didn't have enough rice. See? If I can get some kind of trigger I'm much better at remembering! We had some leftover roasted butternut squash and a frozen peas/carrots blend as side dishes.
This is definitely something I'd make again. We all really liked it, although I think I would maybe cut back on the honey. I didn't measure it so it's entirely possible my estimate of half a cup was actually more than that. It was just a little bit on the sweet side, so I think I'd cut back the honey (or measure it) and be a bit more generous with the curry powder.

I don't even remember how I decided to make this. I think I had slated chicken of some sort but wasn't really excited about the recipe I had chosen, so I went to RecipeZaar.com to find something different. Or maybe I just wanted something that could go in the crockpot. Regardless, I searched for crockpot recipes that had chicken. I had everything on hand for this one, and it sounded pretty good...and I had enough time for it to cook!
Crockpot Deviled Chicken
RecipeZaar Recipe #41882
3 lbs skinless chicken breasts or skinless chicken legs or skinless chicken thighs
2-4 tablespoons butter, melted
1/2 cup honey
1/4 cup prepared mustard
3 garlic cloves, minced
1 teaspoon salt
1-2 teaspoon curry powder
Place chicken in slow cooker. Combine all remaining ingredients and pour over chicken. Cook for 4 to 6 hours on high or 6 to 8 hours on low.
*****
I didn't change it around a whole lot. I used chicken drumsticks because I had some in the freezer that needed to be used soon. I used dijon mustard instead of regular, and I went kind of easy on the curry powder because the husband doesn't like curry. So hopefully he doesn't read this and find out there was curry in it. I also went easy on the butter to make it slightly healthier.
This was really tasty, and it was so easy to throw together--especially since all the sauce ingredients are things I always have on hand. A lot of the comments on the recipe said they thickened the sauce and poured it over the chicken, but I didn't bother. They also served it over rice or noodles, but no one in my family is really a rice fan, so I skipped it. Plus I think I was out of rice anyway. Hmmmm...now I remember why I ended up making this. I was going to make a Rick Bayless dish with chicken, rice, and beans, but I didn't have enough rice. See? If I can get some kind of trigger I'm much better at remembering! We had some leftover roasted butternut squash and a frozen peas/carrots blend as side dishes.
This is definitely something I'd make again. We all really liked it, although I think I would maybe cut back on the honey. I didn't measure it so it's entirely possible my estimate of half a cup was actually more than that. It was just a little bit on the sweet side, so I think I'd cut back the honey (or measure it) and be a bit more generous with the curry powder.

Wednesday, October 14, 2009
Balsamic Chicken Drumsticks
first let me say that one of the shift keys on my computer isn't working, so I'm having a hard time capitalizing some letters. i was recently looking through my freezer and saw some chicken drumsticks that I had forgotten were out there. I got really excited when I remembered this recipe. We had only had it once before, but I liked it. Plus this time I can correct the mistakes I made last time!
(By the way, this will be my last post for awhile. The husband's birthday is Friday, so tomorrow night we're getting pizza for dinner, and then he and I are heading out for a weekend SANS KIDS!!!!!! You have no idea how excited I am!! Or if you have kids, maybe you do have an idea...)
Balsamic Chicken Drumsticks
I wanted to have some kind of couscous side with it, but wasn't sure what to do. I didn't see anything on RecipeZaar.com that looked especially good, so I checked allrecipes.com and found something that sounded good. I'll just link to it:
Company Couscous
I don't have red peppers but I do have green, so I figure I'll just substitute that.
(By the way, this will be my last post for awhile. The husband's birthday is Friday, so tomorrow night we're getting pizza for dinner, and then he and I are heading out for a weekend SANS KIDS!!!!!! You have no idea how excited I am!! Or if you have kids, maybe you do have an idea...)
Balsamic Chicken Drumsticks
I wanted to have some kind of couscous side with it, but wasn't sure what to do. I didn't see anything on RecipeZaar.com that looked especially good, so I checked allrecipes.com and found something that sounded good. I'll just link to it:
Company Couscous
I don't have red peppers but I do have green, so I figure I'll just substitute that.
Monday, August 17, 2009
Grilled Caesar Salad
Sorry it's taken me so long to get back into the blog updating game. We got home from my cousin's wedding last Monday night, but I was super lazy all last week. Then the husband and I had our first overnight date night this past weekend since before the baby was born! It was fantastic!! Now today I'm trying to get back into the groove of everything. Really I could use a day to recover from the weekend, but what are you going to do.
I wasn't really sure what to do for dinner tonight because I don't think I'm going grocery shopping until after the boy goes to bed, so I needed to come up with something that I already had the ingredients for. I bought romaine hearts at Costco last week and remembered seeing recipes for grilled romaine. I thought a caesar salad would be a nice, light dinner for tonight since we're still recovering from excessive food and drink from the weekend. I found recipes on Recipezaar.com for both grilled romaine and a Caesar dressing for which I had all the ingredients. I'm excited for dinner tonight!
Grilled Caesar Salad
Recipe #3624450
1 romaine lettuce hearts, sliced in half with stem still attached
1 teaspoon olive oil
2 teaspoons lemon juice
salt and pepper
2-4 tablespoons prepared caesar salad dressing
1/4 cup crouton
anchovy (optional)
fresh shaved parmesan cheese, to taste (optional)
1/2 lb grilled chicken breast, well seasoned (optional)
Preheat grill to medium high. Drizzle oil and lemon juice over romaine and season with salt and pepper. Place on grill and cook for 1-2 minutes per side. Place cooked romaine on 2 plates and drizzle with dressing top with anchovies, cheese and or croutons. Enjoy!
Low Sodium Caesar Dressing
Recipe #98907
1/2 cup olive oil
4 cloves roasted garlic
1 tablespoon lemon juice
2 tablespoons red wine vinegar
1/2 teaspoon Worcestershire sauce
Blend all ingredients. Shake or stir before serving.
*****
I don't think I'm going to roast just four cloves of garlic, so I'll just use regular garlic. I don't have eggs or mayonnaise on hand right now, so I had to filter those out of my search results because a lot of the recipes called for those. I'm excited to try both this dressing and the grilled salad. I will grill a chicken breast or two as well to throw on top of the salad.
*****
The husband and I were both pretty skeptical of how this was going to turn out and had a frozen pizza in mind as our back-up plan. We were both really surprised--this was FANTASTIC!!! He was probably a little more worried about it than me because I don't think he'd ever heard of grilling lettuce before, but the flavor of the lettuce after it was on the grill was really tasty. And this was super fast and easy to put together; the longest part was grilling the chicken! This is definitely something I will make again. It was a great summer dinner, too, as it was really light!
I wasn't really sure what to do for dinner tonight because I don't think I'm going grocery shopping until after the boy goes to bed, so I needed to come up with something that I already had the ingredients for. I bought romaine hearts at Costco last week and remembered seeing recipes for grilled romaine. I thought a caesar salad would be a nice, light dinner for tonight since we're still recovering from excessive food and drink from the weekend. I found recipes on Recipezaar.com for both grilled romaine and a Caesar dressing for which I had all the ingredients. I'm excited for dinner tonight!
Grilled Caesar Salad
Recipe #3624450
1 romaine lettuce hearts, sliced in half with stem still attached
1 teaspoon olive oil
2 teaspoons lemon juice
salt and pepper
2-4 tablespoons prepared caesar salad dressing
1/4 cup crouton
anchovy (optional)
fresh shaved parmesan cheese, to taste (optional)
1/2 lb grilled chicken breast, well seasoned (optional)
Preheat grill to medium high. Drizzle oil and lemon juice over romaine and season with salt and pepper. Place on grill and cook for 1-2 minutes per side. Place cooked romaine on 2 plates and drizzle with dressing top with anchovies, cheese and or croutons. Enjoy!
Low Sodium Caesar Dressing
Recipe #98907
1/2 cup olive oil
4 cloves roasted garlic
1 tablespoon lemon juice
2 tablespoons red wine vinegar
1/2 teaspoon Worcestershire sauce
Blend all ingredients. Shake or stir before serving.
*****
I don't think I'm going to roast just four cloves of garlic, so I'll just use regular garlic. I don't have eggs or mayonnaise on hand right now, so I had to filter those out of my search results because a lot of the recipes called for those. I'm excited to try both this dressing and the grilled salad. I will grill a chicken breast or two as well to throw on top of the salad.
*****
The husband and I were both pretty skeptical of how this was going to turn out and had a frozen pizza in mind as our back-up plan. We were both really surprised--this was FANTASTIC!!! He was probably a little more worried about it than me because I don't think he'd ever heard of grilling lettuce before, but the flavor of the lettuce after it was on the grill was really tasty. And this was super fast and easy to put together; the longest part was grilling the chicken! This is definitely something I will make again. It was a great summer dinner, too, as it was really light!
Labels:
garlic,
grill,
lemon juice,
lettuce,
olive oil,
parmesan,
salad,
vegetarian
Wednesday, July 22, 2009
Shrimp Creole
One of the dinners I had planned for this week was a jambalaya recipe I haven't made in a long, long time. In thinking about it, I decided I'd rather make shrimp creole, which is something else I haven't made in a long, long time. I figured I could make jambalaya next week with just chicken and sausage, then this week I can use some of the shrimp I have for shrimp creole. It's really super yummy, and I can't even remember the last time we had it. I'm really excited!
Shrimp Creole
1 cup chopped onion
1/2 cup chopped green pepper
1/2 cup chopped celery
1/4 cup butter
1 28-ounce can crushed tomatoes, undrained
6 garlic cloves, minced
2 bay leaves
1 tsp salt
1/2 tsp cayenne pepper
2 tbsp all-purpose flour
3 Tbsp water
1 pound uncooked, medium shrimp, peeled and deveined
1 Tbsp worcestershire sauce
1/4 to 1/2 tsp hot pepper sauce
1/2 cup thinly sliced green onions
2 Tbsp minced fresh parsley
Hot cooked rice
In a Dutch oven, saute onion, green pepper, and celery in butter until tender. Add the tomatoes, garlic, bay leaves, salt, and cayenne. Bring to a boil. Reduce heat; simmer, uncovered, for 35 minutes, stirring occasionally. Discard the bay leaves.
In a small bowl, whisk together flour and water until smooth; add to tomato mixture. Bring to a boil, stirring constantly. Stir in shrimp, worcestershire, and hot pepper sauce. Simmer, uncovered, for 5 minutes or until shrimp turn pink. Serve over rice, garnish with parsley and green onions.
*****
This is one of the first cajun dishes I ever made, and the husband (although he was the boyfriend at the time) loved it. I think we'll just have some bread and a salad on the side. Mmmmm...I can't wait for dinner!
Shrimp Creole
1 cup chopped onion
1/2 cup chopped green pepper
1/2 cup chopped celery
1/4 cup butter
1 28-ounce can crushed tomatoes, undrained
6 garlic cloves, minced
2 bay leaves
1 tsp salt
1/2 tsp cayenne pepper
2 tbsp all-purpose flour
3 Tbsp water
1 pound uncooked, medium shrimp, peeled and deveined
1 Tbsp worcestershire sauce
1/4 to 1/2 tsp hot pepper sauce
1/2 cup thinly sliced green onions
2 Tbsp minced fresh parsley
Hot cooked rice
In a Dutch oven, saute onion, green pepper, and celery in butter until tender. Add the tomatoes, garlic, bay leaves, salt, and cayenne. Bring to a boil. Reduce heat; simmer, uncovered, for 35 minutes, stirring occasionally. Discard the bay leaves.
In a small bowl, whisk together flour and water until smooth; add to tomato mixture. Bring to a boil, stirring constantly. Stir in shrimp, worcestershire, and hot pepper sauce. Simmer, uncovered, for 5 minutes or until shrimp turn pink. Serve over rice, garnish with parsley and green onions.
*****
This is one of the first cajun dishes I ever made, and the husband (although he was the boyfriend at the time) loved it. I think we'll just have some bread and a salad on the side. Mmmmm...I can't wait for dinner!
Friday, July 17, 2009
Pioneer Woman's Pasta with Roasted Red Pepper Sauce: Jen B's Variation
The boy and I had a big day today, and I'm really not feeling very verbose, so I'll just get right to it. My friend Jen B. made this pasta dish when we went to San Diego back in May, and it was so yummy. I've been excited to make it and finally slated it for this week. Jen made some variations on the original recipe from the Pioneer Woman Cooking website, and I'm following her changes to make it a little more healthy.
PW's Pasta with Roasted Red Pepper Sauce (Jen's Version)
2 jars of roasted red peppers, drained and blotted dry on a towel
4 tablespoons pine nuts, divided
1 medium onion, finely diced
3 cloves garlic, minced
1/2 cup fat free half and half
1/3 cup of evaporated non-fat powdered milk
Fresh basil, chopped
Fresh Parmesan, shaved or grated
1 package of bow tie pasta
Directions:
Drain liquid from jar of peppers. Remove peppers to a clean kitchen towel and blot dry. Place dry peppers in food processor. Lightly toast all the pine nuts in a dry skillet. Once nuts are toasted, place 2 Tablespoons of the toasted nuts in the food processor with the red peppers. Puree peppers with pine nuts. Set aside.
Cook pasta according to package directions.
In a skillet or pot over medium heat, drizzle in olive oil. Add diced onions and garlic and cook until soft. Pour in pepper puree and stir together. Add salt to taste. Let simmer on low for a few minutes, so mixture is thick.
In a separate small bowl, whisk together fat free half and half with evaporated non-fat milk, making sure there are no little lumps. Pour the half and half mixture into the red pepper mixture and stir to combine. Taste and add more salt, if necessary. Add cooked pasta, then stir together. Place pasta into a bowl, top with chopped basil and plenty of shaved Parmesan. Top with remaining 2 Tablespoons of toasted pine nuts sprinkled on top. Enjoy!!!
*****
The original recipe called for a half cup of heavy cream, but according to Jen's blog entry of this recipe, the half and half and powdered milk combination is a much healthier substitution. I'm pretty sure that's how she made it in San Diego, and that's how I'm doing it tonight. I'm super excited for dinner tonight, and I'd better get started on it soon. I couldn't find whole wheat farfalle, so I think it's fusilli I bought instead.
*****
This was good, but not as good as when Jen made it. Not sure if it was the different pasta or that I forgot to top with pine nuts or what, but her version was a lot better. I'll definitely make this again because I know how good it can be, I was just slightly disappointed with my version.
PW's Pasta with Roasted Red Pepper Sauce (Jen's Version)
2 jars of roasted red peppers, drained and blotted dry on a towel
4 tablespoons pine nuts, divided
1 medium onion, finely diced
3 cloves garlic, minced
1/2 cup fat free half and half
1/3 cup of evaporated non-fat powdered milk
Fresh basil, chopped
Fresh Parmesan, shaved or grated
1 package of bow tie pasta
Directions:
Drain liquid from jar of peppers. Remove peppers to a clean kitchen towel and blot dry. Place dry peppers in food processor. Lightly toast all the pine nuts in a dry skillet. Once nuts are toasted, place 2 Tablespoons of the toasted nuts in the food processor with the red peppers. Puree peppers with pine nuts. Set aside.
Cook pasta according to package directions.
In a skillet or pot over medium heat, drizzle in olive oil. Add diced onions and garlic and cook until soft. Pour in pepper puree and stir together. Add salt to taste. Let simmer on low for a few minutes, so mixture is thick.
In a separate small bowl, whisk together fat free half and half with evaporated non-fat milk, making sure there are no little lumps. Pour the half and half mixture into the red pepper mixture and stir to combine. Taste and add more salt, if necessary. Add cooked pasta, then stir together. Place pasta into a bowl, top with chopped basil and plenty of shaved Parmesan. Top with remaining 2 Tablespoons of toasted pine nuts sprinkled on top. Enjoy!!!
*****
The original recipe called for a half cup of heavy cream, but according to Jen's blog entry of this recipe, the half and half and powdered milk combination is a much healthier substitution. I'm pretty sure that's how she made it in San Diego, and that's how I'm doing it tonight. I'm super excited for dinner tonight, and I'd better get started on it soon. I couldn't find whole wheat farfalle, so I think it's fusilli I bought instead.
*****
This was good, but not as good as when Jen made it. Not sure if it was the different pasta or that I forgot to top with pine nuts or what, but her version was a lot better. I'll definitely make this again because I know how good it can be, I was just slightly disappointed with my version.
Labels:
cream,
garlic,
onion,
pasta,
pine nuts,
roasted red peppers,
vegetarian
Subscribe to:
Posts (Atom)