Showing posts with label Mexican. Show all posts

Thursday, January 12, 2012

Mexican Lasagna


Happy New Year, everyone!! Are you excited about what 2012 has in store for you? I'm hoping it has more blogging in it for me. I've kind of decided to just go forward with my blog here and potentially not go back and fill in the missing posts I had wanted to do. I don't know...I can't decide. I figure I'll start current and then when I have some time I'll add in old ones here and there. Otherwise I just get too overwhelmed and don't do anything.

My childhood best friend posted on Facebook recently about calories for a Mexican lasagna she makes. I asked her for the recipe because it sounded tasty just from the title. She sent it to me, and I had most everything on hand already, so I put it into my meal plan for the week. Worked out great because I was low on grocery money this week. I was excited to try it--and that it was low cal! 2011 was the year I got fit, so now I'm really focusing on staying that way, so tasty and low-cal recipes that come highly recommended are fantastic!

Mexican Lasagna
Source: Adapted from my friend Sarah (who has a really funny blog about Jason Segel)

1.25 pounds ground turkey
1/2 onion, chopped
Salt
Pepper
Taco seasoning
28 oz can enchilada sauce
1 medium zucchini, shredded
1 red bell pepper, diced
1 package frozen spinach, thawed and drained
1 can refried beans
4 whole wheat tortillas
2 cups shredded Mexican blend cheese

Preheat oven to 400 degrees.

Brown ground turkey and onion in skillet with salt, pepper, and taco seasoning (no more than one packet...use however much you like to taste...or throw in random taco seasoning spices like chili powder, cumin, garlic powder, oregano, and paprika if you don't have actual taco seasoning). Pour enchilada sauce into skillet and add in vegetables (you can use others, too, whatever floats your boat or what you have on hand). Simmer.

In separate pan, heat can of refried beans.

Coat a 9x13 dish with cooking spray. Spread half of the turkey and vegetable mixture in the bottom of the pan. Top with half of the refried beans, spreading to cover as best you can. Top with two whole wheat tortillas, then half of cheese. Repeat layers.

Bake at 400 for 15 minutes. Cut into eight servings.

*****

I didn't change this a whole lot from how Sarah sent it to me, just added in more veggies and used flour tortillas instead of corn. I had intended on using corn originally, but I ran out of time to make them like I'd planned and didn't have any on hand, so whole wheat flour tortillas is what I ended up using. It worked out fine...I probably could have used a couple more so the tortilla layers were thicker, but no one complained.

This was super easy to put together and SO GOOD. Well, the husband and I both thought so. My kids weren't really fans. Boy #2 ate his up once I mixed some Greek yogurt (in lieu of sour cream, which we didn't have on hand) in it to cut the spice a bit. Boy #1 picked at his even with the yogurt mixed in, but he did end up eating a decent amount of his serving. I will definitely make it again.

Oh, and I calculated it to only be 310 calories per serving! Not bad at all--and it was so filling!


Tuesday, August 9, 2011

Grilled Beef Fajitas

I recently picked up quite a bit of flank steak on sale, and I was kind of tired of marinating it in something and throwing it on the grill. Okay, not really, but I wanted to do something different with it. I once again pulled out my trusty Cook's Illustrated 2009 Summer Grilling magazine for an idea. Grilled Beef Fajitas sounded pretty darn tasty and worthy of a try.

Grilled Beef Fajitas
Source: Cook's Illustrated Summer Grilling 2009 magazine

1 large flank steak (about 2-1/2 pounds)
1/4 cup juice from 2-3 limes
Table salt and ground black pepper
1 very large onion (about 14 ounces), peeled and cut into 1/2-inch-thick rounds (do not separate into rings)
2 large red or green bell peppers, seeded, ribbed, and cut into large strips
16 flour tortillas

Turn all burners to high on gas grill and heat with lid down until very hot, about 15 minutes. Use grill brush to scrape cooking grate clean.

Generously sprinkle both sides of steak with lime juice and salt and pepper. Grill steak with lid down until well seared and dark brown on one side, 5-7 minutes. Using tongs, flip steak; continue grilling until interior of meat is slightly less done than you want it to be when you eat it, 2 to 5 minutes more for rare or medium-rare (depending on heat of fire and thickness of steak).

Transfer meat to cutting board; cover loosely with foil and let rest for 10 minutes.

While meat rests, lower grill burners to medium heat. Grill onions and peppers, turning occasionally, until onions are lightly charred, about 6 minutes, and peppers are streaked with dark grill marks, about 10 minutes. Remove vegetables from grill and separate onion rounds into rings and cut peppers into long, thin strips; set aside. Arrange tortillas around edge of grill; heat until just warmed, about 20 seconds per side. Take care not to dry out tortillas or they will become brittle; wrap tortillas in a towel to keep warm and then place in basket.

Slice steak very thin on the bias against grain; adjust seasonings with salt and pepper. Arrange sliced meat and vegetables on a large platter; serve immediately with tortillas, guacamole, and salsa.

Serves 6 to 8.

*****

I really love fajitas. I think maybe it stems from being fascinated with the sizzling fajita plates that would go by in Mexican restaurants when I was little. Or I just liked Mexican food. Or grilled Mexican food. Anyway, I didn't really change this up a lot. I had never grilled all portions of fajitas before. A lot of times I'll grill the meat or protein for them but do the peppers and onions in a skillet on the stove. Well...NO MORE! The grilled vegetables were amazing. They added so much flavor to the finished fajita with the hint of smokiness the grill gave them. Oh man...TASTY! This is definitely my go-to way to prepare fajitas going forward!


Sunday, July 17, 2011

Grilled Chicken Tostadas

In case you haven't noticed, I get bored making the same things all the time. We're not a "Thursday night is pork chop night" kind of family...or at least I'm not that kind of cook. I've mentioned I'm trying to cook the majority of our dinners either using the grill outside or the crockpot so I can avoid heating up my house too much in the insanely hot Phoenix summer. I've been on the lookout for new grilling recipes, so I was excited when I saw this one in a daily recipe email I get from Cooking Light. I love finding things to cook on the grill that aren't usually cooked on a grill, and tostadas seemed to fit the bill!

Grilled Chicken Tostadas
Source: MyRecipes.com via Cooking Light

4 (6-ounce) skinless, boneless chicken breast halves
1 tablespoon fresh lime juice
1 tablespoon 40% less-sodium taco seasoning (such as Old El Paso)
1/2 teaspoon sugar
Cooking spray
6 (8-inch) flour tortillas
6 cups packaged coleslaw
1 (7-ounce) can green salsa
4 cups chopped tomato
1/4 cup sliced ripe olives, chopped
1 1/4 cups fat-free refried beans
1/2 cup (2 ounces) crumbled feta cheese
6 tablespoons reduced-fat sour cream
1/4 cup fresh cilantro leaves
1/4 cup unsalted pumpkinseed kernels, toasted (optional)

Prepare grill, or heat a grill pan over medium-high heat.
Brush chicken with juice; sprinkle with seasoning and sugar. Place chicken on grill rack or grill pan coated with cooking spray; grill 4 minutes on each side or until chicken is done. Cool slightly. Cut chicken into 1/4-inch strips; set aside. Place tortillas on grill rack or grill pan coated with cooking spray; grill 30 seconds on each side or until golden brown.
Combine coleslaw and salsa; toss to coat. Combine tomato and olives; toss gently.
Spread about 3 tablespoons beans over each tortilla; divide chicken evenly among tortillas. Top each serving with about 2/3 cup slaw mixture, 2/3 cup tomato mixture, 4 teaspoons cheese, 1 tablespoon sour cream, and 2 teaspoons cilantro. Sprinkle each serving with 2 teaspoons pumpkinseeds, if desired.

Nutritional Information
Amount per serving (6 servings total)
Calories: 361
Calories from fat: 23%
Fat: 9.2g
Saturated fat: 3.6g
Monounsaturated fat: 1.5g
Polyunsaturated fat: 1.2g
Protein: 28.7g
Carbohydrate: 43g
Fiber: 6.8g
Cholesterol: 65mg
Iron: 3.7mg
Sodium: 844mg
Calcium: 221mg

*****

For some reason, the husband and I decided we'd have these for dinner after the kids went to bed--a random, middle of the week date night. It worked out well to mix up the slaw and tomatoes/olives while the chicken was on the grill, then once the chicken was cooked through and the tortillas were crisped, all we had to do was assemble.

We both REALLY liked these. And they were so filling. I was a little skeptical about the slaw mixture, but it worked great and was super tasty. I don't know if my kids would like these or not, but just because the last few times we've had tostadas, they haven't been very happy with it. These are something I would definitely make again...a great quick, healthy, light summer dinner!

Saturday, June 4, 2011

Herbed Chicken Breasts with Tomatillo Salsa and Queso Fresco

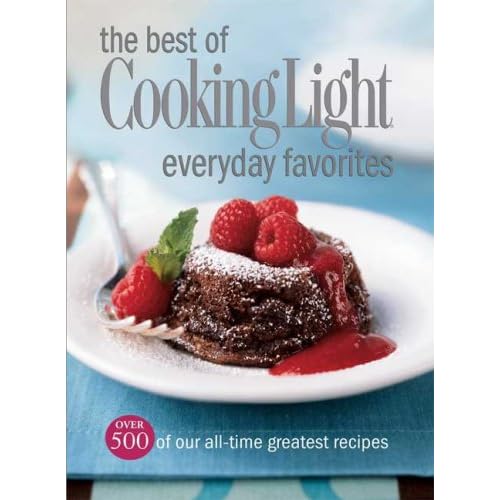
This was another from my new favorite cookbook, The Best of Cooking Light Everyday Favorites. I had queso fresco left from the yummy Roast Chicken Chimichangas and thought this sounded super tasty. It could also easily be made low carb by skipping the breading portion and just grilling the chicken instead.

Herbed Chicken Breasts with Tomatillo Salsa and Queso Fresco
Source: The Best of Cooking Light Everyday Favorites

Salsa:
2 quarts water
1/2 pound tomatillos (about 10 small), husks and stems removed
1 garlic clove
1/2 to 1 serrano chile
1/2 cup chopped fresh cilantro
1/4 cup coarsely chopped onion
1 teaspoon fresh lime juice
1/4 teaspoon salt

Chicken:
3 (1-ounce) slices white bread
4 (6-ounce) skinless, boneless chicken breast halves
1/2 teaspoon salt
1/2 teaspoon ground cumin
1/4 teaspoon ground red pepper
1 large egg, lightly beaten
1 tablespoon olive oil
1/2 cup (2 ounces) crumbled queso fresco cheese
Cilantro sprigs (optional)
Lime wedges (optional)

Preheat oven to 350°.

To prepare salsa, bring water to a boil. Add tomatillos, garlic, and chile; cook 7 minutes. Drain and rinse with cold water. Combine tomatillos, garlic, chile, chopped cilantro, onion, lime juice, and 1/4 teaspoon salt in a food processor or blender; pulse 4 to 5 times or until coarsely chopped. Set aside.

To prepare chicken, place bread in a food processor, and pulse 10 times or until coarse crumbs measure 1 1/2 cups. Arrange crumbs on a baking sheet; bake at 350° for 3 minutes or until lightly browned. Cool completely.

Place each chicken breast half between 2 sheets of heavy-duty plastic wrap; pound to 1/2-inch thickness using a meat mallet or rolling pin. Combine 1/2 teaspoon salt, cumin, and red pepper; sprinkle evenly over chicken.

Place breadcrumbs in a shallow dish. Place egg in another shallow dish. Dip chicken in egg; dredge in breadcrumbs.

Heat oil in a large nonstick skillet over medium-high heat. Add chicken; cook 4 minutes on each side or until done. Top chicken with salsa, and sprinkle with queso fresco cheese. Garnish with cilantro sprigs and lime wedges, if desired.

Nutritional Information
Amount per serving
Calories: 364
Calories from fat: 26%
Fat: 10.7g
Saturated fat: 3.2g
Monounsaturated fat: 4.5g
Polyunsaturated fat: 1.6g
Protein: 47.1g
Carbohydrate: 17.7g
Fiber: 2g
Cholesterol: 162mg
Iron: 3mg
Sodium: 770mg
Calcium: 169mg

*****

I used whole wheat bread for my breadcrumbs because that's what we had. The salsa was super tasty and smelled so good. I had looked up the recipe on the Cooking Light website and saw some people complained that they didn't like that the queso fresco didn't melt onto the chicken, but I really liked that about it. This was super tasty and pretty easy. The salsa could easily be made ahead of time, too. I heated up a can of black beans as our side and sprinkled some queso fresco on top of them when I plated. Mmmmm...tasty!!


Saturday, May 21, 2011

Roast Chicken Chimichangas

I've rediscovered a fantastic Cooking Light cookbook I've owned for quite awhile...The Best of Cooking Light Everyday Favorites. Everything I've tried from it has been awesome.


I flipped through it back for Cinco de Mayo to find some kind of Mexican entrée we could have. This looked really easy and didn't require a lot of ingredients which are two automatic pluses in my book!

Roast Chicken Chimichangas
Source: The Best of Cooking Light Everyday Favorites

2 1/2 cups shredded roasted skinless, boneless chicken breasts
1 cup (4 ounces) crumbled queso fresco cheese
1/4 cup chopped green onions
1 teaspoon dried oregano
1/4 teaspoon ground cumin
1 garlic clove, minced
1 (4.5-ounce) can chopped green chiles, drained
1 (16-ounce) can fat-free refried beans
6 (8-inch) flour tortillas
Cooking spray
1/2 cup bottled green salsa

Preheat oven to 500°.
Combine first 7 ingredients in a large bowl; toss well.
Spread 1/4 cup beans down center of each tortilla. Top each tortilla with 2/3 cup chicken mixture; roll up. Place rolls, seam sides down, on a large baking sheet coated with cooking spray. Coat tops of chimichangas with cooking spray. Bake at 500° for 7 minutes. Serve with salsa.

Calories: 380
Calories from fat: 23%
Fat: 9.7g
Saturated fat: 3.1g
Monounsaturated fat: 4.1g
Polyunsaturated fat: 1.6g
Protein: 28.8g
Carbohydrate: 42.5g
Fiber: 6.5g
Cholesterol: 55mg
Iron: 3.8mg
Sodium: 728mg
Calcium: 157mg

*****

Instead of using some roasted chicken I threw a couple chicken breasts on the grill while my family was swimming then just shredded the meat once they were cooked (the chicken, not my family). These were so easy to make. Throw everything in a bowl, spread some beans on a tortilla, spoon some chicken mixture down the middle, fold, and bake. I was kind of surprised that the serving size was just one, but they were really filling.

We all really liked these. REALLY liked them. The husband actually asked if we could have weekly chimichanga night. I loved how easy these came together and that we all loved them. This will definitely be in regular rotation in our house.

Tuesday, May 17, 2011

Mexican Pizza

I'm so far behind on my blog I figure it's easiest to just start with what's current and go back as I have time. Otherwise I'm going to end up overwhelmed and nothing will ever get done. I looked through my pictures today and realized I have been making a lot of new stuff and have a lot of catching up to do. There are nine things on my list that I want to do posts on. Sheesh!

I had a really yummy sounding dinner planned for one night this week, but then it turned out the meat I needed for it wasn't as much on sale as I thought it would be when I went to the store, so I had to come up with a new plan. I was catching up on blogs I follow and went to Meal Planning 101 for some ideas. One of the first posts on there was ideas for ground beef. I recently purchased 10 pounds of ground beef, so I was open to ideas. I saw this taco pizza recipe and had everything on hand for it, so it was a go!

Mexican Pizza
Source: Meal Planning 101 blog

1 lb lean ground beef
1 small onion, diced
1 clove garlic, minced
2 tbsp taco seasoning (homemade or store-bought)
Splash of water

Your favorite pizza crust
1 cup salsa
1 cup sour cream
Grated cheese (cheddar, mozza or Monteray Jack would all work fine)
1-2 plum tomatoes, diced
1 cup lettuce, finely shredded or 2 tbsp fresh basil, finely shredded

Preheat oven to 425 degrees.

In a skillet over medium high heat, brown the beef with the onions and garlic. Add the cumin, chili powder, oregano, salsa spice, salt and pepper (or sub out all these spices for your favorite taco seasoning). Mix and cook for about 30 seconds then add a splash or two of water to let the spices create more of a sauce for the beef. Turn to low and let simmer a couple minutes until the water has evaporated and remove from heat.

Put your pizza crust on a baking sheet or pizza stone. Mix together the salsa and sour cream and spread about 1/3 - 1/2 cup over your pizza crust. Top with the taco seasoned beef and shredded cheese. I bake for 10 minutes at 425 degrees and then broil for 1-3 minutes to get the cheese on top a nice golden brown. You should note that I use the par-baked shells from the bakery, so if you use fresh dough adjust your cooking time and temperature accordingly.

Give the pizza just a moment or two to cool ever so slightly and then top with diced tomatoes and lettuce or basil. Serve with the rest of the salsa sour cream as a dipping sauce.

*****

I didn't have any taco seasoning on hand, so I just threw in some chili powder, cumin, oregano, salt, and pepper. It was definitely a tad under-seasoned, but I didn't want to over do it. I also could have spread more of the sauce on my crust. Overall, though, we really liked this new take on pizza. The kids didn't have any toppings on theirs, but the husband and I both did and really liked it. I'd definitely make this again!!


Sunday, October 17, 2010

Quick Chile Relleno Casserole

I kind of have a thing for chile rellenos. My mom LOVES them and would always order them at Mexican restaurants when I was growing up. I never really understood them and thought they sounded gross. Then I tried one and was hooked. Since they're ridiculously unhealthy (filled with cheese, battered, and fried), and I assume not super easy to make at home, I generally don't eat them very often anymore. I was at Walmart on Friday picking up a few things for the husband's birthday yesterday and saw they had Anaheim chiles for $0.10 per pound. I had originally slated us to have steak for our Friday date night dinner, but I hadn't bought any steak yet. I saw the chiles and figured I'd scrap the steak plan and do some kind of chile relleno casserole instead.

At one point several years ago I made a chile relleno casserole in the crockpot, but I had no idea where that recipe was, so I turned to Google. Because isn't that what you do when you need to find something? One of the results that came up was from Food.com, and since I've generally had good luck with recipes from there, I figured it was worth a shot. The first recipe I came across sounded good and had good reviews, but it took almost an hour to bake. Conveniently for me, at the bottom of that page was a link to another recipe for Quick Chile Relleno Casserole. That one sounded much better because it only needed 30 minutes in the oven. It called for canned green chiles, so I modified it since I had fresh chiles I was using. The recipe below is my amended version.

Quick Chile Relleno Casserole
Adapted from Quick Chile Relleno Casserole on Food.com

4 Anaheim chiles
1/2 lb monterey jack cheese, sliced
4 eggs
1/3 cup milk
1/2 cup all-purpose flour
1/2 teaspoon baking powder
1 cup shredded cheddar cheese

Roast chiles under the broiler or over gas flame until skin is charred. Place chiles in a bowl, cover with plastic wrap and let stand at least 10 minutes. Remove skins from chiles while trying to keep chiles intact. Cut a slit in each chile, remove seeds, and stuff with sliced cheese.

Coat an 11x7 baking dish with nonstick spray. Place chiles in prepared dish.

Beat eggs with whisk or electric mixer until thick and foamy. Add milk, flour, and baking powder and beat until smooth. Pour mixture over chiles. Top with cheddar cheese.

Bake, uncovered, in a 375F oven for about 30 minutes or until casserole is puffed and appears set when gently shaken.

*****

The only thing I would change about this would be to use more chiles next time. The husband and I ate the entire dish of this. There was enough of the batter in the dish to accomodate a few more chiles, but since I wasn't sure what I was going to do with them when I bought them, I didn't know how many to get. If I was making this for the whole family I'd definitely up the number of chiles. I used Egg Beaters in my batter as I was saving the eggs we had on hand for a birthday breakfast for the husband, so Egg Beaters were my only choice. Plus I figured it made the recipe that much healthier.

This is something I'll definitely make again. We both loved it. The husband ate his in record time.

Roasted chile stuffed with cheese:


Stuffed chiles swimming in the batter:


Finished product! Oh man...I wish I could have somehow captured the smell of this because it was AMAZING!!

Sunday, August 22, 2010

Tofu Enchiladas

I've posted this recipe before, but it was a really long time ago. It's one of the husband's favorites, and I had most of the ingredients for it recently. I'd forgotten how much I like it, although I think it's a lot better when it's fresh as opposed to the leftovers. The husband had no problem eating the leftovers, but I just didn't care for them as much. This is a great recipe for disguising tofu because you really have no idea it's even in there. My college roommate, Joanne, made this for me one time while she lived here in Phoenix, and I immediately fell in love with it. This was also one of the first--if not the actual first--meal I made for the husband when we were first dating.

Tofu Enchiladas

1 package firm tofu
2/3 cup plain yogurt
1/2 tsp tumeric
1/4 tsp paprika
1 cup sliced mushrooms
3-4 green onions
1 cup sliced olives
1 can drained black beans
2 cups grated cheddar cheese
Mexican seasoning
12 corn tortillas
2 cans mild enchilada sauce
1 cup grated cheddar cheese

Mix together first 10 ingredients. Divide filling between tortillas, following diections for rolling on can. Top with 1 cup grated cheese and bake at 350 for 30 minutes.

*****

The only thing I did differently was to use whole wheat flour tortillas instead of corn because I had them on hand and didn't feel like making my own corn tortillas. I had some filling left over--not enough to fill another tortilla but too much to just throw away--so I spread it on the top of the enchiladas before pouring the sauce on there.

We all really liked this. The boy doesn't like mushrooms, but he picked them out. The baby ate just as much of this as I did! He's an eater for sure, but it always amazes me when he eats an adult size portion! I'll have to get this in the dinner rotation more often since we all enjoy it.

Enchilada filling:


Mmmmm...saucy, cheesey enchiladas:

Saturday, June 19, 2010

Pioneer Woman's Pico de Gallo

This will be my second time making PW's pico de gallo recipe, although apparently I didn't post it before. I really, really love pico de gallo...the chunky vegetables, the combination of fresh flavors...yum. And of course I have yet to go wrong with a PW recipe!!

Pioneer Woman's Pico de Gallo

5 whole Plum (roma) Tomatoes
1/2 whole Large (or 1 Small) Onion
3 whole Jalapeno Peppers
Cilantro
Lime Juice
Salt To Taste

Chop jalapenos, tomatoes and onions into a very small dice. (Leave seeds in your jalapenos for a hotter pico). Adjust amount of jalapenos to your preferred temperature. Next, chop up a nice-sized bunch of cilantro. Just remove and discard the long leafless stems before chopping. No need to remove the leaves from the stems completely. Place all of these ingredients together in a bowl and give it a good stir.

Squeeze the juice of half of one lime into the bowl. Add salt to taste and stir again.

*****

Yum. That's all I have to say about that.

Melted Mozzarella Casserole with Mushrooms and Smoky Chipotle Chile (Queso Fundido)

Today is FIESTA DAY at my house! Well, tonight is anyway. My brother is here visiting from Seattle, and a few weeks ago my mom said she thought we should have a fiesta while he's here. I jumped on board immediately because I'm always down for an excuse to eat Mexican food and drink margaritas. We invited my friend Jen and her family, and I think a couple of the husband's friends may swing by too. It's going to be quite the feast. My contributions are going to be this Rick Bayless queso fundido recipe, Pioneer Woman's pico de gallo, and Rick Bayless guacamole (assuming I can find the box with my Mexican Everyday cookbook).

This queso recipe came from the Rick Bayless cookbook Mexico One Plate at a Time that I was holding hostage from the library for literally months, until I had to finally return it this past week. Bummer. My brother's a vegetarian, so I wanted to find something without meat in it, and since my mom and Jen were both making main course items I thought I'd do some sides and decided on queso fundido. This recipe sounded really good...cheese, mushrooms, and chipotle peppers?! Yes please!!

(Thankfully I found the recipe on the Food Network website which means I get to copy and paste instead of typing it out...woo hoo!)

Melted Mozzarella Casserole with Mushrooms and Smoky Chipotle Chile (Queso Fundido)
Recipe from Mexico: One Plate at a Time (Scribner, 2000) by Rick Bayless

- 1 1/2 tablespoons olive oil, preferably extra-virgin
- 1 medium red onion, sliced
- 6 to 8 ounces full-flavored mushrooms, such as shiitakes, oysters or practically any wild variety, stemmed (discard woody stems or finely chop them) and sliced (you'll have about 2 generous cups)
- 2 to 3 canned chipotle chiles en adobo, seeded and thinly sliced
- Salt
- 12 corn tortillas, the fresher the better (store-bought are okay, but homemade will really shine here)
- 8 ounces mozzarella, preferably whole-milk (but not "fresh" mozzarella, which will not melt) or Mexican quesillo, shredded (you'll have about 2 cups)
- A generous 1/2 teaspoon chopped fresh thyme or generous 1 teaspoon chopped fresh epazote
- A little black pepper, preferably freshly ground

The mushroom mixture: Heat the oven to 350 degrees F. In a large skillet (preferably nonstick), heat the oil over medium-high. Add the sliced onion and cook, stirring frequently, until softening and beginning to brown, about 5 minutes. Add the mushrooms and stir nearly constantly until they have softened and any juice they release has evaporated, about 5 minutes longer. Stir in the sliced chiles, then taste and season with salt, usually about 1/4 teaspoon. Transfer the mixture to a 9- or 10-inch shallow baking dish, Mexican cazuela or pie plate.

Finishing the queso fundido: Very lightly dampen a clean kitchen towel. Check the tortillas to make sure none are stuck together. Wrap them in the towel, then in foil, sealing the edges tightly. Place in the oven and set the timer for 7 minutes. When the timer goes off, stir the shredded cheese into the warm mushroom mixture. Set in the oven alongside the tortillas and bake until the cheese is just melted, about 5 minutes longer. Sprinkle with the thyme or epazote and black pepper and serve without a moment's hesitation, accompanied by warm tortillas.

*****

I haven't decided yet if I'm going to make tortillas or not. I bought chips to serve it with but tortillas might be nice too. I don't remember if I've unpacked my tortilla press yet or not, so that will probably be the deciding factor.

I'm going to use a mixture of shiitake and cremini mushrooms for mine. They oyster mushrooms at my grocery store looked questionable. Having never used them before I wasn't entirely sure what they were supposed to look like to know if they were okay or not. So I went with shiitake, but they were pretty pricey so I figured I'd throw in some cremini to save a bit of money.

Tuesday, May 11, 2010

Spicy Zucchini Quesadillas

My internet is working currently (which means it will probably stop in the next couple minutes), so I just had to really quick post the recipe I made last night because they were AWESOME!!! So awesome in fact that I didn't even take a picture because I was too busy diving into it. The recipe comes from a cookbook put together by members of a parenting message board I belong to and has all sorts of yummy recipes. I was looking through it recently for some new vegetarian meal ideas and saw this. Since I occasionally get zucchini in my produce co-op basket I made a mental note of the recipe. Of course when I got said zucchini this past weekend, I had already packed that cookbook for our big upcoming move. Oops. But, thankfully, one of the other women on the board posted the recipe so I didn't have to open all my cookbook boxes (yes, I have multiple already and still haven't finished packing them all) and find this one.

Spicy Zucchini Quesadillas

1 large onion, chopped
1/2 cup sweet red pepper, chopped
1 teaspoon butter, softened
2 cups zucchini, shredded
2 TBSP taco seasoning
2 Tbsp butter, softened
8 flour tortillas
8 oz pepper jack cheese, shredded

In a skillet, saute onion and red pepper in 1 tsp. butter for 3 mins. Stir in zucchini and taco seasoning; saute 3 to 4 mins longer or until veggies are tender. Remove from heat. Spread remaining butter onver one side of tortillas. Place tortillas butter side down on a griddle. Sprinkle about 1/4 cup cheese and 1/4 cup zucchini mixture over half of each tortilla; fold over. Cook over low heat for 1-2 mins on each side, or until cheese is melted. Serve with salsa, sour cream, and jalapenos.

*****

The only thing I changed was using Monterey Jack cheese instead of pepper jack because I didn't think the boy would eat it that way. And instead of sauteeing the onion and red pepper in butter, I just sprayed the pan with non-stick spray to save some calories. I wasn't entirely sure if the recipe was supposed to make eight quesadillas (each tortilla fold over in half) or four (tortilla spread out and topped with a second), so I went with making four.

These were FANTASTIC!!! We all really liked them. The boy and baby originally split one, but the baby ended up having part of mine because he wanted more! The husband and I both thought a whole one was very filling, which was good because I was concerned it wouldn't be enough food and we'd end up hungry still after we ate. This is definitely getting added in to my vegetarian meal rotation--especially with the summer approaching and the abundance of zucchini it can bring!

I'll make them again soon so I can post a picture!

Tuesday, April 27, 2010

Brisket Tostadas

Tap...tap...tap...is this thing on?? I'm back! Did you miss me? Are you still there? The last couple weeks have been crazy with house stuff. I think I've mentioned we're trying to find a new house. Last week I had a minor breakdown that we're never going to find one and would forever be stuck living in our what-used-to-be-nice-but-is-now-ghetto neighborhood. The boys and I went out with our realtor one day last week (after my breakdown) and ended up finding a house that I loved. The husband came and saw it, put an offer on it, and it got accepted!! We're just waiting on the signed contract to come back from the seller then we can move forward with the inspection, appraisal, and all that fun home-buying stuff. What a relief! Of course, once that happens then I have to start cleaning out our house and packing, so I'm sure I won't be updating that often once again. Or I will because I hate packing to move and look for any excuse to procrastinate.

Now...finally I'm going to finish up the rest of my Brisketfest posts!! Well, Brisketfest leftovers anyway. But that was part of the reason to have Brisketfest so we could try a bunch of awesome leftovers using the brisket.

As you know, I heart The Pioneer Woman's cooking website. Since I had used her brisket recipe I thought it was only fair to also use her recipe for Brisket Tostadas. She does a much better job of laying it all out and taking pictures so I'm just going to link to her post:

Pioneer Woman's Brisket Tostadas

I didn't change it up a whole lot, although I bought tostada shells instead of making my own, and I only did two shells per tostada instead of three. I had some leftover Trader Joe's enchilada sauce in the fridge, so I used that instead of the El Pato.

These were so good!! I love tostadas, but I usually just have them with beans. I really liked the addition of the brisket meat. I would definitely make these again, assuming I have leftover brisket again at some point!


I'm soooo wishing I had stuff on hand to make tostadas!!

Thursday, April 1, 2010

Rick Bayless' Zucchini-Musrhoom Tacos with (or without) Chorizo

It makes me sad that this was already two weeks ago that I made this, and I'm just now posting it. This was worthy of posting as soon as I was done eating. I was goign to say while I was eating, but I wouldn't have stopped eating for anything in the world. But now I'm getting ahead of myself.

I had some zucchinis and Mexican squash I needed to use from the produce co-op in which I participate (how's that for wording it so I don't end the sentence with a preposition!!) and stumbled upon this recipe in Rick Bayless' Mexican Everyday cookbook when looking for zucchini recipes. I still had some homemade queso fresco from my cheese making class, so all I needed was chorizo and mushrooms.

Darn it, I can't find this recipe online already (although I really didn't look that hard), so I guess I'll type the beast out myself.

Zucchini-Mushroom Tacos with (or without) Chorizo
Copyright 2005, Rick Bayless' Mexican Everyday

4 ounces fresh Mexican chorizo sausage, casing removed (about 1/2 cup)
1-1/2 Tbsp vegetable or olive oil, if needed
1 medium white onion, sliced 1/4 inch thick
3 ounces mushrooms (shiitake, oyster, portobello or the like), stemmed and sliced about 1/2 inch thick
1 15-ounce can diced tomates in juice (preferably fire-roasted), drained
1 canned chipotle chile en adobo, seeded
1-1/2 tsp chipotle canning sauce
2 medium zucchini, cut into 1/2-inch cubes
salt
1/2 to 3/4 cup crumbled Mexican queso fresco or other fresh cheese
12 warm corn tortillas
Hot sauce, for serving

If using chorizo, lay it in a very large skillet and set over medium heat. Cook, stirring regularly and breaking up clumps, until cooked through, about 4 minutes.

If the chorizo has rendered considerable fat, tip off and discard all but enough to lightly coat the pan; if it has rendered very little--or if you're not using the chorizo--add the oil to the skillet and raise the heat to medium-high. Add the onion and cook, stirring regularly, until beginning to soften, about 2 minutes. Add the mushrooms and cook about 2 minutes more, stirring regularly, until their liquid has evaporated and the mushrooms are beginning to brown.

While the mushrooms are cooking, pour the tomatoes into a food processor or blender. Add the chipotle chile and its canning sauce and process until smooth.

When the mushrooms are ready, add the tomato mixture and cook, stirring regularly, until the mixture has thickened to the consistency of canned tomato sauce, about 3-4 minutes. Add the zucchini and continue to cook, stirring every once in awhile, until the zucchini is cooked through but still a little crisp, 8-10 minutes. Taste and season with salt, usually about 1/2 teaspoon (more if not using chorizo).

Scoop into a bowl and garnish with the crumbled cheese. Serve with the warm tortillas and hot sauce for everyone to make soft tacos.

*****

Wow. Wow. WOW!!! These tacos were phenomenal. They smelled amazing while they were cooking, but man alive did they ever taste good. Our friend Steve was over that night and had dinner with us, and we all (him, the husband, and I) LOVED these. They were so spicy my lips were tingling--but in a good way. I really wasn't sure at first how all the flavors were going to come together, but they were so good. I made my own corn tortillas to go with them. Oh man, just thinking about these tacos makes me want to have them again. The only change I made was slicing zucchini instead of cubing.

I just read the intro to this recipe in the cookbook and it ends with:

"A quick saute, starting with the rousing flavor of Mexican chorizo and dolled up with smoky chipotle chile, shows off the sexier side of zucchini."

Bow chicka bow wow...sexy zucchini indeed!!


Thursday, January 14, 2010

Mexican Chicken Casserole

So, part of my blog hiatus--other than being sick all last week--was due to a weekend trip the husband and I took to New Orleans for his cousin's wedding. We had a fantastic time eating and drinking...mostly drinking. ;) I had one of the best foods I have ever eaten in my life...Chargrilled Oysters at Acme Oyster House. Lordy mama, were they ever tasty. Grilled oysters on the half shell with a seasoned butter and romano cheese. Wow. I could have eaten just those the entire time we were there.

Anyway, now it's back to the daily grind since the vacation is over and my cold is gone. I'm still trying to stick to the Pantry Challenge, and so far so good. I had a different casserole planned for Tuesday night, but after putting all the ingredients into the Points calculator on the WW website, I realized it was going to be too many. So I checked out the Cooking Light website for some other chicken casserole ideas. I was excited to find this one as it also gave me a chance to make my own corn tortillas with the tortilla press I got for Christmas!

Mexican Chicken Casserole

1 cup fat-free, less-sodium chicken broth
2 (4.5-ounce) cans chopped green chiles, divided
1 3/4 pounds skinned, boned chicken breasts
2 teaspoons olive oil
1 cup chopped onion
1 cup evaporated skim milk
1 cup (4 ounces) shredded Monterey Jack cheese
1/4 cup (2 ounces) tub-style light cream cheese
1 (10-ounce) can enchilada sauce
12 (6-inch) corn tortillas
Cooking spray
1/2 cup (2 ounces) shredded reduced-fat extra-sharp cheddar cheese
1 ounce tortilla chips, crushed (about 6 chips)

Combine broth and 1 can of chiles in a large skillet; bring to a boil. Add chicken; reduce heat, and simmer 15 minutes or until chicken is done, turning chicken once. Remove chicken from cooking liquid, reserving cooking liquid; cool chicken. Shred meat with two forks, and set aside.

Preheat oven to 350°.

Heat oil in a large nonstick skillet over medium-high heat. Add 1 can of chiles and onion; sauté 3 minutes or until soft. Add reserved cooking liquid, milk, Monterey Jack, cream cheese, and enchilada sauce; stir well. Stir in shredded chicken; cook 2 minutes. Remove from heat.

Place 4 tortillas in the bottom of a 2-quart casserole coated with cooking spray. Spoon 2 cups chicken mixture over tortillas. Repeat layers twice, ending with chicken mixture. Sprinkle with cheddar cheese and chips. Bake at 350° for 30 minutes or until thoroughly heated. Let stand 10 minutes before serving.

Nutritional Information
Calories:369 (28% from fat)
Fat:11.4g (sat 5g,mono 3.8g,poly 1.4g)
Protein:35.6g
Carbohydrate:31.3g
Fiber:3g
Cholesterol:79mg
Iron:2.4mg
Sodium:479mg
Calcium:360mg

*****

I think all I changed was using less chicken. Then in turn I added in less of the liquids because I didn't want it to be too saucy. The finished product was FANTASTIC! I could have used more of the sauce. It wasn't dry, but it could have been more saucy. Especially when we've had the leftovers, it could have used a little more sauce. My tortillas came out pretty good for my first attempt at making my own. I don't normally like corn tortillas, but these were good.

This is definitely something I'd make again! The husband and I loved it. I had the boy taste the sauce and he thought it was too spicy, so he got to have a quesadilla instead. It wasn't nearly as spicy once it was all melded together in the casserole, so I think he would have been fine eating it.

Sunday, September 20, 2009

Crusty Black Bean Chorizo Subs

Oh man. I am so, so, so, so, so excited for dinner tonight!! I was watching an episode of Rick Bayless' show Mexico One Plate at a Time recently where he was talking about Lucha Libre (the crazy Mexican wrestling with masks) and made a super torta. It looked FANTASTIC. Then it just so happened that the last time I was looking at cookbooks at the library, his Mexican Everyday cookbook was back, so I checked it out and am once again holding it hostage. I was flipping through it and found that the torta he made on that episode was in the cookbook. It also just so happened that I have some chorizo in the freezer I need to be using up, so this worked out great. I've been looking forward to this dinner for a week now. I was going to make it last night, but my aunt called and invited us over for mixed grill. I'm not one to turn down a dinner made by someone else--especially if my uncle is grilling--so I bumped this back to tonight.

Crusty Black Bean Chorizo Subs
aka Tortas de Chorizo y Frijoles Negros
Copyright 2005, Rick Bayless' Mexican Everyday

8 ounces fresh Mexican chorizo sausage, casing removed (about 1 cup)
3-4 Tbsp vegetable or olive oil (divided use)
Two 15-ounce cans black (or other) beans
Salt
4 bolillo rolls, crusty French rolls or submarine sandwich rolls (6-7 inches long, 3 inches wide)
6 ounces queso fresco or other fresh cheese such as feta or goat cheese, sliced 1/4 inch thick
1 ripe avocado, pitted, flesh scooped from the skin and cut into 1/4-inch slices
3/4 cup Roasted Tomatillo Salsa (recipe to follow)

Set a large 12-inch skillet over medium heat and add the chorizo. Cook, breaking up the clumps, until browned and thoroughly cooked, about 8-9 minutes. Add 1-2 Tbsp of the oil (depending on how much fat the chorizo has rendered) and the beans. As the beans come to a simmer, mash them to a smooth paste with a Mexican bean masher, old-fashioned potato masher or the back of a large cooking spoon. Cook, stirring nearly constantly, until the consitency of very soft mashed potatoes--expect about 10 minutes after adding the beans. Taste and season with the salt if you think necessary. Keep warm over the lowest heat, covered to keep the beans soft and moist.

Heat a large griddle or skillet over medium. Slice the rolls open. use fingers or a spoon to scrape out some of the soft bread in the center of each half, making a small hollow. Brush the insides with the remainig 2 Tbsp oil, then lay them cut side down on the griddle or skillet to crisp to a rich golden brown, about 3 minutes.

Smear about 1/2 cup of the chorizo-bean mixture over the bottom half of each roll. Top with slices of the cheese and the avocado. Spoon on the salsa or dash on the hot sauce. Set the top of each roll i place, and you're ready to serve.

Roasted Tomatillo Salsa
Copyright 2005, Rick Bayless' Mexican Everyday

4 medium (8 ounces total) tomatillos, husked, rinsed, and halved
2 large garlic cloves, peeled
Hot green chiles to taste (2 serrano or 1 jalapeno), stemmed and roughly chopped
About 1/3 cup (loosely packed) roughly chopped cilantro
1/2 small white onion, finely chopped
Salt

Set a large nonstick skillet over medium-high heat. Lay in the garlic and tomatillos, cut side down. When the tomatillos are well browned, 3-4 minutes, turn everything over and brown the other side. The tomatillos should be completely soft.

Scrape the tomatillos and garlic into a blender or food processor and let cool to room temperature, about 3 minutes. Add the chiles, cilantro, and 1/4 cup water. Blend to a coarse puree. Pour into a salsa dish and thin with a little additional water if necessary to give the salsa an easily spoonable consistency.

Scoop the chopped onion into a strainer and rinse under cold water. Stir into the salsa. Taste and season with salt, usually about 1/2 tsp.

*****

Mmmmmmm...I cannot wait for this dinner!!! The chorizo I'm using is bulk chorizo, so I don't need to worry about removing the casing. It's also chicken chorizo, which I'm assuming is slightly healthier. I just started doing Weight Watchers to get rid of this darn baby weight, so I'm all about healthier choices. I'll probably cut back some on the oil, too.

I wasn't really sure what to do for a side, so I looked on RecipeZaar.com and found a potato recipe that sounded pretty good and like it would be a nice accompaniment...Ancho Chile Fries. We'll probably have a salad on the side, too.

*****

Rick Bayless is a god among men...but only in a food/cooking way, not in a blasphemous, breaking-a-commandment way. Oh man...these were so good!!! Super easy to put together, too. I'm so glad there was some left because I've already slated it for lunch today. I didn't put enough of the salsa on mine at first, so I added some more. YUM! The boy didn't really like it, but the baby ate quite a bit of the chorizo/bean mixture. Crazy, huh?! I swear that baby will eat anything. The chorizo wasn't very spicy, otherwise I wouldn't have given it to him. It could have been a little spicier, but that's really my only complaint, and really it was my own doing. I will definitely make these again!!!

Oh, and the salsa was AWESOME!! I'm kicking myself for not having bought any tortilla chips when I went grocery shopping this week. We have to go to Target today, so I'll be sure to pick some up there so I can enjoy every last drop of the tomatillo salsa.


Wednesday, September 16, 2009

Steak Fajitas

Last night we had steak fajitas for dinner. I wasn't really sure how to season the meat...my cousin's fajita seasoning recipe, my friend Jen B's fajita recipe, or find a completely new one. I decided to use my cousin's but change it up a bit.

My Cousin Kim's Fajita Seasoning Recipe

Her recipe uses chicken bouillon, but since I was doing steak I thought that might be weird. So I substituted for Montreal Steak Seasoning. I also added in a bit more cumin (because I really heart cumin) and instead of 2 Tbsp of chili powder, I did half chili powder and half ancho chili powder. I wasn't sure what the directions were on a packet of regular fajita seasoning, so I just used this like a dry rub on the steak I was grilling.

Wow. WOW!! This was super tasty!!! The meat was so flavorful. I loved the sort of crust it got on the outside of it from the seasoning rub. Even though i ended up using the meat for fajitas, I'd use this as just seasoning for a regular steak or London Broil. I will definitely make this again!

Thanks, Kim, for a great recipe!!

(Here's something weird...before I posted this just now, I noticed over on my side bar where I see who comes to my blog that something like four people had recently gone to my original post with the recipe. Isn't that weird?!)

Monday, July 20, 2009

Fish Tacos

What a crazy weekend we had! That's why I'm just now posting for the weekend on Monday. I'll have to do a separate post on why our weekend was so crazy--it's because my husband is the best husband ever!! But, I'll post on that next.

Last week the husband had requested fish tacos for dinner one night. I wanted to find a new way of doing them and RecipeZaar.com of course came through for me!


Fish Tacos

Recipe #26516

1/2 cup sour cream
1/2 cup mayonnaise
1/4 cup chopped fresh cilantro
1 package taco seasoning mix, divided
1 lb cod or white fish fillet, cut into 1 inch pieces (about 4)
2 tablespoons vegetable oil
2 tablespoons lemon juice
1 (12 count) package taco shells, warmed or flour tortillas
Toppings (shredded cabbage, chopped tomato, lime juice, taco sauce)

Combine sour cream, mayonnaise, cilantro and 2 tablespoons seasoning mix in small bowl.

Combine fish, vegetable oil, lemon juice and remaining seasoning mix in medium bowl; pour into large skillet. Cook, stirring constantly, over medium-high heat for 4 to 5 minutes or until cod flakes easily when tested with a fork.

Fill taco shells with fish mixture. Top with toppings.

*****

This is my new favorite way to make fish tacos. The sauce was fantastic, although it made way too much. I'll cut it in half next time because I had to throw out a lot of it (I couldn't come up with anything to do with what was left). We all really liked this--even the boy who usually isn't very fond of fish tacos. I had some catfish nuggets in the freezer that needed to be used up, so that was the fish I use. For toppings we had tomatoes and avocados. I was kind of kicking myself because I had just thrown out half a head of cabbage on Saturday because I didn't know what I was going to use it for, and I could have used it last night as a taco topping. Oops!

Wednesday, July 15, 2009

Slow Cooker Pinto Beans

I don't know why I've been slacking on posting lately. Monday was a pretty bad day at our house, and our dinner was easy, just tofu stir fry. Yesterday I don't know why I never got around to posting. Who knows. This is what we had. I'd seen a recipe for slow cooker pinto beans in a vegetarian cookbook I have and thought I'd try it. Then I saw my friend Jen B. had a recipe for them, and there is also one in my new favorite cookbook, Rick Bayless' Mexican Everyday. I decided to kind of combine all of them into one and see what I got.

Slow Cooker Pinto Beans

1 lb. dried pinto beans
1 onion, chopped
6 cloves garlic, peeled and minced
2 slices bacon, cut into chunks
2 bay leaves
2 Tbsp kosher salt
1 Tbsp black pepper
1 Tbsp Ancho chili powder
1 Tbsp cumin
1 Tbsp coriander
1 can beef broth
5 cups water

Sort through beans for any debris, pebbles, or sticks. Throw everything into slow cooker and cook on low 8-10 hours. When beans are done, strain liquid into a separate container and save for another use. Remove bay leaves and any other chunks you don't want in there (although I left the bacon in and thought it was yummy).

*****

I made refried beans out of some last night. For that I used two tablespoons of butter and probably two cups of the beans and a few ladlefuls of the cooking liquid and mashed it up first with a potato masher and then I switched to using my immersion blender. That worked a lot better.

Oh man...these were fantastic beans!! The flavor of them was so much better than anything I've ever had in a can. I think I'm a homemade refried beans convert now. I used them last night for tostadas, and for that I just fried some tortillas in oil to get them crispy (my oil took forever to heat up--I didn't think we were ever going to eat!) and then topped with the refried beans, cheese, lettuce, tomato, sour cream, guacamole, and salsa. They were quite tasty!! I had leftovers for lunch today and was just as pleased as I was last night!

Friday, July 10, 2009

Chipotle Shrimp

I'm holding a cookbook hostage from the library. I do this often because I fall in love with them and don't want to return them, so I keep renewing them. This particular one is Rick Bayless' Mexican Everyday. I've gotten it before and really liked what I made from it, and I happened to spot it several weeks ago when I was looking at cookbooks at the library. I'm honestly not entirely sure how long I've had it now...I think I've renewed it three times now. I really should just buy it or see if it's on Google Books. Jen B. turned me on to Rick Bayless, and I just heart him now. I was super excited when he won his round of Top Chef Masters on Bravo.

Anyway, I was looking for something to do with shrimp recently and looked in this cookbook for ideas. One recipe stood out--Chipotle Shrimp. I had everything on hand except a can of diced tomatoes, which I had regretfully used just a few days before I looked up the recipe. D'oh! So I slated it for tonight so the husband and I could have it after the kids go to bed. I'm super excited to try it. The picture looks fantastic!!

Chipotle Shrimp

1 15-ounce can diced tomatoes in juice (preferably fire-roasted), drained
2 to 3 canned chipotle chiles en adobo
1 Tbsp chipotle canning sauce
2 Tbsp vegetable or olive oil
3 garlic cloves, peeled and finely chopped or crushed through a garlic press
About 1-1/2 cups fish or chicken broth or water
Salt
1 to 1-1/4 pounds medium-large shrimp, peeled and deveined, tail left on if you wish
About 1/4 cup (loosely packed) roughly chopped cilantro, for garnish

Pour the drained tomatoes into a blender or food processor. Add the chipotle chiles and chipotle canning sauce. Process until smooth.

In a very large (12-inch) skillet, heat the oil over medium. Add the garlic and stir until fragrant and golden, about 1 minute. Pour in the tomato mixture. Cook, stirring frequently, for 5 minutes to allow the flavors to meld. Add enough broth or water to achieve a light tomato sauce consistency. Taste and season highly with salt, usually about 1 teaspoon.

Add the shrimp to the pan. Cook, stirring nearly constantly, until the shrimp are cooked through, about 4 minutes. Stir in a little more broth or water if the sauce has thickened too much.

Scoop onto dinner plates and sprinkle with the cilantro.

*****

Mmmmm...I can't wait! I think I'm going to make some basmati rice to go with this with some cilantro and lime in it. We're also making margaritas. I love doing mini date nights with the husband on Friday nights!

*****

Wowie, wow, wow!!!! This dinner was AMAZING. Just amazing!!!!!!!!!!!!!! I dare say this is the best dinner I have ever made and one of the best dinners I've ever eaten. This is highly embarrassing, but I licked my plate. Seriously. I could not get enough of this. The husband thought a few bites of his were too spicy, but I thought they were all fine. I ended up making Chipotle Copycat Lime Rice which was awesome, too. I think that will be my new go-to rice to accompany Mexican dishes.

Wednesday, May 27, 2009

Three Cheese Enchiladas

The husband is a HUGE Detroit Red Wings fan, and tonight is game five in the series against Chicago. He requested last night that tonight's dinner be something in the crock pot so he didn't have to entertain the boy while I'm cooking. That was after I had gone to the grocery store, and I couldn't think of anything to do in the crockpot that wasn't chicken related, and I'm kind of tired of chicken. I wanted something vegetarian, and I realized I had posted this recipe but never made it. I thought it would be easy enough because the boy could help me mix up everything. He loves to help in the kitchen, especially for dinner. It's pretty rare he gets to help with dinner since it usually involves raw meat, sharp knives, and using the stove. He's engrossed with Bob the Builder right now, so once he's done with that I'll see if he wants to help. Here's the original post with the recipe:

Three Cheese Enchiladas

*****

These were pretty good. I don't know if I'd go out of my way to make them again, but I usually have all of these ingredients on hand, so it's nice to have another "oh no it's 4:00 and I don't know what to make for dinner" meal in my pocket. I used way more cheese than was called for--three ounces of Monterey Jack, four ounces of goat cheese, and two ounces of cream cheese--and I really don't think it would have been filling enough with increasing those amounts. I think everything else I kept the same, except I used whole wheat tortillas instead of corn. I made a Rick Bayless rice recipe as a side dish, but it did not turn out. I think it was my fault, not the recipe's. I'll post it later because I want to hang out with the husband and baby.