Showing posts with label cream cheese. Show all posts

Friday, March 15, 2013

GG's Lasagna


I cannot believe I've never done a post about my grandma's lasagna recipe. But, alas, that must be the case because when I went to make it recently I couldn't find it here on the ol' blog. For those of you that don't know her, my grandma is awesome. Seriously, I've never met someone that doesn't love her as soon as they meet her. She'll be 95 in May, and she's still going strong. She takes one medication and only because her doctor thinks a woman her age should be on some sort of medication. Sheesh. She grew up on a farm in Hale, Missouri during the Great Depression, and I (still) love when she tells me stories about her youth. She is hands down one of my favorite people in the world.


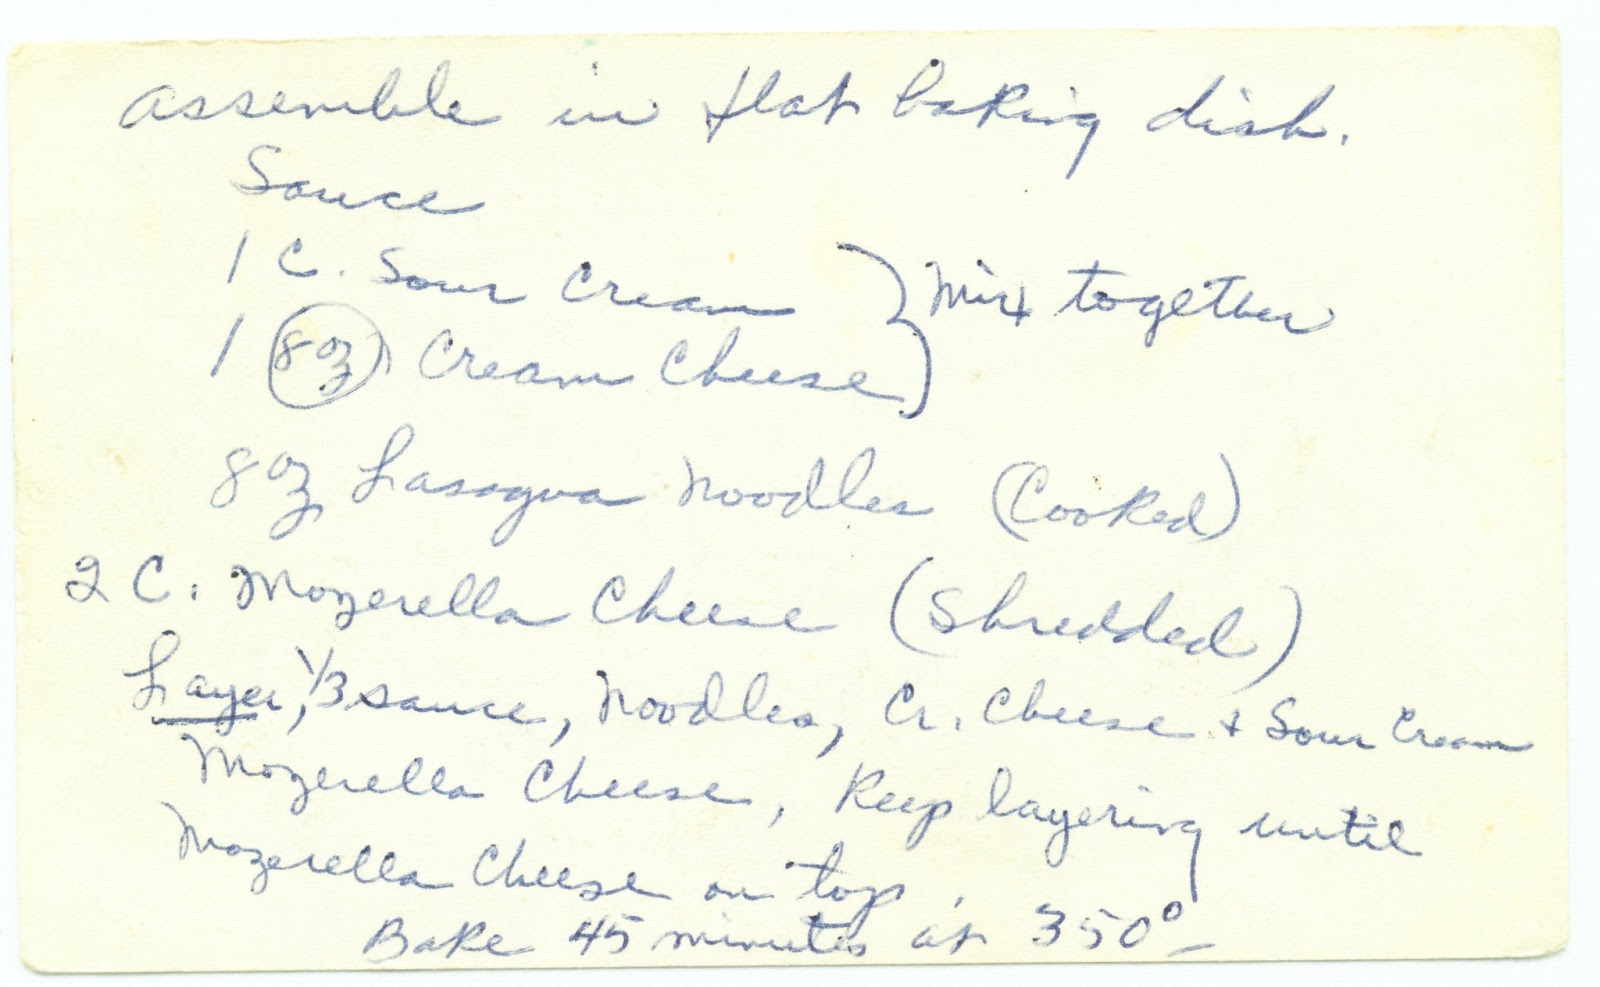
We all love her lasagna recipe, and it is Boy #1's absolute favorite food in the world. He turned seven last month, and while my brother and his girlfriend were here visiting for the weekend for his birthday we had a lasagna dinner at my mom's. My grandma made her lasagna, and my brother made a vegan one. That was on a Saturday night, I think it was. The boy's birthday was Wednesday, and I asked him what he wanted me to make for his birthday dinner one night that week, and he said, "GG's lasagna." I said, "Really? But we just had that." He said, "I know, it's my favorite." Okay...I can't argue with that! So we had GG's lasagna again later that week. A few years ago I took my scanner to my grandparents' house and sat down with my grandma's recipe box to scan some of my favorite recipes of hers. I love that I have the recipe in her handwriting, too.


GG's Lasagna
Source: my awesome grandma

Sauce:
1-1/2 lb. ground beef
1 small onion, chopped
2 cloves garlic, minced
2 8-ounce cans tomato sauce
1 cup water
1 T. dried parsley
1 t. oregano
3/4 t. salt
1/4 t. thyme
1 bay leaf

Simmer. Remove bay leaf before using sauce.

Other ingredients:
1 cup sour cream
8 ounces cream cheese
8 ounces lasagna noodles, cooked
2 cups shredded mozzarella cheese

Mix together sour cream and cream cheese.

Assemble in a flat baking dish and layer:
1/3 cup sauce, noodles, cream cheese and sour cream, mozzarella. Keep layering until mozzarella cheese is on top.

Bake 45 minutes at 350.

*****

This lasagna does not last when I make it. There's maybe one or two servings leftover, and normally Boy #1 has it for breakfast the next day or wants to take it in his lunch. I really think he'd eat this every day if I'd make it that often.


Wednesday, December 26, 2012

Crockpot Cheesy Spinach Artichoke Dip


Merry Christmas, everyone!! Did you have a nice time celebrating? Ours was pretty fantastic, although the days leading up to Christmas were pretty stressful, to the point where I didn't even care about Christmas and wasn't excited at all. But I had a nice, long, nine mile run on Christmas Eve that cleared my head a little and lots of family here with us for church and dinner on Christmas Eve. And with two little boys, it's hard to not catch their excitement. We were all very spoiled by my family, and now today the boys and I are hanging out at home playing with all our new toys while the husband has to go to work.

We went to my mom's house for Christmas "dinner" last night. We had our usual Christmas "dinner" spread of tons of appetizers. I had four I planned on making, but I ended up whittling it back to two. One of them I made to take to a party last Friday, and while they were tasty, they were time consuming, and I didn't want to deal with them. Then another I decided to skip after seeing how much food there was already, plus I was tired of being in the kitchen and wanted to hang out and drink my wine. It sounds like a super tasty dip, so I will make it at some point.

When I was deciding what I'd make this year I perused my Snacks board on Pinterest and got really, really overwhelmed. So many good appetizers! But I knew I wouldn't want to be in the kitchen slaving away either here or at my mom's, so the fact that this was a slow cooker recipe appealed to my lazy nature. I ended up changing it a bit because of time constraints and lack of ingredients, so there will be a link to the original recipe, but the one below is how I ended up making it.

Crockpot Cheesy Spinach Artichoke Dip
Source: Adapted from Cooking Light

1 (14-ounce) can quartered artichoke hearts, drained and coarsely chopped
1 (10-ounce) package frozen chopped spinach, thawed, drained, and squeezed dry
1 (8-ounce) block light cream cheese, softened
1 (8-ounce) carton low-fat sour cream
3/4 cup grated Parmesan cheese
1/2 cup (2 ounces) crumbled reduced-fat feta cheese
1/2 cup diced onion
1/2 cup mayonnaise
1 tablespoon white wine vinegar
1/4 teaspoon freshly ground pepper
2 garlic cloves, crushed

Place all ingredients in a 3 1/2-quart electric slow cooker; stir well. Cover with lid; cook on low-heat setting 2 hours or until cheese is melted and dip is heated through. Serve warm with toasted pita wedges or tortilla chips.

*****

The original recipe called for 3/4 cup milk. I debated calling my mom to see if she had milk because sometimes she doesn't. But I figured she would. Then she didn't. My uncle and husband both offered to run to the gas station to get some for me, but I opted to not. I figured I'd see how it turned out and if it needed some liquid, I'd come up with a solution of some sort. After it cooked for awhile, I checked on it and found the consistency of it was perfect! I was so glad I had skipped the milk; it would have been way too runny with that added to it. I had bought tortilla chips to serve with this because I have the hardest time finding pita chips at my Safeway store, and I just didn't want to go to other stores in the days leading up to Christmas. This was a super tasty dip, and it's one I will definitely make again. Tasty and easy are two of my favorite combinations!!

Do you like my festive nail polish? It was one of my gifts from Boy #1. I heart that kid!

Thursday, April 5, 2012

Twice-Baked Cauliflower


We're going to my mom's house for Easter dinner this year. Well, we generally always go to her house for dinner. I asked what I could bring, and she said we're having ham and turkey, so I said I could either make funeral potatoes or this twice baked cauliflower dish I made when we were doing low carb awhile back. She said either would be fine, so I decided I'd go with the cauliflower because it's healthier and something different. Then I realized I had never posted it on my blog! So, if you're looking for a side dish for Easter dinner, consider this! It's super tasty. We originally had it with Pimento Cheese Stuffed Chicken Breasts and the flavors complimented each other really well! And they shared a lot of the same ingredient which made preparing them at the same time a total breeze.

Twice Baked Cauliflower
Source: Kalyn's Kitchen blog
Serves 6-8

1 large head cauliflower
4 oz. low fat cream cheese (do not use fat free)
1/2 cup low fat sour cream (do not use fat free)
1/4 cup minced green onions
1/4 cup freshly grated Parmesan cheese (If you only have finely grated Parmesan, use a bit less)
6 slices bacon, cooked until very crisp, fat blotted with paper towel and then crumbled
1 cup reduced fat sharp cheddar cheese


Preheat oven to 350F/180C. Cut out stem and core from cauliflower, and cut into small pieces. Cook in large pot of boiling salted water until cauliflower is tender, but not overly soft. Drain well and mash with potato masher, leaving some chunks. Mix in light cream cheese, light sour cream, green onion, Parmesan, and 3/4 of the crumbled bacon.

Spread evenly in a medium-sized glass casserole dish. Sprinkle with low-fat cheddar cheese and reserved bacon. Bake 30-35 minutes, or until hot and bubbly.

*****

I mostly followed the recipe except I steamed the cauliflower instead of boiling it because I've always read that it's a better way to cook vegetables (so they keep more of their nutrients)--especially with cauliflower. I think we'll have 11 people at Easter dinner, so I think I'm going to double this. Plus it's so tasty I really don't mind having leftovers. My mom loves cauliflower, so I hope she likes this.

This is a great substitute for potatoes if you're doing no or low carb. Don't get me wrong, I love potatoes, but the bite of the cauliflower really adds a lot to this, and cauliflower is lower in calories (significantly!) and carbs (even more significantly!) than potatoes Plus Boy #1 doesn't like potatoes (I know, it's weird!), and he loved this.

Mashed cauliflower!

Please excuse the half eaten chicken breast, I forgot to take a picture before we started eating!

Thursday, January 26, 2012

No Carb Pizza


Last week the husband suggested to me that we have a no carb week this week. He went to Mississippi to visit his best friend and knew he'd be over indulging. Last year we started the year off with a no carb week, but this year we were running a half marathon on January 15th, so going without carbs the first week of the year was going to be more detrimental than helpful. Since we both tend to get tired of the no carb thing quickly I chose all new dinner recipes to try and keep it exciting for us. Enter Pinterest.com. I did a search on low carb meals and came up with a bevy of ideas. Some have been good, some have been okay, nothing has been awful. I've had an easier time this week than in times past cutting out carbs, maybe because I'm more used to doing it now? I don't know. Or maybe I know we're just doing it through Monday, so the end is near already.

Anyway, the husband and my kiddos love pizza. I'm a fan, but I'm not a pizza monster like the three of them are. This sounded intriguing...pizza with no carbs in the crust? But I figured it was worth a try.

No Carb Pizza
Source: AccidentalMommies.com via Pinterest.com

For the crust:
1 (8 oz.) package of full fat cream cheese (room temp.)
2 eggs
Freshly ground black pepper
Garlic powder
1/4 cup grated parmesan cheese

For the pizza:
1/2 cup marinara sauce
1/2 teaspoon oregano
1 cup shredded mozzarella cheese
Sauteed pepperoni
Garlic powder

For the crust:
Preheat oven to 350.
Butter a 9×13 baking dish
Blend cream cheese and eggs and season with pepper & garlic powder
Add parmesan cheese and stir until combined
Pour into buttered baking dish
Bake for 17 minutes or until golden brown
Let crust cool for 10 minutes before adding toppings
After crust is cooked, raise oven to 400 degrees

For the pizza:
Mix together marinara sauce, garlic powder, & oregano
Top crust with marinara and spread evenly
Top with mozzarella cheese
Add toppings
Bake for 8 minutes or until cheese is bubbly

*****

I was pretty skeptical when I pulled the "crust" out of the oven, and I was a bit worried because my universal dinner back-up plan of Little Ceasar's pizza wouldn't work with no carbs. But I forged ahead praying and crossing my fingers it would at least be edible. And you know what? It was actually pretty awesome. Boy #2 wasn't sure about the crust at first and just ate the toppings, but once the husband told him it was cheese and eggs, he was completely on board with it. There was none of this left by the time dinner was done. The husband said he'd even eat it when we were doing no carbs! I used turkey pepperoni as the only topping. It didn't even occur to me to put anything else on it, but I think next time I'd add some veggies or a second meat to make it slightly more filling. this will definitely grace our table again!

Monday, January 16, 2012

Chicken and Spinach Pasta Bake


Ah, a quiet Monday afternoon. The husband and Boy #1 are off at a hockey game, Boy #2 is upstairs watching Dumbo, I took a power nap on the couch, rolled out some king cake dough, and decided to update my blog. I wanted to get laundry put away and clean up our toy room a bit, but since the boy is upstairs watching a movie I've decided to put all that off and deal with it later to enjoy some peace and quiet downstairs. Ahhh. I have to revel in it now because I know it won't last long!!

This was another new recipe we had for dinner this past week. I had limited grocery money to use, but I had a lot of the items for this on hand already. It came from (surprise, surprise) Pinterest. I love a good casserole and this one sounded really tasty. Pasta, chicken, spinach, and cheese? Sounds scrumptious! Oh, Pinterest, where would my life be if I hadn't discovered you. If my husband were answering that question I'm sure he'd come up with some witty comment about how our house would be clean, laundry would be done, and we'd eat dinner on time every night. But, he's not, so I'll go on with my Pinterest obsession fascination.

Chicken and Spinach Pasta Bake
Source: Adapted from Saving Money Living Life blog (found via Pinterest)

8 oz uncooked whole wheat rotini pasta
1 T olive oil
1 c chopped onion
1 (10 oz) pack frozen spinach, thawed
3 c cubed, cooked chicken breasts
1 (14 oz) can Italian-style diced tomatoes, drained
1 (8 oz) container Philadelphia chive & onion cream cheese
1 cup ricotta cheese
½ t salt
½ t pepper
1½ c shredded mozzarella cheese

Prepare pasta according to package directions. Spread oil on bottom of 9x13 baking dish; add onion in a single layer. Bake at 375 for 15 minutes or just until tender. Transfer onion to large bowl, set aside.

Drain chopped spinach well. Stir pasta, spinach, chicken, & next 5 ingredients into onion in bowl. Spoon mixture into dish & sprinkle evenly with shredded mozzarella cheese. Bake uncovered at 375 for 30 minutes.

*****

I only changed up the original recipe slightly. It called for rigatoni, but I like whole wheat pasta, but my grocery stores don't carry whole wheat rigatoni, so I used rotini instead. I also added in the ricotta because 1) I was worried it wasn't going to be creamy enough, and 2) I had some in the fridge that needed to be used up. Plus we're all about extra cheeses here at my house. The original recipe also called for baking it covered for 30 minutes and then uncovered for 15. I didn't want to wait that long to eat, and I really didn't see the point in it since all the parts were cooked already and it just had to combine and heat up. It worked out fine that way. if I had more time I might try it the original way to see how it compared.

This was a total hit with everyone in my family. The husband and I especially dug it, and Boy #2 had more than one serving. Boy #1 I guess was more lukewarm about it now that I think back to dinner that night, but he still ate most of his and didn't complain. No complaining about a dinner, I take that as a win. This is definitely something I would make again. The husband and I really enjoyed the leftovers for lunch the next couple days, too.


By the way, I calculated this to be 279 calories per serving, assuming seven servings (based on the portions I served myself and the husband).


Monday, November 28, 2011

Pesto Chicken Stuffed Shells


My love for Pinterest.com has not waned while I've been slacking on updating my blog. Food, crafts, decorating ideas, projects for my kids...what's not to love about it?! Although probably I could have gotten a few blog posts done in the time I spend on it, but I'll try to not think about it. In fact I'm trying really hard to resist the urge to go look at it now. I try not to think about all I could get done around my house if I didn't have a computer the internet.

Anyway, I love stuffed shells, but I don't make them very often because they're messy. And I generally try to only use whole wheat pasta, and either they don't make whole wheat pasta shells or I just can't find them in my limited selection of grocery stores. But these sounded so tasty and I had some pesto I needed to use up, so I figured it was worth having regular pasta shells.

Pesto Chicken Stuffed Shells
Source: What’s Cookin’ Chicago, via Pinterest

12-16 jumbo pasta shells
water for boiling pasta
4oz cream cheese, softened
1 cup freshly grated Parmesan or Asiago cheese + 1/4 cup for topping
3 tablespoons prepared pesto (homemade or store bought)
2 cups shredded cooked chicken
2 cloves garlic, minced
salt and pepper to taste

In a large pot over high heat, boil water and prepare pasta shells as directed on package. Cook pasta shells only until al dente. The pasta will finish cooking when the dish is baked. Drain the pasta shells and set aside.

In a large bowl, combine the rest of the ingredients, except the 1/4 cup of cheese for the topping. Fill the pasta shells with the filling and place in a baking dish. Sprinkle the remaining 1/4 cup of cheese over filled shells.

Preheat oven to 350 degrees and bake shells uncovered for 30 minutes or until shells are bubbling hot and cheese melts.

To make ahead/freezer meals - Prepare as directed but place filled shells in an oven- and freezer-proof baking dish. Top with remaining 1/4 cup of cheese over filled shells, cover and freeze. When ready to prepare, defrost. Preheat oven to 350 degrees and bake shells uncovered for 35-40 minutes or until shells are bubbling hot and cheese melts.

*****

My only complaint was that there could have been more cheese. You know how we love cheese at my house. This would be a great use for leftover chicken. I loved the creamy, pesto filling of the shells. I loved this take on stuffed shells, instead of my usual recipe I use that has the shells stuffed with cheese and then topped with a red sauce. My whole family really liked these, so it's definitely something I'll make again...especially if I can find whole wheat shells somewhere!

Creamy Beef Taquitos


I know I've shared my love of the Meal Planning 101 blog before. I don't think I've had a single bad recipe from her website, so I go to it a lot when I need meal ideas. My Bff, Jen Clementine had made these awhile ago and really liked them, so I thought I'd give them a try. I'm always game for a new Mexican food recipe.

Creamy Beef Taquitos
Source: Meal Planning 101 blog


1 lb lean ground beef
2 tbsp taco seasoning (homemade or store-bought)
1/3 cup light cream cheese
1/4 cup salsa
1 tbsp lime juice
3 tbsp cilantro, chopped
2 tbsp green onions, chopped
1 cup grated cheese (cheddar, mozzarella or pepperjack)
12 small flour tortillas (can also use corn tortillas)

Heat oven to 425. Line a baking sheet with foil and lightly coat with cooking spray.

In a large frying pan over medium-high heat, brown the ground beef and break it up into crumbles as it cooks. Add the taco seasoning and cook the beef about 8 minutes until cooked through.

Heat cream cheese in the microwave for about 20-30 seconds so it's soft and easy to stir. Add salsa, lime juice, cilantro and green onions and stir to combine. Once the beef is browned, add the beef and cheese and combine well. You can prepare up to this step ahead of time. Just keep the mixture in the fridge.

Place 2-3 tbsp of beef mixture on the lower third of a tortilla, keeping it about 1/2 inch from the edges. Roll it up as tight as you can. If your tortillas are cracking or breaking, you can microwave them for 10-20 seconds with a damp paper towel over top. Once rolled, place seam side down on the baking sheet. Lay all of the taquitos on the baking sheet and make sure they are not touching each other. Spray the tops lightly with cooking spray or brush with a bit of oil and sprinkle some kosher salt on top. Place pan in oven and bake for 15-20 minutes or until crisp and the ends start to get golden brown.

Dip taquitos in salsa, sour cream, guacamole, or Chipotle Ranch dressing.

*****

The only thing I changed up was to use ground turkey instead of ground beef because I had it on hand, and the husband was going through a "let's lay off the red meat" phase for awhile back when I made these.

Like I expected, these were super easy to put together, fast to cook, and really tasty!! Winner winner, taquito dinner! I love those frozen taquitos that you see a lot at parties, but these were so much better. I'll definitely make them again. Actually I'm wishing I had some ground beef or turkey on hand so I could make them this week!

Saturday, September 17, 2011

Smoked Salmon and Pesto Sandwich

This was another sandwich creation that stemmed from mine and Clementine's recent visit to Postino Winecafe. They had a bruschetta with smoked salmon and pesto that was incredible. I couldn't stop thinking about it. I love the combination of pesto and salmon. My mom makes a really tasty pesto salmon, but since the husband doesn't like salmon I don't get it very often. Clementine came up with the idea of making a sandwich version of the bruschetta. When she told me about it when she had the idea, I was tempted to run out and buy the ingredients to have it too. Last weekend I was able to go to Trader Joe's, so I figured I'd pick up some smoked salmon there to make these sandwiches for the husband and me.

Smoked Salmon and Pesto Sandwich
Source: My BFF Clementine

olive oil
1 par-baked ciabiatta loaf
1 4-ounce package smoked salmon
1/2 package of softened cream cheese
3-4 tablespoons of pesto (store-bought or homemade)
1/4 red onion, minced finely
1/2 small jar of capers

Preheat the oven to 400 degrees. Place the whole ciabiatta loaf directly on the oven rack for 10 minutes, so the crust may get crisp and the inside may get warm. Remove from oven with tongs and let cool slightly on a cutting board. (Note: if your ciabatta loaf is fully baked, use a 350 degree oven for more like 5 minutes.)

Once bread is cool enough to handle, slice the entire loaf lengthwise and brush some olive oil on both the top and bottom halves. Spread 1/4 cup of softened cream cheese on each half. On the bottom half, sprinkle capers and red onions over the cream cheese. Layer the smoked salmon on next. On the top half of the bread, slather pesto sauce over the cream cheese layer. Place top and bottom halves of the loaf together to assemble one large sandwich. Cut into individual sandwich servings and serve immediately.

*****

Wow. Wow. Wow. This may have been the best sandwich I have ever had. It's at least one of the top five. It was so good, I was tempted to run to the store to get more smoked salmon and ciabatta bread. I may have gone if I hadn't already consumed a few glasses of wine at that point. Jen Clementine put tomatoes on hers when she made them, but I wasn't sure I'd like it with tomatoes, so I left them off. I have to say, this was the perfect combination of ingredients. My bread was perfect--crunchy on the outside but soft inside, creamy from the cream cheese, salty with the smoked salmon and capers, the rich pesto. Wow. This is something we will definitely have on a regular basis.

Best. Sandwich. Ever.


Wednesday, April 27, 2011

Green Goddess Grilled Cheese Panini

I heart cheese. That's not news. I heart paninis, too, and that's probably equally newsworthy. There's a panini blog I follow, Panini Happy. She has all sorts of amazing sandwiches on there that I'm dying to try. Ummm...grilled mac and cheese with pulled pork?! Yes, please!! I had seen her post about this Green Goddess Grilled Cheese on St. Patrick's Day and thought it sounded fantastic. I found myself needing to be somewhere near our Saturday's Farmer's Market recently and decided to stop in to get the fresh herbs I'd need to make this.

Panini Happy's Green Goddess Grilled Cheese Panini
Source: PaniniHappy.com

1 clove garlic, finely chopped
1 oil-packed anchovy, finely chopped
1 teaspoon lime zest (about 1 lime)
3 tablespoons chopped fresh Italian parsley
2 tablespoons chopped fresh tarragon
2 tablespoons chopped fresh cilantro
1 tablespoon chopped fresh basil
1 tablespoon finely chopped shallot
1/4 teaspoon Dijon mustard
2 ounces cream cheese, cut into smaller cubes
1 cup shredded mozzarella
1 cup shredded sharp cheddar
8-12 slices sourdough bread
2 tablespoons extra-virgin olive oil

Add garlic and anchovies to a mini-prep food processor and pulse for a few seconds until it’s really finely chopped, almost like a paste (if you don’t have a food processor, you can always just chop the ingredients really well with a knife on a cutting board).

Add in the lime zest, parsley, tarragon, cilantro, basil, shallot, mustard and cream cheese and pulse again until well blended. Transfer to a medium-sized bowl and stir in the mozzarella and cheddar cheeses.

Preheat the panini grill to medium-high heat.

For each sandwich: Spread a generous amount of the cheese mixture onto one slice of bread. Close the sandwich with a second slice of bread. Brush a little olive oil on top. Grill for 5 to 6 minutes until the cheese is melted and oozy and the bread is toasted. Serve immediately and enjoy!

*****

I'm lazy and didn't chop everything on my own...I tossed it all in my food processor to let it work for me. What's the point of having machines in my kitchen and me doing all the work they can do? Oh, but I didn't have any shallots. I don't know why my grocery store is so hit or miss with shallots. they aren't that uncommon an item are they? Oh what I'd give to have a store that carries everything nearby. I shouldn't complain...when we first moved to this area there was only one grocery store. Now I at least have choices. Anyway.

The cheese filling on this was FANTASTIC. Before it cooked it had a really garlicky bite to it, but that mellowed a lot while the cheesy goodness melted while the sandwich was on the panini press. My only complaint was my bread choice. I didn't buy sourdough bread for this because I figured we could just use the regular whole wheat bread we use on a regular basis. I was WRONG. Don't make my same mistake. This sandwich needs a sturdy bread, not lame-o Oroweat Double Fiber Whole Wheat bread. And be generous with the filling on said sturdy bread. It's worth it. Oh, and don't forget to put the leftover spread away and sitting on your kitchen counter all night because you'll be a sad cheese-lover in the morning when you come downstairs and discover your mistake. I'm just saying...learn from my mistake.

I'd totally make this again but only with a better kind of bread.

Sandwich filling:


Wednesday, March 23, 2011

Tiramisu Cake with Cream Cheese Frosting

Wow are things dusty around here from lack of use! I can't believe it's been so long since I updated my blog. Although, in my quest to use up the massive amount of items I had in my freezers, I wasn't making a whole lot of new stuff. And we were on vacation for a week. While we were on vacation--hobnobbing with Mickey Mouse and playing at the beach--I realized how much I miss my blog and need to get back in the groove of updating and trying new recipes. I miss my cookbook project, too.

I was just going through pictures on my computer to move stuff to my "cooking blog" pictures folder and saw the pictures of this amazing cake. I'm embarrassed to say that it was the middle of February when I made it, but I just never got around to posting it. Actually I've posted it before, but this time I remembered to take pictures as I was going. Two of my friends and I decided awhile back to do a supper club. This was back in November I think. We tried to plan it for December, but it fell through. i don't remember if we tried for January. It was originally going to be husbands and kids, too, but my husband didn't really want to go and it turned out another husband was out of town, so we decided to just have it be the girls. I was glad it worked out that way, it was so fun! It was at my friend Jenn's house, and she made a delicious roasted chicken with green beans and amazing fingerling potatoes. Oh my gosh, the potatoes! They were so tasty. Jen brought a really good feta dip as an appetizer, and I was in charge of dessert. I really had no idea what to take, and then I remembered this dessert. It's so rich and decadent and time-consuming, but I love it and wanted an excuse to make it.

Tiramisu Cake with Cream Cheese Frosting

Cake
3 1/2 cups all purpose flour
1 tablespoon baking powder
1/2 teaspoon salt
2 1/4 cups sugar
1 1/2 cups (3 sticks) unsalted butter, room temperature
5 large eggs
1 1/3 cups whipping cream
1 tablespoon vanilla extract

Preheat oven to 325°F. Butter and flour 2 9-inch round cake pans. Whisk flour, baking powder and salt in large bowl to blend. Using electric mixer, beat sugar and butter in another large bowl to blend. Add eggs 1 at a time, beating well after each addition. Beat in cream and vanilla. Stir flour mixture into butter mixture. Divide batter equally among pans. Bake until tester inserted into center of cakes comes out clean, about 35 minutes. Cool completely.

Frosting / Filling
3 1/2 8-ounce packages cream cheese, room temperature
2 1/3 cups powdered sugar
1 cup chilled whipping cream
1 1/4 tablespoons vanilla extract

Using electric mixer beat cream cheese in large bowl until light. Gradually add sugar and beat until fluffy. Add cream and vanilla and beat until well blended. Cover refrigerate for at least 1 hour.

Soaking Syrup
1 1/3 cups Kahlúa or other coffee liqueur
1/2 cups water
1/8 cup instant espresso powder or coffee powder

Combine.

Assembly
4 ounces semisweet chocolate, chopped
1 9-inch-diameter cardboard cake round
2 cups assorted berries (such as raspberries, blueberries, blackberries and strawberries)

Finely grind chopped chocolate in processor (do not over process or chocolate will clump together). After cakes have cooled completely, take about half a cup of frosting and spread it on a cardboard round or what ever you will be placing the cake on.

Cut the cakes in half horizontally. Place bottom of one cake on cardboard round, cut side up. Brush with 1/3 of syrup. Spread out about 1 cup of frosting and then sprinkle with 1/3 of the chocolate. Place top of cake on top - repeat syrup, frosting, chocolate. Place bottom of 2nd cake on top, cut side up - repeat with the remains of the syrup, 1 cup of frosting and remains of the chocolate.

Now, to tidy it up - take a serrated knife and cut around the cake to make it even all around, this made it very easy to frost the cake.

Frost the entire outside of cake. Decorate with berries, icing or chocolate.

This cake is best when allowed to sit for a day or so.

*****

I'm currently doing Phase One of the South Beach Diet again and just thinking about this cake is adding pounds back on to my body, I'm pretty sure. It's really, really, really time consuming, but it's so worth it. Be very generous when using the soaking syrup. The cake is really dense, so you want to use as much of the syrup as you can so it soaks through and makes the cake layers moist and flavorful. And definitely let it sit as long as possible so the cake has more time to absorb the syrup.

This is hands down one of my favorite cakes ever.

Cake batter...I told you it's a dense cake!


Layer of cake with syrup...really brush it on there!


Syrup with chopped chocolate in the background


Mmmmm...cream cheese frosting...


Cake in progress


Frosting cakes is not one of my strong suits, but I'm okay with it since I rarely do it. It tasted awesome, and that's what really counts.

Thursday, March 3, 2011

Turkey Tetrazzini

Many, many years ago I bought a special edition of Cooking Light. On the front of the magazine it says "Display until December 31, 2003." There's a recipe in it for Chicken Tetrazzini that always looked good to me, but for whatever reason I never made it. I remember at one point I was going to make it for a friend after she had a baby, but then I think she ended up having to be admitted to the hospital again, so I never took them dinner. A few weeks ago I cooked a whole turkey because it was taking up a lot of space in my freezer, and I remembered this recipe. I figured I'd switch the chicken to turkey and use up some of the meat I had left. Win win!

Chicken Tetrazzini
Source: Cooking Light

1 tablespoon butter
Cooking spray
1 cup finely chopped onion
2/3 cup finely chopped celery
1 teaspoon freshly ground black pepper
3/4 teaspoon salt
3 (8-ounce) packages presliced mushrooms
1/2 cup dry sherry
2/3 cup all-purpose flour
3 (14.5-ounce) cans fat-free, less-sodium chicken broth
2 1/4 cups (9 ounces) grated fresh Parmesan cheese, divided
1/2 cup (4 ounces) 1/3-less-fat cream cheese
7 cups hot cooked vermicelli (about 1 pound uncooked pasta)
4 cups chopped cooked chicken breast (about 1 1/2 pounds)
1 (1-ounce) slice white bread

Preheat oven to 350°.

Melt butter in large stockpot coated with cooking spray over medium-high heat. Add onion, celery, pepper, salt, and mushrooms; sauté 4 minutes or until mushrooms are tender. Add sherry; cook 1 minute.

Lightly spoon flour into a measuring cup; level with a knife. Gradually add flour to pan; cook 3 minutes, stirring constantly (mixture will be thick) with a whisk. Gradually add broth, stirring constantly. Bring to a boil. Reduce heat; simmer 5 minutes, stirring frequently. Remove from heat.

Add 1 3/4 cups Parmesan cheese and cream cheese, stirring with a whisk until cream cheese melts. Add the pasta and chicken, and stir until blended. Divide the pasta mixture between 2 (8-inch-square) baking dishes coated with cooking spray.

Place bread in food processor; pulse 10 times or until coarse crumbs form. Combine breadcrumbs and 1/2 cup Parmesan cheese; sprinkle evenly over pasta mixture.

Bake at 350° for 30 minutes or until lightly browned. Remove casserole from oven; let stand 15 minutes.

To freeze unbaked casserole: Prepare through Step 5. Cool completely in refrigerator. Cover with plastic wrap, pressing to remove as much air as possible. Wrap with heavy-duty foil. Store in freezer for up to 2 months.

To prepare frozen unbaked casserole: Thaw casserole completely in refrigerator (about 24 hours). Preheat oven to 350º. Remove foil; reserve foil. Remove plastic wrap; discard wrap. Cover casserole with reserved foil; bake at 350º for 30 minutes. Uncover and bake an additional 1 hour or until golden and bubbly. Let stand 15 minutes.

*****

I originally planned this on a night that I was taking dinner to someone from church, but then I found out she's diabetic, so I wasn't sure if this would be the best dish for her to have. i didn't want to come up with something new, so I figured I'd go ahead and still make it for us and take her something different. At first I was going to cut it in half instead of freezing a casserole, so I only got two packages of mushrooms, but then I figured I might as well make it as written and have one in the freezer. I stuck with the reduced amount of mushrooms. My kids aren't big mushroom fans anyway, so it kind of worked out okay. Oh, and instead of making bread crumbs for the top I used some panko I already had on hand.

I was worried it was going to be too bland when I tasted it once everything was mixed together, but I needed to be leaving to take dinner, so I didn't have time to play around with it. It was definitely on the bland side, so with the one I was putting in the freezer I took it out of the casserole dish and added some Lawry's Seasoned Salt to it. I think I've gotten lazy lately because that's my go to seasoning when I think a dish is lacking flavor. It's just easier to throw some of that in there than try and figure out what it really needs.

This is definitely something I'd make again, and it's extra nice that it makes two (or I suppose you could do it all in one bigger pan) because now I have a go to dinner in the freezer when I need something fast.

Wednesday, January 19, 2011

Stuffed Baguette

I realized when I was organizing some pictures on my computer that I had never posted this recipe I made for Christmas. We've started a tradition in my family where we have a bunch of awesome appetizers for Christmas dinner instead of a real, sit-down dinner. It's so much nicer and easier than scrambling around to get dinner ready and everything finished at once while also opening presents and all that Christmas jazz. This was the second year we've done it, and it seems to be a big hit.

Last year we had an insane amount of food, so my mom suggested we scale it back some this year. Honestly the last two weeks of December are such a blur with my dad passing away, I don't even remember what my contributions were. I think I did a baked brie, Lil' Smokies in the crockpot, and this stuffed baguette. There may have been something else, I'm not sure. I don't even remember what all other foods there were. My uncle made an awesome shrimp dip (my pregnant cousin and I finished it off the next night) for which I need to get the recipe. There were meatballs in the crockpot, a ricotta/lemon spread our friend Betty made, deviled eggs. It was a feast, and that's all that really matters.

Last January I came across this recipe somehow and emailed it to myself. When I was trying to figure out what I'd make for Christmas I went through my recipes email folder and saw this. I don't know why I hadn't made it for another event, it sounded super yummy. It also sounded easy and was something I could make ahead of time, so I slated it for one of my contributions to Christmas "dinner."

Stuffed Baguette
Source: BakingObsession.com

Baguette about 14-inch long
8 oz cream cheese, at room temperature
4 oz fresh goat cheese
1 large garlic clove, minced
½ cup finely chopped red bell pepper (about 1 medium)
½ cup finely chopped sun dried tomatoes in olive oil
¼ cup finely chopped Kalamata olives
2 oz finely chopped spicy salami
About 2 tbsp minced Italian parsley
About 1 tsp minced fresh thyme
Freshly ground black pepper
Salt to taste (very unlikely since there’re plenty of salty ingredients)

Slice off both ends of the baguette. Using a long thin knife and working from the both ends, hollow the baguette out leaving about ½-inch thick crust all around.

Using an electric mixer beat the cream cheese until smooth and lump-free. Beat in the goat cheese and garlic. Stir in the rest of the ingredients.

Working again from the both ends, fill the baguette with the cheese mixture. Pack the filling tight. I like to use a slender tequila shot glass for pressing the filling in. Wrap the stuffed baguette very well in plastic and refrigerate for at least two hours and up to two days. Right before serving, slice the baguette into ½-inch thick slices and serve. For the most neat looking slices, treat it as a cheesecake – each time slice it with a hot dry knife.

*****

Now that I think about it, I think Aggie's Kitchen posted a link to it on Facebook. Perhaps in the future when I email myself recipes I should include in the email how I came across it since after having two kids I have zero memory left.

I didn't make any changes to this because I wanted to see how it turned out on its own. It definitely didn't need any salt, with the salty salami and kalamata olives it was pretty well salted. When I tasted the filling mixture it reminded me a lot of a muffuletta sandwich, so I think at some point I'm going to try making this with muffuletta ingredients and see how it turns out.

I thought I was being really smart in my preparation and threw everything into my food processor that needed to be chopped. My plan was to then add the cream cheese and goat cheese straight to the bowl of the food processor to mix it all up, but I was worried the ingredients would end up just mushing together into a paste and you wouldn't be able to tell what everything was. So after I used the food processor for chopping I threw it all in a bowl and added the goat cheese and cream cheese to that and just mixed by hand. Can you believe I don't own an electic mixer aside from my stand mixer? It's something I keep meaning to get but just never do.

I stood staring down my baguette for awhile trying to decide what to do with it exactly. I ended up cutting it in half to make it slightly more manageable for stuffing. As far as tearing the bread out from the inside, I used a serrated knife at first but then ended up using it to scrape the insides out as I found that to be a lot easier. I did use the tequila shot glass trick to compact the filling, but I was kicking myself because at some point I decided instead of stuffing from just one end I'd stuff from both so it would meet in the middle. It worked out okay, but I was worried there'd be a big empty spot in the middle where the filling wouldn't have met up with the other side, if that makes sense.

This was a big hit. Everyone really liked it. I'd recommend eating it the day of or day after preparing it so the bread doesn't get too soggy. This will definitely go into my appetizer rotation, and it's something that the filling ingredients could easily be changed up to make it a different way each time.


Thursday, December 23, 2010

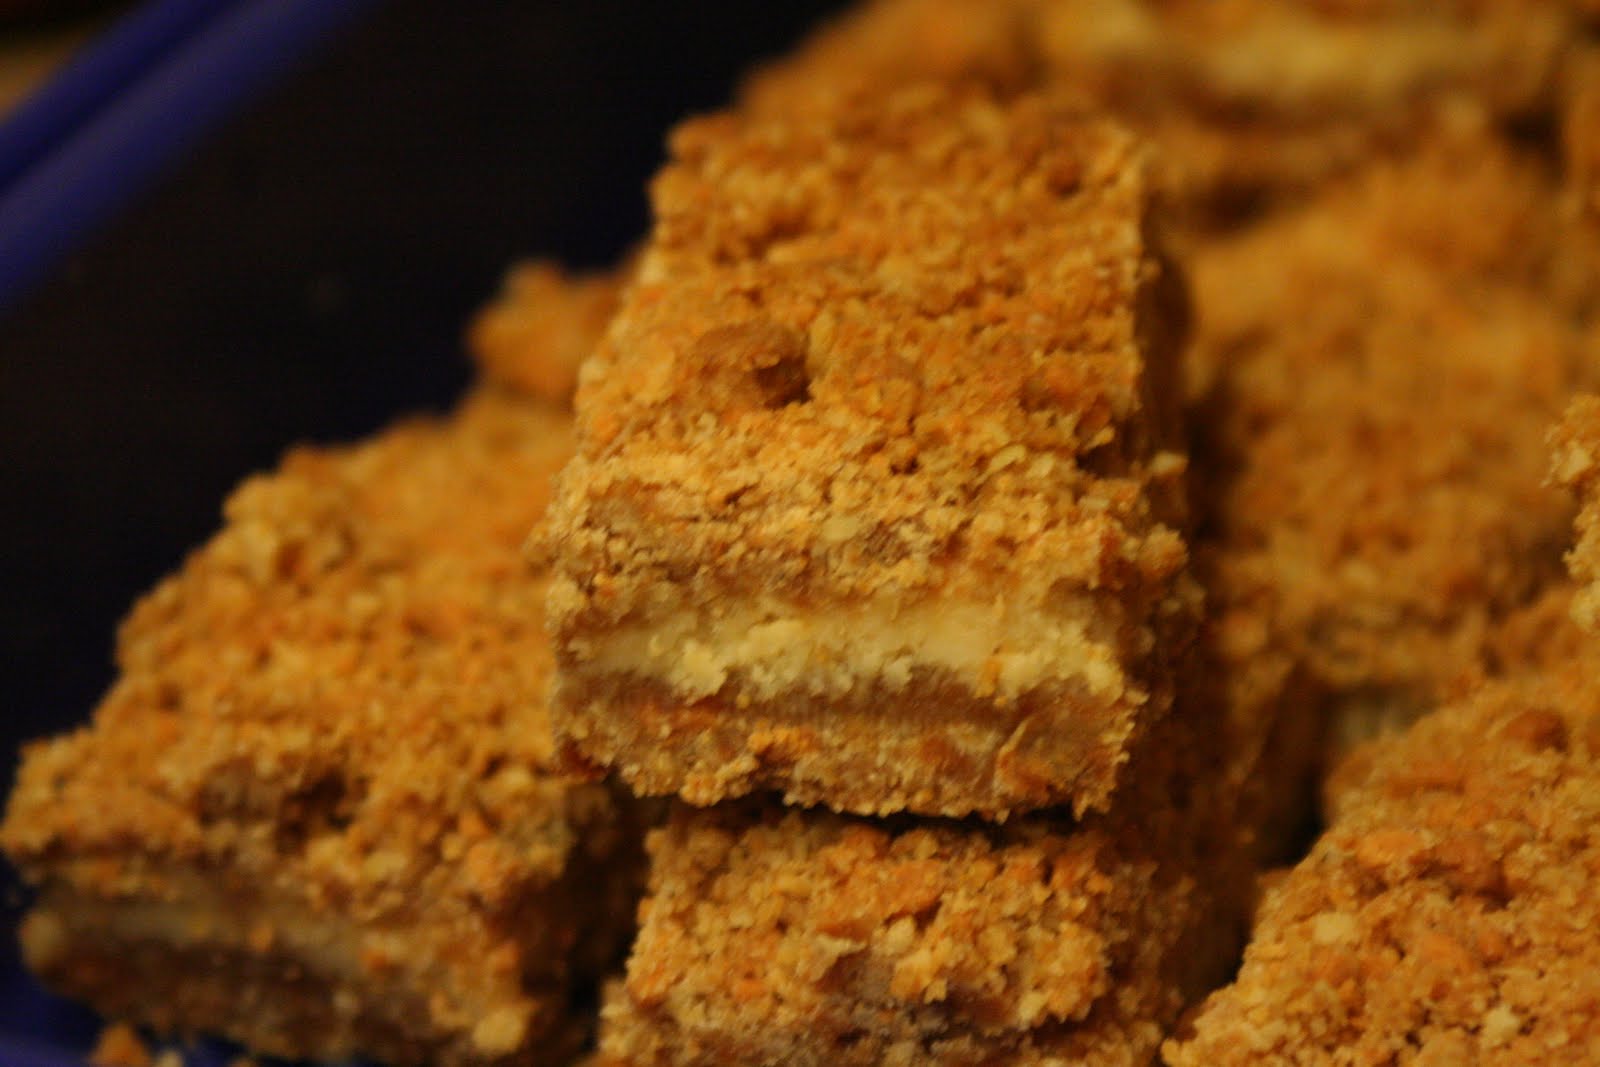
Oatmeal Cream Cheese Butterscotch Bars

I've missed my blog, so while my kids are being entertained by a dog-themed Disney Christmas movie I figured I'd post my most recent Christmas treat. My search for new Christmas cookie recipes lead me to the Food Network website a few weeks ago and somehow I stumbled upon this recipe from Anne Burrell. I like her a lot. How could you not with her fun, spiky hair?? Plus she's worked with some great chefs at some great restaurants.

Once I saw this recipe I couldn't wait to make them. I made sure I picked up everything I needed for them the next time I was at the store after seeing the recipe. I decided earlier this week that my mom and I needed a normal day doing normal Christmastime stuff so we should make Christmas cookies. Of course we ended up doing a bunch of stuff around the house and with the kids, so it didn't work out exactly as I'd planned, but I did make these and those peanut butter cookies where you put the Hershey Kiss on top of them when they come out of the oven. Since everyone knows that recipe, I figured this one was more worth sharing, even though you could very easily find it yourself on the Food Network website. I'm just enabling I guess...making it easier for everyone to discover these.

Oatmeal Cream Cheese Butterscotch Bars
Recipe courtesy Anne Burrell, from FoodNetwork.com

2 sticks unsalted butter, at room temperature, cut into pea-sized pieces, plus more for pan
2 cups all-purpose flour
1 1/2 cups old fashioned rolled oats
3/4 cup firmly packed brown sugar
1 teaspoon ground cinnamon
1 (11-ounce) bag butterscotch chips
1 (8-ounce) package cream cheese, at room temperature
1 (14-ounce) can sweetened condensed milk
1 lemon, zested and juiced
1 teaspoon vanilla extract

Preheat the oven to 350 degrees F. Drape a 9 by 13-inch pan with overlapping pieces of aluminum foil, creating handles for easy removal. Butter the paper, and reserve.

In a food processor add the flour, oats and brown sugar and pulse to combine. Add the 2 sticks of butter, the cinnamon and the butterscotch chips. Pulse, pulse, pulse until the mixture forms clumps when pressed between your fingers. Transfer the mixture to a large bowl. Press half of the mixture into the bottom of the prepared pan in an even layer, reserve the other half. Bake in the preheated oven just until slightly golden and set, about 12 to 15 minutes. Remove from the oven and cool completely.

Beat together the cream cheese, condensed milk, lemon zest and juice and vanilla in an electric stand mixer fitted with a paddle, or with an electric hand mixer until no lumps of cream cheese remain. Spread evenly over the baked and cooled oatmeal mixture. Sprinkle the remaining half of the oatmeal mixture over the cream cheese. Bake until the top is golden, about 40 minutes.

Cool and chill before cutting. Run a knife around the edge of the pan, and using the foil handles, transfer the bars to a cutting board. Cut into 2-inch squares with a sharp knife and serve.

Call yourself a superstar!!!

*****

Now, don't be like me and forget the part about buttering the pan and just assume that since there are two sticks of butter it won't be a problem. Really it wasn't too bad, but I did have to yank on the foil to get them out of the pan. The only thing I changed about this was decreasing the amount of lemon zest. I thought with the juice of a lemon and the zest from a lemon, that would give me more lemon flavor than I wanted. So I juiced the lemon and then zested maybe a quarter of a lemon. I'm not a huge lemon fan, so I didn't want there to be too much lemon flavor, especially since I LOVE butterscotch, so I wanted that to stand out more.

These are AMAZING. I'm having a hard time keeping myself from eating the entire batch. My friend Jen ran to my house yesterday and was kind enough to sample these for me. She approved. As do my kids, the husband, my mom, and me. They were really easy to make too. Dry ingredients in the food processor, wet ingredients in the stand mixer. I skipped putting the dry stuff once blended into a separate bowl--why dirty an extra bowl when I could just grab it out of the food processor bowl? These may in fact be my new favorite Christmas cookie. I'm making the husband's favorite today, then we figure we'll have a taste test in case there's a new favorite to be declared in our house.

Dry ingredients. I forgot to take a picture of the wet ingredients or as I was assembling the bars. Cut me some slack...it was 10:00 at night, and I was wrapping Christmas presents.


Mmmmm...container of bars!


Mmmmm...close up of bar!

Wednesday, October 13, 2010

GG's Carrot Cake

Isn't it funny how once you have kids you start referring to people how your kids do? I rarely refer to my mom as mom anymore...it's usually Gaga. My grandmas have become GG and Granny. I guess it's just easier and avoids confusion as to whom you are discussing or trying to talk to. My mom? Your mom? Me? My grandma? My mom as grandma? Yeah, it's a lot simpler using whatever term my kids use.

My grandma, whom my kids call GG, makes a fantastic carrot cake. It's always been my dad's favorite and always what he chooses for his birthday. At some point the boy became obsessed with carrot cake. I'm not sure how or why as I don't think it's a favorite of most four year olds, but who knows. My mom's birthday was earlier this month, and the boy wanted to make her a carrot cake. I said why didn't we make carrot cake cupcakes instead. He went for it, which was good because I knew I could easily sit and eat a plethora of pieces of GG's carrot cake. Several years ago I took my scanner over to my grandparents' house for a day so I could scan my grandma's recipes. Not to be morbid, but I figured when she passes away there would be an annoying fight over who got her recipe cards, plus this way I could have copies of them in her handwriting. This was one that I scanned.

GG's Carrot Cake

2 cups sugar
2 cups flour
2 cups grated carrots
1 can (8-1/4 oz) crushed pineapple
1 cup shredded coconut
2 tsp cinnamon
2 tsp baking soda
1 tsp salt
1 cup chopped nuts
2 tsp vanilla
3 eggs
1-1/4 cup vegetable oil

Combine all ingredients. Do not mix a whole lot. Bake at 350 for 45 to 50 minutes or until cake is done. Makes 3 8" layers or large flat pan.

Frosting

1 cup margarine or butter
1 8 ounce package cream cheese
1 package powdered sugar (I assumed 1 pound)
1 cup nuts
2 tsp vanilla

Cream margarine and cream cheese together. Add sugar, vanilla, and nuts. Spread on cake when cool.

*****

I was really good and stuck to my diet and only had one cupcake. Well, one at my mom's party. I had one the day before sans frosting to make sure they tasted okay. And I have to say...I'm not entirely sure how a carrot muffin is all that different from a carrot cake cupcake. This is definitely one of my most favorite cakes ever. I heart my grandma so much!!

The boy helped me put this all together and was really pleased with himself for helping make Gaga's (see...there I go again!) birthday cupcakes. They were a huge hit. Oh, and I used chopped walnuts as my nut of choice for this...mostly because it's what my mom said my grandma uses when she makes it (GG was at lunch when I needed to know what kind of nut to get). I wasn't sure how long to bake them, so I did some Googling and found 15 to 20 minutes would be the ideal cupcake baking time. Changing this into cupcakes I got 24 cupcakes and an 8x8 square dish single layer cake out of it. I was pretty pleased with my creativity and cut the square cake into fourths and made a little layer cake out of it for my dad (I mean Baba since that's what my kiddos call him).

And I should probably admit that I'm completely frosting inept. I cannot frost a cake to save my life. Well, maybe if I really needed to save my life I could do a decent job frosting one, but normally they look pretty horrible. Or like my almost two year old did the job for me. Sadly I'm not exaggerating that much. Maybe that's a subconscious reason why I chose cupcakes instead of a regular layer cake...


I'm fairly certain my baby is going to be a ninja. Or a football player...but a very stealthy one. Somehow he managed to sneak three cupcakes down from the counter, take them to the table, sit down, and start eating them without the husband or me noticing. I didn't know whether to laugh or be mad when I saw him. He was very methodical about it all, too. He lined them up, then he'd take a bite from one and put it down, move to the next and take a bite and put it down, move to the next and take a bite and put it down, then start the cycle over again. What a goof!!

Thursday, February 11, 2010

Buffalo Chicken Dip

There's a blog I follow called Gina's Weight Watcher Recipes. She makes all sorts of yummy, low WW points food. I'd read recipes for this dip before and thought it sounded good but never tried it. Then last Thursday I saw this light version and thought, "Hmmm...I should try that one." Then Friday night I was at a baby shower for my friend Kelly, and someone had made the regular (i.e. not light!) version of this dip. I could not stop eating it. Even on my way out the door I went back over to the table for another bite. I woke up Saturday morning craving it. It was THAT good. I decided then and there that I'd try the light version--with a few substitutions. For Gina's recipe, check out the posting on her blog. My version is below.

Skinny Buffalo Chicken Dip

2-3 cups shredded cooked chicken
8 oz reduced fat cream cheese, softened
3/4 cup light ranch dressing
3/4 cup Frank's hot sauce
3/4 cup reduced fat cheddar cheese, shredded

Preheat oven to 350. Combine first four ingredients and spread in 8x12 baking dish. Top with shredded cheese. Bake for 30 minutes or until cheese is melted and dip is bubbly. Serve with tortilla chips and/or celery sticks.

*****

I don't know if the husband was excited to try this or not, but I could not wait for game time to have this. I had a huge chicken breast in the freezer that I thawed and baked. I'm not entirely sure how much chicken it was, but it was quite a bit. The husband declared this to be his new favorite dip that I make. We barely ate the muffuletta because we ate so much of the dip. It was gone by Monday night. And Tuesday morning, the husband said he wished there was some left he could have for breakfast. Somehow these ingredients morph into crack when combined. You should definitely try this. Soon. And invite me over for some while you're at it!

Dip prior to receiving its cheese topping:


Mmmm...baked and ready to be devoured:


Oozy, gooey, bubbly dish of dip goodness:

Thursday, January 14, 2010

Mexican Chicken Casserole

So, part of my blog hiatus--other than being sick all last week--was due to a weekend trip the husband and I took to New Orleans for his cousin's wedding. We had a fantastic time eating and drinking...mostly drinking. ;) I had one of the best foods I have ever eaten in my life...Chargrilled Oysters at Acme Oyster House. Lordy mama, were they ever tasty. Grilled oysters on the half shell with a seasoned butter and romano cheese. Wow. I could have eaten just those the entire time we were there.

Anyway, now it's back to the daily grind since the vacation is over and my cold is gone. I'm still trying to stick to the Pantry Challenge, and so far so good. I had a different casserole planned for Tuesday night, but after putting all the ingredients into the Points calculator on the WW website, I realized it was going to be too many. So I checked out the Cooking Light website for some other chicken casserole ideas. I was excited to find this one as it also gave me a chance to make my own corn tortillas with the tortilla press I got for Christmas!

Mexican Chicken Casserole

1 cup fat-free, less-sodium chicken broth
2 (4.5-ounce) cans chopped green chiles, divided
1 3/4 pounds skinned, boned chicken breasts
2 teaspoons olive oil
1 cup chopped onion
1 cup evaporated skim milk
1 cup (4 ounces) shredded Monterey Jack cheese
1/4 cup (2 ounces) tub-style light cream cheese
1 (10-ounce) can enchilada sauce
12 (6-inch) corn tortillas
Cooking spray
1/2 cup (2 ounces) shredded reduced-fat extra-sharp cheddar cheese
1 ounce tortilla chips, crushed (about 6 chips)

Combine broth and 1 can of chiles in a large skillet; bring to a boil. Add chicken; reduce heat, and simmer 15 minutes or until chicken is done, turning chicken once. Remove chicken from cooking liquid, reserving cooking liquid; cool chicken. Shred meat with two forks, and set aside.

Preheat oven to 350°.

Heat oil in a large nonstick skillet over medium-high heat. Add 1 can of chiles and onion; sauté 3 minutes or until soft. Add reserved cooking liquid, milk, Monterey Jack, cream cheese, and enchilada sauce; stir well. Stir in shredded chicken; cook 2 minutes. Remove from heat.

Place 4 tortillas in the bottom of a 2-quart casserole coated with cooking spray. Spoon 2 cups chicken mixture over tortillas. Repeat layers twice, ending with chicken mixture. Sprinkle with cheddar cheese and chips. Bake at 350° for 30 minutes or until thoroughly heated. Let stand 10 minutes before serving.

Nutritional Information
Calories:369 (28% from fat)
Fat:11.4g (sat 5g,mono 3.8g,poly 1.4g)
Protein:35.6g
Carbohydrate:31.3g
Fiber:3g
Cholesterol:79mg
Iron:2.4mg
Sodium:479mg
Calcium:360mg

*****

I think all I changed was using less chicken. Then in turn I added in less of the liquids because I didn't want it to be too saucy. The finished product was FANTASTIC! I could have used more of the sauce. It wasn't dry, but it could have been more saucy. Especially when we've had the leftovers, it could have used a little more sauce. My tortillas came out pretty good for my first attempt at making my own. I don't normally like corn tortillas, but these were good.

This is definitely something I'd make again! The husband and I loved it. I had the boy taste the sauce and he thought it was too spicy, so he got to have a quesadilla instead. It wasn't nearly as spicy once it was all melded together in the casserole, so I think he would have been fine eating it.

Tuesday, December 29, 2009

Mango Stuffed French Toast

Somehow I forgot the most important recipe I made on Christmas--our breakfast!! I was looking at recipes on the Rick Bayless website recently and saw this recipe for Mango Stuffed French Toast. Oh man...I wanted to make it right then! I figured I'd save it for Christmas morning. I like to have some kind of breakfast casserole that can be in the oven while we're opening presents. It worked out even more perfectly because there were mangos in my basket from Bountiful Baskets.

Mango Stuffed French Toast
Copyright © 2009 Rick Bayless

4 tablespoons unsalted butter, plus 1 tablespoon softened butter for casserole dish
3 mangos (approximately 2 1/2 pounds) peeled and diced into 1/2-inch pieces
1/2 cup sugar (divided use)
12 ounces cream cheese (softened)
12 slices egg bread (challah) sandwich loaf
6 large eggs
1 1/2 cups half & half
1 teaspoon ground cinnamon
1 teaspoon pure vanilla extract
Powdered sugar for garnish
Warm maple or agave syrup

In a very large (12-inch) non-stick skillet over medium-high heat, melt 4 tablespoons butter. Add the mango and saute for approximately 10 minutes or until soft. Sprinkle in a 1/4 cup sugar and stir until the sugar has dissolved. Set aside to cool.

In a small bowl, mix the softened cream cheese and the remaining 1/4 cup sugar.

Butter a 13 x 9 casserole dish with 1 tablespoon softened butter. Divide the cream cheese mixture equally between the slices of bread and spread, covering the entire surface. Place 6 of the slices in the bottom of the prepared dish with the tops of the bread facing out. You may need to squeeze the slices together to make them fit. Spoon the cooled mango slices and their syrup evenly over the bread. Press the remaining slices, cream cheese side down, on top of the mango layer.

Whisk together the eggs, half and half, vanilla and cinnamon. Pour the mixture over the top of the stuffed French toast, making sure to cover all the bread with the egg mixture. Wrap tightly and refrigerate overnight.

In the morning, remove the baking dish from the refrigerator and let stand at room temperature for 20 minutes while you preheat the oven to 350 degrees. Bake for approximately 45 minutes, or until lightly browned and warmed through. Sprinkle the top with powdered sugar and serve with warm syrup.

*****

I just realized we didn't have any syrup or powdered sugar with ours--we just ate it as is (or as was). This was AMAZING. I have yet to be disappointed by a Rick Bayless recipe. I'm telling you, he's a god among men (but not in a blasphemous way). Jen B. and I are dying to take a trip to Chicago and eat at all three of his restaurants.

We all really liked this. It's definitely a breakfast dish I'd make again. It was easy to put together and tasted awesome. Just thinking about it makes me want it again!

Soggy and gooey, going in the fridge the night before!


Mmmmmm...pan of mango french toast...


See the yummy layers? Man I can't wait to have this again!

Saturday, December 19, 2009

PW's Mashed Potatoes

Oh man, what a crazy week it's been. The husband's been laid up in bed since Tuesday, so I've been a single parent for basically five days now. Kudos to those of you that do it all the time--you should all be nominated for sainthood! Everything has fallen to the wayside, including finishing my posts for Thanksgiving #2 that we had last weekend. This week has been so long it blows my mind that was just a week ago. Man. Of course I still have leftovers sitting in my fridge from it, so let's hope it really was just a week ago. ;)

The husband's family doesn't have mashed potatoes at their Thanksgiving dinner, and it's one of the things I miss having the most. So of course they were pretty high priority for Thanksgiving #2. I heart mashed potatoes very, very much. Normally I just boil up the potatoes, mash, add butter and milk and call it good, but I'd seen that The Pioneer Woman had a mashed potato recipe that could be made a couple days before and reheated in the oven, so I thought I'd give that a try. Plus PW has never led me astray.

PW's Creamy Mashed Potatoes

5 pounds Russet Or Yukon Gold Potatoes
3/4 cups Butter
1 package (8 Oz.) Cream Cheese, Softened*
½ cups (to 3/4 Cups) Half-and-Half
½ teaspoons (to 1 Teaspoon) Lawry's Seasoned Salt
½ teaspoons (to 1 Teaspoon) Black Pepper

Peel and cut the potatoes into pieces that are generally the same size. Bring a large pot of water to a simmer and add the potatoes. Bring to a boil and cook for 30 to 35 minutes. When they’re cooked through, the fork should easily slide into the potatoes with no resistance, and the potatoes should almost, but not totally, fall apart.

Drain the potatoes in a large colander. When the potatoes have finished draining, place them back into the dry pot and put the pot on the stove. Mash the potatoes over low heat, allowing all the steam to escape, before adding in all the other ingredients.

Turn off the stove and add 1 ½ sticks of butter, an 8-ounce package of cream cheese and about ½ cup of half-and-half. Mash, mash, mash! Next, add about ½ teaspoon of Lawry’s Seasoning Salt and ½ a teaspoon of black pepper.

Stir well and place in a medium-sized baking dish. Throw a few pats of butter over the top of the potatoes and place them in a 350-degree oven and heat until butter is melted and potatoes are warmed through.

Note: When making this dish a day or two in advance, take it out of the fridge about 2 to 3 hours before serving time. Bake in a 350-degree oven for about 20 to 30 minutes or until warmed through.

*****

If you want to check out her post on them--with step by step pictures--check it out by following this link.

These were super yummy, although I did have some spillage issues when they were in the oven in that some of the potatoes somehow spewed out over the side onto the bottom of my oven. Thankfully it was towards the end of baking so they didn't burn and ruin everything else that was in there at that time, which was, like, all our side dishes. It was so nice to be able to have made these the day before and be done with them. Honestly these were much more decadent than I would normally make mashed potatoes, but isn't Thanksgiving supposed to be decadent?! I mean, really, if you're going to indulge, you should really go all out right?! These would work out really nicely to take somewhere, too, I think. I'd make these again for a special occasion, but I think for normal mashed potato eating I'll stick with my usual way to save on the calories and fat. Plus it made A LOT!

By the way, they were good cold too. You know, from the one bite I took out of the container when they were cold. It's not like I finished off more than a serving that was left while they were still cold. I wouldn't do that. Nope. Not me...

Friday, December 11, 2009

Fisher Nutty Bacon Cheese Ball

This is one of the recipes I meant to blog about but never did. The pictures had been uploaded, so I figured I'd go ahead and post it. The Christmas party for my MOMS Club was one night last week, and everyone was asked to bring an appetizer or dessert. I chose appetizer, and was trying to come up with something to make when I remembered this cheese ball recipe I'd made once before several years ago. I saw it on an episode of Oprah around Christmastime and had bookmarked it. I don't know how I thought of it, but I figured it would be tasty. I mean really...cheese and bacon?! How can you go wrong?! Paula Deen prepared the recipe, but apparently it's from a KitchenAid mixer cookbook, so any of the mixer references in the recipe refer to that.

Fisher Nutty Bacon Cheese Ball

1 package (8 ounces) cream cheese , softened
1/2 cup milk
2 cups shredded sharp cheddar cheese
1/4 cup (1 ounce) blue cheese , crumbled
1/4 cup finely minced green onions (white part only)
1 jar diced pimento , drained
3/4 cup Fisher pecans , divided
10 slices bacon , cooked, drained, finely crumbled and divided
Salt and pepper
1/4 cup minced parsley
1 tablespoon poppy seeds

Place cream cheese in mixer bowl. Attach bowl and flat beater to mixer. Turn to Speed Two and mix 1 minute. Stop and scrape bowl. Turn to Speed Two and gradually add milk, mixing until well blended about 1 minute. Stop and scrape bowl. Add cheeses, onions, pimientos, half of the bacon and half the pecans. Turn to Speed 4 and beat until well blended, about another minute. Season with salt and pepper to taste.

Transfer mixture to a large piece of plastic wrap. Form into a ball and wrap tightly.

Repeat with the remaining mixture. Refrigerate (or freeze) at least 2 hours.

Combine the remaining bacon and remaining pecans, parsley and poppy seeds in a pie plate. Then, remove the plastic wrap and roll the cheese ball lightly in the bacon/nut mixture until evenly coated. Wrap it back up in plastic wrap and refrigerate again until ready to use.

*****

Since it had literally been years since I made this I didn't really remember anything about the recipe. I questioned the addition of the milk, but I went with it...and then regretted it. I really don't think it was necessary as the mixture didn't hold together hardly at all. I put it in the freezer for two hours hoping that would help bring it together more than just having it in the fridge, but when two hours was up the outside of the ball was frozen and the middle was still really squishy. I reshaped it in the plastic wrap and let it go a little longer. I thought about taking something different, but I didn't want to have to stop at the store, so I went ahead and took it, even though it was more cheese blob than ball. THere were only a few bites left at the end of the night, so it tasted fine, it just didn't look the greatest. I think next time I will either skip the milk entirely or cut it back to 1/4 cup or less. I made two cheese balls out of the recipe and have the second one in the freezer, saving it for Christmas.


I have to say that I was pretty pleased with my "plating." Since I had to take it somewhere I wanted an easy way to transport it, so I stuck the cheese blog in a pie plate and then surrounded with crackers. I thought it was ingenious!!