Showing posts with label butter. Show all posts

Thursday, August 15, 2013

Baked Hawaiian Ham Sandwiches


So chances are good that if you're on Pinterest, you've seen this recipe and/or pinned it.  We had these last night, and I couldn't believe they weren't on my blog because I've made them several times, and they're completely easy and delicious.

I've always loved the http://www.kingshawaiian.com/products/">King's Hawaiian breads
, and it seems that now they're a whole lot easier to find than they were many years ago.  It used to be a big treat to find them, now pretty much every grocery store has them.  And I love them.  That was selling point number one for these sandwiches.  Although it just occurred to me that I've never looked at the ingredient list.  Sigh.  I probably should, but I'm fairly certain that means I won't want to buy them anymore.  Do you ever run into this conundrum if you try and mainly eat real food?  I suppose I could find a recipe to make my own...surely there's one out there.  But I digress...
I also love sandwiches.  I'd say who doesn't love them, but I do know of someone that doesn't.  She doesn't like mixing her food together, which I understand I guess, but man alive is she missing out!  I can see not wanting your mashed potatoes and peas to mingle together on your plate, but a sandwich is something completely different.  These sounded super easy when I first saw the recipe, and I'm always up for an easy to prepare dinner!  Especially if it's a delicious sandwich.

Baked Hawaiian Ham Sandwiches

One 12-count package http://www.kingshawaiian.com/products/rolls-12-pack/">King's Hawaiian sweet dinner rolls
3 sticks butter
3 Tbsp dijon mustard
1-1/2 tsp worcestershire sauce
1 Tbsp poppy seeds
1 onion, somewhere between finely chopped and diced
1 pound thin sliced ham
6 slices Swiss cheese

Preheat oven to 350.

In a medium saucepan, melt butter and add in mustard, worcestershire, poppy seeds, and onion.  Let simmer 5-7 minutes.

Slice entire package of rolls in half horizontally, so you have 12 bottoms and 12 tops.  Keep them connected--don't break them apart into separate rolls.

Place bottom halves of rolls into a foil-lined 9x13 baking dish.  Brush 1/3 to 1/2 butter mixture on rolls.  Place ham on top, layering evenly across rolls.  Lay cheese slices in single layer on top of ham.  Place top halves of rolls over the cheese and brush remaining butter mixture on the top of the rolls.

Cover with foil.  Bake approximately 15 minutes.  Remove foil cover and bake another 5-7.  Slice into individual rolls and serve.

*****

Obviously you can probably tell from my initial comments that these are a huge hit at my house.  My kids don't like the pieces of onion on theirs that inevitably end up on the top of the roll, so they just push them off and have a little onion pile on their plate, which is okay by me.  I'm not sure how many times I've made them, but last night I actually doubled the recipe so there'd be leftovers because we'll eat a whole batch in one meal.  But then of course today, Boy #1 wanted to buy lunch at school, and the husband had an all day meeting with lunch being served, so there's a whole pan of them just sitting in my fridge now.  Good thing it's leftover clean-up for dinner tonight!

By the way, does anyone know of a ham that is free of nitrates and nitrites?  Try as I might, I cannot find one.  I'm starting to think unless I get a fresh ham and cook it myself, it's not going to happen.  And if that's the case, I'll either stick with the nitrites or do away with ham altogether.

Who am I kidding...I would never do away with ham.

Speaking of ham...check out Boy #2 posing with the sandwiches!


Sunday, June 24, 2012

Italian Beer Bread with Sun Dried Tomato Butter


This was my final contribution to my grandma's happy hour birthday party. Back when Boy #1 turned six in February, he requested Little Ceasar's pizza for his family birthday dinner. Since no one other than my two kids are big fans of that, I made an executive decision to have a happy hour type party for him, so he could still have his pizza, but the rest of us wouldn't be forced to eat it. My brother and his girlfriend came down from Seattle for the party, but she ended up getting really sick while they were visiting, which meant no one wanted to touch our house with a 10 foot pole, meaning my family didn't end up coming over for his birthday dinner. Instead we had our best friends over to celebrate with us. I had this bread recipe slated to make for it, so I went ahead and made it. We all liked it so much I decided to make it again so my family could actually try it!

Italian beer bread and sun dried tomato butter
Source: SnappyGourmet.com via Pinterest

Bread:
3 1/2 cups (15oz.) all-purpose flour
1/2 cup granulated sugar
1/2 cup grated parmesan cheese
1 tablespoon baking powder
1 tablespoon Italian seasoning
1 teaspoon salt
1/2 teaspoon garlic powder
1/4 teaspoon onion powder
1/4 teaspoon black pepper
12 oz. beer
2-3 tablespoons unsalted butter, melted (optional)

Butter:
1/2 cup unsalted butter, softened
1/4 cup sundried tomatoes in oil, chopped
1/4 teaspoon salt
1/8 teaspoon pepper

Preheat oven to 350 degrees F. Spray a 9×5 inch bread pan with nonstick cooking spray.
In a large bowl, whisk together flour, sugar, cheese, baking powder, Italian seasoning, 1 teaspoon salt, garlic powder, onion powder, 1/4 teaspoon pepper until well combined. Pour in beer and stir until just combined.

Place dough in prepared bread pan. Spoon 2-3 tablespoons of butter on top of bread if desired.

Bake bread for about 50-70 minutes or brown and crispy around edges. Cool slightly then remove from pan.

Meanwhile, place 1/2 cup butter, sundried tomatoes, 1/4 teaspoon salt, and 1/8 teaspoon pepper in food processor and process until smooth. Serve with bread.

Notes
SNAPPY TIPS: Be sure to cook the bread until is browned and crispy around edges so that it’s cooked through the middle. If you don’t add butter to the top of the bread, you can cover the bread halfway through the cooking time to help prevent overbrowning before the bread is cooked through.

*****

Like I said above, I had already made this before, so I knew it was a winner. I love a good quick bread recipe, and this comes together really easily. The sun dried tomato butter is tasty, too, although it is really hard to spread if you keep it in the fridge. This is a relatively easy appetizer to make, and I know it's one that I'll make a lot in the future.


Wednesday, January 18, 2012

The Best Ever Chocolate Chip Cookies


I've been making these chocolate chip cookies since I was in college, and I could not believe that I have never put the recipe here on my blog. These are without a doubt the BEST chocolate chip cookies ever. Well, my friend Kelly makes some tasty chocolate chip cookies, too, but aside from hers these are hands down my favorite. I don't even mind making them, and I generally hate making cookies. The recipe came to me from my college boyfriend's mom. Honestly when he and I broke up I was most disappointed that I would never have his mom's chocolate chip cookies again. Yeah...things had really gone downhill at that point since that was what disappointed me the most. His family also made the most delicious frozen margaritas, but I'd already learned how to make those. Anyway, I eventually put on my big girl panties and emailed his mom asking for the recipe. She was thrilled to hear from me and sent me the recipe. Haha..score! And I've been making them ever since. I used to make them really, really often and had the recipe memorized, but now since I don't make them all the time I have to pull out the recipe each time I want them. And I was reminded yesterday why I don't make them very often...I ate four of them almost immediately. I'm not proud of it, but damn they're tasty.

The Best Ever Chocolate Chip Cookies
Source: Susan, my ex-boyfriend's mom

1 cup white sugar
1 cup brown sugar
3 sticks butter minus about 2 tablespoons
2 eggs
2 teaspoons vanilla

Put ingredients in a bowl and cream really well. It will look yucky and then look like a thick whipping cream. I always start with everything right out of the refrigerator.

Add
3 cups flour
1 teaspoon salt
1 teaspoon baking soda

I don’t mix this too much, just enough to combine.

Then add chocolate chips (1-2 12 oz bags depending on taste) and pecans or walnuts.

Bake at 375 until done, about 10-12 minutes.

*****

I have found that 11 minutes is the optimal baking time for these cookies. They will look a little underdone at that point, but trust me when I say that's the best time to pull them out. Otherwise they're too crunchy. Not that they're bad then, but they're much better when they're soft in the middle. I don't ever add nuts to mine either, mostly because I don't have those nuts on hand, and I'm not really a fan of nuts in my cookies. I always mix these up in my Kitchenaid mixer because it's super easy to let it do all of the work. I think that's another reason I like this recipe--I don't end up dirtying a ton of dishes, and that's one of the big beefs I have with baking. Why does it seem to always produce more dirty dishes than just cooking?

Oh, and I really like milk chocolate chips in these, although the batch I made yesterday I used a bag of milk chocolate and half a bag of semi sweet chips that I had in my pantry.

Anyway, try these cookies. Now. You won't be disappointed. And if you make them and think your chocolate chip cookie recipe is better, send it to me! I'm down for a taste test!

This is also the only cookie dough I like to eat.

What's a plate of chocolate chip cookies without a glass of milk?!

Saturday, June 4, 2011

Broccoli with Garlic Butter and Cashews

I know I've mentioned the parenting message board I'm a member of before, The Mamasphere. This recipe was posted by one of the members and got rave reviews from everyone that's tried it. The member's username is AmRo, so it was dubbed AmRo's Broccoli Cashew Yumminess by someone else. We've actually had this several times as a side dish and as a main dish by adding chicken and serving it over quinoa. See, I wasn't kidding about incorporating quinoa more often! I love the flavors of the sauce and the crunch the cashews add to it. Really I'm just a sucker for anything with cashews.

Broccoli with Garlic Butter and Cashews

1 lb of broccoli, cut into bite sized pieces
1/3 cup of butter (I cut this to about 1/4 cup)
1 teaspoon brown sugar
2 tablespoons soy sauce
Several twists of black pepper (to taste)
2 cloves garlic, minced
Chopped cashews, as few or as many as you'd like, but probably no more than 1/3 cup.

1. Steam the broccoli until tender/crisp.

2. Melt the butter in a small saucepan over medium heat. Add the garlic and saute for a minute or so. Mix in the soy sauce, brown sugar, and pepper. Bring to bubbling, then reduce heat to low and simmer for a few minutes to thicken a smidge. Add the cashews, pour the sauce over the broccoli and stir to coat.

*****

Super easy and super tasty!! I've made it with fresh and frozen broccoli and had good results both times. It really comes together quickly, and it's so good. I've toasted the cashews each time I've made it. Plus the ingredients are things I normally have on hand. Well, not always the cashews but everything else.


I forgot to take a picture before I was packing up the leftovers.

Wednesday, March 23, 2011

Tiramisu Cake with Cream Cheese Frosting

Wow are things dusty around here from lack of use! I can't believe it's been so long since I updated my blog. Although, in my quest to use up the massive amount of items I had in my freezers, I wasn't making a whole lot of new stuff. And we were on vacation for a week. While we were on vacation--hobnobbing with Mickey Mouse and playing at the beach--I realized how much I miss my blog and need to get back in the groove of updating and trying new recipes. I miss my cookbook project, too.

I was just going through pictures on my computer to move stuff to my "cooking blog" pictures folder and saw the pictures of this amazing cake. I'm embarrassed to say that it was the middle of February when I made it, but I just never got around to posting it. Actually I've posted it before, but this time I remembered to take pictures as I was going. Two of my friends and I decided awhile back to do a supper club. This was back in November I think. We tried to plan it for December, but it fell through. i don't remember if we tried for January. It was originally going to be husbands and kids, too, but my husband didn't really want to go and it turned out another husband was out of town, so we decided to just have it be the girls. I was glad it worked out that way, it was so fun! It was at my friend Jenn's house, and she made a delicious roasted chicken with green beans and amazing fingerling potatoes. Oh my gosh, the potatoes! They were so tasty. Jen brought a really good feta dip as an appetizer, and I was in charge of dessert. I really had no idea what to take, and then I remembered this dessert. It's so rich and decadent and time-consuming, but I love it and wanted an excuse to make it.

Tiramisu Cake with Cream Cheese Frosting

Cake
3 1/2 cups all purpose flour
1 tablespoon baking powder
1/2 teaspoon salt
2 1/4 cups sugar
1 1/2 cups (3 sticks) unsalted butter, room temperature
5 large eggs
1 1/3 cups whipping cream
1 tablespoon vanilla extract

Preheat oven to 325°F. Butter and flour 2 9-inch round cake pans. Whisk flour, baking powder and salt in large bowl to blend. Using electric mixer, beat sugar and butter in another large bowl to blend. Add eggs 1 at a time, beating well after each addition. Beat in cream and vanilla. Stir flour mixture into butter mixture. Divide batter equally among pans. Bake until tester inserted into center of cakes comes out clean, about 35 minutes. Cool completely.

Frosting / Filling
3 1/2 8-ounce packages cream cheese, room temperature
2 1/3 cups powdered sugar
1 cup chilled whipping cream
1 1/4 tablespoons vanilla extract

Using electric mixer beat cream cheese in large bowl until light. Gradually add sugar and beat until fluffy. Add cream and vanilla and beat until well blended. Cover refrigerate for at least 1 hour.

Soaking Syrup
1 1/3 cups KahlĂșa or other coffee liqueur
1/2 cups water
1/8 cup instant espresso powder or coffee powder

Combine.

Assembly
4 ounces semisweet chocolate, chopped
1 9-inch-diameter cardboard cake round
2 cups assorted berries (such as raspberries, blueberries, blackberries and strawberries)

Finely grind chopped chocolate in processor (do not over process or chocolate will clump together). After cakes have cooled completely, take about half a cup of frosting and spread it on a cardboard round or what ever you will be placing the cake on.

Cut the cakes in half horizontally. Place bottom of one cake on cardboard round, cut side up. Brush with 1/3 of syrup. Spread out about 1 cup of frosting and then sprinkle with 1/3 of the chocolate. Place top of cake on top - repeat syrup, frosting, chocolate. Place bottom of 2nd cake on top, cut side up - repeat with the remains of the syrup, 1 cup of frosting and remains of the chocolate.

Now, to tidy it up - take a serrated knife and cut around the cake to make it even all around, this made it very easy to frost the cake.

Frost the entire outside of cake. Decorate with berries, icing or chocolate.

This cake is best when allowed to sit for a day or so.

*****

I'm currently doing Phase One of the South Beach Diet again and just thinking about this cake is adding pounds back on to my body, I'm pretty sure. It's really, really, really time consuming, but it's so worth it. Be very generous when using the soaking syrup. The cake is really dense, so you want to use as much of the syrup as you can so it soaks through and makes the cake layers moist and flavorful. And definitely let it sit as long as possible so the cake has more time to absorb the syrup.

This is hands down one of my favorite cakes ever.

Cake batter...I told you it's a dense cake!


Layer of cake with syrup...really brush it on there!


Syrup with chopped chocolate in the background


Mmmmm...cream cheese frosting...


Cake in progress


Frosting cakes is not one of my strong suits, but I'm okay with it since I rarely do it. It tasted awesome, and that's what really counts.

Thursday, December 23, 2010

Oatmeal Cream Cheese Butterscotch Bars

I've missed my blog, so while my kids are being entertained by a dog-themed Disney Christmas movie I figured I'd post my most recent Christmas treat. My search for new Christmas cookie recipes lead me to the Food Network website a few weeks ago and somehow I stumbled upon this recipe from Anne Burrell. I like her a lot. How could you not with her fun, spiky hair?? Plus she's worked with some great chefs at some great restaurants.

Once I saw this recipe I couldn't wait to make them. I made sure I picked up everything I needed for them the next time I was at the store after seeing the recipe. I decided earlier this week that my mom and I needed a normal day doing normal Christmastime stuff so we should make Christmas cookies. Of course we ended up doing a bunch of stuff around the house and with the kids, so it didn't work out exactly as I'd planned, but I did make these and those peanut butter cookies where you put the Hershey Kiss on top of them when they come out of the oven. Since everyone knows that recipe, I figured this one was more worth sharing, even though you could very easily find it yourself on the Food Network website. I'm just enabling I guess...making it easier for everyone to discover these.

Oatmeal Cream Cheese Butterscotch Bars
Recipe courtesy Anne Burrell, from FoodNetwork.com

2 sticks unsalted butter, at room temperature, cut into pea-sized pieces, plus more for pan
2 cups all-purpose flour
1 1/2 cups old fashioned rolled oats
3/4 cup firmly packed brown sugar
1 teaspoon ground cinnamon
1 (11-ounce) bag butterscotch chips
1 (8-ounce) package cream cheese, at room temperature
1 (14-ounce) can sweetened condensed milk
1 lemon, zested and juiced
1 teaspoon vanilla extract

Preheat the oven to 350 degrees F. Drape a 9 by 13-inch pan with overlapping pieces of aluminum foil, creating handles for easy removal. Butter the paper, and reserve.

In a food processor add the flour, oats and brown sugar and pulse to combine. Add the 2 sticks of butter, the cinnamon and the butterscotch chips. Pulse, pulse, pulse until the mixture forms clumps when pressed between your fingers. Transfer the mixture to a large bowl. Press half of the mixture into the bottom of the prepared pan in an even layer, reserve the other half. Bake in the preheated oven just until slightly golden and set, about 12 to 15 minutes. Remove from the oven and cool completely.

Beat together the cream cheese, condensed milk, lemon zest and juice and vanilla in an electric stand mixer fitted with a paddle, or with an electric hand mixer until no lumps of cream cheese remain. Spread evenly over the baked and cooled oatmeal mixture. Sprinkle the remaining half of the oatmeal mixture over the cream cheese. Bake until the top is golden, about 40 minutes.

Cool and chill before cutting. Run a knife around the edge of the pan, and using the foil handles, transfer the bars to a cutting board. Cut into 2-inch squares with a sharp knife and serve.

Call yourself a superstar!!!

*****

Now, don't be like me and forget the part about buttering the pan and just assume that since there are two sticks of butter it won't be a problem. Really it wasn't too bad, but I did have to yank on the foil to get them out of the pan. The only thing I changed about this was decreasing the amount of lemon zest. I thought with the juice of a lemon and the zest from a lemon, that would give me more lemon flavor than I wanted. So I juiced the lemon and then zested maybe a quarter of a lemon. I'm not a huge lemon fan, so I didn't want there to be too much lemon flavor, especially since I LOVE butterscotch, so I wanted that to stand out more.

These are AMAZING. I'm having a hard time keeping myself from eating the entire batch. My friend Jen ran to my house yesterday and was kind enough to sample these for me. She approved. As do my kids, the husband, my mom, and me. They were really easy to make too. Dry ingredients in the food processor, wet ingredients in the stand mixer. I skipped putting the dry stuff once blended into a separate bowl--why dirty an extra bowl when I could just grab it out of the food processor bowl? These may in fact be my new favorite Christmas cookie. I'm making the husband's favorite today, then we figure we'll have a taste test in case there's a new favorite to be declared in our house.

Dry ingredients. I forgot to take a picture of the wet ingredients or as I was assembling the bars. Cut me some slack...it was 10:00 at night, and I was wrapping Christmas presents.


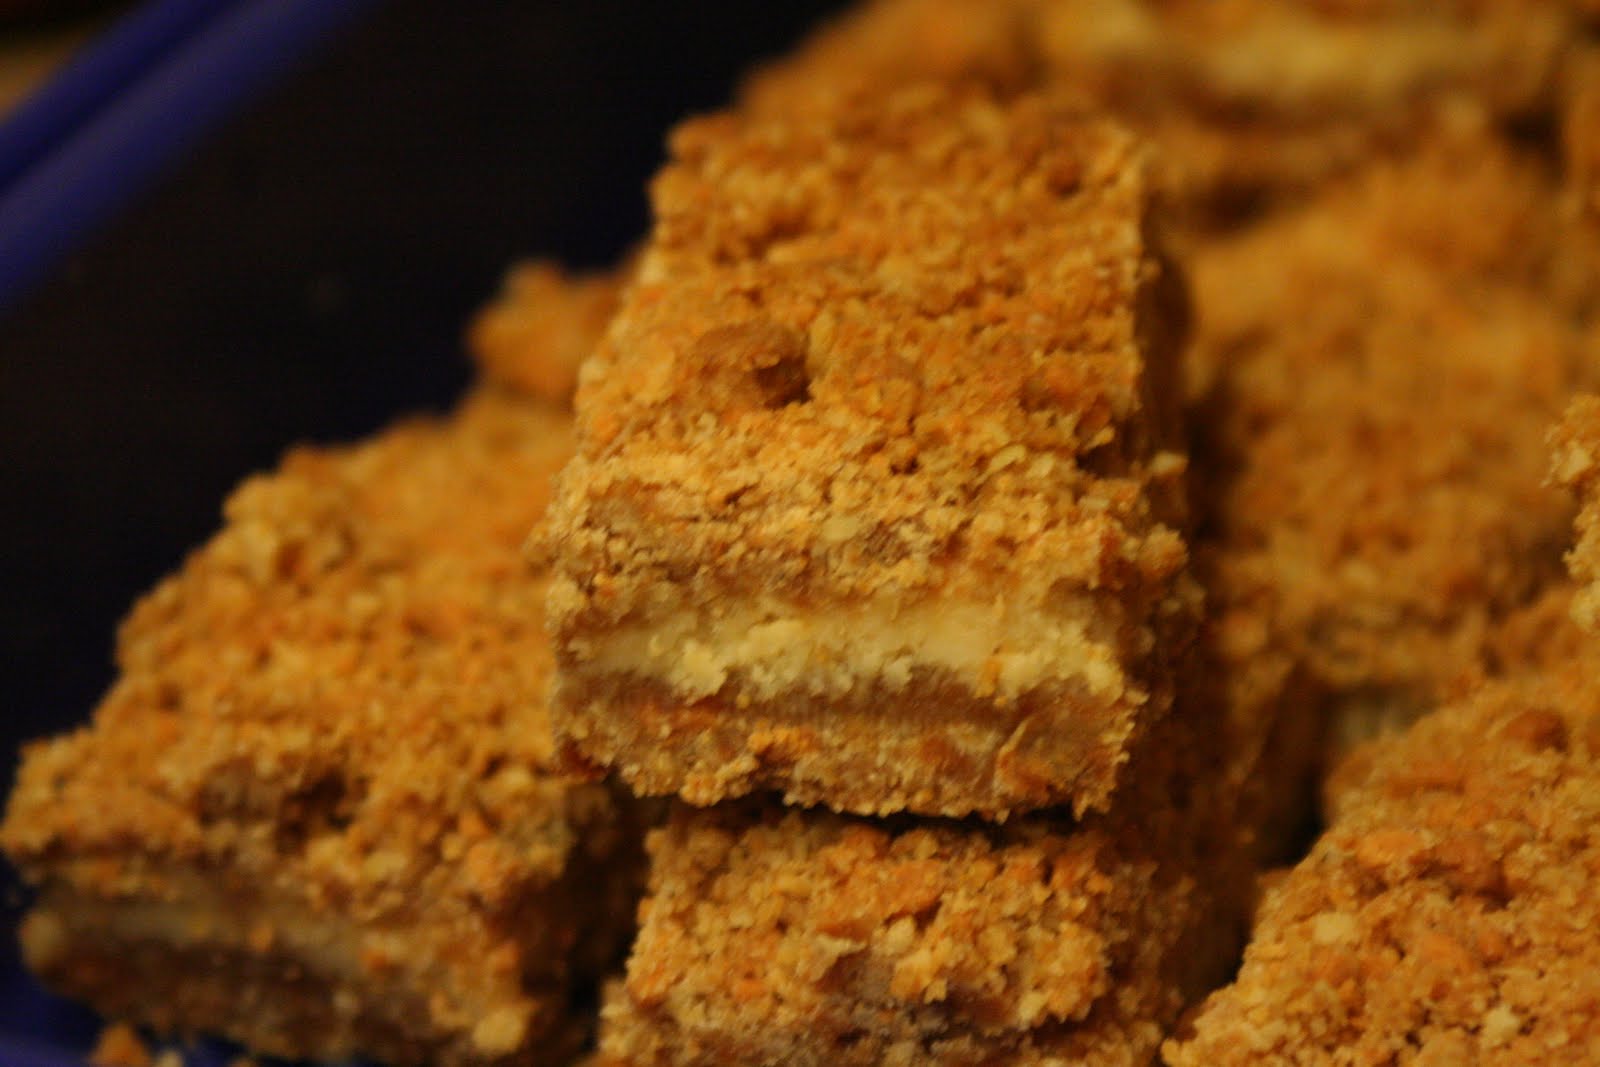
Mmmmm...container of bars!


Mmmmm...close up of bar!

Monday, December 13, 2010

Pioneer Woman's Spicy Roasted Chicken Legs

I know I have a ton of posts to go back and catch up on, but I figure it's better to start with the current and then move backwards, otherwise I'll get overwhelmed thinking about it and sit in the corner in the fetal position rocking back and forth. Maybe not quite that severe, but I have put off updating the ol' blog here for awhile because it overwhelmed me to think about what all I wanted to post. Sigh.

I was recently looking at the Pioneer Woman's website and saw this recipe for chicken legs. I had a package of them out in the freezer, so it seemed the stars aligned. Plus I had everything on hand to make them, which was a bonus because I was trying to use up things I had here because my freezer, pantry, and fridge all seemed to be overflowing.

If you want to see all of PW's nice pictures, here's the recipe on her website. I'm a slacker and forgot to take pictures. Oops.

Pioneer Woman's Spicy Roasted Chicken Legs

24 whole Chicken Legs
2 sticks Butter
1 Tablespoon Hot Salt (or You Favorite Seasonings)
½ cups Lemon Juice (or To Taste)

Melt 2 sticks of butter in a saucepan. Pour ½ cup of lemon juice (fresh or bottled). Now add your seasonings. In this case, 1 tablespoon of Morton’s Hot Salt. You can use whatever seasonings makes your skirt fly up, be it minced garlic, salt and Cayenne pepper … let your imagination run wild. Stir it together until combined.

Rinse and pat your chicken legs dry. With metal tongs, transfer them one by one into the butter mixture and place on a baking sheet. Once all of the chicken legs are coated and on the baking rack, take a pastry brush and give them one last coating of the butter mixture. Sprinkle them with some more of your seasonings.

Place them into a 400-degree oven for 30 minutes. If they need a bit more color, turn on the broiler for a couple minutes and watch them closely. Remove them when they are nice and golden brown.

*****

I was going to get the Hot Salt when I went grocery shopping yesterday, but I decided to stay home and hang out with the husband instead of going to the store, so I worked with what I had. I went with Tony Chachere's because everything is better with some Tony's on it. I also added in some garlic powder and Lawry's seasoning salt just for kicks. I kept the Tony's pretty minimal because the boy doesn't dig on spicy. I probably could have stepped it up a little because you couldn't really taste it at all.

This was a super easy chicken recipe, and we all really liked it. My kids love eating drumsticks...God sure got it right when he made that part of the chicken for us to eat, didn't He. It's such a perfect kid food with its built in handle and all. I didn't have 24 drumsticks, I think there were more like 15 in my package. It was quite a lot for my family of four. I only used one stick of butter, which was plenty.

This is something I'll definitely make again. In fact, chicken legs are on sale this week at my grocery, so I may just pick up another package when I'm there today.

Again, sorry there's no picture...but check out PW's website if you want to see better pictures than I take anyway. ;)

Friday, November 5, 2010

Prosciutto-Wrapped Chicken with Green Beans

I've been down with strep throat most of this week. I had figured I'd update my blogs while stuck in bed, but I did something like 10 entries for my family blog and was all blogged out after that. Plus every time I'd think of it I'd realize most of the recipes I'd made weren't online and the actual recipes were downstairs which would require me leaving my sickbed. Hopefully over the weekend I can get caught up on everything.

We had this a week or so ago, and I honestly wasn't sure what my family members would think. I generally assume prosciutto-wrapped anything is going to be awesome, but everyone else in my house doesn't share my affinity for olives. Their loss I guess. It's a recipe from America's Test Kitchen 30-Minute Suppers Summer 2010. Honestly I'm not sure how I never noticed it before because I've looked through this magazine hundreds of times.

Prosciutto-Wrapped Chicken with Green Beans
From America's Test Kitchen 30-Minute Suppers Summer 2010

4 Tbsp unsalted butter, softened
1/4 cup pitted mixed olives
1/4 cup lightly packed sage leaves
4 boneless, skinless chicken breasts
Salt and pepper
8 thin slices prosciutto
2 Tbsp olive oil
3 garlic cloves, sliced thin
1 pound green beans, stem ends trimmed
1/4 cup water

Adjust oven rack to upper middle position and heat oven to 400 degrees. Process butter, olives, and sage in food processor until smooth.

Pat chicken dry with paper towels and season with salt and pepper. Spread butter mixture on 1 side of each chicken breast. Working with 1 breast at a time, slightly overlap 2 slices of prosciutto on work surface. Lay chicken, butter side down, in center of slices, then fold prosciutto over chicken. Repeat with remaining prosciutto and chicken.

Heat oil in large skillet over medium-high heat until just smoking. Add chicken, seam side down, and cook until well browned, about 2 minutes per side. Transfer chicken to baking sheet and bake until chicken registers 160 degrees, about 8 minutes. Transfer to platter and tent with foil.

Reduce heat to medium. Add garlic to skillet and cook until lightly browned, 1-2 minutes. Add green beans and toss to coat thoroughly. Add water, cover, and cook until bright green and tender, 8-10 minutes. Season with salt and pepper to taste. Serve chicken with green beans.

*****

I didn't change anything with the chicken and used a mix of green and kalamata olives. I went to the olive bar at my grocery store and picked out a few olives of two different kinds. I've used the green olives before in muffuletta sandwiches and knew they were quite yummy because they're marinated in olive oil and garlic. Yum! I used frozen green beans because it was what I had. I was feeling lazy and didn't want to slice garlic, so instead I just threw some dried garlic in the pan.

This chicken was AMAZING. I took one bite and was in l-o-v-e!! Yes, I feel like I'm 13 writing this but I don't care. It was so fantastically good. We all loved it. The husband and I both devoured ours. Just thinking about it makes me salivate some. The salty olives, the slightly crisped prosciutto...lordy mama. This will definitely go into high dinner rotation or as often as I rotate dinners anyway!

Sorry the picture isn't better...I couldn't find my good camera. I didn't know which was "better," the picture that looked orange or the one with the glaring flash. Sigh.


Thursday, September 23, 2010

Chargrilled Oysters Acme Oyster House Style

I know I've mentioned before that the husband grew up in New Orleans. We love to go visit, although it doesn't happen very often since it's not cheap to get there, and it's definitely not cheap once you're there. But when we do go, it's our tradition to head straight to Acme Oyster House. Heaven on a plate, I'm telling you! Well, if you like oysters. Oysters are another food I refused to eat growing up. They just seemed so slimy and gross. My parents loved them and would buy jars of them and have fried oysters. Ugh. The husband finally convinced me to try oysters on the half shell at some point, and I loved them. I know as a Pac Northwest girl at heart I shouldn't say this, but gulf oysters are so much tastier than the oysters you get in Washington. Those oysters are too briny, whereas gulf oysters taste sweet.

Anyway, we were in New Orleans in January for the husband's cousin's wedding, so after we checked into our hotel we headed straight for Acme Oyster House. I don't remember if we saw someone having the Chargrilled Oysters or our waiter told us about them or we just thought they sounded good. They were one of the best things I've ever eaten. EVER. I'm pretty sure I texted, called, or emailed my friend Jen about them as soon as I was done eating. Actually I don't think I got cell service in the restaurant so I had to wait until we were outside. But I digress.

Recently these delectable oysters popped into my head, and I couldn't stop thinking about them. Since a trip to New Orleans is out of the question, I did some Googling and found a recipe on Food.com for Chargrilled Oysters Acme Oyster House Style. You have no idea how elated I was. My mom was keeping the kids for us this past weekend so the husband and I could have a date weekend and a little staycation at home. I wanted to have some awesome yummy snacks for us while the kids were gone, so I decided to make these. We were actually supposed to go out to dinner but ended up staying home and eating these instead.

Chargrilled Oysters Acme Oyster House Style
From Food.com

12 fresh shucked oysters, on the half shell
1/2 lb unsalted butter
1 tablespoon fresh lemon juice
1/2 tablespoon Worcestershire sauce
1 bunch green onions, finely chopped
10 garlic cloves, pureed
1/2 teaspoon crushed red pepper flakes
1 1/2 tablespoons finely chopped fresh thyme
1 1/2 tablespoons finely chopped fresh oregano
1 tablespoon creole seasoning
1 ounce white wine
1/2 cup grated romano cheese

Melt half the butter in a medium sauce pan over medium heat. Add your lemon juice, Worcestershire sauce, green onions and all herbs and seasonings. Cook for 2-3 minutes, then stir in wine. Keep stirring and remove from heat as soon as the green onions wilt. Let cool for 3-4 minutes. Add the rest of the butter and stir until completely incorporated.

Heat grill to to 350°F Place oysters on grill. When the oyster liquor starts to bubble, spoon 1 tablespoon of sauce on top of each, then top with 1 tablespoon of Romano cheese. Let the cheese melt. When oysters begin to slightly brown at the edges, remove from grill and place on a heat proof plate or tray.

Top each oyster with an additional tablespoon of the butter sauce and serve immediately with slices of french bread for dipping.

*****

My mouth started watering just thinking about these. If Whole Foods were closer and the baby wasn't napping, I'd be tempted to run out and get some oysters to make these again. In case you couldn't tell, we LOVED these. The recipe on the website actually calls for four servings, but I halved it. The sauce smelled amazing as it was cooking (although when doesn't butter smell amazing?!).

This was my first time shucking and cooking oysters. I was a little nervous about the shucking, but I looked up how to do it (what did we do before the internet?!). Plus my brother has shucked oysters before, so I figured if he could do it, so could I. It wasn't as hard as I thought. I just held the oyster in a thick kitchen towel, stuck a knife in and twisted it open. There were two that I couldn't open which kind of pissed me off, but I figured it wasn't worth the fight, so I just tossed them.

There isn't anything I would change about this recipe, except I'd make more of it. The butter sauce was so amazing, the husband went scrounging around in the freezer for some ciabatta rolls I thought were there so we could mop up the sauce. He found them, we heated them up and ate every last drop of sauce from our plates. Man alive was this tasty!!! Healthy, no. Tasty, yes!

Lucky for you, I took copious amounts of pictures!

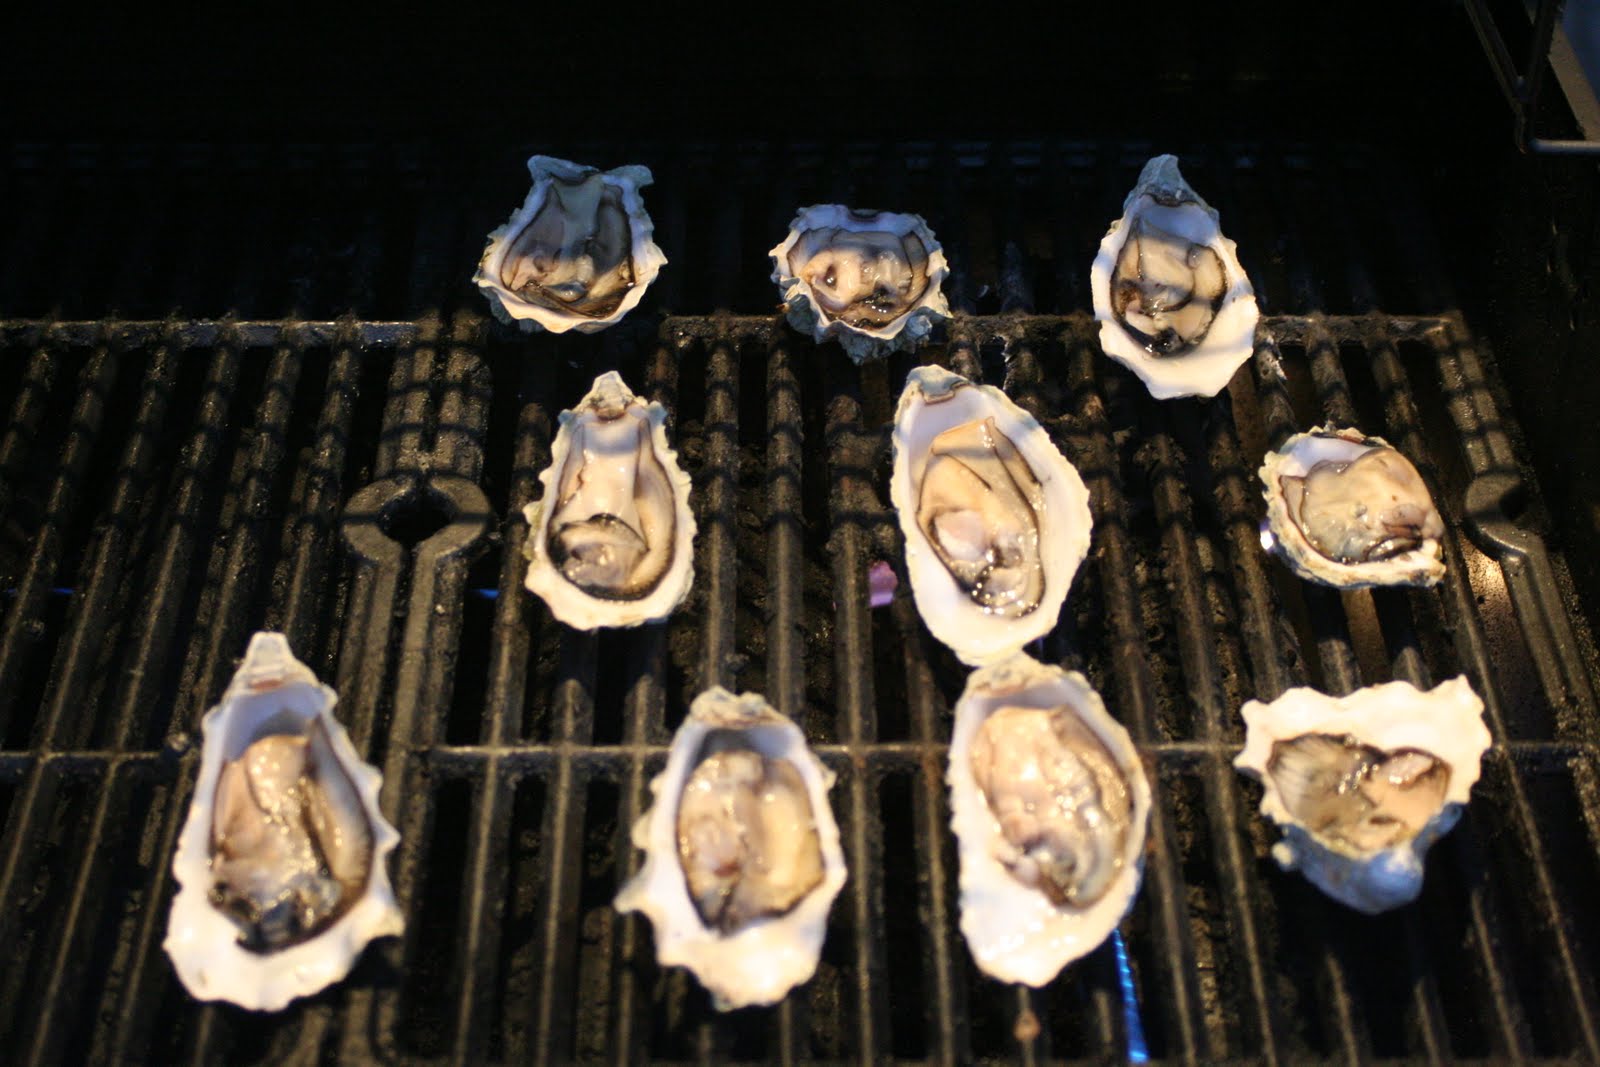
Well, hello, one dozen oysters ready to be shucked...


Oysters are weird looking. But tasty.


Grill, baby, grill!


Excuse me while I wipe the drool off my keyboard...


Fighting urge to go buy more oysters...

Monday, August 30, 2010

Confetti Corn

My entire family came over for dinner on Saturday night because my grandmas and my cousin hadn't seen the new house yet. I had a bunch of corn in the freezer from my recent purchase of 48 ears (ugh...I'm so done with cooking corn!), and I thought there were a couple different Barefoot Contessa corn recipes from which to choose. The first cookbook of hers I grabbed off my shelf--"Back to Basics"--had a corn dish in it that sounded fantastic and easy. That's one of the things I love most about Ina's recipes, none of them require a lot of ingredients, but the ingredients they do use need to be high quality and fresh so you can really appreciate the taste. I'd much rather prepare dishes that way than ones that require 30 different ingredients.

Barefoot Contessa's Confetti Corn
2008, Barefoot Contessa Back to Basics, All Rights Reserved

2 tablespoons good olive oil
1/2 cup chopped red onion
1 small orange bell pepper, 1/2-inch diced
2 tablespoons unsalted butter
Kernels cut from 5 ears yellow or white corn (4 cups)
1 1/2 teaspoons kosher salt
1 teaspoon freshly ground black pepper
2 tablespoons julienned fresh basil, minced fresh chives, and/or minced fresh parsley leaves

Heat the olive oil over medium heat in a large saute pan. Add the onion and saute for 5 minutes, until the onion is soft. Stir in the bell pepper and saute for 2 more minutes.

Add the butter to the pan and allow it to melt. Over medium heat, add the corn, salt, and pepper and cook, stirring occasionally, for 5 to 7 minutes, until the corn just loses its starchiness. Season to taste, gently stir in the basil or other green herbs, and serve hot.

*****

I don't know if I've gone on before about olive oil, but it really does make a huge difference to use good quality olive oil instead of whatever is cheapest at the store. I used to be one of the "buy whatever is cheapest" shoppers until I was at Sur La Table one day and was convinced by the sales lady to try an olive oil they had on special. Oh man, did it ever make a difference!! You could taste how much better it was, and the smell is so flowery and yummy and awesome. If you don't already, try buying a really good olive oil sometime and put a little in a dish and put some of the cheap stuff in a dish. Dip some bread in each (don't mix them, you want to taste each on its own) and see what I mean.

Back to my review, this was super easy to make, and it was a huge hit!! Everyone really liked it. My mom was still talking about it yesterday when I called her for something. I think I cooked the onions a bit too long because they were starting to take on that gray tinge that cooked red onions can have, but they were still good. This was a great summer dish, and so flavorful and pretty! Now I'm kind of glad I have all that corn in my freezer!

Monday, July 12, 2010

Grilled Whole Trout

We went out of town for the 4th of July weekend with my mom to a cabin up in northern AZ. It was fantastic!! The cabin was right on a pretty big creek, and my boys (including the husband) had a great time playing in it--fishing, shoveling mud, splashing, throwing rocks. It was an amazing, relaxing weekend.

Not far from the cabin was a trout farm. The boy and husband have gone fishing at a park near our house quite a few times, but they've never caught anything. We figured taking the boy to the trout farm would be a great way for him to catch his first fish. And it was! He ended up catching three (with the husband's help, of course) and was so pleased with himself for catching dinner for his family. It was so sweet listening to him tell me how it was going to be the best fish ever and how he was so happy he could get dinner for his family. I heart that boy so much!

I haven't cooked much fish (or rather I always stick to the same kinds because I know what I'm doing), so I had to do some Googling to figure out the best way to cook rainbow trout. I found an article on about.com on grilling them whole and then found a very basic recipe on Cooks.com. I hadn't really thought about grilling the fish and how to do it when we were at the grocery store earlier that day, but thankfully we had a lemon and some butter with us at the cabin.

Grilled Whole Trout

Fresh trout, cleaned with heads & tails left on
Butter
Lemon

Place several pats butter and several slices fresh lemon in trout cavity. Spray aluminum foil with non-stick spray. Wrap trout with foil. Grill 8 to 10 minutes on each side, depending on size of fish.

*****

Our trout weren't very big, so we had some cheese hot dogs to go along with this, as there wasn't enough to feed three adults and two children (one of which generally eats the same amount as an adult). Don't judge us. Thankfully the trout farm folks cleaned the fish for us. The husband had figured he'd do it, which was good because that is not in my skillset. My dad used to always clean the fish I caught. I view it as a man's job.

Anyway, this was a really, easy, simple way to prepare a whole fish, and the fish tasted fantastic!! My boy did a great job picking us three tasty fish for dinner. I assume that the only real time I'll be cooking trout is if he takes another trip to the trout farm, but I would definitely use this again! Make sure you spray the foil with non-stick spray. It would be very, very ugly if you didn't, and there's a good chance you wouldn't get a whole lot of meat from your fish.

And now, some pictures.

The first fish!


Fishing is a patience game, you know.


Our three rainbow trout, ready for the grill.


"Mom, can I touch its eye?"


To change things up a bit...a picture of me grilling the fish. Okay, okay, and opening the package of cheese dogs.


The finished product...after I took out the bones and all that. It was actually really easy to do. I was able to pull up on the spine a little and the whole skeleton came out of the fish. Weird and gross, but convenient.


And, the cheese dogs. I wouldn't want them to feel left out.

Thursday, April 1, 2010

Barefoot Contessa's Hashed Browns

It occurred to me that we hadn't had Biscuits and Vegetarian Sausage Gravy for quite awhile, and I had just bought a box of Morningstar Farms sausage patties at Costco, so I slated it for dinner one night last week. I wanted some potatoes to go with it, so I grabbed a Barefoot Contessa cookbook figuring at least one of her books had to have a hash brown recipe in it. Lo and behold, there was one, in the Family Style cookbook. Super easy with basic ingredients--excellent!!

Barefoot Contessa's Hashed Browns
Copyright, 2002, Barefoot Contessa Family Style, All rights reserved.

5 tablespoons unsalted butter
1 1/2 pounds boiling potatoes, peeled and 1/2-inch diced
1 1/2 cups chopped yellow onions (2 onions)
2 teaspoons kosher salt
1 teaspoon freshly ground black pepper
2 tablespoons minced fresh flat-leaf parsley
2 tablespoons minced scallions (white and green parts)

Melt the butter in a large (10 to 12-inch) saute pan. Add the potatoes, onions, salt, and pepper and cook over medium-low heat for 15 to 20 minutes, turning occasionally with a flat spatula, until the potatoes are evenly browned and cooked through. (Allow the potatoes to cook for 5 minutes before turning.) Turn off the heat and add the parsley and scallions. Serve hot.

*****

I only chopped up one onion because I don't like chopping onions, and I thought that one would be enough. I checked the recipe at least five times to make sure it really said five tablespoons of butter because it seemed like a lot.

These were good potatoes, but I think the five tablespoons was a bit too much for my liking. Maybe since I used one less onion I should have scaled it back a bit? I don't know. They were definitely tasty--I LOVE hash browns--but they didn't really ever brown a whole lot because of all the butter. Or at least that's what I'm attributing it to. Definitely easy, definitely good, and definitely something I'll make again--only with less butter next time.

Thursday, February 4, 2010

Tomato Sauce with Onion and Butter

Two posts in two days--are you shocked?! I tell you, sick kids give you more computer time. The boy seems to be on the mend--he was well enough to go on his preschool field trip today--but now I think the baby might have gotten pink eye. Ugh!! Not cool for a mommy that's supposed to get Lasik done on Saturday!

When I posted about my insanely huge onion asking what I should do with it, and someone named Stephanie--sorry, the Blogger profile was unavailable so I have nothing else to go on--suggested this pasta sauce that had recently been posted on SmittenKitchen.com. I went and checked it out and thought it looked quite tasty and simple. Although I had forgotten it was Smitten Kitchen and instead went to Steamy Kitchen and was so perplexed that I was all the way back in October in the archives and hadn't seen it. Then I checked back on the comment and realized I was on the wrong blog. Oops!

I didn't end up using the giant onion for this--I need to do my post about that still--but I liked the idea of the sauce and it sounded really good. I thought about doing it last night when I needed to come up with a dinenr plan, but I prefer to give my kids pasta sauce like this on bath nights. The baby tends to get quite into his food.

Tomato Sauce with Butter and Onions
From SmittenKitchen.com

28 ounces (800 grams) whole peeled tomatoes from a can (San Marzano, if you can find them)*
5 tablespoons (70 grams) unsalted butter
1 medium-sized yellow onion, peeled and halved
Salt to taste

Put the tomatoes, onion and butter in a heavy saucepan (it fit just right in a 3-quart) over medium heat. Bring the sauce to a simmer then lower the heat to keep the sauce at a slow, steady simmer for about 45 minutes, or until droplets of fat float free of the tomatoes. Stir occasionally, crushing the tomatoes against the side of the pot with a wooden spoon. Remove from heat, discard the onion, add salt to taste (you might find, as I did, that your tomatoes came salted and that you didn’t need to add more) and keep warm while you prepare your pasta.

Serve with spaghetti, with or without grated parmesan cheese to pass.

*****

How easy is that?! Mine is simmering away on the stove. I love me a dinner that takes less than five minutes to throw together (not counting pasta cooking time). I had exactly five tablespoons of butter in the fridge which worked out perfect, so I just unwrapped that and tossed it in a pan, opened the tomatoes, peeled an onion and sliced it in half, and voila!!

It's especially nice since it looks like I may need to take the baby to urgent care about this eye issue. Ugh!!

*****

Okay, this was REALLY good and REALLY easy!! I made a little too much pasta, so when I dumped the pasta into the sauce it wasn't quite saucy enough but it was still good. I ended up taking the baby to a Cigna clinic down the street once the husband got home. Good thing I did--poor guy has pink eye AND double ear infections. :( The upside was walking back into our house when we got home, and it smelled amazing!! The smell reminded me of a vodka tomato sauce I used to make but haven't made in years. In hindsight I shouldn't have mixed the pasta in with the sauce so it would have been a little saucier, but that's the only thing I'd change. I ended up using a rotini pasta because my kids have a hard time with spaghetti noodles. This is something I will definitely make again--especially since the ingredients are all things I normally have on hand.

I took pictures, just need to upload them to the camera. Since it looks like we'll mostly be homebound again tomorrow, look for picture updates to be added then!

Saturday, December 19, 2009

Julie's Caramel Bars

I'm not making Christmas treats this year in an effort to help mine and the husband's diets. There have been some points where I've regretted this decision and have really wanted to do some baking, but I've held strong. Mostly because I didn't have a lot of baking ingredients on hand. I wanted to make something for the boy's preschool teacher and the aide in his class, and I immediately thought of these. The recipe comes from an old family friend (as in she's been friends with our family for a long time, not that she is old), and I love making them at Christmastime. The only downside is the double boiler, but you can always use the microwave instead. I just decided to be true to the recipe this year.

Julie's Caramel Bars

35 light caramels
5 T. cream
3/4 cup melted butter
1 cup flour
1 cup oats
3/4 cup brown sugar
1/2 t. baking soda
1/2 t. salt
1 cup chopped nuts
6 ounces milk chocolate chips

Melt caramels and cream in a double boiler (or in the microwave).

Mix butter through salt and spread half the mixture in a greased 9x13 pan. Bake 10 minutes at 350 degrees. Sprinkle chopped nuts and chocolate chips on crust. Pour caramel mix over this and sprinkle with remaining crust mixture. Bake 20 minutes. Chill two hours before cutting.

*****

This are insanely good. Like, ridiculously good. Like, sinfully good. I find I use slightly more than half the crust mixture on the bottom, otherwise I can't get it to completely cover the bottom of the pan. I probably do 2/3 on the bottom and sprinkle 1/3 on top. My mom had wondered if she could make these using a jar of caramel ice cream topping, but I don't know if she ever tried it. I really don't know why that wouldn't work. I put the caramels on to melt while the boy and I mixed up the crust ingredients, then I'd go stir it every now and then until it was done.

I was kind of sad to give these all away to the boy's teachers, but I'm sure they'll enjoy them. And the husband and I did sample a couple of them before I packaged them up, so we did indulge just a little. Hopefully next year he and I will both be skinny and can enjoy some extra treats this time of year!


PW's Mashed Potatoes

Oh man, what a crazy week it's been. The husband's been laid up in bed since Tuesday, so I've been a single parent for basically five days now. Kudos to those of you that do it all the time--you should all be nominated for sainthood! Everything has fallen to the wayside, including finishing my posts for Thanksgiving #2 that we had last weekend. This week has been so long it blows my mind that was just a week ago. Man. Of course I still have leftovers sitting in my fridge from it, so let's hope it really was just a week ago. ;)

The husband's family doesn't have mashed potatoes at their Thanksgiving dinner, and it's one of the things I miss having the most. So of course they were pretty high priority for Thanksgiving #2. I heart mashed potatoes very, very much. Normally I just boil up the potatoes, mash, add butter and milk and call it good, but I'd seen that The Pioneer Woman had a mashed potato recipe that could be made a couple days before and reheated in the oven, so I thought I'd give that a try. Plus PW has never led me astray.

PW's Creamy Mashed Potatoes

5 pounds Russet Or Yukon Gold Potatoes
3/4 cups Butter
1 package (8 Oz.) Cream Cheese, Softened*
½ cups (to 3/4 Cups) Half-and-Half
½ teaspoons (to 1 Teaspoon) Lawry's Seasoned Salt
½ teaspoons (to 1 Teaspoon) Black Pepper

Peel and cut the potatoes into pieces that are generally the same size. Bring a large pot of water to a simmer and add the potatoes. Bring to a boil and cook for 30 to 35 minutes. When they’re cooked through, the fork should easily slide into the potatoes with no resistance, and the potatoes should almost, but not totally, fall apart.

Drain the potatoes in a large colander. When the potatoes have finished draining, place them back into the dry pot and put the pot on the stove. Mash the potatoes over low heat, allowing all the steam to escape, before adding in all the other ingredients.

Turn off the stove and add 1 ½ sticks of butter, an 8-ounce package of cream cheese and about ½ cup of half-and-half. Mash, mash, mash! Next, add about ½ teaspoon of Lawry’s Seasoning Salt and ½ a teaspoon of black pepper.

Stir well and place in a medium-sized baking dish. Throw a few pats of butter over the top of the potatoes and place them in a 350-degree oven and heat until butter is melted and potatoes are warmed through.

Note: When making this dish a day or two in advance, take it out of the fridge about 2 to 3 hours before serving time. Bake in a 350-degree oven for about 20 to 30 minutes or until warmed through.

*****

If you want to check out her post on them--with step by step pictures--check it out by following this link.

These were super yummy, although I did have some spillage issues when they were in the oven in that some of the potatoes somehow spewed out over the side onto the bottom of my oven. Thankfully it was towards the end of baking so they didn't burn and ruin everything else that was in there at that time, which was, like, all our side dishes. It was so nice to be able to have made these the day before and be done with them. Honestly these were much more decadent than I would normally make mashed potatoes, but isn't Thanksgiving supposed to be decadent?! I mean, really, if you're going to indulge, you should really go all out right?! These would work out really nicely to take somewhere, too, I think. I'd make these again for a special occasion, but I think for normal mashed potato eating I'll stick with my usual way to save on the calories and fat. Plus it made A LOT!

By the way, they were good cold too. You know, from the one bite I took out of the container when they were cold. It's not like I finished off more than a serving that was left while they were still cold. I wouldn't do that. Nope. Not me...

Monday, December 14, 2009

Kittencal's Perfected Roasted Whole Turkey

Wow, I had no idea it would take me until Monday to get the recipes for Thanksgiving #2, although I should have expected it since most of Saturday was spent preparing the meal, then most of yesterday was spent at my mom's hanging out with my brother since it was his last day here.

Anyway, I'd only ever cooked a whole turkey once before, but I didn't want to use that same recipe. In case you're interested in it, it was from the magazine Real Simple, Roast Turkey with Sage and Orange Gravy. My friend Benah made it one time for the Supper Club we used to do every month, and it was awesome. But, you have to spread Boursin under the skin of the turkey, and Jen is having a hard time with dairy while she's pregnant, so I wanted something different. I turned to RecipeZaar.com because that's just where I go when I need to find a recipe. I looked at a ton of the turkey recipes on there and thought this one sounded simple and easy...totally what I wanted in a turkey! Kittencal is the name of the person that submitted the recipe; I have several of her recipes bookmarked to try, and they all sound fantastic.

Kittencal's Perfect Roasted Whole Turkey
RecipeZaar.com Recipe #199612

1 (18 lb) whole turkey
1/3 cup melted butter, cooled (can use margarine)
1/3 cup vegetable oil
1 tablespoon white salt (or use as much salt as desired)
fresh ground black pepper (lots of pepper!)
2 quarts chicken stock (might use less)
8 cups favorite prepared stuffing (optional)

Set oven to 325 degrees F, convection oven heat set to 320 degrees F. Set oven rack to lowest position.

Remove the giblets and neck from the cavity. Rinse the turkey well with cold water inside and out then pat dry with a paper towel. Place the turkey on a rack on a roasting pan.

In a small bowl mix together the melted butter with oil (add in 1 teaspoon garlic powder with the oil/butter mixture if you are a garlic-lover). If you are stuffing the bird, fill the inside cavity loosley with prepared stuffing (if you are not using stuffing then tie the legs together with cotton butchers twine).

Using clean hands rub the outside of the turkey with the oil/butter/garlic mixture. Season the turkey all over with salt and lots fresh ground black pepper.

If you are NOT stuffing the bird place breast-side down on the rack, if stuffing leave breast-side up. Place/tent a large piece of heavy foil over the turkey. Place the pan in the oven, then pour about 4-5 cups chicken broth in the pan. Keep basting the turkey about every 30-40 minutes with the pan juices on the bottom of the pan (removing the foil and re-tenting every time you baste). If you see the juices starting to evaporate then add in more broth to the pan about 2 cups at a time.

After about 2-1/2 hours of cooking time remove the foil. Keep roasting (325 degrees F) until the internal thermometer reads 180 degrees F (80 degrees C). The total cooking time for this 18-pound stuffed bird should be about 4 hours. Transfer the cooked turkey to a large serving platter, cover loosley with foil and let rest 30 minutes before carving (DO NOT slice the turkey before 30 minutes or all juices will flow out of the bird!).

**NOTE** cooking times for whole turkeys cooked at 325 degrees are as follows.
- For an 8-12 pound turkey, roast for 2-3/4 to 3 hours.
- For a 12-14 pound turkey, roast for 3 to 3-3/4 hours.
- For a 14-18 pound turkey, roast for 3-3/4 to 4-1/4 hours.
- For an 18-20 pound turkey, roast for 4-1/2 to 4-3/4 hours.

*****

See? Totally simple! I wasn't really sure how it was going to work getting the bird out of the roasting pan and then flipping it over, but Jen came up with the brilliant idea of using a big fork and the honing blade for my knives. Smart cookie that one!! The only bummer was that the skin on the breast side of the turkey wasn't all golden and shiny and crispy like the side that had cooked facing up, but the breast meat was really juicy and good.

Actually the cooking time worked out perfectly. The turkey I had was 17 pounds, so I left it in there just a little over four hours, then took it out and let it set the recommended 30 minutes, which was great because most of the sides I needed to throw in the oven needed 30 minutes of bake time! I love when meals come together like that--especially big ones like this!

When the need arises for me to cook another turkey this is definitely the way I'm going to do it! Oh, and I did use the garlic powder in the butter/oil mixture. It smelled awesome, and I'm generally not a turkey skin eater, but I did have a bit, and it was quite tasty!

Saturday, November 7, 2009

Barefoot Contessa's Caramelized Butternut Squash

This past week Barefoot Bloggers had a Bonus Recipe Challenge (BRC) where five recipes were posted that were optional to try throughout the week. One of them I'd made before--Peanut Butter and Jelly Bars--and didn't have all the ingredients on hand to make them. There was a Potato Leek Soup I thought about making, but my friend Jen B. had made it before and wasn't impressed, so I figured it wasn't worth it. There was a chicken chili recipe that sounded good, but I already had minestrone slated for one night during the week and thought two soups might be overkill. We've been on a big butternut squash kick lately, so I thought this one sounded perfect!

Caramelized Butternut Squash
1999, The Barefoot Contessa Cookbook, All rights reserved

2 medium butternut squash (4 to 5 pounds total)
6 tablespoons unsalted butter, melted
1/4 cup light brown sugar, packed
1 1/2 teaspoons kosher salt
1/2 teaspoon freshly ground black pepper
Directions
Preheat the oven to 400 degrees F.

Cut off and discard the ends of each butternut squash. Peel the squash, cut them in half lengthwise, and remove the seeds. Cut the squash into 1 1/4 to 1 1/2-inch cubes and place them on a baking sheet. Add the melted butter, brown sugar, salt, and pepper. With clean hands, toss all the ingredients together and spread in a single layer on the baking sheet. Roast for 45 to 55 minutes, until the squash is tender and the glaze begins to caramelize. While roasting, turn the squash a few times with a spatula, to be sure it browns evenly. Taste for seasonings and serve hot.

*****

I only used one squash, and it was plenty for a side dish for my family. This was REALLY tasty!! The husband loved it, I think butternut squash is his new favorite food. The boy didn't really eat a whole lot of it, but the baby liked it too. This was such an easy way to make a tasty and pretty healthy side dish. I actually went to Trader Joe's again and bought two more squash. I think I may use one of them to make this again sometime this coming week...it was that tasty!!


Wednesday, September 16, 2009

Easy Sole Meuniere

I'm definitely on a Barefoot Contessa kick lately, as this is another of her recipes. Maybe I should just start cooking my way through all of her books. I was at the grocery store I don't like recently, and they had packages of Dover Sole on manager's special. I rarely see sole in the markets, much less marked down! So, I grabbed two packages because I had remembered seeing this in the Back to Basics cookbook. I already had my meal plan figured out for last week, so I slated it for tonight. I'm so excited to try this!! I got even more excited when last week on Top Chef, one of the sauces they had to prepare was a meuniere sauce.

Easy Sole Meuniere
Copyright 2008, Barefoot Contessa Back to Basics, All Rights Reserved

Ingredients
1/2 cup all-purpose flour
Kosher salt and freshly ground black pepper
4 fresh sole fillets, 3 to 4 ounces each
6 tablespoons unsalted butter
1 teaspoon grated lemon zest
6 tablespoons freshly squeezed lemon juice (3 lemons)
1 tablespoon minced fresh parsley

Preheat the oven to 200 degrees F. Have 2 heat-proof dinner plates ready

Combine the flour, 2 teaspoons salt, and 1 teaspoon pepper in a large shallow plate. Pat the sole fillets dry with paper towels and sprinkle one side with salt.

Heat 3 tablespoons of butter in a large (12-inch) saute pan over medium heat until it starts to brown. Dredge 2 sole fillets in the seasoned flour on both sides and place them in the hot butter. Lower the heat to medium-low and cook for 2 minutes. Turn carefully with a metal spatula and cook for 2 minutes on the other side. While the second side cooks, add 1/2 teaspoon of lemon zest and 3 tablespoons of lemon juice to the pan. Carefully put the fish filets on the ovenproof plates and pour the sauce over them. Keep the cooked fillets warm in the oven while you repeat the process with the remaining 2 fillets. When they're done, add the cooked fillets to the plates in the oven. Sprinkle with the parsley, salt, and pepper and serve immediately.

*****

Sounds simple and delicious!!! I might make a Barefoot Contessa wild rice dish to go with this, but the recipe isn't on the Food Network website, and I'm feeling too lazy to go get the cookbook and type it out. We'll see how I feel about cooking it at dinner time. If I don't make that I think I have a box of Trader Joe's Mushroom Risotto in the pantry I can make, and then some kind of vegetable on the side. Yum! Oooh...I should go put a bottle of white wine in the fridge now so it's ready at dinner time!

Tuesday, August 25, 2009

Mashed Sweet Potatoes

So, the chicken sausage recipe author said she had made mashed sweet potatoes to go with the sausage. I did another search on RecipeZaar to see what I could find because I conveniently had bought a bag of sweet potatoes at Trader Joe's last week. I really had no idea what I was going to do with them, other than maybe puree them for the baby to eat since he refuses to eat baby food anymore. This sounded easy, I had all the ingredients on hand, and it was listed as kid-friendly. And I figured without the honey in it the baby could have some too.

Apparently it's an Emeril recipe.

Emeril's Sweet Potato Mash
RecipeZaar Recipe #381427

4 sweet potatoes, peeled and roughly chopped
2 quarts water
1 tablespoon unsalted butter
salt & freshly ground black pepper
1/2 teaspoon ground cinnamon
2 tablespoons honey

In a large pot over high heat, bring the sweet potatoes and water to a boil. Cook for 10 to 15 minutes or until the sweet potatoes are tender.

Drain well and return to the pot.

Add butter, salt and pepper to taste, cinnamon and honey and mash until all ingredients are combined.

Serve immediately.

*****

I used to not really like sweet potatoes, except at Thanksgiving with the marshmallows on top, and really then I always considered the sweet potatoes to be merely a vessel for the marshmallows. I don't know at what point I've started enjoying them, but it's been pretty recent. Actually over the weekend I had some sweet potato fries that were really yummy. I digress. This is one of the first times I've made sweet potatoes, and I have to say I was really quite pleased with how they came out, even though the recipe is pretty fool-proof. Everyone at my table liked them. The baby tore through his bowl, the husband had seconds, I scarfed down my portion. Yum. Super easy and a great new side dish to add to my arsenal!

Thursday, July 2, 2009

Cheerios Breakfast Cookies

Back in May when I went to San Diego with my mom and my friend Jen B. and our crazy bobo boys, Jen made some really yummy breakfast cookies for the trip. I'd been wanting to make them myself but always forgot to buy Cheerios for them. The boy isn't really a fan of Cheerios, so they aren't a cereal I normally have on hand. I grabbed a box of Trader Joe's Cheerios-equivalent when I was there last time, and yesterday the boy and I finally made these. The dough was really tasty, and I'm not usually a cookie dough eater.

Cheerios Breakfast Cookies
From: recipezaar.com/recipe #142860

Ingredients:
1 1/4 cups sugar
1/2 cup butter or margarine
1/2 cup peanut butter
1/4 cup water
1 tablespoon vanilla
1 egg
1 1/2 cups whole wheat flour or all-purpose flour
1 cup old fashioned oats or quick-cooking oat
1 cup raisins
1/2 teaspoon salt
1/2 teaspoon baking soda
4 cups Cheerios toasted oat cereal

Directions:
1. Heat oven to 375°. Stir together sugar, butter, peanut butter, water, vanilla and egg in large bowl. Stir in remaining ingredients except cereal. Gently stir in cereal.
2. Drop dough by rounded 1/3 cupfuls 4 inches apart onto ungreased large cookie sheet. Flatten dough to about 1 inch thick.
3. Bake 13 to 15 minutes or until golden brown. Let stand 5 minutes before removing from cookie sheet. Store loosely covered.

© 2009 Recipezaar. All Rights Reserved.