Wednesday, June 8, 2011

Beef Bulgogi

Did I mention that we just moved Boy #2 from his crib into a big boy bed? I'm freakin' exhausted. He apparently thinks it means he can get up as many times as he wants at night and come wake me up and get up at the ass crack of dawn in the morning. *yawn* I'm a tired mama. Last night I got 6.5 hours of sleep, one of which was spent laying on the floor of his bedroom. Ugh. I know Boy #1 took awhile to adjust to not being confined when he slept, but I don't remember how long it took. I don't really feel capable of getting anything accomplished around my house today (I changed into jammies after my post-gym shower), so I'm going to update my blog.

By the way, I created a Facebook Page for my little blog here. There's a link over on the right sidebar where you can like it from here or come visit me on there. I don't really know what I'm going to do with it, I'd just been thinking about doing it for awhile and today seemed like a good day.

I've been in a bit of a funk lately, which I'm sure directly correlates to my lack of sleep, and meal planning just wasn't exciting for this week. I pulled a cookbook off my shelf that my mother-in-law had gotten me for Christmas a couple years ago and flipped through it hoping for ideas. She was a teacher at a Christian high school in San Antonio (she just retired!), and it was a fundraising project from the senior class I think. I love cookbooks where people submit their own recipes because who's going to submit something that sucks? This recipe called for flank steak, but London broil was on sale, so I thought it would be good. Bulgogi, according to the recipe intro, is a Korean treatment for steak that has very wide appeal to western palates and is remarkably easy to make. Also sometimes written as Pulgogi, Bulgogi literally means "fire meat" although this refers more to the cooking method than the spiciness of the dish. So there you go. I have no idea how to pronounce it. Bul-go-gee? Bul-gah-gee? Something else entirely?

Beef Bulgogi

2 lb flank steak or sirloin
1/2 c. packed dark brown sugar
3/4 c. soy sauce (preferably low salt)
1 Tbsp sesame oil
Dash of red pepper flakes or ground cayenne
5 or 6 green onions, sliced
2 Tbsp rice vinegar
3 cloves garlic, minced or crushed

For cooking:
3 Tbsp sesame oil
3 Tbsp peanut or vegetable oil

For thickening marinade/sauce:
1 Tbsp cornstarch dissolved in 1 Tbsp water

Trim any visible fat and sinuous tissue from the uncooked steak and wrap the meat in plastic wrap or a Ziploc bag and place in the freezer for half an hour to partially freeze meat. Remove meat from the freezer and slice as thinly as possible across the grain. Lay out meat slices in a single layer in a low, glass or ceramic casserole dish. As you cover the bottom once, crumble some of the brown sugar over the uncooked meat and continue layering meat and brown sugar until all the steak is sliced and the sugar used.

Marinade: In a bowl, mix soy sauce, 1 tablespoon sesame oil, red pepper, onions, rice vinegar, and garlic. Pour marinade over sugared meat and cover to marinate in the refrigerator for at least 2 hours. Can be marinated all day or even overnight if using low sat soy sauce.

Heat a large skillet on medium high heat and mix the remaining sesame oil with the peanut or vegetable oil. Working in small batches to preserve the heat of the pan, use a little of the mixed oils and quickly fry the steak until just cooked medium rare. Remove cooked slices to a warm serving platter and repeat the process until the whole batch of meat is cooked. use more oil if necessary. After meat is cooked, reduce heat to medium and add leftover marinade to skillet. Bring to gentle simmer and stir in cornstarch/water mixture. Stir while thickening and pour over cooked meat.

*****

The marinade smelled fantastic. I love the smell of sesame oil. As I was cooking the meat Boy #1 kept saying, "Mommy dinner smells so yummy!" It ended up being super tasty. I think our meat ended up being more on the medium or medium well side because I wasn't really sure how long to let it cook before flipping it, but it was still good. The sauce on top was really good, too. Since it had raw meat marinating in it, I heated it to boiling just to be safe. We all really liked this. Boy #1 complained at one point that he was getting full and asked if he could just eat half of what was left on his plate. I said sure, but then a couple minutes later he and I realized he'd eaten all of it! We just had the meat with some frozen Asian blend vegetables, but I think the meat would be really good in lettuce wrap form, too. I'll definitely make this again!


Sadly, none of the pictures I took of the cooked meat turned out. :(

Tuesday, June 7, 2011

Lasagna Cupcakes

I'm still not caught up on older posts, but we had these last night and they were so yummy I had to post them right away. A friend of mine posted a link on Facebook to the recipe, and I thought they looked so cute and tasty. Plus I love lasagna, but I hate making it because it takes forever and makes a ton. We're pretty much eating lasagna for a week straight when I do make it. This seemed like a clever way to have lasagna, and all I needed to buy for it were the won ton wrappers.

Lasagna Cupcakes
Source: CruftBox.com via my friend Callista on Facebook

24 won ton or gyoza wrappers
Marinara sauce
1 lb. Italian sausage or ground beef
Ricotta cheese
Mozzarella cheese

Spray or wipe a cupcake/muffin tin with olive oil. Place one wrapper in the tin form it into a cup shape. Add a small dollop of pasta sauce then some sausage. Add a spoonful of ricotta cheese. Once you filled in the first layer, gently press another wrapper on top of the ricotta layer, forming another cup. Repeat the filling and top each with shredded mozzarella.

Bake at 375 for 20 minutes.

*****

Isn't that clever? Boy #1 claimed he didn't like ricotta, but the rest of us gobbled them up. I had really wanted to use gyoza wrappers for their round shape, but my grocery store only had won ton wrappers. It wasn't that big a deal except that there were corners on each of the cupcakes. I made my own marinara by heating up a can of crushed tomatoes with some seasonings added in, so I had my muffin tin on the counter next to the stove. I put the first layer of won ton wrappers in each spot/hole/whatever-you-want-to-call-it then put a spoonful of sauce in each. Then I added a spoonful of sausage, then a spoonful of ricotta. I kind of squished each layer down as I went with the back of a spoon. Then I repeated. It all came together really fast.

I'll definitely make these again. Easy, relatively inexpensive, pretty quick...all pluses in my book!


Saturday, June 4, 2011

Grilled Mac and Cheese with Pulled Pork Panini

I know, crazy huh?! I've mentioned my love of the Panini Happy blog before. Awhile back I was at the grocery store and saw the Food Network magazine at the checkout stand. On the cover was a panini with macaroni and cheese and pulled pork. Holy yummy, Batman!! I made a mental note to look up the recipe online. Then a couple days later I got an email from the Panini Happy blog that this recipe was her latest post!! It was meant to be. Recently pork loin roasts were on sale, so I grabbed one with the sole intention of making this sandwich for the husband and me to try. We had pulled pork for dinner on a Thursday, Friday night I made Pioneer Woman's mac and cheese for my kiddos then after they went to bed the husband and I had these sandwiches. Efficient use of food, huh?

Grilled Mac and Cheese with Pulled Pork Panini
Source: Food Network magazine and PaniniHappy.com

4 tablespoons unsalted butter, divided
4 cups prepared macaroni and cheese, warmed
2 onions, thinly sliced
Kosher salt and freshly ground pepper
1 cup barbecue sauce
2 cups prepared pulled pork
8 slices sourdough bread
12 slices sharp cheddar cheese (about 6 ounces)

Spread the macaroni and cheese in an 8-inch-square baking dish to about 3/4 inch thick. Cover with plastic wrap and chill until firm, about 45 minutes. Cut the macaroni and cheese into squares that are slightly smaller than the bread slices.

Meanwhile, melt 2 tablespoons butter in a skillet over medium heat. Add the onions and cook, stirring, until caramelized, about 20 minutes. Season with salt and pepper.

Combine the barbecue sauce and pulled pork in a saucepan over low heat and cook until warmed through, about 5 minutes.

Preheat the panini grill to medium-high heat.

Melt the remaining 2 tablespoons butter and brush on one side of each bread slice. Flip over half of the bread slices; layer 1 slice of cheddar, 1 macaroni-and-cheese square and another slice of cheddar on each. Top each with one-quarter of the pulled pork and caramelized onions and another slice of cheddar. Top with the remaining bread slices, buttered-side up.
Working in batches, cook the sandwiches until the cheese melts and the bread is golden, about 5 minutes.

*****

This sandwich was FILLING. I couldn't even eat half of mine. My only complaint was that my pork could have been saucier, but that was my fault, not the recipe's. This was awesome cheesy yummy goodness. A diet buster for sure, but awesome. If you make it, make sure you use a sturdy bread because this is a monster sandwich. And it's not for the carb-shy. Decadent for sure. Mmmm...now I want to make it again saucier and see if it really does make a difference.

I could only fit one on my panini press at a time.

Look at that gooey cheesy macaroni goodness spilling out...

See, definitely needs more sauce.

Broccoli with Garlic Butter and Cashews

I know I've mentioned the parenting message board I'm a member of before, The Mamasphere. This recipe was posted by one of the members and got rave reviews from everyone that's tried it. The member's username is AmRo, so it was dubbed AmRo's Broccoli Cashew Yumminess by someone else. We've actually had this several times as a side dish and as a main dish by adding chicken and serving it over quinoa. See, I wasn't kidding about incorporating quinoa more often! I love the flavors of the sauce and the crunch the cashews add to it. Really I'm just a sucker for anything with cashews.

Broccoli with Garlic Butter and Cashews

1 lb of broccoli, cut into bite sized pieces
1/3 cup of butter (I cut this to about 1/4 cup)
1 teaspoon brown sugar
2 tablespoons soy sauce
Several twists of black pepper (to taste)
2 cloves garlic, minced
Chopped cashews, as few or as many as you'd like, but probably no more than 1/3 cup.

1. Steam the broccoli until tender/crisp.

2. Melt the butter in a small saucepan over medium heat. Add the garlic and saute for a minute or so. Mix in the soy sauce, brown sugar, and pepper. Bring to bubbling, then reduce heat to low and simmer for a few minutes to thicken a smidge. Add the cashews, pour the sauce over the broccoli and stir to coat.

*****

Super easy and super tasty!! I've made it with fresh and frozen broccoli and had good results both times. It really comes together quickly, and it's so good. I've toasted the cashews each time I've made it. Plus the ingredients are things I normally have on hand. Well, not always the cashews but everything else.


I forgot to take a picture before I was packing up the leftovers.

Herbed Chicken Breasts with Tomatillo Salsa and Queso Fresco

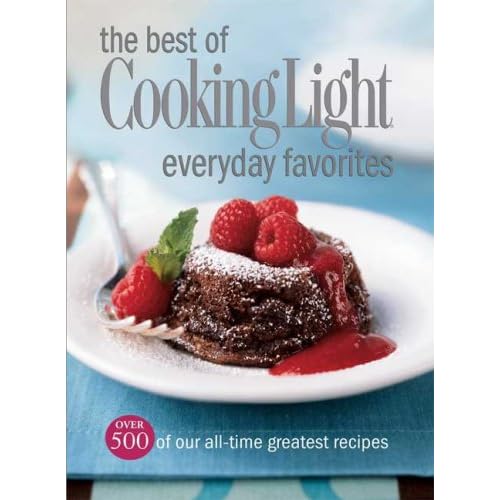
This was another from my new favorite cookbook, The Best of Cooking Light Everyday Favorites. I had queso fresco left from the yummy Roast Chicken Chimichangas and thought this sounded super tasty. It could also easily be made low carb by skipping the breading portion and just grilling the chicken instead.

Herbed Chicken Breasts with Tomatillo Salsa and Queso Fresco
Source: The Best of Cooking Light Everyday Favorites

Salsa:
2 quarts water
1/2 pound tomatillos (about 10 small), husks and stems removed
1 garlic clove
1/2 to 1 serrano chile
1/2 cup chopped fresh cilantro
1/4 cup coarsely chopped onion
1 teaspoon fresh lime juice
1/4 teaspoon salt

Chicken:
3 (1-ounce) slices white bread
4 (6-ounce) skinless, boneless chicken breast halves
1/2 teaspoon salt
1/2 teaspoon ground cumin
1/4 teaspoon ground red pepper
1 large egg, lightly beaten
1 tablespoon olive oil
1/2 cup (2 ounces) crumbled queso fresco cheese
Cilantro sprigs (optional)
Lime wedges (optional)

Preheat oven to 350°.

To prepare salsa, bring water to a boil. Add tomatillos, garlic, and chile; cook 7 minutes. Drain and rinse with cold water. Combine tomatillos, garlic, chile, chopped cilantro, onion, lime juice, and 1/4 teaspoon salt in a food processor or blender; pulse 4 to 5 times or until coarsely chopped. Set aside.

To prepare chicken, place bread in a food processor, and pulse 10 times or until coarse crumbs measure 1 1/2 cups. Arrange crumbs on a baking sheet; bake at 350° for 3 minutes or until lightly browned. Cool completely.

Place each chicken breast half between 2 sheets of heavy-duty plastic wrap; pound to 1/2-inch thickness using a meat mallet or rolling pin. Combine 1/2 teaspoon salt, cumin, and red pepper; sprinkle evenly over chicken.

Place breadcrumbs in a shallow dish. Place egg in another shallow dish. Dip chicken in egg; dredge in breadcrumbs.

Heat oil in a large nonstick skillet over medium-high heat. Add chicken; cook 4 minutes on each side or until done. Top chicken with salsa, and sprinkle with queso fresco cheese. Garnish with cilantro sprigs and lime wedges, if desired.

Nutritional Information
Amount per serving
Calories: 364
Calories from fat: 26%
Fat: 10.7g
Saturated fat: 3.2g
Monounsaturated fat: 4.5g
Polyunsaturated fat: 1.6g
Protein: 47.1g
Carbohydrate: 17.7g
Fiber: 2g
Cholesterol: 162mg
Iron: 3mg
Sodium: 770mg
Calcium: 169mg

*****

I used whole wheat bread for my breadcrumbs because that's what we had. The salsa was super tasty and smelled so good. I had looked up the recipe on the Cooking Light website and saw some people complained that they didn't like that the queso fresco didn't melt onto the chicken, but I really liked that about it. This was super tasty and pretty easy. The salsa could easily be made ahead of time, too. I heated up a can of black beans as our side and sprinkled some queso fresco on top of them when I plated. Mmmmm...tasty!!


Spiced Cod with Broccoli Quinoa Pilaf

I felt like I was on such a roll there for awhile getting my blog updated and caught up on back posts. Then things got crazy. This past week I was completely overwhelmed getting Boy #2's bedroom switched from baby room to big boy room. I never painted when we moved into our house a year ago, and I wanted to get his room painted before his new furniture came, so I spent literally every free moment this past week working on his room. I decided a striped accent wall would be a good idea. It wasn't. His room in our old house had tone on tone stripes (flat and glossy paint in the same color) and it was a BITCH. I knew stripes would be bad, but kind of like childbirth, I'd forgotten just how bad they were. Ugh. I was up until midnight Thursday night measuring and taping. Of course it didn't help that I measured the length of the room wrong the first time. Double ugh. But it's done and looks fantastic and he is now the proud owner of a bunk bed. No more crib for my little guy! Anyway, every aspect of my life was neglected this past week as I got his room ready. Plus my oldest has had swim lessons the past two weeks, so things have been nutty.

I told the husband that one of the things I want to do this weekend is get caught up on my blogs. I have seven posts I want to do for just this blog, so we'll see how far I get. I turned on some cartoons for my kiddos this morning (do you have Boomerang network where you are? Oh my gosh, I love it!! I love letting my kids watch the cartoons I watched on Saturday mornings when I was little.) and it's mostly keeping them entertained, except that they're boys and fight a lot, so I have to keep intervening.

Anyway, I don't even remember when we had this it's been so long ago, but it was tasty and pretty easy, so it's worth posting. I received it in a recipe email I get from Real Simple magazine. I had some cod in the freezer and thought it would be a tasty way to fix it instead of fish and chips. That's all I know to do with cod. Did you know that cod are actually a really mean fish? I had no idea. The husband and I were watching a show on octopus awhile ago, and apparently cod fish eat octopus. Crazy, huh? I tell ya, I'm a wealth of knowledge.

Spiced Cod with Broccoli Quinoa Pilaf
Source: RealSimple.com

3 teaspoons olive oil
1/2 small onion, chopped
kosher salt and black pepper
1 cup quinoa, rinsed well
2 cups chopped broccoli
1/4 cup raisins
1/2 cup roasted almonds, coarsely chopped
2 scallions, sliced
4 6-ounce pieces skinless cod, halibut, or striped bass fillet
1/2 teaspoon paprika

Heat 1 teaspoon of the oil in a medium saucepan over medium-high heat. Add the onion and season with ¾ teaspoon salt and ¼ teaspoon pepper. Cook, stirring occasionally, until softened and starting to brown, 3 to 4 minutes.

Add the quinoa and 1½ cups water to the saucepan and bring to a boil; reduce heat to low, cover, and simmer gently until almost all the water has evaporated, 10 to 12 minutes. Fold the broccoli and raisins into the quinoa, cover, and cook until the quinoa and broccoli are tender, 8 to 10 minutes more. Remove from heat and fold in the almonds, scallions, ½ teaspoon salt, and ¼ teaspoon pepper.

Meanwhile, heat the remaining 2 teaspoons of oil in a large non-stick skillet over medium-high heat. Season the cod with the paprika, ¼ teaspoon salt, and ¼ teaspoon pepper and cook until opaque throughout, 3 to 4 minutes per side. Serve with the pilaf.

Nutritional Information
Per Serving
Calories 464
Fat 16g
Sat Fat 2g
Cholesterol 65mg
Sodium 833mg
Protein 37g
Carbohydrate 44g
Sugar 7g
Fiber 6g
Iron 6mg
Calcium 109mg

*****

I haven't used quinoa very much, but I really liked it. Actually this may have been the first time. I tried to make quinoa stuffed peppers one time, but it didn't go over well, and I don't think they were ever eaten. This time we all really liked it. I love that it's high in protein. Did you know that technically it's a seed, not a grain? See, wealth of knowledge. I didn't have raisins in mine because for some strange reason we were out of them, but honestly raisins in it sounded kind of weird, so I wasn't that upset we skipped them. This dinner came together really quickly which was nice, too. This was a dinner I really liked and would readily make again. Note to self: find more ways to incorporate quinoa into our diet!


Sorry for the lame picture...the husband's iPhone camera was all I had available.

Saturday, May 21, 2011

Roast Chicken Chimichangas

I've rediscovered a fantastic Cooking Light cookbook I've owned for quite awhile...The Best of Cooking Light Everyday Favorites. Everything I've tried from it has been awesome.


I flipped through it back for Cinco de Mayo to find some kind of Mexican entrée we could have. This looked really easy and didn't require a lot of ingredients which are two automatic pluses in my book!

Roast Chicken Chimichangas
Source: The Best of Cooking Light Everyday Favorites

2 1/2 cups shredded roasted skinless, boneless chicken breasts
1 cup (4 ounces) crumbled queso fresco cheese
1/4 cup chopped green onions
1 teaspoon dried oregano
1/4 teaspoon ground cumin
1 garlic clove, minced
1 (4.5-ounce) can chopped green chiles, drained
1 (16-ounce) can fat-free refried beans
6 (8-inch) flour tortillas
Cooking spray
1/2 cup bottled green salsa

Preheat oven to 500°.
Combine first 7 ingredients in a large bowl; toss well.
Spread 1/4 cup beans down center of each tortilla. Top each tortilla with 2/3 cup chicken mixture; roll up. Place rolls, seam sides down, on a large baking sheet coated with cooking spray. Coat tops of chimichangas with cooking spray. Bake at 500° for 7 minutes. Serve with salsa.

Calories: 380
Calories from fat: 23%
Fat: 9.7g
Saturated fat: 3.1g
Monounsaturated fat: 4.1g
Polyunsaturated fat: 1.6g
Protein: 28.8g
Carbohydrate: 42.5g
Fiber: 6.5g
Cholesterol: 55mg
Iron: 3.8mg
Sodium: 728mg
Calcium: 157mg

*****

Instead of using some roasted chicken I threw a couple chicken breasts on the grill while my family was swimming then just shredded the meat once they were cooked (the chicken, not my family). These were so easy to make. Throw everything in a bowl, spread some beans on a tortilla, spoon some chicken mixture down the middle, fold, and bake. I was kind of surprised that the serving size was just one, but they were really filling.

We all really liked these. REALLY liked them. The husband actually asked if we could have weekly chimichanga night. I loved how easy these came together and that we all loved them. This will definitely be in regular rotation in our house.

Friday, May 20, 2011

Rocco's Chicken Picatta

A few weeks ago I decided to use Rocco DiSpirito's Now Eat This as my cookbook of the week. One of the dishes I made was his Chicken Picatta recipe. I've always liked picatta dishes...the tangy lemon and capers together...yum! I was excited to find a low cal version of this, and I figured I couldn't go wrong with Rocco.

Rocco's Chicken Picatta
Source: Now Eat This by Rocco DiSpirito

4 skinless, boneless chicken breasts (4 ounces each), pounded thin
Salt and freshly ground black pepper
1/2 cup plus 2 tablespoons whole-wheat flour
1 cup egg substitute
2 tablespoons unsalted butter
4 garlic cloves, minced
1/3 cup fresh lemon juice
2/3 cup water
3 tablespoons drained capers
1/3 cup chopped fresh flat-leaf parsley

1. Heat 2 large nonstick saute pans over medium heat.

2. While pans are heating, season the chicken with salt and pepper to taste. Put the ½ cup flour in one shallow dish and the egg substitute in another shallow dish. Dredge the chicken in the flour, then in the egg substitute, to coat completely.

3. When pans are hot, add ½ tablespoon of the butter to each pan. Allow the butter to melt completely and brown slightly. Then add 2 coated chicken breasts to each pan. Saute the chicken until it is golden brown and just cooked through, about 2 minutes per side. Transfer the chicken to a serving platter, and tent it with foil to keep the chicken warm.

4. Raise the heat under one of the saute pans to high. Add the remaining 1 tablespoon butter to the pan and allow it to melt. Add garlic and sweat for one minute. Whisk the remaining 2 tablespoons flour into the butter. Whisk in the lemon juice and the water; bring to a boil. Reduce the heat to low-and continue to cook the sauce, whisking constantly, until it has thickened, about 2 minutes. Stir in the capers and parsley. Season with salt and pepper to taste, if desired. Spoon the sauce over the chicken, and serve.

Fat 7.4g
Calories 241
Protein 31g
Carbohydrates 12g
Cholesterol 81mg
Fiber 2g
Sodium 459mg

*****

I left the sauce off my kids' pieces because I just didn't know if they'd like it, and I'm all about avoiding potential issues and fights at the dinner table. The husband and I loved it though. The crunchy breading, the lemons and capers...great combination! This is definitely something I'll make again, and since I don't use capers very often a jar lasts me awhile and I pretty much always have them in my fridge.

Marinated Grilled Chicken Legs

I have to say, I'm on a roll with the new Cooking Light recipes I've been trying. So much so that the husband said we should have Cooking Light Month at our house. I gotta say, I'm not opposed to the idea. Three of the six recipes I still need to post about are CL recipes and were all tasty. I don't remember how I came across this one. I think it was an article on their website about 101 ways to cook chicken or something. Boy #1 LOVES chicken legs, and they were on sale last week, so I thought this would be good. It's pretty funny because he calls them "chicken bones." Let me tell you, it took awhile to figure out what he meant when he was asking for chicken bones.

Marinated Grilled Chicken Legs
Source: Cooking Light website

1 cup fresh orange juice
2 tablespoons fresh lemon juice
4 teaspoons low-sodium soy sauce
1 tablespoon dry sherry
1 1/2 teaspoons bottled minced garlic
1 1/2 teaspoons balsamic vinegar
1 1/2 teaspoons basil oil
1 teaspoon onion powder
1 teaspoon dark sesame oil
1/2 teaspoon salt
1/4 teaspoon hot pepper sauce
8 chicken drumsticks (about 2 1/4 pounds), skinned
Cooking spray
Green onion strips (optional)

Combine the first 11 ingredients in a large zip-top plastic bag. Add chicken to bag; seal. Marinate in refrigerator 2 hours, turning bag occasionally.

Prepare grill.

Remove chicken from bag, reserving marinade. Place reserved marinade in a small saucepan; cook over medium heat 3 minutes. Place chicken on grill coated with cooking spray; grill 30 minutes or until chicken is done, turning and basting occasionally with reserved marinade. Garnish with green onion strips, if desired.

Amount per serving (2 drumsticks)
Calories: 215
Calories from fat: 31%
Fat: 7.5g
Saturated fat: 1.8g
Monounsaturated fat: 2.8g
Polyunsaturated fat: 1.8g
Protein: 30g
Carbohydrate: 4.4g
Fiber: 0.1g
Cholesterol: 97mg
Iron: 1.5mg
Sodium: 339mg
Calcium: 18mg

*****

I figure since the nutritional info was there I might as well include in case anyone else is counting calories like we are.

This chicken was REALLY good. The only thing I left out was the basil oil because I don't have any and didn't really want to buy any for the small amount that is used. Although in hindsight I probably could have just bought some fresh basil and made my own. Oh well. I used sriracha for the hot sauce and was worried I'd added too much, but it wasn't spicy at all. Dodged a bullet there because Boy #1 does not like spicy and would have been very disappointed if he couldn't eat the chicken bones.

We all really liked this. I wished I'd thrown a few more legs into the marinade so I could have had another and/or some leftovers. This will definitely be a go to recipe for chicken bones in the future!

Wednesday, May 18, 2011

Baked Camembert Pasta

I happened to be grocery shopping with my friend Jen recently and saw a marked down package of camembert cheese in the deli section. I turned to her and said, "Didn't you use camembert for something recently?" To which she replied, "Why yes I most certainly did." Or something along those lines in the way of an affirmative answer. She said it was like a decadent, grown-up mac and cheese. Sold! That was all I needed to hear to throw the package in my cart. I know I've professed my love for mac and cheese before, so I won't bore you with the details of it again.

I'm copying the recipe from Jen's blog but she found it from a Jamie Oliver cookbook.

Baked Camembert Pasta
Source: Food Revolution by Jamie Oliver

a box of Camembert Cheese (250g)
2 cloves of garlic, peeled and finely sliced
1 sprig of fresh rosemary, pick the leaves off the woody stalk
sea salt and freshly ground black pepper
extra virgin olive oil
100g grated Parmesan cheese
400g dried rigatoni
150g fresh spinach

Directions:
1. Open the box of cheese and unwrap it. Place it back to the wooden container.

2. Score a circle into the top of the skin, then lift it off and discard.

3. Lay the garlic slices on top of the cheese, sprinkle some pepper and drizzle a little extra virgin olive oil.

4. Scatter the rosemary leaves over the top and gently pat with your fingers to coat them in the oil.

5. Bake the cheese in a preheated oven of 180C (350F) for about 25 minutes, until golden and melted. (***May take a little longer until the cheese is melted***)

6. When the cheese has 10 minutes left to cook, add the pasta to the pan and cook according to packet instructions.

7. When the pasta is cooked, add the spinach to the pan – it only needs cooking for 10 seconds or so.

8. Drain the pasta and spinach to the pan and let it wilt.

9. Drizzle with a couple of good lugs of extra virgin olive oil and add the grated Parmesan. If the sauce is too thick for you, add a splash of reserved cooking water to thin out a bit. Season with salt and pepper and give it a good stir.

10. Remove the cheese from the oven. Divide the pasta between your serving bowls. Either drizzle the melted Camembert on top or pop cheese on the table and let everyone help themselves to a lovely, gooey spoonful.

*****

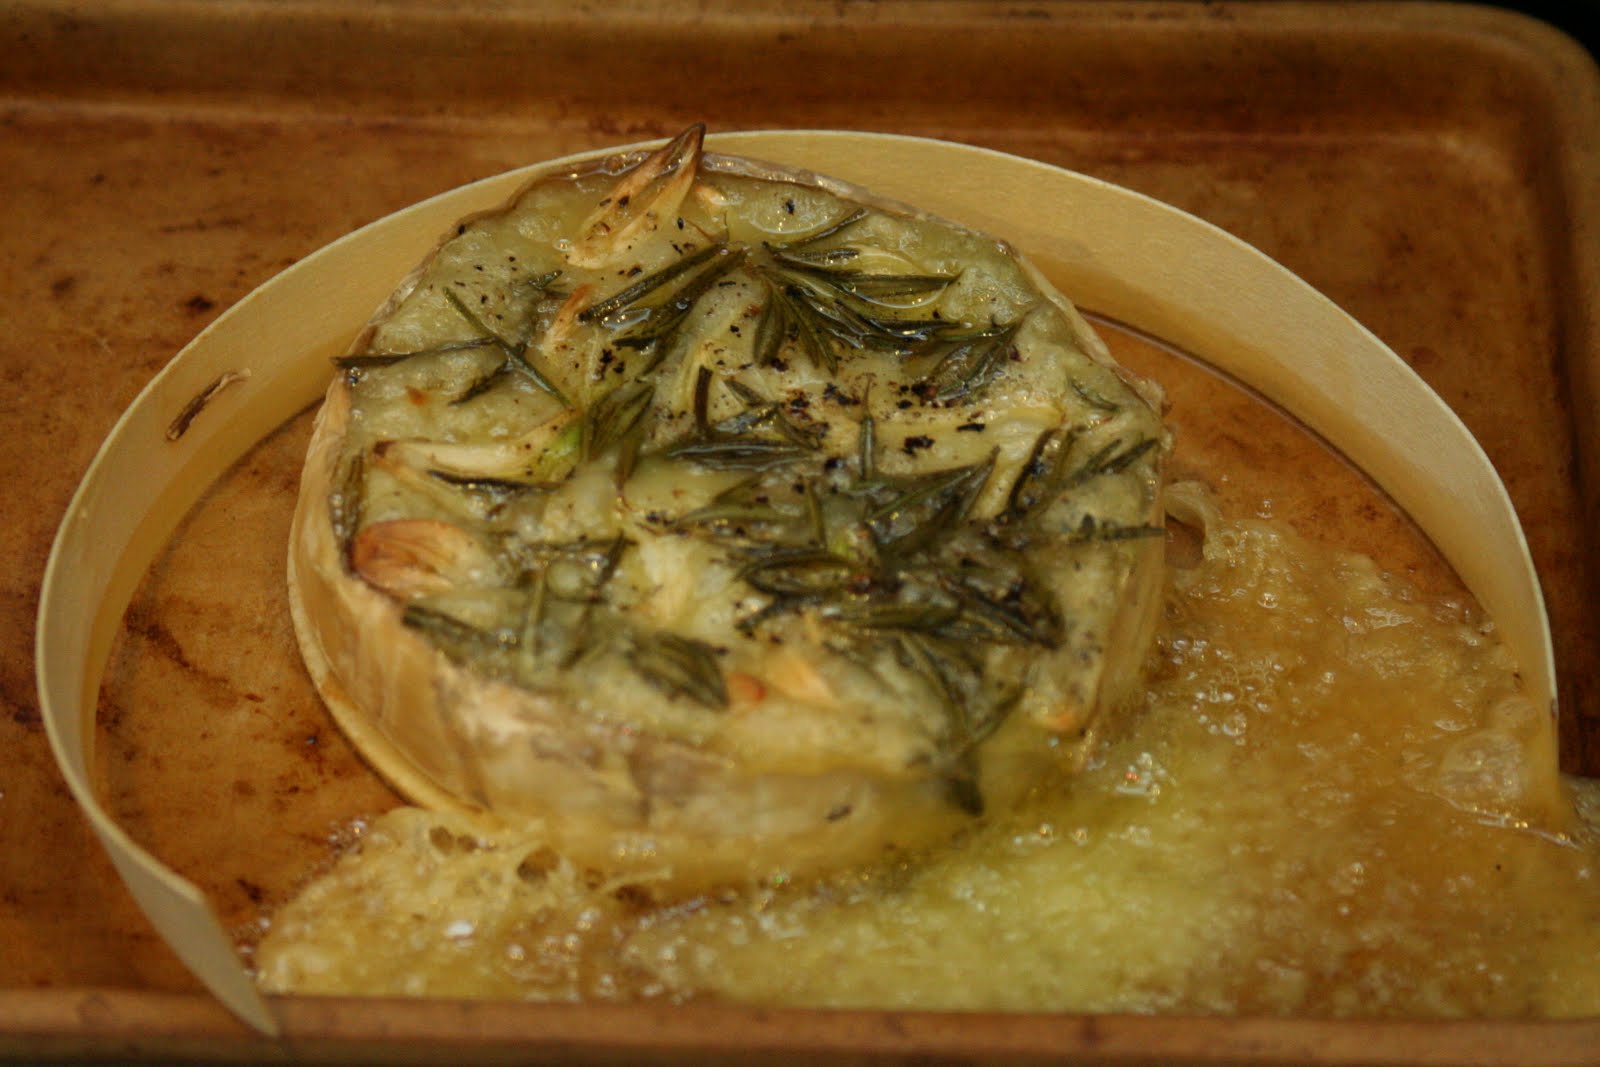
I forgot the spinach when I was getting the other ingredients I needed. Oops. And I used whole wheat rotini instead of rigatoni. This was indeed a decadent, grown-up mac and cheese. So much so that I tried to ration the amount of cheese I gave my kids on their pasta so that the husband and I could have more. When I pulled the cheese out of the oven it smelled AMAZING. And the cheese was all gooey and melty with yummy slices of garlic and bits of rosemary on top. Oh man. I seriously could have stood there and eaten it with a spoon.

I don't know how often I'd make this just because camembert is not an inexpensive cheese, so it would have to be a special occasion. Or if I happened to find it marked down again. But if it's in your grocery budget, I say give this a try. But only if you look gooey, melty, awesomeness.

I would advise putting your cheese on a baking sheet of some sort. Just in case something like this happens. It would 1) be a shame to lose the cheese and 2) suck to have to clean that mess up from the bottom of your oven.

Rocco's Mushroom Lasagna

I have a bit of a celebrity crush on a handsome chef...Rocco DiSpirito. Haven't heard of him? here's some eye candy:


Handsome fella, don't you think? I found his most recent cookbook, Now Eat This! Diet at Costco and had to get it. I really like his first Now Eat This cookbook. I had seen this mushroom lasagna on his Facebook page and really wanted to try it. I slated it for last Friday night's dinner for just the husband and me.

Rocco's Mushroom Lasagna
Source: Now Eat This! Diet by Rocco DiSpirito

Nonstick cooking spray
2 cups reduced-fat ricotta cheese, such as Sargento
1/2 cup chopped fresh basil
2 tablespoons chopped fresh flat-leaf parsley
1 cup grated Parmigiano-Reggiano
Salt
Freshly ground black pepper
4 ounces (about 8 sheets) no-boil whole wheat lasagna noodles, such as Dalallo
10 ounces sliced cremini mushrooms
4 ounces white button mushrooms
1/2 cup shredded reduced-fat mozzarella cheese

Preheat the oven to 350°F. Coat the inside of an 8 x 8 x 2-inch baking pan with cooking spray and set aside.

In a medium bowl, add the ricotta, basil, parsley, and ¾cup Parmigiano-Reggiano. Mix with a spoon until blended. Season with salt and pepper to taste. Set aside.

Line the bottom of the prepared baking pan with two lasagna sheets. Top with ½ cup of the cheese mixture. Using the back of a spoon, spread the mixture so that the noodles are covered. Top with a layer of mushrooms. Repeat the procedure two more times. On the last layer, place two lasagna sheets on top of the mushrooms. Spread a layer of the remaining cheese mixture on top. Scatter the mozzarella and remaining Parmigiano-Reggiano on top.

Cover tightly with foil and bake in the oven for 30 minutes.

Raise the temperature of the oven to 425°F, and bake for another 15 minutes. Uncover the dish and continue to bake for another 15 minutes or until the top is golden brown.

PER SERVING
388 calories 15g fat (8g sat / 2.6g mono / 1.2g poly) 57mg cholesterol 510mg sodium 34g carbohydrates 3g fiber 28g protein

*****

I wasn't able to find the no-boil whole wheat noodles, so I just went with regular no-boil noodles instead. It worked out okay because the husband was doing an open water swim race the next day, so he was happy to have the carbs. I followed the cooking directions exactly for mine...and it came out pretty dry. I think I could have reduced the amount of time at 425 and it would have been fine. It was still good, just a little dry.

This is definitely something I'd make again. The 8x8 dish yielded four very generous servings and at only 388 calories each, that's pretty good! Oh, Rocco, you did not disappoint!


Tuesday, May 17, 2011

Mexican Pizza

I'm so far behind on my blog I figure it's easiest to just start with what's current and go back as I have time. Otherwise I'm going to end up overwhelmed and nothing will ever get done. I looked through my pictures today and realized I have been making a lot of new stuff and have a lot of catching up to do. There are nine things on my list that I want to do posts on. Sheesh!

I had a really yummy sounding dinner planned for one night this week, but then it turned out the meat I needed for it wasn't as much on sale as I thought it would be when I went to the store, so I had to come up with a new plan. I was catching up on blogs I follow and went to Meal Planning 101 for some ideas. One of the first posts on there was ideas for ground beef. I recently purchased 10 pounds of ground beef, so I was open to ideas. I saw this taco pizza recipe and had everything on hand for it, so it was a go!

Mexican Pizza
Source: Meal Planning 101 blog

1 lb lean ground beef
1 small onion, diced
1 clove garlic, minced
2 tbsp taco seasoning (homemade or store-bought)
Splash of water

Your favorite pizza crust
1 cup salsa
1 cup sour cream
Grated cheese (cheddar, mozza or Monteray Jack would all work fine)
1-2 plum tomatoes, diced
1 cup lettuce, finely shredded or 2 tbsp fresh basil, finely shredded

Preheat oven to 425 degrees.

In a skillet over medium high heat, brown the beef with the onions and garlic. Add the cumin, chili powder, oregano, salsa spice, salt and pepper (or sub out all these spices for your favorite taco seasoning). Mix and cook for about 30 seconds then add a splash or two of water to let the spices create more of a sauce for the beef. Turn to low and let simmer a couple minutes until the water has evaporated and remove from heat.

Put your pizza crust on a baking sheet or pizza stone. Mix together the salsa and sour cream and spread about 1/3 - 1/2 cup over your pizza crust. Top with the taco seasoned beef and shredded cheese. I bake for 10 minutes at 425 degrees and then broil for 1-3 minutes to get the cheese on top a nice golden brown. You should note that I use the par-baked shells from the bakery, so if you use fresh dough adjust your cooking time and temperature accordingly.

Give the pizza just a moment or two to cool ever so slightly and then top with diced tomatoes and lettuce or basil. Serve with the rest of the salsa sour cream as a dipping sauce.

*****

I didn't have any taco seasoning on hand, so I just threw in some chili powder, cumin, oregano, salt, and pepper. It was definitely a tad under-seasoned, but I didn't want to over do it. I also could have spread more of the sauce on my crust. Overall, though, we really liked this new take on pizza. The kids didn't have any toppings on theirs, but the husband and I both did and really liked it. I'd definitely make this again!!


Sprinkles Cupcakes' Strawberry Cupcakes

What a crazy morning!! My MOMS Club has a monthly birthday brunch party to celebrate the mommies having birthdays that month. My friend Laura coordinates it and asked if I'd host May's because two of my friends, Michelle and Cindy were both having birthdays. So I said sure. I forget how much I hate hosting events at my house until the morning of them. Really I just hate the running around getting my house ready for company. But it kind of pays off because now I have time to update my blog since my house is already clean. So I guess I can't complain too much.

Anyway, Laura asked if I could make some cupcakes for the party. The birthday girls--there was another one, too, Carissa who owns our fabulous local ice cream shop--wanted Funfetti and strawberry. I offered to make strawberry. I'm not big on mixes and ready made frosting because of all the gross stuff that can be in them (have you ever read the ingredients on a cake mix or tub of frosting?), so I did some searching for a recipe I could make. My Googling lead me to Oprah's website and a recipe for Sprinkles Cupcakes' Strawberry Cupcakes. I've heard of Sprinkles but never actually consumed one of their cupcakes, but since I know it's a popular place I figured this would be a good recipe to try.

Sprinkles Cupcakes' Strawberry Cupcakes
Source: Oprah.com

2/3 cup fresh or frozen whole strawberries (thawed if frozen)
1 1/2 cups all-purpose flour, sifted
1 tsp. baking powder
1/4 tsp. coarse salt
1/4 cup whole milk, room temperature
1 tsp. pure vanilla extract
1/2 cup (1 stick) unsalted butter, room temperature
1 cup sugar
1 large egg, room temperature
2 large egg whites, room temperature

Preheat oven to 350°. Line a 12-cup muffin tin with cupcake liners; set aside.

Place strawberries in a small food processor; process until pureed. You should have about 1/3 cup of puree. Add a few more strawberries if necessary, or save any extra puree for frosting; set aside.

In a medium bowl, whisk together flour, baking powder and salt; set aside. In a small bowl, mix together milk, vanilla and strawberry puree; set aside.

In the bowl of an electric mixer fitted with the paddle attachment, cream butter on medium-high speed, until light and fluffy. Gradually add sugar and continue to beat until well combined and fluffy. Reduce the mixer speed to medium and slowly add egg and egg whites until just blended.

With the mixer on low, slowly add half the flour mixture; mix until just blended. Add the milk mixture; mix until just blended. Slowly add remaining flour mixture, scraping down sides of the bowl with a spatula, as necessary, until just blended.

Divide batter evenly among prepared muffin cups. Transfer muffin tin to oven and bake until tops are just dry to the touch, 22 to 25 minutes. Transfer muffin tin to a wire rack and let cupcakes cool completely in tin before icing.

Sprinkles Cupcakes' Strawberry Frosting
Source: Oprah.com

1/2 cup frozen whole strawberries, thawed
1 cup (2 sticks) unsalted butter, firm and slightly cold
Pinch coarse salt
3 1/2 cups confectioners' sugar, sifted
1/2 tsp. pure vanilla extract

Place strawberries in the bowl of a small food processor; process until pureed. In the bowl of an electric mixer fitted with the paddle attachment, beat together butter and salt on medium speed until light and fluffy. Reduce mixer speed and slowly add confectioners' sugar; beat until well combined. Add vanilla and 3 tablespoons strawberry puree (save any remaining strawberry puree for another use); mix until just blended. Do not overmix, or frosting will incorporate too much air. Frosting consistency should be dense and creamy, like ice cream.

*****

I needed more than one dozen cupcakes, so I doubled the recipe for the cupcakes but I left the frosting recipe as is. I can only deduce that Sprinkles Cupcakes must have a TON of frosting because I was able to frost 22 cupcakes (two little scoundrels each took a cupcake yesterday while I was upstairs getting dressed, so I had less than my original 24) with the single batch and had some left over. Even if I'd frosted 24 cupcakes I think I'd still have some left.

These were pretty freakin' fantastic. The husband had one last night after they were frosted and said it may be the best cupcake he'd ever eaten. The frosting was AMAZING--and I loved that it tasted like real strawberries, not strawberry flavoring and Red #40. The cupcakes themselves had a mild strawberry flavor, but the frosting really made it pop. The cupcakes were really dense which was so good. The only change I made was to use almond milk instead of whole milk. We don't drink whole milk, and I wasn't about to buy a container of it for just this recipe. I didn't think skim milk would be a good substitution, but I did have almond milk in the fridge that I thought would work.

Even as much as I don't like to bake, these were pretty easy to make. The end product is definitely worth making again!!

Tuesday, May 10, 2011

Please excuse the dust

I'm playing around with a new look and format for my blog, so please be patient with me as I figure out how I want it to look. Basically, if this is your first time here please come back again...it doesn't always look this weird and crazy and hodge podge, I swear. Sadly I don't have all the time in the world to get this figured out in one sitting (darn kids of mine, requiring things like quality time with their mom, clean diapers, and meals).

Wednesday, May 4, 2011

Food Flowchart

I need to get back to posting some of my long list of overdue blog entries, but I saw this earlier today on a website I really like, , Fooducate.com. Haven't heard of it? You should check it out. Great, short articles on commonplace foods and how gross some of them are or where food things come from or dispelling "health" and "nutrition" claims. I'm all about healthy eating and limiting the amount of processed foods my family eats, so I love reading the different articles and becoming more educated.

Anyway, I'm a fan of theirs on Facebook and read something they posted this morning then after clicking my way through a bunch of different "You might like..." posts I came across this food flowchart. I thought it was hilarious and very much worth sharing.

Source: Funny Flowchart for Choosing Food at the Supermarket


Probably dog food...hahaha! Too funny!

Saturday, April 30, 2011

Mmmm...crawfish

I know I've mentioned before that the husband is from Louisiana. I think one of the things he misses most is the crawfish boil. You just don't really have them in Arizona because, well, we don't really have crawfish here. Sure you can have them overnighted but it costs a pretty penny (trust me, I've checked). Somehow at some point I stumbled upon the Cajun Cactus Foundation and their annual events. They're basically a group of Louisianans (wow, I wasn't sure if that was a word, but apparently it is) who miss all the awesomeness that is Louisiana, so they have events here to make it feel more like home. In the fall we went to the Great Cajun Cook-Off and Food Fest (which I'm debating entering this year) and had a BLAST. Their spring event is the Great Cajun Crawfish Boil which we went to last night.

I'd had boiled crawfish before (I guess that's what you call the resulting crawfish from a crawfish boil?) but had never actually been to one. It was AWESOME. Along with copious amounts of crawfish there were all sorts of tasty Louisiana/Southern sides...dirty rice, red beans and rice (so tasty), hot links, mac and cheese, potato salad, green olive cole slaw, Krispy Kreme bread pudding, Snoballs (similar to what the rest of the US knows as snow cones), catfish tacos. I worked my ass off at the gym Friday morning so I could really go balls to the wall and indulge...and yet I still ended up over calories. But that was probably more from the beer than the food. Anyway...we had a great time, had great food, and we can't wait for it again next year. The husband always has New Orleans withdrawals this time of year because of Jazzfest, but he said the crawfish boil last night made him hardly miss it at all this year.

I took a few pictures that I thought I'd share.

Crawfish...lots and lots of crawfish. Frankly the potato is just taking up space that could be held by more crawfish.


The husband enjoying his mud bugs


Our friend Steve...he looks angry at the crawfish, but I don't think he really was.


Boy #2 having some of the corn from the boil. I think my kids pretty much had Snoballs and Krispy Kreme donuts for dinner. What can I say, sometimes I'm an awesome mom.


Boy #1 post-Snoball


Crawfish remains


A rare photo of me with a crawfish. The rarity comes from me being in a picture, not that I'm posing with crawfish.

Wednesday, April 27, 2011

Green Goddess Grilled Cheese Panini

I heart cheese. That's not news. I heart paninis, too, and that's probably equally newsworthy. There's a panini blog I follow, Panini Happy. She has all sorts of amazing sandwiches on there that I'm dying to try. Ummm...grilled mac and cheese with pulled pork?! Yes, please!! I had seen her post about this Green Goddess Grilled Cheese on St. Patrick's Day and thought it sounded fantastic. I found myself needing to be somewhere near our Saturday's Farmer's Market recently and decided to stop in to get the fresh herbs I'd need to make this.

Panini Happy's Green Goddess Grilled Cheese Panini
Source: PaniniHappy.com

1 clove garlic, finely chopped
1 oil-packed anchovy, finely chopped
1 teaspoon lime zest (about 1 lime)
3 tablespoons chopped fresh Italian parsley
2 tablespoons chopped fresh tarragon
2 tablespoons chopped fresh cilantro
1 tablespoon chopped fresh basil
1 tablespoon finely chopped shallot
1/4 teaspoon Dijon mustard
2 ounces cream cheese, cut into smaller cubes
1 cup shredded mozzarella
1 cup shredded sharp cheddar
8-12 slices sourdough bread
2 tablespoons extra-virgin olive oil

Add garlic and anchovies to a mini-prep food processor and pulse for a few seconds until it’s really finely chopped, almost like a paste (if you don’t have a food processor, you can always just chop the ingredients really well with a knife on a cutting board).

Add in the lime zest, parsley, tarragon, cilantro, basil, shallot, mustard and cream cheese and pulse again until well blended. Transfer to a medium-sized bowl and stir in the mozzarella and cheddar cheeses.

Preheat the panini grill to medium-high heat.

For each sandwich: Spread a generous amount of the cheese mixture onto one slice of bread. Close the sandwich with a second slice of bread. Brush a little olive oil on top. Grill for 5 to 6 minutes until the cheese is melted and oozy and the bread is toasted. Serve immediately and enjoy!

*****

I'm lazy and didn't chop everything on my own...I tossed it all in my food processor to let it work for me. What's the point of having machines in my kitchen and me doing all the work they can do? Oh, but I didn't have any shallots. I don't know why my grocery store is so hit or miss with shallots. they aren't that uncommon an item are they? Oh what I'd give to have a store that carries everything nearby. I shouldn't complain...when we first moved to this area there was only one grocery store. Now I at least have choices. Anyway.

The cheese filling on this was FANTASTIC. Before it cooked it had a really garlicky bite to it, but that mellowed a lot while the cheesy goodness melted while the sandwich was on the panini press. My only complaint was my bread choice. I didn't buy sourdough bread for this because I figured we could just use the regular whole wheat bread we use on a regular basis. I was WRONG. Don't make my same mistake. This sandwich needs a sturdy bread, not lame-o Oroweat Double Fiber Whole Wheat bread. And be generous with the filling on said sturdy bread. It's worth it. Oh, and don't forget to put the leftover spread away and sitting on your kitchen counter all night because you'll be a sad cheese-lover in the morning when you come downstairs and discover your mistake. I'm just saying...learn from my mistake.

I'd totally make this again but only with a better kind of bread.

Sandwich filling:


Falafel Pitas with Cucumber Dipping Sauce

I don't remember how I came across this recipe. Oh, I take that back. I think I had bookmarked a list of easy vegetarian dinners from the Cooking Light website and found it that way. I'm trying to work back in some more vegetarian meals into our dinners each week. I really like falafel, but I'd never tried making my own before. it sounded pretty easy from this recipe and most of the ingredients were things I had on hand (well, except the pita bread). Double bonus!!

Falafel Pitas with Cucumber Dipping Sauce
Source: CookingLight.com

1/4 cup minced red onion
1 tablespoon Dijon mustard
1 teaspoon ground cumin
1/2 teaspoon paprika
1/4 teaspoon freshly ground black pepper
1/8 teaspoon salt
1 (15 1/2-ounce) can chickpeas (garbanzo beans), rinsed and drained
1 (1-ounce) slice whole wheat bread, torn into pieces
1 large egg
1 large egg white
1 1/2 tablespoons olive oil
2 (6-inch) whole wheat pitas, split
1 cup arugula
1/2 cup Cucumber-Yogurt Dressing

Combine first 10 ingredients in a food processor; pulse 6 times or until well blended (mixture will be wet).

Heat olive oil in a large nonstick skillet over medium-high heat. Spoon about 1/3 cup chickpea mixture per patty into pan; cook 4 minutes on each side or until golden brown.

Line each pita half with 1/4 cup arugula, add 1 patty to each pita half, and spoon 2 tablespoons Cucumber-Yogurt Dressing into each pita half.

Cucumber-Yogurt Dressing
Source: CookingLight.com

1 cup plain fat-free yogurt
1/2 cup diced seedless cucumber
1/4 cup minced red onion
1 teaspoon fresh lemon juice

Combine all ingredients in a small bowl. Cover and chill.

Note: Nutritional analysis includes Cucumber-Yogurt Dressing.
Calories: 280
Calories from fat: 30%
Fat: 9.4g
Saturated fat: 1.2g
Monounsaturated fat: 5g
Polyunsaturated fat: 2.2g
Protein: 11.4g
Carbohydrate: 40.1g
Fiber: 7.3g
Cholesterol: 53mg
Iron: 3.3mg
Sodium: 592mg
Calcium: 81mg

*****

Since the nutritional info was there on the website, I figured I'd include it for the recipe. I actually used whole wheat naan instead of pita bread because pita bread and I just don't get along. We have issues...always have, always will. I find naan much easier to work with and even a little tastier.

I wasn't really sure what my kids were going to think of this, but they both ate it pretty well. Especially after I gave them ketchup to dip their falafel in. I know, I know...ketchup with falafel?! But they ate it all and there wasn't a fight at the dinner table. Sometimes we moms do what we gotta do.

This was super easy to put together and really tasty. I'd definitely make it again, especially since for the most part it was made up of things I had in my fridge or pantry already!

Falafel mixture:


Falafel patties cooking away:


Mmmm...falafel pitas...


Cuban Sandwiches

Hello, dear blog. I've missed you so. I really have no excuse for why I've stayed away so long. Well, I kind of do but it's not a very good one. I wrote out a list of blog posts I want to do and there are seven on the list and two maybes. Yikes. That's a lot of catching up to do. Conveniently I feel like doing no sort of household chores today, other than what I've already accomplished, so that works out pretty well. Plus someone from church is swinging by at some point, so I don't want to be in the middle of, say, giving the dog a bath when she gets here.

Quite awhile ago the husband and I went on a date night to a local Cuban restaurant. My mom had bought a Groupon for it but wasn't going to be able to use it, so she generously gave it to us. Woo hoo! I love a date night, but a free date night is even better! Actually I think we ended up spending more than the amount of the Groupon because (here's a little known fact about me) I cannot resist a good, fresh mojito...the kind with real mint leaves in the bottom of the glass. Lordy mama, am I ever a sucker for a good mojito. It's actually kind of a sickness because whenever I smell fresh mint all I can think of are mojitos.

Anyway...

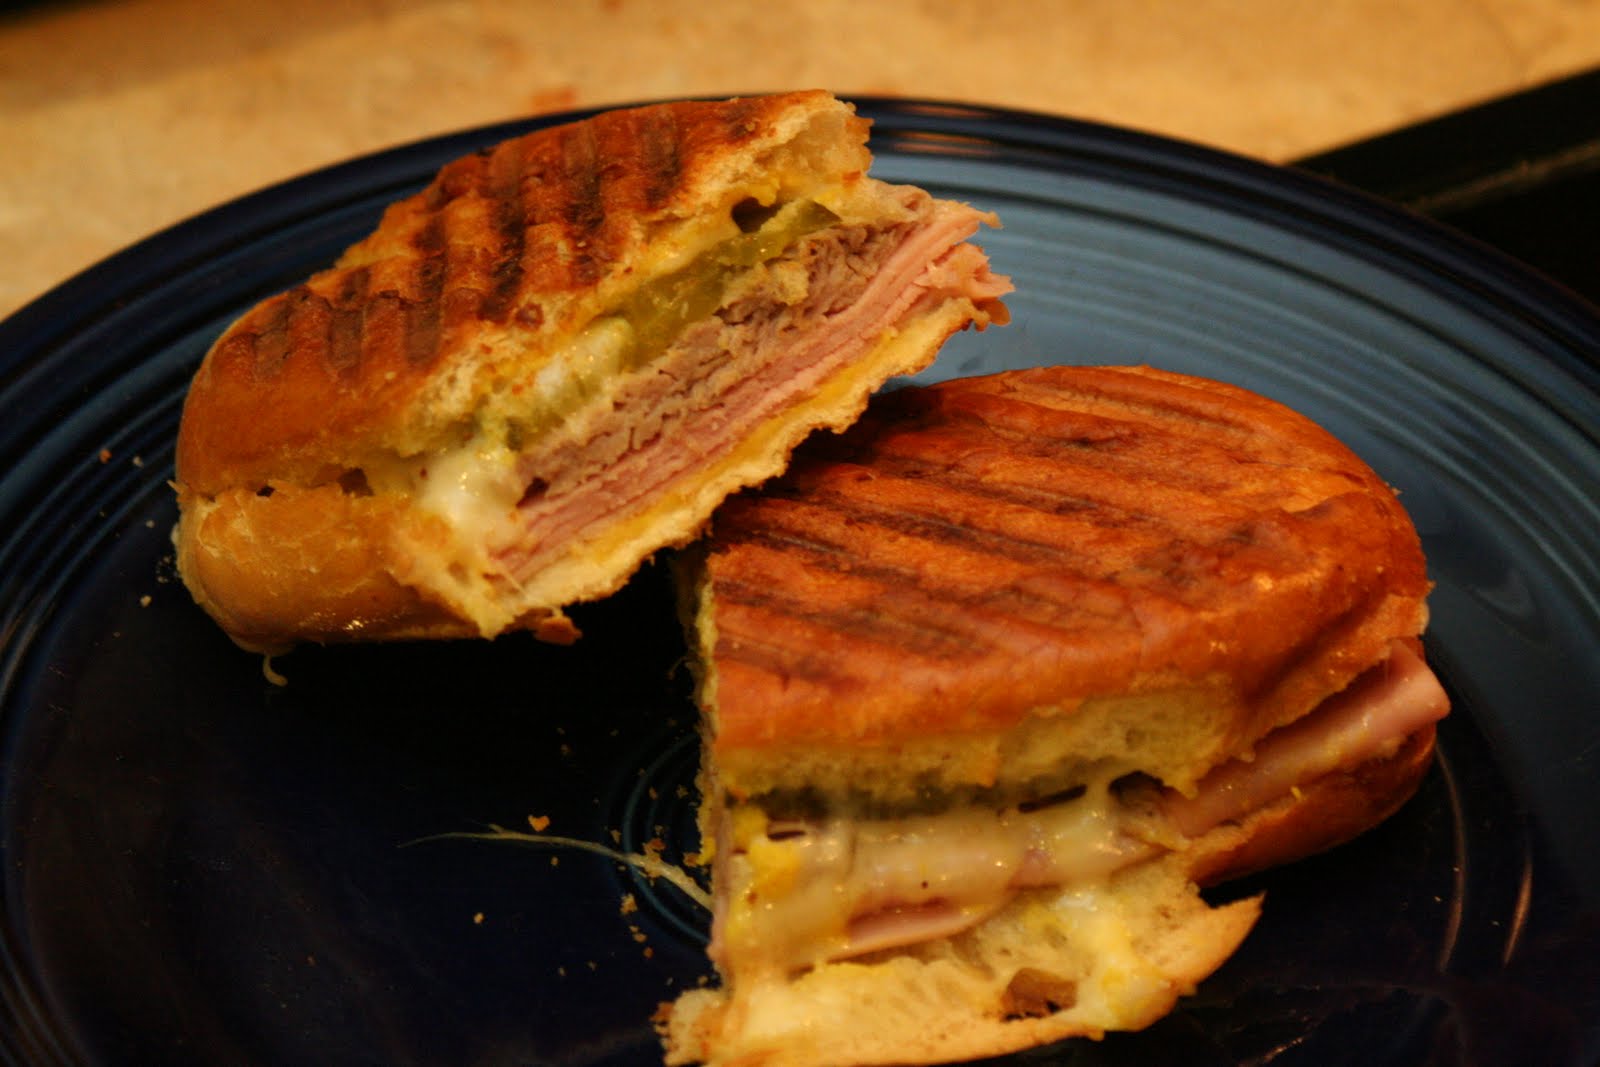
We went to this Cuban restaurant for dinner and decided to share two entrees. I seriously could not decide. We knew we wanted a Cuban sandwich and honestly I would have eaten anything else on the menu. We ended up getting some kind of pulled pork that was really good, but the Cuban sandwich was AMAZING. I've always been a fan of Cuban sandwiches...pork, ham, swiss cheese, mustard, pickles. What's not to love?! After having a very tasty sandwich there the husband and I decided we needed to have them again soon. So we had them for a date night dinner one Friday after the kiddos went to bed. I just kind of winged the recipe.

Cuban Sandwiches

4 slices deli ham
4 slices roasted pork
2 slices Swiss cheese
4 slices dill pickles
Mustard
2 crusty rolls or 4 pieces french bread

Split open rolls and spread both sides with mustard. use as much or little mustard as you like. On bottom half of roll, layer 2 slices ham, 2 slices pork, 1 slice Swiss cheese, and 2 pickle slices. Top with top half of roll.

Using a panini press (or whatever you like to use for a pressed sandwich), grill sandwich until cheese is melted and the bread is toasted.

*****

Pretty easy. For the pork component I used a one pound pork loin roast that I had cooked in the crockpot. I used my friend Jen's method for cooking a pork roast...throw the roast, a can of beer, some salt and pepper in the crockpot and let it cook. It was pretty awesome pork and I think my new go to method for cooking pork when I just need the meat for something.

These weren't quite as good as the ones we had at Havana Cafe, but I think that was due to the bread. I didn't have access to special Cuban bread, and I really think that would make a big difference. The husband and I both liked them, and it was a pretty easy dinner to throw together, so I'm sure we'll have them again.

Wednesday, April 6, 2011

Strawberry Pancake Topping

I guess this doesn't have to be a pancake topping, but the title "strawberry topping" just seemed weird. We're having it on pancakes, but I imagine it would work for waffles, ice cream, crepes...you name it. I was looking through the breakfast recipes in my cookbook for the week, America's Test Kitchen Healthy Family Cookbook, and thought about making a multigrain pancake recipe I saw, but it would have required me purchasing a lot of ingredients that probably wouldn't get used a whole lot. Okay, really just "no-sugar-added muesli" and I wasn't sure how often I'd use that again or even if any of the stores around me would have it. I mean, I couldn't find leeks the other day...what are my chances of finding "no sugar added muesli?!" I remembered I had a Trader Joe's multigrain pancake mix in my pantry, so I figured there was no point reinventing the wheel when I could just use that. I had already seen the strawberry topping recipe, so I figured I'd make that to go with the pancakes from the mix. we're going to have scrambled eggs and bacon to go along with the pancakes.

Strawberry Topping
Source: The America's Test Kitchen Healthy Family Cookbook, Copyright 2010

4 cups strawberries (about 20 ounces), hulled and sliced thin
1/4 cup sugar
Pinch salt
1 Tbsp fresh lemon juice

Toss 2 cups of the strawberries, the sugar, and salt together in a large bowl and let sit, stirring occasionally, until the strawberries have released their juice and the sugar has dissolved, about 30 minutes. Transfer the mixture, including all of the liquid, to a small saucepan and stir in the remaining strawberries. Cook over medium heat until the juice has thickened into a sauce, about 6 minutes. Off the heat, stir in the lemon juice. Let cool 1 hour before serving.

*****

This strawberry sauce was really good. It wasn't super sweet which I really liked. It tasted like strawberries, not syrupy sweet strawberries. I didn't let it cool for an hour because I forgot to factor in that time when I started making it. I figured it didn't need to be cool, though, since we were having it on pancakes. We all really liked it. Actually it made me think of my dad. Growing up when we'd have breakfast for dinner it was a big treat for my dad to make waffles and then we'd have strawberries and whipped cream on them. The strawberry sauce on the pancakes reminded me of that. I'd definitely make this again. There's still some left in my fridge...I kind of wish I had some vanilla ice cream to go with it.


Stir-Fried Pork and Napa Cabbage with Ginger Sauce

In case you're not a follower of my weight loss blog, you may not know that I'm going to be running the Disneyland Half Marathon in September. Are you saying, "I had no idea Claire was a runner"? Yeah...I'm not. Or I wasn't at least. I guess I'm becoming a runner. I decided to do the Couch to 5K program at the start of 2011. I have never been a runner. NEVER. My friend Jess reminded me that I used to tell people I only ran if being chased. It's true, I did say that. And now I can run 30 minutes straight without any real problems. Except for the voice in my head reminding me how much I hate running. But I'm learning to tune out that voice. Thinking about how much I hate it isn't going to get me running 13.1 miles.

Anyway, I'm running the race with my friend Jen, and last night was our first training session. I didn't want a super heavy meal knowing I'd be heading out the door to go running approximately an hour after we ate, so I thought this stir fry would be a good meal to have. The husband only chose the cookbook for the week, not the recipes. I had some pork chops in the freezer I needed to be using, so I thought this would work well.

Sadly I couldn't find it online anywhere, so I have to type out the whole thing. Lame.

Stir-Fried Pork and Napa Cabbage with Ginger Sauce
Source: The America's Test Kitchen Healthy Family Cookbook, copyright 2010

Pork:
2 Tbsp toasted sesame oil
1 Tbsp cornstarch
1 Tbsp all purpose flour
2 tsp low-sodium soy sauce
2 tsp Chinese rice cooking wine or dry sherry
1 12-ounce pork tenderloin, sliced into thin strips

Stir-Fry:
3 scallions, minced
3 garlic cloves, minced
1 Tbsp grated fresh ginger
4 tsp canola oil
2 carrots, peeled and cut into matchsticks
1 red bell pepper, stemmed, seeded, and cut into matchsticks
1/2 head napa cabbage, cored and shredded into 1-inch wide pieces
1 recipe Ginger Sauce (recipe below)

For the Pork: combine the sesame oil, cornstarch, flour, soy sauce, and rice wine in a bowl, stir in the pork, and marinate for at least 10 minutes or up to 1 hour.

For the stir-fry: combine the scallions, garlic, ginger, and 1 teaspoon of the canola oil in a bowl.

Heat 1 teaspoon more canola oil in a 12-inch nonstick skillet over high heat until just smoking. Add the pork, break up any clumps, and cook until lightly browned on all sides but not fully cooked, 2 to 4 minutes. Transfer to a bowl, cover, and set aside.

Add the remaining 2 teaspoons canola oil to the skillet and return to high heat until shimmering. Add the carrots and bell pepper and cook until the vegetables are crisp-tender, 3-4 minutes. Stir in the cabbage and cook, tossing constantly, until it is slightly wilted and crisp-tender, about 2 minutes.

Clear the center of the skillet, add the garlic mixture, and cook, mashing the mixture into the pan, untril fragrant, 15 to 30 seconds. Stir it into the vegetables.

Return the pork, with any accumulated juice, to the skillet. Whisk the sauce to recombine, then add to the skillet. Simmer, tossing constantly, until the pork is cooked through and the sauce has thickened, 30 seconds to 2 minutes. Serve.

Per 1-1/4 cup serving: 300 calories, 15g fat, 2g sat fat, 55mg cholesterol, 20g carbohydrates, 22g protein, 2g fiber, 780mg sodium

Ginger Sauce
1/2 cup low-sodium chicken broth
1/4 cup low-sodium soy sauce
2 Tbsp Chinese rice cooking wine or dry sherry
1 Tbsp sugar
2 tsp cornstarch
1 tsp toasted sesame oil
1 Tbsp grated fresh ginger

Whisk all the ingredients together in a bowl and use as directed in stir-fry recipes.

*****

I love how fast stir fries come together for a dinner. I got the pork marinating and then worked on prepping everything else. If you aren't used to making stir fries, having everything ready to go is a pretty crucial step since the ingredients usually cook super fast.

This was something my whole family really enjoyed. Boy #1 thought it looked gross when he saw the picture in the cookbook, but he ate just about every bite on his plate. I served it over some brown rice (I needed some carbs for my run!), and the husband and I each had an egg roll with ours. This is definitely something I'd make again. I think you could easily substitute chicken for the pork as well.

The picture isn't the greatest. I forgot to take a pic after I had plated, but when I thought of it my plate was kind of a mess, so I took a picture of what was left in the pan. I also keep forgetting to put the Speedlite back on my camera, so the lighting is pretty horrible.

Sunday, April 3, 2011

Creamy Chicken Dijon

I know I've mentioned before my great aunt who is (well, was as she passed away a few years ago) a James Beard award winner for a cookbook she authored. One of the cookbooks she wrote was a low carb slow cooker one. My mom had a copy and gave it to me the last time I did Phase One of the South Beach Diet. I hadn't used it, then when I was meal planning for this past week I got it out to see what was in it. I had originally slated this for Wednesday night because I knew we'd be getting home late, but then plans ended up changing, so I didn't make it. I had meant to make it for Saturday night then but forgot. So it then became our Sunday night dinner.

Creamy Chicken Dijon
Source: Low-Carb Slow & Easy by Frances Towner Giedt

2 large leeks, white part and 1 inch pale green
3 boneless, skinless chicken breast halves
3 boneless, skinless chicken thighs
Salt and freshly ground pepper, to taste
2 Tbsp Dijon mustard
1/2 tsp crushed dried tarragon
1-1/2 ounces prosciutto, cut into 1-inch wide strips
1/2 cup white Burgundy wine or low-sodium canned chicken broth
1/2 cup heavy cream

Cut the trimmed leeks in half lengthwise and wash well. Thinly slice on the diagonal. Place the leeks in the bottom of a 5-quart or larger crockery slow cooker.

Rinse the chicken; discard any fat. Pat dry with paper towels. Season with salt and pepper. In a small dish, combine the Dijon mustard and tarragon. Spread on the chicken pieces and wrap strips of the prosciutto around each piece. Place the chicken on top of the leeks. Pour the wine over the chicken.

Cover and cook on low for 5-6 hours or on high for 2.5-3 hours. Transfer the chicken to a heated serving platter. If cooking on low, increase the temperature setting to high. Whisk the cream into the pan juices and cook, uncovered, until sauce is slightly thickened, about 5 minutes. Spoon the sauce over the chicken. Serve immediately.

Nutritional Info (per serving):
222 calories, 12 grams fat, 24 grams protein, 5 grams carbohydrates

*****

The store where I did the bulk of my grocery shopping last week didn't have leeks. I tried another store. They only had organic leeks, which I was okay with, except that they all looked horrible. You know how if you leave green onions in your fridge too long they get kind of slimy and stick together? That's about what these leeks looked like. I wasn't paying good money for bad leeks. So I skipped that part of the recipe. And I couldn't find any tarragon in my pantry, so I used Italian seasoning instead. I also used all chicken breasts because I didn't have any chicken thighs on hand. And since wine isn't allowed in Phase One, I used chicken broth instead of a white Burgundy wine. And half and half instead of cream. So really I kept very little of the original recipe intact.

We were all kind of ho-hum about this. My sauce didn't really turn out, and the chicken really needed some sauce. My kids resorted to dipping theirs in ketchup. I have some ketchup issues, but if it got them to eat...fine. And they both did eat all the chicken that was on their plates. Whenever I cook chicken in the crockpot, it's so dried out when we eat it. That's my only real complaint. And the dijon mustard didn't provide a whole lot of flavor like I thought it would. I think this dish done in the oven instead of the crcokpot would turn out a lot better.

Sadly, it's probably not something I'd make again. Also sadly, my memory card wasn't in my camera, so I didn't get a picture of it.

Saturday, April 2, 2011

Back in the saddle!

Be ready for some new blog posts this coming week!! I was staring at my cookbook bookshelf, eyes glazing over as I was overwhelmed with choices, trying to decide which book to choose for this coming week. The husband wandered in and offered to choose for me. He picked America's Test Kitchen Healthy Family Cookbook.


I haven't made anything from it yet, so I'm pretty excited he chose it. I might have gone a little carb crazy on my meal planning since we're wrapping up Phase One of the South Beach Diet.

Can I interrupt myself to say that I met my goal weight?!?!?!? Of course I can...it's my blog. I honestly don't know when the last time was that I weighed this little. It was definitely before my wedding and before I was engaged, so some time between college (although at the end of college I know I weighed less than I do now) and a year or two into my relationship with the husband. regardless, it's very exciting.

Anyway, there's lots of new and exciting recipes coming this week, so stay tuned!!

Pimento Cheeseburgers

Not that long ago I bought a special America's Test Kitchen magazine, The Best of America's Test Kitchen: Best Recipes and Reviews 2011 I'm pretty much a sucker for any kind of special edition magazine they put out. I couldn't remember if I'd read through all of it, so I stuck it in when we went to CA a couple weeks ago. There are some fabulous things in it--of course--but one thing immediately jumped out to me:

PIMENTO CHEESEBURGERS

I heart me some pimento cheese. My grandma used to make it, and I loved it. I found out the husband loves it, so I started making it. This was years ago. Actually I think when my grandma found out that the husband loves it, she'd make it special for him. Anyway, we love pimento cheese. And a burger stuffed with it?! Awesome. I couldn't wait to try it. Plus I figured, sans bun, it would be a great dinner for one night while we were doing Phase One of the South Beach Diet. Technically you aren't supposed to have cream cheese, but there are only two ounces of it in the whole recipe, so I figured that was fine.

Pimento Cheeseburgers
Source: America's Test Kitchen

6 ounces extra-sharp cheddar cheese, grated fine (about 1.5 cups)
1/3 cup drained jarred pimentos, chopped fine
2 ounces cream cheese, softened
1/2 tsp dry mustard
1/8 tsp cayenne pepper
1 tbsp mayonnaise
2 slices high-quality white sandwich bread, torn into pieces
1/4 cup whole milk
1-1/2 pounds 85 percent lean ground beef
1 tbsp Worcestershire sauce
1/2 tsp salt
1/2 tsp black pepper

Mix cheddar cheese, pimentos, cream cheese, mustard, and cayenne in bowl until well combined. Drop four 2-tablespoon portions of pimento cheese mixture on plate and cover tightly in plastic wrap. Freeze until firm, at least 2 hours. Combine remaining pimento cheese with mayonnaise, cover with plastic, and refrigerate.

Combine beef, Worcestershire, salt, and pepper in large bowl and gently knead until well combined. Divide meat into 4 equal -portions. Mold half of 1 portion of meat around 1 piece of the frozen cheese, then surround this mini-patty with the remaining half portion of meat. Repeat with the remaining frozen cheese and 3 portions meat to form 4 hamburgers.

Heat vegetable oil in large nonstick skillet over medium heat until just smoking. Add patties and cook until well browned, about 6 minutes. Flip burgers, cover skillet, and continue cooking until well done, about 6 minutes.

Distribute cheese-mayonnaise mixture evenly on top of burgers, cover, and cook until mixture is slightly melted, about 1 minute. Transfer to plate, tent with foil, and let rest 5 minutes. Serve.

*****

I ended up finding the recipe online to copy instead of typing it all out. The magazine version has you grilling the burgers, but it was hot here yesterday, so I just did them in a skillet. I did the burgers a little differently, I skipped the bread and milk step and just used ground beef (actually I used ground bison) with some salt and pepper...I'm out of Worcestershire.

These. Were. Tasty. Wow. I only used a pound of meat, so I made three burgers, and the husband and I each had 1.5. We both loved them. The melted pimento cheese inside, the melted pimento cheese on the outside. I definitely thought the meat itself could have used a little more seasoning, but as long as there was some pimento-y, cheesy goodness on the bite, it didn't matter a whole lot. This will definitely become a favorite burger in our house!!

(Sorry, my camera was in the car so the best I could do was a picture on my phone.)