Friday, March 31, 2023

Slow Cooker Bacon Wrapped Pulled Pork

 Sure enough, just when I was excited about being back to updating my blog life got in the way, and it's been months now since I posted.  Oops.  I've taken lots of pictures of Jefferson with the intention of then posting a recipe, but I have no excuse other than life.  And we just got back from a pretty amazing trip to Europe, so in all honesty a lot of my free time before the trip was spent doing trip planning and watching YouTube travel videos.  

Anyway, this was fresh in my mind because I just made it Monday, so I figured before I start working this morning I'd do a quick write up about it.  I had plans Monday night to play bunco, and normally if I'm going to be gone for dinner my husband and kids get some kind of take out for dinner or everyone fends for themselves.  I used to always make something then realized they would just get pizza, so at some point I figured why go to the trouble.  But we were going to get takeout on Tuesday, so I didn't want the money spent two nights in a row.  Pork shoulders were on sale, and we hadn't had this in awhile, so the stars aligned for this to be dinner on Monday.

I'm not a huge barbecue fan.  I don't dislike it, but unless we're somewhere like Austin or Kansas City I am not usually inclined to make barbecue my first choice.  Technically I'm not sure if this recipe counts as barbecue since it's done in a slow cooker, but whatever...pulled pork is decidedly barbecue, right?  I do like this recipe as it's super easy to put together and really versatile, and it's one that everyone in my family really likes.  Since you don't actually cook it with any barbecue sauce you can use the meat for all kinds of things.  Last night I threw some of the leftovers in a skillet with some El Pato tomato sauce then put it in quesadillas.

Remember a few years ago when those Tasty cooking videos were so popular?  Man I loved watching them.  That's where I got this recipe.  The original post is linked below, but I don't make it with the coleslaw, I just do the pork, so that's the recipe I'm posting.


Slow Cooker Bacon Wrapped Pulled Pork

Source: Buzzfeed/Tasty cooking video

3 pounds boneless pork shoulder

1 tablespoon sea salt

1 teaspoon garlic powder

½ tablespoon liquid smoke

8 strips of bacon


Quarter pork to portion into approximately ½-pound pieces.  Place pork into a large bowl. Add salt, garlic powder, and liquid smoke, and mix until each piece of pork is evenly covered.  Wrap each pork with bacon.  Place pork into the slow cooker and cook for 6 hours on low or 4 hours on high.

Take pork out onto a baking sheet. With 2 forks, pull apart the meat into desired size.  Broil on high for a few minutes to until the ends of the pork start to crisp up.  Serve on a bun with added barbecue sauce if desired.

*******

Pork chunks wrapped in bacon.  I don't actually weigh mine, I just cut into chunks and then wrap in bacon.  Usually one piece of bacon fits around the pork with the size I cut.


Shredded pork!

Pork shredded and back in the slow cooker to keep it warm.  The bacon gives it good smoky flavor and adds a little fat that crisps up nicely under the broiler.

No pics of it being served or plated since I wasn't here for dinner.

Monday, November 7, 2022

Southwest Tater Tot Casserole


I should have known that once I got the ol' blog up and running again and was enjoying writing posts that life would happen and get in the way.  At least I'm getting this post in under the two month mark from the last one!  I feel like we've just been swamped, although a good chunk of it was fun.  In the last two months my husband and I have taken a trip to Louisville, KY for a music festival and spent a weekend in NYC to see one of our favorite people get married.  Then I fractured my ankle hiking and came down with a cold.  Plus throw in there all the day-to-day stuff like working and managing kid activities and attending said kid activities, and life is just busy.  

Basically this meme is my life...


Anyway, my oldest is in Milwaukee, WI this weekend for a choral festival, so while he's gone I was trying to come up with meals he doesn't particularly like that the rest of us do.  This Southwest Tater Tot Casserole was the first one to pop in my head.  

In the summer of 2019 we were going to housesit for some friends in the Seattle area while they went on the trip of a lifetime to China.  My youngest and I made a road trip out of it on the way there and stopped in Boise to visit my lifelong BFF and her family for a few days.  We've been friends since our ages were single digits which is pretty incredible because we are both solidly in our 40s now.  We of course had a blast with them, and I loved that our kids played together like they've known each other forever.  Our last night at their house she made this for dinner.  I absolutely love tater tot casserole and have literally been eating it since I was a kid, and my kids love it, too, so Miles and I were super excited to try this version.  Once we were back home I made it for my family and was shocked when Will didn't like it.  What the heck, man?!  So now I make it if Will isn't going to be here for dinner, although sometimes he has to suck it up and have it because it's what I want to make for dinner.

The website where the recipe originally came from isn't up anymore, so luckily I had printed off the recipe at some point.  I've changed it up a little from the recipe I printed to adjust to how my family likes it.

Southwest Tater Tot Casserole

1 package ground turkey (I buy mine at Costco in packages of four)

1 can corn

1 can black beans, drained and rinsed

1 packet taco seasoning

1 large can green enchilada sauce, heat level of your choice (we like medium heat)

1-2 cups shredded cheese of your choice (Mexican blend, colby jack, cheddar, pepper jack...whatever)

1 bag frozen tater tots

Salt and pepper to taste


Preheat oven to 425.  Brown ground turkey in an ovenproof skillet sprayed with nonstick spray, seasoned with salt and pepper.  

Once the turkey is no longer pink, add in corn, black beans, taco seasoning, and 1/2 to 2/3 of the can of enchilada sauce.  Sitr to combine and let simmer on medium heat for 10-12 minutes so the flavors combine.  This will also help the enchilada sauce cook down a little.  If it looks or gets too dry, add in more enchilada sauce.

Turn off the burner and top the mixture with shredded cheese.  Arrange tater tots on top of cheese.

Move the skillet into the oven and bake for 25 minutes or until cheese is melted and tots are crispy.

Note: if you don't have an ovenproof skillet, you can use a 9x13 or 11x7 casserole dish.  Spray dish with nonstick spray and transfer skillet mixture to the casserole dish before topping with cheese.  Top with cheese then tater tots and bake as directed.


Jefferson is keeping a close eye on the skillet mixture.


Topping with tots. My husband makes fun of my symmetrical tot placement, but how else are you supposed to do it?  Throw on tots all willy-nilly?!


Wednesday, September 7, 2022

Jen Hatmaker's Barbecue Braised Beans and Chicken

I have to say I'm kind of enjoying being back at this...although I also hesitate to say that in case the novelty wears off, and I stop with the updates!  

I just love Jen Hatmaker.  Her Facebook posts, podcast, books.  I kind of feel like we could be best friends if we actually knew each other.  Maybe that's an overstatement, but I adore her.  The last time we were in Austin, TX I secretly hoped I'd run into here somewhere.  Awhile back she posted a picture of a pot soaking in a sink from a dinner she had made, and it really resonated with me because a lot of times I also have a pot soaking the sink, but mostly because I'm lazy and don't like doing dishes.  Anyway, the recipe she posted with it sounded like something my family would like.  I was scrolling through my Instagram bookmarks this past weekend to meal plan for the week and saw that post.  Tonight I had to drive carpool after football practice, so I wanted something easy for dinner.  This fit the bill since it gets prepped early and then just sits in the oven for several hours.

Jen Hatmaker's Barbecue Braised Beans and Chicken

This was a big hit, but it was definitely spicy.  I ended up using about half the can of chipotles mostly because I didn't want to scrape the seeds out of all the peppers and was worried using all of them would make it way too spicy.  I'm not a big barbecue bean fan, but these were really good.  Would definitely make it again!

Before going in the oven...


The finished product...


Sous Chef Jeff hoping to get a serving...


Monday, September 5, 2022

Binging with Babish's Deluxe Grilled Cheese

 Wow, it has been a MINUTE since I've done this!  Thank you, Blogger, for simply having a "new post" link when I go to my blog to make it easy on me.

I recently created an Instagram account for our little dog because he is constantly hovering by anyone preparing food in our kitchen, so I decided to combine cooking and recipes with dog pics.  I'm still working on how to best provide links for the recipes I show, so while I get that figured out I thought the easiest way to start would be directing anyone interested here, and I can provide a link (or the recipe) to whatever the post is.

Interested in following along with this new endeavor?  Give us a follow on Insta at Sous Chef Jeff!

Here's Jefferson aka Sous Chef Jeff in all his cuteness...


So, with all of that being said and introduced, here we go!  My 16 year old son recently introduced me to a YouTube channel, Binging With Babish, and I've kind of been watching it incessantly, sometimes with my son and sometimes on my own.  He had seen this grilled cheese video and thought we should try it sometime.  He was going to make it with me, but high school life got in the way, so I was on my own.

Instead of copying and pasting, I'm just giving you the links.


Binging with Babish: Grilled Cheese Deluxe inspired by Regular Show on the Babish website

This was definitely a tasty grilled cheese and one I would make again for sure.  I did make a few mistakes I would change next time...
  • On the video he puts the cheese into a ramekin to solidify and cool.  The recipe calls for spreading it on a cookie sheet to make slices.  I was having a struggle with plastic wrap for the cookie sheet, so I opted for a container.  I recommend using a cookie sheet if you want the cheese to set faster...basic science stuff here, but it took awhile for the big chunk o' cheese in the container to cool because it was so dense...which meant we actually had these the next night for dinner because the cheese wasn't set in time.  I would have prepped it earlier in the day to avoid this, but at the time I thought my son was going to help me with it, so I was waiting for him to get home from school and sports practice.
  • Once the cheese was cool, and I took it out to slice it, I ended up slicing it way too thick.  Thinner is better if you want an epic cheese pull when you cut the sandwich.
  • I used brioche bread because I thought that would be delicious, but I think next time I'd stick with a regular white sandwich bread, like Pepperidge Farm's.  That's my go-to white bread for sandwiches that require white bread (really white bread is the only option for things like pimento cheese and meatloaf sandwiches, don't you think?).  The brioche was still good, just not what I was looking for with this.  The end result actually reminded me a lot of a Sonic grilled cheese, which by no means was a bad thing.
Here's my cheese blob after I took it out of the container for slicing.  I cut it in half widthwise and then cut slices from the smaller pieces.


And the finished sandwich!


Thursday, August 15, 2013

Baked Hawaiian Ham Sandwiches


So chances are good that if you're on Pinterest, you've seen this recipe and/or pinned it.  We had these last night, and I couldn't believe they weren't on my blog because I've made them several times, and they're completely easy and delicious.

I've always loved the http://www.kingshawaiian.com/products/">King's Hawaiian breads
, and it seems that now they're a whole lot easier to find than they were many years ago.  It used to be a big treat to find them, now pretty much every grocery store has them.  And I love them.  That was selling point number one for these sandwiches.  Although it just occurred to me that I've never looked at the ingredient list.  Sigh.  I probably should, but I'm fairly certain that means I won't want to buy them anymore.  Do you ever run into this conundrum if you try and mainly eat real food?  I suppose I could find a recipe to make my own...surely there's one out there.  But I digress...
I also love sandwiches.  I'd say who doesn't love them, but I do know of someone that doesn't.  She doesn't like mixing her food together, which I understand I guess, but man alive is she missing out!  I can see not wanting your mashed potatoes and peas to mingle together on your plate, but a sandwich is something completely different.  These sounded super easy when I first saw the recipe, and I'm always up for an easy to prepare dinner!  Especially if it's a delicious sandwich.

Baked Hawaiian Ham Sandwiches

One 12-count package http://www.kingshawaiian.com/products/rolls-12-pack/">King's Hawaiian sweet dinner rolls
3 sticks butter
3 Tbsp dijon mustard
1-1/2 tsp worcestershire sauce
1 Tbsp poppy seeds
1 onion, somewhere between finely chopped and diced
1 pound thin sliced ham
6 slices Swiss cheese

Preheat oven to 350.

In a medium saucepan, melt butter and add in mustard, worcestershire, poppy seeds, and onion.  Let simmer 5-7 minutes.

Slice entire package of rolls in half horizontally, so you have 12 bottoms and 12 tops.  Keep them connected--don't break them apart into separate rolls.

Place bottom halves of rolls into a foil-lined 9x13 baking dish.  Brush 1/3 to 1/2 butter mixture on rolls.  Place ham on top, layering evenly across rolls.  Lay cheese slices in single layer on top of ham.  Place top halves of rolls over the cheese and brush remaining butter mixture on the top of the rolls.

Cover with foil.  Bake approximately 15 minutes.  Remove foil cover and bake another 5-7.  Slice into individual rolls and serve.

*****

Obviously you can probably tell from my initial comments that these are a huge hit at my house.  My kids don't like the pieces of onion on theirs that inevitably end up on the top of the roll, so they just push them off and have a little onion pile on their plate, which is okay by me.  I'm not sure how many times I've made them, but last night I actually doubled the recipe so there'd be leftovers because we'll eat a whole batch in one meal.  But then of course today, Boy #1 wanted to buy lunch at school, and the husband had an all day meeting with lunch being served, so there's a whole pan of them just sitting in my fridge now.  Good thing it's leftover clean-up for dinner tonight!

By the way, does anyone know of a ham that is free of nitrates and nitrites?  Try as I might, I cannot find one.  I'm starting to think unless I get a fresh ham and cook it myself, it's not going to happen.  And if that's the case, I'll either stick with the nitrites or do away with ham altogether.

Who am I kidding...I would never do away with ham.

Speaking of ham...check out Boy #2 posing with the sandwiches!


Monday, August 12, 2013

Grilled Chicken and Zucchini Yakitori


Well, so much for my plan of keeping my blog updated over the summer.  Boy #1 started second grade last Monday, and Boy #2 starts his last year of preschool this afternoon.  I don't know how they got to be this old.  One of my friends posted a picture on Facebook of Boy #1 and one of his BFFs on the first day of school.  They've been friends since they were one, and seeing them so big and starting second grade had me in tears.  Anyway, now that school is back in the swing, and I have four afternoons a week to myself, I'm hoping to get back on the blog wagon.  The past few weeks I haven't made a whole lot of new stuff.  It's hard to find the time to come  up with meal plans that include a bunch of new recipes when I have both kids at home.

This recipe has been one of our new favorites over the summer.  The first time I made it I was watching my friend Amanda's daughters, and I wasn't sure how the kids would receive it.  I mean, it's grilled chicken, so I figured it would be okay.  Turns out I had nothing to worry about.  This is from SkinnyTaste.com, which is one of my favorite healthy cooking blogs.  I don't think I've ever been disappointed with a recipe I've used from her website.  I love grilling in the summer, especially if we're hanging out in our pool, but I get tired of always grilling the same stuff, so finding a new grilled chicken recipe is pretty fantastic in my book.

Grilled Chicken and Zucchini Yakitori
Source: Adapted from http://www.skinnytaste.com/2013/06/grilled-chicken-and-zucchini-yakitori.html">SkinnyTaste.com

2 tablespoons rice wine vinegar
1/2 cup low sodium soy sauce (for GF use low sodium Tamari)
1 1/2 tablespoons honey
1 garlic clove, crushed
3 lb boneless skinless chicken thighs, all fat trimmed
2 medium zucchini, sliced into 1/2-inch thick rings
18 (10 inch) bamboo skewers

Bring vinegar, low sodium soy sauce, honey and crushed garlic to a boil in a medium-sized sauce pan, and cook over medium heat for about 5 minutes. Set aside to cool.

Cut the chicken into 1-inch pieces and place in a ziplock bag; pour half of the marinade over the chicken. Place the zucchini in a second large ziplock bag and pour the remaining marinade over the zucchini. Refrigerate for at least 30 minutes. Meanwhile, soak the skewers in water 30 minutes so they don't burn.

Thread the chicken onto skewers, discarding the chicken marinade.

Thread the zucchini onto skewers, reserving the marinade for basting.

Preheat the grill or a grill pan over medium-high heat. When hot, spray with oil then reduced heat to medium; grill the zucchini and chicken skewers about 5 to 6 minutes on each side brushing both sides of the skewers with the yakitori sauce during the last few minutes of cooking time.

*****

I said above that when I made this for my family and my friend's daughters I didn't have to worry about them not liking it.  The kids all had seconds of the chicken.  There were no leftovers from this, which was kind of disappointing because I had hoped to have some for the husband and me for lunch the next day.  The kids didn't eat the zucchini, but the husband and I loved it.  This thick-zucchini-slices-on-bamboo-skewers was actually my go-to way to grill zucchini over the summer when we'd have it as a side dish.  So easy!  If I wasn't making this recipe I'd brush the slices with some olive oil and sprinkle with some Lawry's or Tony Chachere's and throw them on the grill with whatever protein I was cooking.

This is super easy to put together (as long as you plan ahead for marinating time), and so good.  The original recipe called for sake instead of the rice wine vinegar, but since I didn't have sake on hand I substituted the vinegar.  It also called for green onions to be on the skewers between chicken pieces and zucchini pieces, but I haven't ever done that, so I took it out of the ingredient list.

I have already made this so many times this summer, but it's so easy and my family loves it, so it's definitely going to stay one of my go-to chicken thigh recipes!


Tuesday, June 25, 2013

Grilled Pork Ribs


I just love to grill in the summer.  It does have its downsides being in Phoenix and standing outside in the roasting heat over a hot grill, but it creates significantly less dirty dishes and doesn't heat up my kitchen by using the oven.  Plus we have a pool, so a lot of times whomever is grilling will take pool breaks or just hang out in the pool while dinner cooks.  It's a pretty sweet system.

I've always been a fan of boneless ribs.  Gnawing on ribs with the bones in them has always seemed gross and honestly a little barbaric to me.  although for a lot of years I wouldn't even eat meat with bones in it because it reminded me that it once was walking around.  Can you tell I lived with vegetarians in college?  I don't think I had my first buffalo wing until I was in my mid-20s.  I've gotten over it now, but I still won't eat bone-in ribs.  Recently boneless ribs were on sale for a super good price, so I bought a package of them planning on grilling them.  I wasn't really sure how to grill them, if I just threw them on there or what, so a little Googling directed me to a brine recipe, and I ran with it.  My uncle makes really fantastic grilled ribs, but I knew I'd need ingredients I didn't have, and I try to limit grocery store trips in the summer since I have to drag both kids with me.  This was also my first attempt at a brine, so I was pretty excited to try it out.

Grilled Boneless Pork Ribs

1 cup water
1/4 salt
1 T. sugar
3 pounds boneless country style pork ribs

In a gallon Ziploc bag, combine water, salt, and sugar.  Add in ribs, squeeze out excess air, and let sit for at least 30 minutes and up to overnight.

Preheat your grill for indirect heat grilling (is that the right phrase?).  My grill has four burners, I turned on all four to heat it up, then reduced the middle two super low.  Lay ribs in the middle of the grill and cook for 10 minutes.  Flip them over and grill another 10.  Their internal temperature should be 145 degrees.  Remove from grill and serve with your favorite barbecue sauce (or make your own if you're an overachiever like me).

*****

I really had no idea how this was going to turn out.  I'll be honest--I had visions of dried out, tough, inedible ribs, and I was working on a back up dinner plan in the back of my head the whole time.  My original plan had been to only cook about half the package of ribs, but Boy #2 was helping me make dinner, and he said we should do all of them so there'd be leftovers.  Thankfully he's a lot more optimistic than his mama because I didn't know if we should plan on leftovers in case they were awful.

These turned out AMAZING.  I don't know why I doubted myself.  Normally my go-to method of cooking boneless ribs is throwing them in the crockpot with a sweet and sour barbecue sauce that's my great aunt's recipe, but this may very well be my new go to.  It was a huge hit with my family.  There were leftovers but not many.  They were good on their own, they were good with the barbecue sauce (although my kids preferred them without the sauce, the husband and I were torn on which was better).  This was an all around winner!!


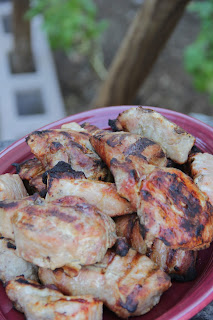
 My grill could maybe use a cleaning.

 I tried to make this one a little scenic.  See my failing garden in the background?  Those green things are my sad basil plants that are the only remnant of what I had hoped to be a successful summer garden.