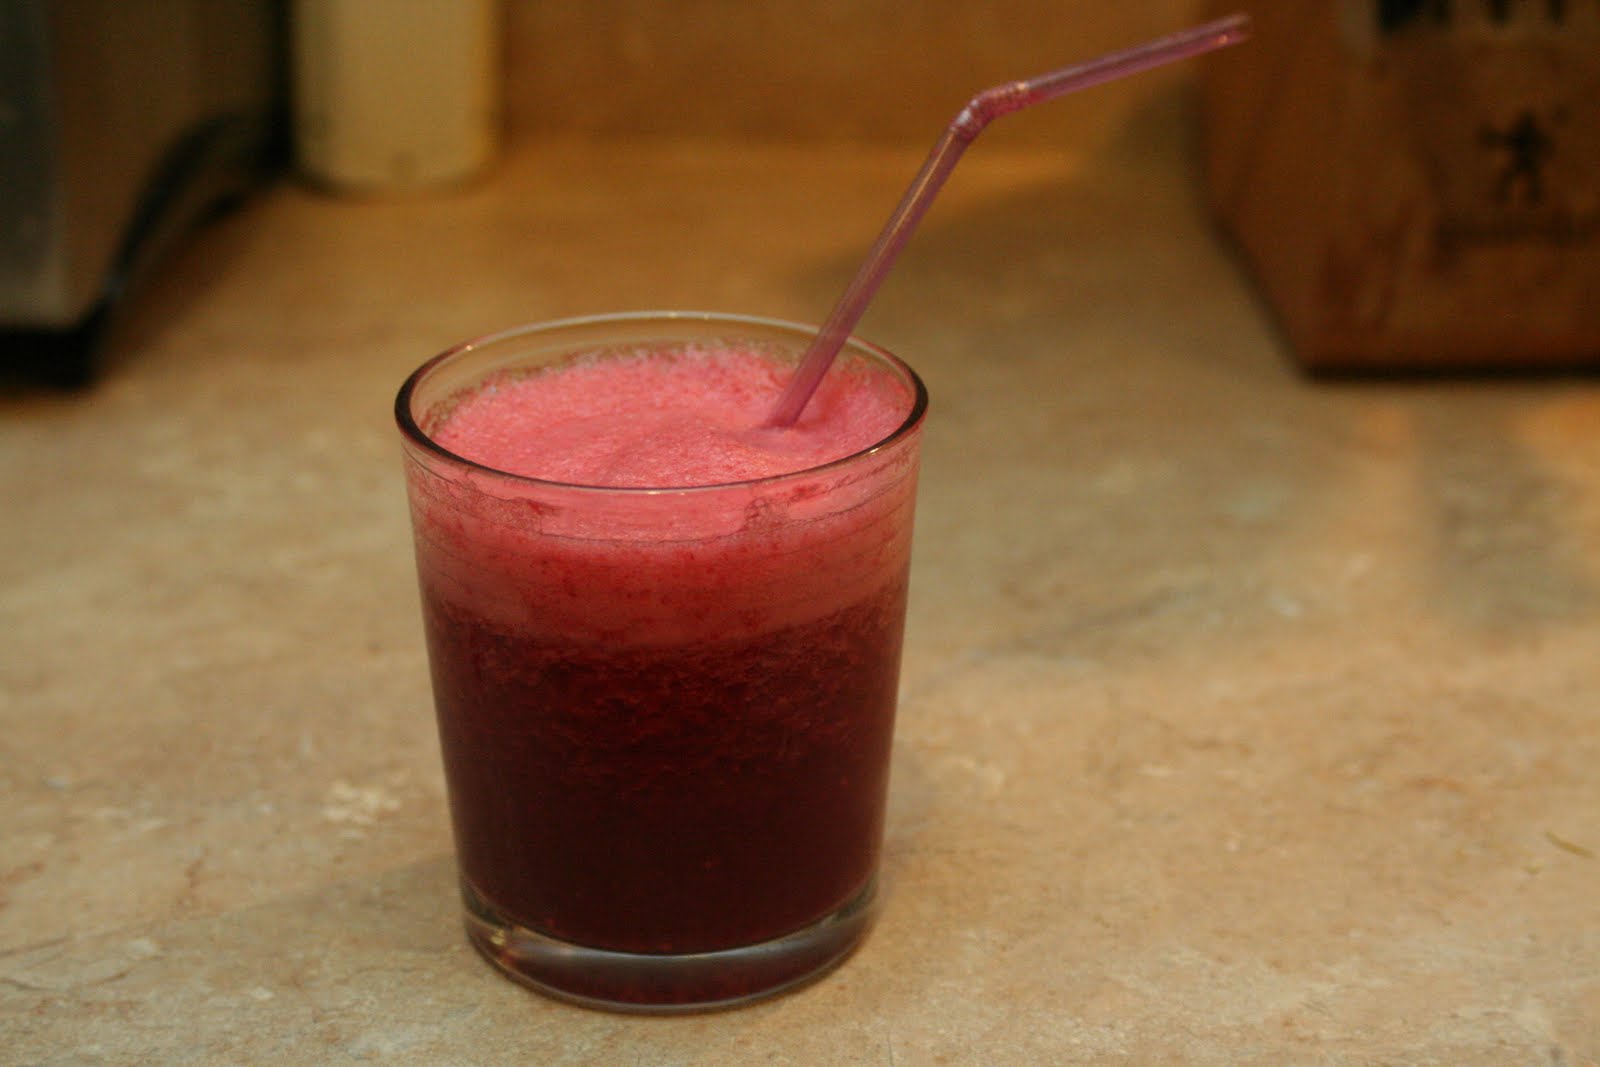
In my quest to expand my adult beverage recipe collection for my Summer Drink Series, I stumbled upon a great boozy website: Drink Of The Week. You can search by all sorts of things; I chose to click on the tags over on the left side of the website based on what I had available on the liquor shelf of my pantry. We had a pretty random mix of libations, so I chose a bottle that was mostly full: silver (blanco) tequila. Actually I last used it for Summer Drink Series #1: Blackberry Margaritas. I didn't want to have to buy a ton of ingredients, and this one came up towards the top of my search and sounded tasty. It calls for grapefruit soda (or juice), and I love grapefruit soda. I think it's an often over-looked soda or at least not very popular because Safeway is the only place I can find it. I don't drink soda very often--and hardly ever buy it--so it may very well be available tons of places, but I've always only ever seen it there. I'm not a fan of grapefruit juice. Actually I'm not a fan of grapefruits in general. My grandpa always liked grapefruit soda, and I think I got my love of it from him. The whole point of that was that I was excited to get some grapefruit soda.
Paloma
Source: Drink Of The Week website
2 oz. Tequila (blanco or reposado)
1 oz. Lime Juice
4 - 5 oz. Grapefruit Juice or Soda
pinch of salt
Build in a tall glass over ice. Start with the tequila, lime juice and salt and then fill with grapefruit juice. Garnish with a lime wedge.
*****
I love easy boozy drinks that don't require a bunch of ingredients you're only going to use one time. The husband and I both really liked these, although I got Diet Grapefruit soda to help save on calories, and I'd recommend going with the regular soda, not diet. I don't know, I swear I could taste the artificial sweetener in it so that kind of ruined it for me. These went down really smooth, so be warned. Definitely a great pool drink or if you're having a fiesta and want something different than margaritas.
Cheers!
Saturday, August 6, 2011
Grilled Chicken Salad with Rustic Guacamole, Romaine and Queso Anejo
It seems like forever that I've been away from my blog! Hello, blog...have you missed me? Two weekends ago I went to Tucson, AZ with some friend on a scrapbooking weekend retreat. The last time I really sat down and scrapbooked, I was nine months pregnant with my youngest son (who will be three in November). Yeah, it had been awhile. My house and family were somewhat neglected for probably two weeks leading up to said weekend while I went through years of pictures on my computer to get prints made, planned out what pages I needed/wanted to do, organized my supplies, etc. I had a fantastic time and ended up doing something like 30 pages and made an album for our Santa pictures, so it was definitely productive. Anyway, once I got home from that weekend I was excited to get back into the swing of my blog, but I had a couple weeks' worth of chores to catch up on, so the blog kind of fell to the wayside. Then this past week was Boy #1's last week of summer vacation (my baby is starting kindergarten on Monday...how is that possible?!), so I was trying to cram in one on one time with him and do lots of fun stuff before he starts school.
So here it is Saturday night...the husband is out celebrating a friend's birthday, my kiddos are in bed, and I'm going to get caught up on blog posts. I haveeight nine (forgot about the next Summer Drink Series beverage!) posts to do, which I'm guessing won't all get done tonight, but I'll slog my way through as many as I can. I had meant to start sooner, but I've recently discovered Pintrest.com and have a tendency to get sucked into that since finding out about it.
Anyway, I had a hankering for some Rick Bayless recently while working on my menu plan, and I came across this salad. I'm all about salad in the summer because it's so ridiculously hot here. I knew I couldn't go wrong with something from the Mexican Everyday cookbook, and I was surprised at how many salads were in there!
Grilled Chicken Salad with Rustic Guacamole, Romaine and Queso Anejo
Source: Mexican Everyday by Rick Bayless
DRESSING:
½ cup vegetable or olive oil, plus a little more for onion
4 garlic cloves, peeled and halved
Fresh hot green chiles to taste (I like 2 serranos or 1 large jalapeno), stemmed and halved
½ cup fresh lime juice
¾ cup (loosely packed) cilantro, roughly chopped
Salt
¼ teaspoon ground black pepper
GRILLED CHICKEN SALAD:
4 medium (about 1¼ pounds total) boneless, skinless chicken breast halves
1 medium white onion, cut into ½-half-inch slices
2 ripe avocados
8 cups romaine hearts, sliced crosswise at ½-inch thick
1/3 cup grated Mexican queso anejo or other garnishing cheese (Romano or Parmesan)
Directions:
Heat oil in small skillet over medium heat. Add garlic and chiles; cook, stirring frequently, until garlic is soft and lightly browned (usually 1 to 2 minutes). Pour oil, garlic and chiles into blender jar or food processor. Add lime juice, cilantro, black pepper, and 1 scant teaspoon salt. Process garlic mixture until smooth.
Pour 1/3 of garlic mixture over chicken breasts, spreading it evenly over all sides.
Heat a grill pan or gas grill to medium to medium-high heat (or start a charcoal fire and let it burn until coals are medium hot and covered with white ash). Lightly brush or spray onion slices with oil; sprinkle with salt. Lay chicken and onion on grill pan or grill. Cook until chicken is just cooked through and onion is well browned (3 to 4 minutes on each side). Chop onion into small pieces and scoop into bowl. Set the chicken aside to cool.
Pit and peel avocados, scooping flesh into bowl with onion. Add another 1/3 of garlic mixture, then coarsely mash everything together with old-fashioned potato masher, large fork or back of spoon. Taste and season with salt (usually about ½ teaspoon).
Scoop the sliced romaine into large bowl. Drizzle on remaining 1/3 of garlic mixture and toss to combine. Divide between 4 dinner plates. Scoop a portion of guacamole into center of each plate. Cut each breast into cubes and arrange over guacamole. Sprinkle each plate with garnishing cheese. Serve.
*****
I ended up doing mine a little differently. I had planned on making something different for dinner in the crockpot, but I realized it wasn't going to happen because I had forgotten to put what I needed into the crockpot. So I already had some cooked, shredded chicken on hand, so instead of grilling the chicken in the dressing, I just mixed some into my shredded chicken. I knew this wasn't something my kids would eat, so I only made half the guacamole called for. I loved using the dressing to flavor the guacamole, by the way.
The husband and I thought this was FANTASTIC. The dressing was fresh and spicy and wow! Having it on the chicken, mixed in the guacamole, and as dressing on the salad made sure that you always had some of its spicy kick on your bite. I will definitely make this salad again. Yum!
So here it is Saturday night...the husband is out celebrating a friend's birthday, my kiddos are in bed, and I'm going to get caught up on blog posts. I have
Anyway, I had a hankering for some Rick Bayless recently while working on my menu plan, and I came across this salad. I'm all about salad in the summer because it's so ridiculously hot here. I knew I couldn't go wrong with something from the Mexican Everyday cookbook, and I was surprised at how many salads were in there!
Grilled Chicken Salad with Rustic Guacamole, Romaine and Queso Anejo
Source: Mexican Everyday by Rick Bayless
DRESSING:
½ cup vegetable or olive oil, plus a little more for onion
4 garlic cloves, peeled and halved
Fresh hot green chiles to taste (I like 2 serranos or 1 large jalapeno), stemmed and halved
½ cup fresh lime juice
¾ cup (loosely packed) cilantro, roughly chopped
Salt
¼ teaspoon ground black pepper
GRILLED CHICKEN SALAD:
4 medium (about 1¼ pounds total) boneless, skinless chicken breast halves
1 medium white onion, cut into ½-half-inch slices
2 ripe avocados
8 cups romaine hearts, sliced crosswise at ½-inch thick
1/3 cup grated Mexican queso anejo or other garnishing cheese (Romano or Parmesan)
Directions:
Heat oil in small skillet over medium heat. Add garlic and chiles; cook, stirring frequently, until garlic is soft and lightly browned (usually 1 to 2 minutes). Pour oil, garlic and chiles into blender jar or food processor. Add lime juice, cilantro, black pepper, and 1 scant teaspoon salt. Process garlic mixture until smooth.
Pour 1/3 of garlic mixture over chicken breasts, spreading it evenly over all sides.
Heat a grill pan or gas grill to medium to medium-high heat (or start a charcoal fire and let it burn until coals are medium hot and covered with white ash). Lightly brush or spray onion slices with oil; sprinkle with salt. Lay chicken and onion on grill pan or grill. Cook until chicken is just cooked through and onion is well browned (3 to 4 minutes on each side). Chop onion into small pieces and scoop into bowl. Set the chicken aside to cool.
Pit and peel avocados, scooping flesh into bowl with onion. Add another 1/3 of garlic mixture, then coarsely mash everything together with old-fashioned potato masher, large fork or back of spoon. Taste and season with salt (usually about ½ teaspoon).
Scoop the sliced romaine into large bowl. Drizzle on remaining 1/3 of garlic mixture and toss to combine. Divide between 4 dinner plates. Scoop a portion of guacamole into center of each plate. Cut each breast into cubes and arrange over guacamole. Sprinkle each plate with garnishing cheese. Serve.
*****
I ended up doing mine a little differently. I had planned on making something different for dinner in the crockpot, but I realized it wasn't going to happen because I had forgotten to put what I needed into the crockpot. So I already had some cooked, shredded chicken on hand, so instead of grilling the chicken in the dressing, I just mixed some into my shredded chicken. I knew this wasn't something my kids would eat, so I only made half the guacamole called for. I loved using the dressing to flavor the guacamole, by the way.
The husband and I thought this was FANTASTIC. The dressing was fresh and spicy and wow! Having it on the chicken, mixed in the guacamole, and as dressing on the salad made sure that you always had some of its spicy kick on your bite. I will definitely make this salad again. Yum!
Sunday, July 17, 2011
Grilled Chicken Tostadas
In case you haven't noticed, I get bored making the same things all the time. We're not a "Thursday night is pork chop night" kind of family...or at least I'm not that kind of cook. I've mentioned I'm trying to cook the majority of our dinners either using the grill outside or the crockpot so I can avoid heating up my house too much in the insanely hot Phoenix summer. I've been on the lookout for new grilling recipes, so I was excited when I saw this one in a daily recipe email I get from Cooking Light. I love finding things to cook on the grill that aren't usually cooked on a grill, and tostadas seemed to fit the bill!
Grilled Chicken Tostadas
Source: MyRecipes.com via Cooking Light
4 (6-ounce) skinless, boneless chicken breast halves
1 tablespoon fresh lime juice
1 tablespoon 40% less-sodium taco seasoning (such as Old El Paso)
1/2 teaspoon sugar
Cooking spray
6 (8-inch) flour tortillas
6 cups packaged coleslaw
1 (7-ounce) can green salsa
4 cups chopped tomato
1/4 cup sliced ripe olives, chopped
1 1/4 cups fat-free refried beans
1/2 cup (2 ounces) crumbled feta cheese
6 tablespoons reduced-fat sour cream
1/4 cup fresh cilantro leaves
1/4 cup unsalted pumpkinseed kernels, toasted (optional)
Prepare grill, or heat a grill pan over medium-high heat.
Brush chicken with juice; sprinkle with seasoning and sugar. Place chicken on grill rack or grill pan coated with cooking spray; grill 4 minutes on each side or until chicken is done. Cool slightly. Cut chicken into 1/4-inch strips; set aside. Place tortillas on grill rack or grill pan coated with cooking spray; grill 30 seconds on each side or until golden brown.
Combine coleslaw and salsa; toss to coat. Combine tomato and olives; toss gently.
Spread about 3 tablespoons beans over each tortilla; divide chicken evenly among tortillas. Top each serving with about 2/3 cup slaw mixture, 2/3 cup tomato mixture, 4 teaspoons cheese, 1 tablespoon sour cream, and 2 teaspoons cilantro. Sprinkle each serving with 2 teaspoons pumpkinseeds, if desired.
Nutritional Information
Amount per serving (6 servings total)
Calories: 361
Calories from fat: 23%
Fat: 9.2g
Saturated fat: 3.6g
Monounsaturated fat: 1.5g
Polyunsaturated fat: 1.2g
Protein: 28.7g
Carbohydrate: 43g
Fiber: 6.8g
Cholesterol: 65mg
Iron: 3.7mg
Sodium: 844mg
Calcium: 221mg
*****
For some reason, the husband and I decided we'd have these for dinner after the kids went to bed--a random, middle of the week date night. It worked out well to mix up the slaw and tomatoes/olives while the chicken was on the grill, then once the chicken was cooked through and the tortillas were crisped, all we had to do was assemble.
We both REALLY liked these. And they were so filling. I was a little skeptical about the slaw mixture, but it worked great and was super tasty. I don't know if my kids would like these or not, but just because the last few times we've had tostadas, they haven't been very happy with it. These are something I would definitely make again...a great quick, healthy, light summer dinner!
Grilled Chicken Tostadas
Source: MyRecipes.com via Cooking Light
4 (6-ounce) skinless, boneless chicken breast halves
1 tablespoon fresh lime juice
1 tablespoon 40% less-sodium taco seasoning (such as Old El Paso)
1/2 teaspoon sugar
Cooking spray
6 (8-inch) flour tortillas
6 cups packaged coleslaw
1 (7-ounce) can green salsa
4 cups chopped tomato
1/4 cup sliced ripe olives, chopped
1 1/4 cups fat-free refried beans
1/2 cup (2 ounces) crumbled feta cheese
6 tablespoons reduced-fat sour cream
1/4 cup fresh cilantro leaves
1/4 cup unsalted pumpkinseed kernels, toasted (optional)
Prepare grill, or heat a grill pan over medium-high heat.
Brush chicken with juice; sprinkle with seasoning and sugar. Place chicken on grill rack or grill pan coated with cooking spray; grill 4 minutes on each side or until chicken is done. Cool slightly. Cut chicken into 1/4-inch strips; set aside. Place tortillas on grill rack or grill pan coated with cooking spray; grill 30 seconds on each side or until golden brown.
Combine coleslaw and salsa; toss to coat. Combine tomato and olives; toss gently.
Spread about 3 tablespoons beans over each tortilla; divide chicken evenly among tortillas. Top each serving with about 2/3 cup slaw mixture, 2/3 cup tomato mixture, 4 teaspoons cheese, 1 tablespoon sour cream, and 2 teaspoons cilantro. Sprinkle each serving with 2 teaspoons pumpkinseeds, if desired.
Nutritional Information
Amount per serving (6 servings total)
Calories: 361
Calories from fat: 23%
Fat: 9.2g
Saturated fat: 3.6g
Monounsaturated fat: 1.5g
Polyunsaturated fat: 1.2g
Protein: 28.7g
Carbohydrate: 43g
Fiber: 6.8g
Cholesterol: 65mg
Iron: 3.7mg
Sodium: 844mg
Calcium: 221mg
*****
For some reason, the husband and I decided we'd have these for dinner after the kids went to bed--a random, middle of the week date night. It worked out well to mix up the slaw and tomatoes/olives while the chicken was on the grill, then once the chicken was cooked through and the tortillas were crisped, all we had to do was assemble.
We both REALLY liked these. And they were so filling. I was a little skeptical about the slaw mixture, but it worked great and was super tasty. I don't know if my kids would like these or not, but just because the last few times we've had tostadas, they haven't been very happy with it. These are something I would definitely make again...a great quick, healthy, light summer dinner!
Labels:
chicken,
Cooking Light,
grill,
Mexican,
tortilla
Thursday, July 14, 2011
Summer Drink Series #2: Watermelon Martinis
There's a blog I follow called Gina's Skinny Recipes. I don't remember how I came across it, but it's a great resource if you're doing Weight Watchers (WW) because she includes WW Points for all her recipes, along with the nutritional info. Since we're calorie counters around here I especially like knowing the calorie, fat, carb, etc. info from her recipes. Recently she posted this one for Watermelon Martinis. I had plans to buy a watermelon last weekend when they were on sale everywhere for the 4th, so I thought this would be a great drink to try for my second Summer Drink Series cocktail. Plus it's low cal! I made it according to the recipe, but the recipe below will include the changes I made. Check out her blog for the original version!
Watermelon Martinis
Adapted from: Gina's Skinny Recipes
2 cups seedless watermelon
3 ounces vodka
2 ounces melon liqueur
1 ounce fresh lime juice
1 cup ice
Puree 2 cups of watermelon in a blender and add vodka, liqueur, lime juice and ice and blend well. Pour 6 oz martini into each martini glass.
*****
I thought about copying the nutritional info, too, but since I changed mine up a bit (less watermelon, more alcohol) I figured it wouldn't be accurate. Gina's recipe called for diced up watermelon to be added to each glass, but I didn't really like the chunks of fruit in my drink. I left the watermelon pieces out in subsequent drinks and found it to be quite tasty. I had to brave the grocery store on July 4th for the melon liqueur which sucked, but I was a lady on a mission. I ended up buying melon schnapps over Midori because it was a lot more cost effective, but either would work equally as well. I'm just cheap. ;)
This is definitely something I'd make again. It was a great, easy drink and quite tasty for sipping on while floating leisurely in my pool. Plus I have a bottle of watermelon schnapps to use up. ;)
Watermelon Martinis
Adapted from: Gina's Skinny Recipes
2 cups seedless watermelon
3 ounces vodka
2 ounces melon liqueur
1 ounce fresh lime juice
1 cup ice
Puree 2 cups of watermelon in a blender and add vodka, liqueur, lime juice and ice and blend well. Pour 6 oz martini into each martini glass.
*****
I thought about copying the nutritional info, too, but since I changed mine up a bit (less watermelon, more alcohol) I figured it wouldn't be accurate. Gina's recipe called for diced up watermelon to be added to each glass, but I didn't really like the chunks of fruit in my drink. I left the watermelon pieces out in subsequent drinks and found it to be quite tasty. I had to brave the grocery store on July 4th for the melon liqueur which sucked, but I was a lady on a mission. I ended up buying melon schnapps over Midori because it was a lot more cost effective, but either would work equally as well. I'm just cheap. ;)
This is definitely something I'd make again. It was a great, easy drink and quite tasty for sipping on while floating leisurely in my pool. Plus I have a bottle of watermelon schnapps to use up. ;)
Friday, July 8, 2011
Wine...how do I love thee, let me count the ways
On our recent vacation we spent a week on California's Central Coast. Several years ago--four I think it was--we vacationed with the husband's family in Monterrey, CA. Boy #1 was almost 18 months old, Boy #2 was no where near existing yet. The husband and I came up with the genius (insert heavy, dripping sarcasm for the word "genius") idea to drive home to Phoenix via the Pacific Coast Highway. We had driven it from San Francisco to San Luis Obispo when we were engaged and loved it. If you've never driven it, you really should because it's gorgeous. However, we somehow failed to take into account the extra time it would add to our drive and that we had a toddler with us who didn't care at all about driving along the ocean and the beautiful views it provides. Yeah...the last few hours of our trip were pretty miserable. We cut over from the PCH through Paso Robles which, unbeknownst to us at the time, is wine country. We passed vineyard and winery after vineyard and winery...with a screaming toddler in the car. Oh how we wanted to stop! But somehow we figured our presence would not be appreciated with said screaming toddler. The next time we were back in the area, I was pregnant with Boy #2 so wine tasting was out yet again. So this time we wanted to make it happen.
Originally we looked into doing some kind of tour or having a limo take us around so we didn't have to worry about who was going to drive us home. Instead we decided we'd just go to a couple instead of making a day of it. My in-laws agreed to watch the boys for us, so off we went. We hadn't really researched where to go; my friend Jess is a wine distributor, so I had texted her for suggestions, and she gave me some she liked and some to avoid. We ended up just stopping at random ones we came across.
Our first stop was Zin Alley. The husband used to not be a fan of zinfandel, but lately he's come around to them. We were a bit leery when we got there because there were no other cars and we weren't sure where to park. So we made our own parking spot and went inside. It turned out that the guy behind the counter pouring the wine was the grower as well. He told us all about the grapes and his vineyard. It's completely dry farmed (no irrigation other than what nature provides) and he uses no pesticides. We sampled a couple different zinfandels, including some from his son's winery further south. The bottles were a bit pricey, but it was hands down one of the best wines we've ever had, so we splurged. He also doesn't advertise or enter his wines into contests...he basically just makes wine because he loves it. How cool is that?! We were pretty pleased with our first stop and continued on our way.
Oh, and he had this sign on his door which cracked me up:
And a picture of the vineyard:
We continued on down the highway and saw a sign for two nearby wineries that were close together. Perfect, we thought. We turned and drove and drove and drove. Actually it wasn't that long but we did question whether we were making a good choice having veered off the main highway so far. Turns out we did.
Our second stop was Rotta Winery. It was one of three original wineries in the Paso Robles area and has been around since 1908. There was a gorgeous patio in front of the tasting room (actually Zin Alley had a gorgeous patio, too) and it was bordered by cool wine barrels:
There were two other couples in the tasting room, and it turned out they were all from AZ too. Weird coincidence, eh? Rotta had 12 wines for us to try...awesome! If I'm paying a tasting fee, I want it to be worth my money. ;) Our tasting started with a chardonnay, then a zinfandel rose (why are rose wines so hard to find?!??!), then it moved to reds. We had some tasty wines. We ended up getting two bottles. One was their Trinity Blend--a cab, merlot, and cab franc blend. In looking at the list now, I don't remember what the other one was we got. Cut me some slack, I had sampled 12 wines there and five at the previous winery...I was feeling pretty good. I think it was a Cabernet Franc, which normally is used as just a blend and not on its own, but it was really tasty.
The original sign we saw off the highway had said there was another nearby winery, so we followed the signs to Venteux Vineyards. It was yet another gorgeous looking winery. I don't remember how many tastes we got here, but we did leave with a bottle of a taste cuvee. The girl doing the pouring was really knowledgeable, too. Did you know that Cal Poly has a wine degree? Kind of makes me want to go back to school. She also gave us a map/brochure of the area, so that helped us quite a bit.
This was the bathroom at Venteux...yes, I took a picture of the bathroom because I thought it was super cool.
At this point we were getting pretty hungry, and I needed to eat something quick. We looked on the map we had just received and saw we were near the town of Templeton, so we headed there. The husband found somewhere for us to eat on the GPS, so we made our way there...and then found out they had closed for a break between lunch and dinner about 20 minutes before we got there. Oops. So instead we headed to a tasting room across the street because we were there, they were open, and it didn't seem that any other place right around there was. They featured wines from Clavo Cellars (and thankfully had a little snack paired with each wine, otherwise I might not have survived much longer). There were quite a few that we sampled (have you noticed that I remember less and less about each progressive place? Good thing the husband was driving and not me! I am not the drinker I used to be...), and once again the girl pouring the wines was very friendly and knowledgeable. We ended up getting a bottle of syrah to take home. The tasting fee was $5 each or waived if you bought a bottle; I think the bottle we got was $12 or $15, so we figured for a few more dollars we might as well go home for something.
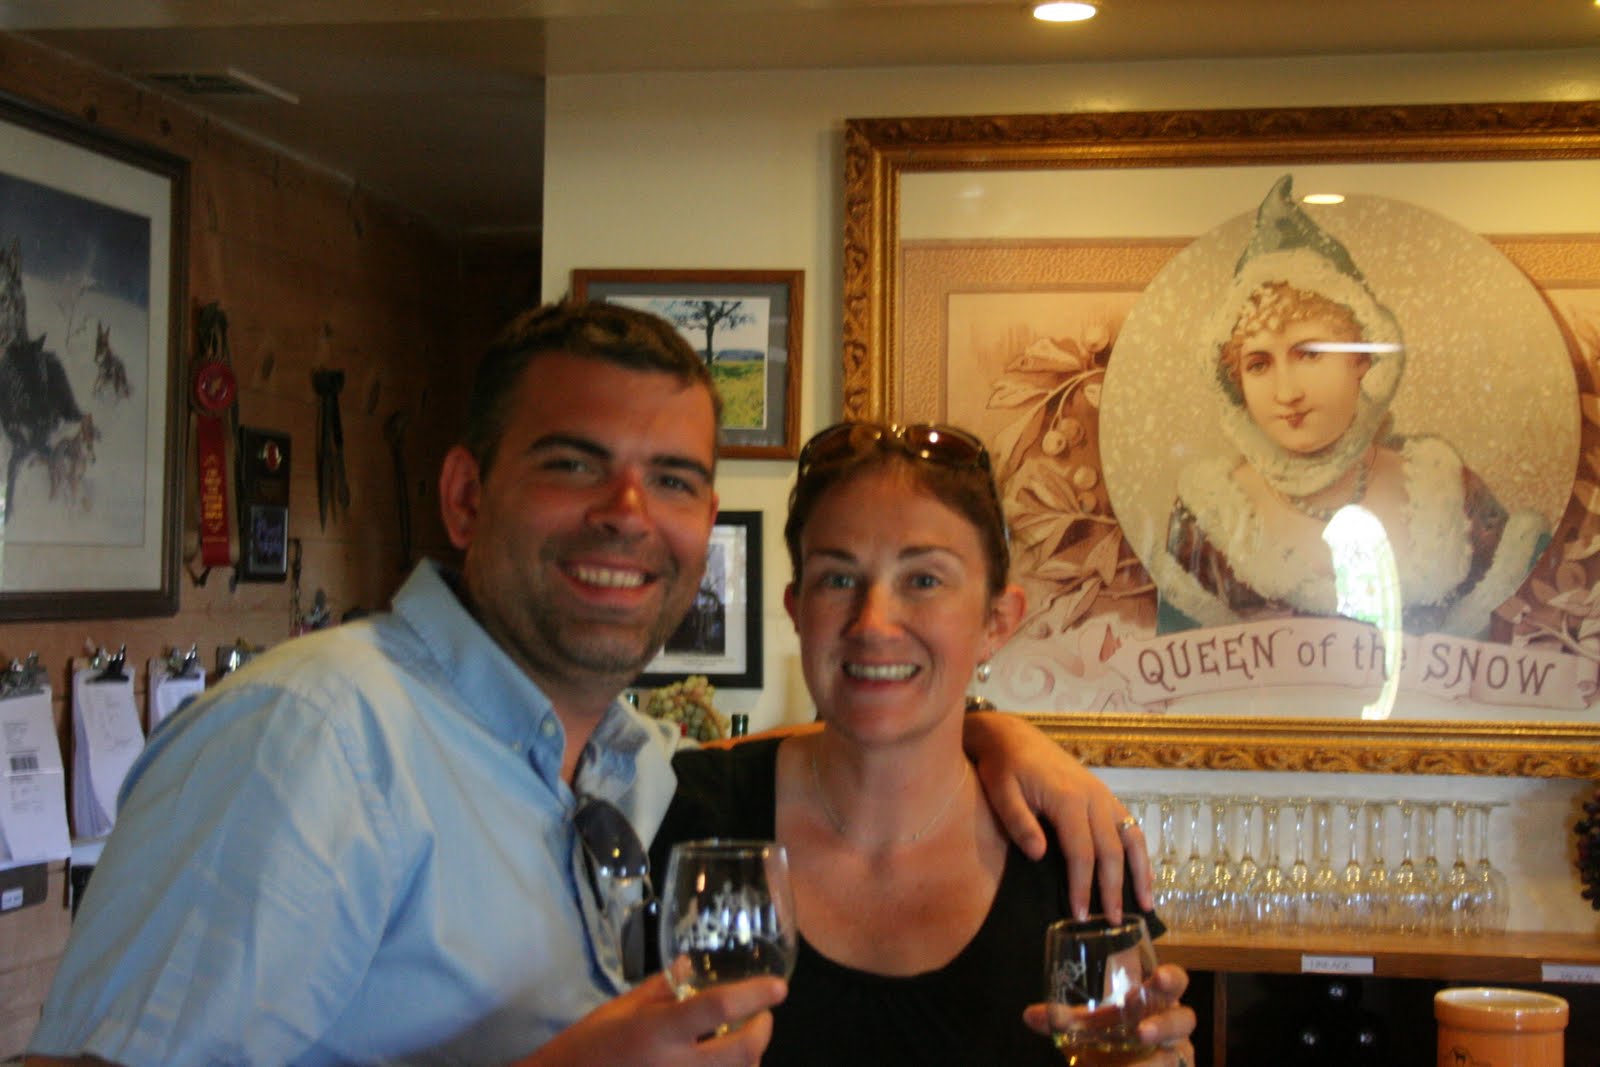
We stopped for lunch after this, which I really needed. The girl at Clavo had recommended a seafood restaurant nearby, so we found our way there and had a bite to eat. We figured it was probably time to head back after that, but on our way home we passed another winery we figured we'd stop in and try. I had it in my head it was Lone Wolf (which made me laugh thinking about this scene from The Hangover), but it's actually Grey Wolf Cellars. There was another group in there that had consumed way more wine than we had by that point, so the employee kind of had her hands full with them. The husband and I got a nice picture taken of us there, but that was about the highlight.
We ended up coming home with quite a few bottles of wine. Some we are saving for special occasions, others we shared with the husband's family while we were still in CA. It was such a fun afternoon, and such a fun experience to try so many different wines and hear and learn about winemaking in the area. I won't say wine tasting is the main reason we want to go back to the area in future years, but it's definitely a perk of a Central Coast vacation!
Originally we looked into doing some kind of tour or having a limo take us around so we didn't have to worry about who was going to drive us home. Instead we decided we'd just go to a couple instead of making a day of it. My in-laws agreed to watch the boys for us, so off we went. We hadn't really researched where to go; my friend Jess is a wine distributor, so I had texted her for suggestions, and she gave me some she liked and some to avoid. We ended up just stopping at random ones we came across.
Our first stop was Zin Alley. The husband used to not be a fan of zinfandel, but lately he's come around to them. We were a bit leery when we got there because there were no other cars and we weren't sure where to park. So we made our own parking spot and went inside. It turned out that the guy behind the counter pouring the wine was the grower as well. He told us all about the grapes and his vineyard. It's completely dry farmed (no irrigation other than what nature provides) and he uses no pesticides. We sampled a couple different zinfandels, including some from his son's winery further south. The bottles were a bit pricey, but it was hands down one of the best wines we've ever had, so we splurged. He also doesn't advertise or enter his wines into contests...he basically just makes wine because he loves it. How cool is that?! We were pretty pleased with our first stop and continued on our way.
Oh, and he had this sign on his door which cracked me up:
And a picture of the vineyard:
We continued on down the highway and saw a sign for two nearby wineries that were close together. Perfect, we thought. We turned and drove and drove and drove. Actually it wasn't that long but we did question whether we were making a good choice having veered off the main highway so far. Turns out we did.
Our second stop was Rotta Winery. It was one of three original wineries in the Paso Robles area and has been around since 1908. There was a gorgeous patio in front of the tasting room (actually Zin Alley had a gorgeous patio, too) and it was bordered by cool wine barrels:
There were two other couples in the tasting room, and it turned out they were all from AZ too. Weird coincidence, eh? Rotta had 12 wines for us to try...awesome! If I'm paying a tasting fee, I want it to be worth my money. ;) Our tasting started with a chardonnay, then a zinfandel rose (why are rose wines so hard to find?!??!), then it moved to reds. We had some tasty wines. We ended up getting two bottles. One was their Trinity Blend--a cab, merlot, and cab franc blend. In looking at the list now, I don't remember what the other one was we got. Cut me some slack, I had sampled 12 wines there and five at the previous winery...I was feeling pretty good. I think it was a Cabernet Franc, which normally is used as just a blend and not on its own, but it was really tasty.
The original sign we saw off the highway had said there was another nearby winery, so we followed the signs to Venteux Vineyards. It was yet another gorgeous looking winery. I don't remember how many tastes we got here, but we did leave with a bottle of a taste cuvee. The girl doing the pouring was really knowledgeable, too. Did you know that Cal Poly has a wine degree? Kind of makes me want to go back to school. She also gave us a map/brochure of the area, so that helped us quite a bit.
This was the bathroom at Venteux...yes, I took a picture of the bathroom because I thought it was super cool.
At this point we were getting pretty hungry, and I needed to eat something quick. We looked on the map we had just received and saw we were near the town of Templeton, so we headed there. The husband found somewhere for us to eat on the GPS, so we made our way there...and then found out they had closed for a break between lunch and dinner about 20 minutes before we got there. Oops. So instead we headed to a tasting room across the street because we were there, they were open, and it didn't seem that any other place right around there was. They featured wines from Clavo Cellars (and thankfully had a little snack paired with each wine, otherwise I might not have survived much longer). There were quite a few that we sampled (have you noticed that I remember less and less about each progressive place? Good thing the husband was driving and not me! I am not the drinker I used to be...), and once again the girl pouring the wines was very friendly and knowledgeable. We ended up getting a bottle of syrah to take home. The tasting fee was $5 each or waived if you bought a bottle; I think the bottle we got was $12 or $15, so we figured for a few more dollars we might as well go home for something.
We stopped for lunch after this, which I really needed. The girl at Clavo had recommended a seafood restaurant nearby, so we found our way there and had a bite to eat. We figured it was probably time to head back after that, but on our way home we passed another winery we figured we'd stop in and try. I had it in my head it was Lone Wolf (which made me laugh thinking about this scene from The Hangover), but it's actually Grey Wolf Cellars. There was another group in there that had consumed way more wine than we had by that point, so the employee kind of had her hands full with them. The husband and I got a nice picture taken of us there, but that was about the highlight.
We ended up coming home with quite a few bottles of wine. Some we are saving for special occasions, others we shared with the husband's family while we were still in CA. It was such a fun afternoon, and such a fun experience to try so many different wines and hear and learn about winemaking in the area. I won't say wine tasting is the main reason we want to go back to the area in future years, but it's definitely a perk of a Central Coast vacation!
Labels:
wine
Tuesday, July 5, 2011
Back from vacation
We got back Saturday night from a ten day Griswald-style family vacation to California. Several months ago my husband decided he needed to get in shape and started swimming. He wanted a goal, so he signed up for the Alcatraz Shark Swim in San Francisco where participants swim from Alcatraz Island to Aquatic Park near Fisherman's Wharf. We spent four days in San Francisco with some of the husband's family touring around and fighting our way through the city with a stroller on public transit. We had a good time, but we decided we need to stick with relaxing vacations while our kids are little instead of trying to do a bunch of sightseeing. The husband's swim went great. He wanted to finish in under an hour and not be last, and he met both his goals!! I'm so unbelievably proud of him!! We ended up leaving San Fran a day early and headed south to the beach town of Cayucos in the Central Coast area where the husband's family had all congregated. We had two rental houses and spent a week with his parents, bro and his kids, sister and her husband and her kids. My kiddos had a blast with their cousins and being doted on by their grandparents. Cayucos may be the most perfect place on earth. I probably shouldn't have said that...it's nice and not crowded and if word gets out, it may not stay that way!
In an effort to save money on our trip we did a lot of cooking and eating at the rental houses we had. We did get awesome Chinese take out our last night in San Francisco. I heart Chinese food so much, and it was awesome to get really yummy Chinese food. I ate to the point of almost being sick from eating so much, but it was so good! We ate at a couple places at Fisherman's Wharf with the husband's family, but there was nothing to write home about...or blog post about. We did have a yummy sourdough pizza snack at Boudin Bakery...sourdough crust, sauce, and cheese. Yum. On our way out of town we had lunch at a place I had heard about via Facebook, The American Grilled Cheese Kitchen. As you know, my family is crazy about all things cheese. When I told Boy #1 there was a grilled cheese restaurant in San Fran, he flipped out and insisted on going. We made sure to work it into our agenda and figured lunch there on our way out of town would be perfect. What happened when we got there? He wanted nothing to do with it. Ugh. My kids were beyond exhausted and I think just too worn out and tired to eat. I had a bite of their sandwich and it was tasty. They did end up eating it in the car later. I had a Mushroom Gruyere grilled cheese, fontina, gruyère, roasted wild mushrooms + gold potatoes, melted leeks, caramelized onions, thyme butter (per the website). It was tasty but not amazing. Honestly we were kind of wishing we had opted for clam chowder in a bread bowl at the wharf. Don't get me wrong, it was tasty but in the end it was just grilled cheese.
In Cayucos we mostly ate at our beach house except for a few lunches at Giovanni's in Morro Bay, the next town down the coast. We vacationed in Cayucos three years ago when I was pregnant with Boy #2, and I remembered eating there then. I told the husband we'd have to eat there again, and we ended up having lunch there three times in four days. I generally don't eat at the same restaurant multiple times on a trip so I can try new places, but it was so tasty, it wasn't worth finding somewhere different. The husband and I split clam chowder in a bread bowl and halibut and chips two of the times, then the last time I had a cup of chowder and fried clam strips. Yum. The halibut was fantastic, and the breading they use was just amazing. My mom is actually going to be up that way later this month, and I'm wondering if there's a way she could bring some back with her. I need to do more thinking on it. The house we were staying in was so gorgeous and had an amazing view of the ocean, we were really fine eating there and grilling. Want to see the husband grilling steaks one night?
Doesn't the background look fake?! It's not...that was what we had to look at for a week. It was a tough life, but we suffered through it.
So now we have to get back to the daily grind. The husband goes back to work today. It's insanely hot here in AZ, so I've planned a menu for the coming week of either grilled or crockpot dinners because with highs hovering around 110, the thought of turning on my oven makes me want to curl up in a ball and cry.
Oh yeah, and be on the look out for Tasty Summer Cocktail #2 coming later this week...maybe even today!
In an effort to save money on our trip we did a lot of cooking and eating at the rental houses we had. We did get awesome Chinese take out our last night in San Francisco. I heart Chinese food so much, and it was awesome to get really yummy Chinese food. I ate to the point of almost being sick from eating so much, but it was so good! We ate at a couple places at Fisherman's Wharf with the husband's family, but there was nothing to write home about...or blog post about. We did have a yummy sourdough pizza snack at Boudin Bakery...sourdough crust, sauce, and cheese. Yum. On our way out of town we had lunch at a place I had heard about via Facebook, The American Grilled Cheese Kitchen. As you know, my family is crazy about all things cheese. When I told Boy #1 there was a grilled cheese restaurant in San Fran, he flipped out and insisted on going. We made sure to work it into our agenda and figured lunch there on our way out of town would be perfect. What happened when we got there? He wanted nothing to do with it. Ugh. My kids were beyond exhausted and I think just too worn out and tired to eat. I had a bite of their sandwich and it was tasty. They did end up eating it in the car later. I had a Mushroom Gruyere grilled cheese, fontina, gruyère, roasted wild mushrooms + gold potatoes, melted leeks, caramelized onions, thyme butter (per the website). It was tasty but not amazing. Honestly we were kind of wishing we had opted for clam chowder in a bread bowl at the wharf. Don't get me wrong, it was tasty but in the end it was just grilled cheese.
In Cayucos we mostly ate at our beach house except for a few lunches at Giovanni's in Morro Bay, the next town down the coast. We vacationed in Cayucos three years ago when I was pregnant with Boy #2, and I remembered eating there then. I told the husband we'd have to eat there again, and we ended up having lunch there three times in four days. I generally don't eat at the same restaurant multiple times on a trip so I can try new places, but it was so tasty, it wasn't worth finding somewhere different. The husband and I split clam chowder in a bread bowl and halibut and chips two of the times, then the last time I had a cup of chowder and fried clam strips. Yum. The halibut was fantastic, and the breading they use was just amazing. My mom is actually going to be up that way later this month, and I'm wondering if there's a way she could bring some back with her. I need to do more thinking on it. The house we were staying in was so gorgeous and had an amazing view of the ocean, we were really fine eating there and grilling. Want to see the husband grilling steaks one night?
Doesn't the background look fake?! It's not...that was what we had to look at for a week. It was a tough life, but we suffered through it.
So now we have to get back to the daily grind. The husband goes back to work today. It's insanely hot here in AZ, so I've planned a menu for the coming week of either grilled or crockpot dinners because with highs hovering around 110, the thought of turning on my oven makes me want to curl up in a ball and cry.
Oh yeah, and be on the look out for Tasty Summer Cocktail #2 coming later this week...maybe even today!
Sunday, June 19, 2011
Skillet Chicken with Mexican Green Rice
I have to say I've been on a bit of a cooking roll this week. I love when that happens. I wanted to try some new things but also use up some ingredients we had on hand. I had found chicken thighs marked down recently at the grocery store and originally planned on making a recipe that involved roasting apples and chicken thighs, but since it's definitely summer here (the high temps have been in the low 100s), roasting sounded like a horrible way to cook dinner. I pulled out one of my trusty America's Test Kitchen 30-Minute Supper magazines for a different idea. I found this recipe in the issue from last summer. I had always wanted to try it, but chicken thighs aren't something I usually have on hand.
Skillet Chicken with Mexican Green Rice
Source: America's Test Kitchen 30-Minute Suppers, Summer 2010
8 boneless, skinless chicken thighs, excess fat trimmed
2 Tbsp vegetable oil
1 onion, chopped fine
2 poblano peppers, cored, seeded, and chopped
3 garlic cloves, minced
1 tsp ground cumin
1 14-ounce can green enchilada sauce
1 cup long-grain white rice
1-1/4 cups water
1/2 cup chopped fresh cilantro
Pat chicken dry and season with salt and pepper. Heat 1 tablespoon oil in large skillet over medium-high heat until just smoking. Cook chicken until well browned on one side, about 5 minutes. Transfer to plate.
Add onion, poblanos, and remaining oil to now-empty skillet and cook until softened, about 5 minutes. Stir in garlic and cumin and cook until fragrant, about 30 seconds. Add enchilada sauce, rice, water, and any accumulated chicken juices and bring to boil, scraping up any browned bits. Nestle chicken in rice browned side up, cover, and cook over low heat, stirring every 5 minutes, until rice is tender and chicken registers 175 degrees, about 20 minutes.
Stir in cilantro and season with salt and pepper to taste. Serve.
*****
This ended up taking me more like 45 minutes than 30 because I couldn't fit all the chicken in my skillet without really crowding it and had to cook it in two batches. I was a bit worried my kiddos wouldn't like this because Boy #1 doesn't dig on spicy food, but it wasn't really spicy at all which was good. If you wanted it hotter, you could add in a minced jalapeno with the onion and poblano. I don't think I stirred mine often enough because I had some rice that stuck to the bottom of the skillet.
All in all, we really liked this. My kids ate it no problem, and the rice cooked in the enchilada sauce was really tasty. I don't know about you, but I cannot find 14 ounce cans of enchilada sauce lately, only the big 28 ounce cans. It works out okay because I freeze the other half to use later, but it sure would be nice to get just the size I need. It was actually kind of funny because I had found a bag of something dark red in my freezer recently and had no idea what it was. Then when I was packing up the remaining green enchilada sauce, I realized what was in the mystery bag--red enchilada sauce! Why I hadn't labeled it, I don't know.
Anyway, this is definitely something I'd make again! I finished up the leftovers for lunch yesterday, and they were still tasty, although the rice wasn't quite as good as it was originally.
FYI, the picture in the magainze is a lot nicer looking. Their rice isn't nearly as saucy as mine, but that's okay...I like saucy rice. And their pieces of chicken were more browned than mine.
Skillet Chicken with Mexican Green Rice
Source: America's Test Kitchen 30-Minute Suppers, Summer 2010
8 boneless, skinless chicken thighs, excess fat trimmed
2 Tbsp vegetable oil
1 onion, chopped fine
2 poblano peppers, cored, seeded, and chopped
3 garlic cloves, minced
1 tsp ground cumin
1 14-ounce can green enchilada sauce
1 cup long-grain white rice
1-1/4 cups water
1/2 cup chopped fresh cilantro
Pat chicken dry and season with salt and pepper. Heat 1 tablespoon oil in large skillet over medium-high heat until just smoking. Cook chicken until well browned on one side, about 5 minutes. Transfer to plate.
Add onion, poblanos, and remaining oil to now-empty skillet and cook until softened, about 5 minutes. Stir in garlic and cumin and cook until fragrant, about 30 seconds. Add enchilada sauce, rice, water, and any accumulated chicken juices and bring to boil, scraping up any browned bits. Nestle chicken in rice browned side up, cover, and cook over low heat, stirring every 5 minutes, until rice is tender and chicken registers 175 degrees, about 20 minutes.
Stir in cilantro and season with salt and pepper to taste. Serve.
*****
This ended up taking me more like 45 minutes than 30 because I couldn't fit all the chicken in my skillet without really crowding it and had to cook it in two batches. I was a bit worried my kiddos wouldn't like this because Boy #1 doesn't dig on spicy food, but it wasn't really spicy at all which was good. If you wanted it hotter, you could add in a minced jalapeno with the onion and poblano. I don't think I stirred mine often enough because I had some rice that stuck to the bottom of the skillet.
All in all, we really liked this. My kids ate it no problem, and the rice cooked in the enchilada sauce was really tasty. I don't know about you, but I cannot find 14 ounce cans of enchilada sauce lately, only the big 28 ounce cans. It works out okay because I freeze the other half to use later, but it sure would be nice to get just the size I need. It was actually kind of funny because I had found a bag of something dark red in my freezer recently and had no idea what it was. Then when I was packing up the remaining green enchilada sauce, I realized what was in the mystery bag--red enchilada sauce! Why I hadn't labeled it, I don't know.
Anyway, this is definitely something I'd make again! I finished up the leftovers for lunch yesterday, and they were still tasty, although the rice wasn't quite as good as it was originally.
FYI, the picture in the magainze is a lot nicer looking. Their rice isn't nearly as saucy as mine, but that's okay...I like saucy rice. And their pieces of chicken were more browned than mine.
Friday, June 17, 2011
Garlic and Fresh Oregano Grilled Chicken
The husband, boys, and I were all out front recently while the husband and I worked on cleaning up the garage and the boys rode bikes. My friend and neighbor Claudine happened to stop by on her way to work to give me some fresh oregano she had just picked from her garden. Don't you just love neighbors like that?! I heart fresh oregano and was overwhelmed with choices of what I could do with it. Something Greek? Italian? I didn't know. I thought some kind of really fresh, light marinade for chicken would be good, so I did some Googling. I found a couple recipes that sounded tasty and ended up making a modified version of one from about.com.
Garlic and Fresh Oregano Grilled Chicken
Source: Adapted from About.com
1/4 cup olive oil
6 cloves coarsely chopped garlic
1/2 cup coarsely chopped fresh oregano leaves
1 tablespoon Balsamic vinegar
2 tablespoons fresh lime juice
2 tablespoons fresh lemon juice
1 tablespoon honey
2 teaspoon ancho powder
Combine all ingredients in a mixing bowl. Mix until thoroughly combined. Marinate chicken for 6 hours or more. Prepare indirect grill and cook until done. Makes enough marinade for 2 chickens quartered.
*****
The original recipe called for half a cup of garlic. That seemed like waaaaaay too much to me. Plus I didn't have that much garlic. I love me some garlic, but half a cup? Really?! I basically used what I had and called it good. I also went light on the ancho chile powder since Boy #1 isn't a fan of spicy. I used chicken legs as my chicken part of choice and grilled them for close to 30 minutes. I had quite a bit of marinade left over, so I thawed a chicken breast and left it marinating overnight and then grilled it in the morning for the husband to take in his lunch. I warned him he shouldn't get used to freshly grilled meat every morning.
This marinade was good, but it wasn't amazing I didn't think. For chicken breasts I think I like my Saito Chicken better, and we really loved the Marinated Grilled Chicken Legs that we had recently. If you have the ingredients on hand, this is worth making, but I think if Claudine ever graces me with more fresh oregano I'll find something different to make with it.
Garlic and Fresh Oregano Grilled Chicken
Source: Adapted from About.com
1/4 cup olive oil
6 cloves coarsely chopped garlic
1/2 cup coarsely chopped fresh oregano leaves
1 tablespoon Balsamic vinegar
2 tablespoons fresh lime juice
2 tablespoons fresh lemon juice
1 tablespoon honey
2 teaspoon ancho powder
Combine all ingredients in a mixing bowl. Mix until thoroughly combined. Marinate chicken for 6 hours or more. Prepare indirect grill and cook until done. Makes enough marinade for 2 chickens quartered.
*****
The original recipe called for half a cup of garlic. That seemed like waaaaaay too much to me. Plus I didn't have that much garlic. I love me some garlic, but half a cup? Really?! I basically used what I had and called it good. I also went light on the ancho chile powder since Boy #1 isn't a fan of spicy. I used chicken legs as my chicken part of choice and grilled them for close to 30 minutes. I had quite a bit of marinade left over, so I thawed a chicken breast and left it marinating overnight and then grilled it in the morning for the husband to take in his lunch. I warned him he shouldn't get used to freshly grilled meat every morning.
This marinade was good, but it wasn't amazing I didn't think. For chicken breasts I think I like my Saito Chicken better, and we really loved the Marinated Grilled Chicken Legs that we had recently. If you have the ingredients on hand, this is worth making, but I think if Claudine ever graces me with more fresh oregano I'll find something different to make with it.
Labels:
balsamic,
chicken,
garlic,
lemon juice,
lime juice,
marinade,
olive oil,
oregano
Wednesday, June 15, 2011
Summer Drink Series #1: Blackberry Margaritas
Summer is definitely upon us here in Phoenix. Today I think is going to be the hottest day of the year so far with a forecasted high of 110. This is the time of year I start to wonder why it is I live here. But I have a pool in my backyard which makes it somewhat bearable. It's definitely going to make training for my half marathon tricky since pretty soon even the lows will be in the upper 80s or low 90s. (Did you know I'm training to run a half marathon? I am. You can follow my progress on my weight loss blog if you're interested.)
Anyway, I was toying with the idea of having a series of blog posts over the summer of tasty adult beverages. I posted on my Facebook page asking for ideas and if people thought it was a good idea. They did and they offered up some tasty sounding ideas, so my idea is a go. I rely heavily on peer pressure, in case you can't tell. So here's the first drink in my summer adult beverage blog series.
I hadn't had a chance to flip through the most recent Cooking Light issue when my friend Jen said there was a tasty looking recipe in there for blackberry margaritas. The mere mention of the word "margarita" generally makes my ears perk up, so I quickly found my copy and looked up the recipe. Tasty indeed! Coincidentally, not more than a day or two after that conversation, there were blackberries in my produce basket from the produce co-op. The Good Lord obviously wanted me to make these. I thought they'd be a perfect accompaniment to the queso fundido burgers I had slated for the husband and I to have later that week. I just had to hide the blackberries from my kiddos.
Blackberry Margaritas
Source: Cooking Light, June 2011
1 1/2 tablespoons granulated sugar
1/2 teaspoon kosher salt
1 lime
1 cup water
1/2 cup sugar
1 cup 100% agave blanco tequila
3/4 cup Grand Marnier
2/3 cup fresh lime juice
12 ounces fresh blackberries
Combine 1 1/2 tablespoons granulated sugar and kosher salt in a dish. Cut lime into 9 wedges; rub rims of 8 glasses with 1 lime wedge. Dip rims of glasses in salt mixture. Combine water and 1/2 cup sugar in a microwave-safe glass measuring cup. Microwave at HIGH 2 1/2 minutes, stirring to dissolve sugar; cool. Combine syrup, tequila, Grand Marnier, fresh lime juice, and blackberries in a blender; process until smooth. Strain mixture through a cheesecloth-lined sieve over a pitcher; discard solids. Serve over ice. Garnish with remaining lime wedges.
*****
I love me a good margarita and this definitely fit the bill. Although we skipped the whole straining step in an effort to save time and get to drinking sooner. However, that pretty much backfired because then they were too thick and seedy. So we threw some ice into the blender and had frozen margaritas instead. Normally we aren't frozen margarita people, but these were really tasty.
Summer Drink #1 was deemed a success!
I loved the color of these margaritas!!
Anyway, I was toying with the idea of having a series of blog posts over the summer of tasty adult beverages. I posted on my Facebook page asking for ideas and if people thought it was a good idea. They did and they offered up some tasty sounding ideas, so my idea is a go. I rely heavily on peer pressure, in case you can't tell. So here's the first drink in my summer adult beverage blog series.
I hadn't had a chance to flip through the most recent Cooking Light issue when my friend Jen said there was a tasty looking recipe in there for blackberry margaritas. The mere mention of the word "margarita" generally makes my ears perk up, so I quickly found my copy and looked up the recipe. Tasty indeed! Coincidentally, not more than a day or two after that conversation, there were blackberries in my produce basket from the produce co-op. The Good Lord obviously wanted me to make these. I thought they'd be a perfect accompaniment to the queso fundido burgers I had slated for the husband and I to have later that week. I just had to hide the blackberries from my kiddos.
Blackberry Margaritas
Source: Cooking Light, June 2011
1 1/2 tablespoons granulated sugar
1/2 teaspoon kosher salt
1 lime
1 cup water
1/2 cup sugar
1 cup 100% agave blanco tequila
3/4 cup Grand Marnier
2/3 cup fresh lime juice
12 ounces fresh blackberries
Combine 1 1/2 tablespoons granulated sugar and kosher salt in a dish. Cut lime into 9 wedges; rub rims of 8 glasses with 1 lime wedge. Dip rims of glasses in salt mixture. Combine water and 1/2 cup sugar in a microwave-safe glass measuring cup. Microwave at HIGH 2 1/2 minutes, stirring to dissolve sugar; cool. Combine syrup, tequila, Grand Marnier, fresh lime juice, and blackberries in a blender; process until smooth. Strain mixture through a cheesecloth-lined sieve over a pitcher; discard solids. Serve over ice. Garnish with remaining lime wedges.
*****
I love me a good margarita and this definitely fit the bill. Although we skipped the whole straining step in an effort to save time and get to drinking sooner. However, that pretty much backfired because then they were too thick and seedy. So we threw some ice into the blender and had frozen margaritas instead. Normally we aren't frozen margarita people, but these were really tasty.
Summer Drink #1 was deemed a success!
I loved the color of these margaritas!!
Queso Fundido Burger
I've been up since before the sun was up because Boy #2 decided it was time to be awake. I didn't want him to wake up Boy #1, so I went into his room with him to try and keep him contained and quiet. I'm tired. I also don't feel like accomplishing anything around my house, so I'm going to update my blog and then lay on the couch and read some magazines. Sounds like a lovely afternoon, doesn't it?
As you know, I am a huge fan of Rick Bayless. Occasionally I scour his website for new and yummy sounding recipes. A long, long time ago I came across a queso fundido burger recipe on there. I sent it to my friend Jen along with myself and then somehow forgot about it. She came across the email recently and made the burgers and said they were great. I mean, it's a Rick Bayless recipe so how could it possibly be bad, right?! I slated it for a Friday night because I didn't think my kids would really like it, but the husband and I wanted to try it.
Queso Fundido Burger
Source: RickBayless.com
2 fresh medium poblano chiles
1 medium onion, sliced into 1/4-inch slices
2 cloves garlic, minced
2 teaspoons oil
1 1/2 pounds ground chuck
8 ounces chorizo, cooked
1 to 2 canned chipotle chiles den adobo, finely minced, seeded if you wish
8 thick slices Monterey Jack cheese
4 hamburger buns, lightly toasted
Roast the poblanos over an open flame or 4 inches below a broiler, turning regularly until blistered and blackened all over, about 5 minutes for an open flame, 10 minutes for the broiler. Place in a bowl, cover with a kitchen towel and let cool. Rub off the blackened skin and pull out the stems and seed pods. Cut into 1/4-inch strips.
Heat the oil in a medium skillet over medium. Once the oil is hot, add the onions, stirring frequently until it begins to brown, 7 to 8 minutes. Stir in the garlic and poblano and cook for 2 minutes. Season with salt, usually about 1/2 teaspoon. Scrape the rajas into a bowl and cover to keep warm.
In a large bowl, combine the ground beef, cooked chorizo, chipotles and 1 1/2 teaspoon salt. Mix until well combined. Divide the meat into 4 equal portions and form the patties.
Heat a gas grill to medium-high, or light a charcoal fire and let it burn until the charcoal is covered with white ash (and about medium hot); bank the coals to one side.
Place the hamburger patties on the grill and cook for a total of 4 to 5 minutes for medium rare. Lay one piece of cheese on top of each burger, top with the warm rajas and then another piece of cheese. Close the lid and continue cooking until the cheese has melted about 1 minute. Remove from the grill and place on a toasted bun. Serve immediately.
*****
I used Anaheim chiles instead of poblanos because I had gotten some in the produce co-op I sometimes use. The onions, peppers, and garlic smelled amazing when it was cooking. Actually the burgers smelled fantastic too. I opted to just use my grill pan instead of heating up the grill and having to go back and forth, inside and out. We were watching a movie, and that would have just been a PITA.
We REALLY liked these burgers. The spice in them was fantastic, like "make your lips tingle" spicy. I love that!! I'd definitely make these again, although probably not for my kids. They do not like "make your lips tingle" spicy.
I went all out and used fancy plates...nothing but the best in paper plates for us!
As you know, I am a huge fan of Rick Bayless. Occasionally I scour his website for new and yummy sounding recipes. A long, long time ago I came across a queso fundido burger recipe on there. I sent it to my friend Jen along with myself and then somehow forgot about it. She came across the email recently and made the burgers and said they were great. I mean, it's a Rick Bayless recipe so how could it possibly be bad, right?! I slated it for a Friday night because I didn't think my kids would really like it, but the husband and I wanted to try it.
Queso Fundido Burger
Source: RickBayless.com
2 fresh medium poblano chiles
1 medium onion, sliced into 1/4-inch slices
2 cloves garlic, minced
2 teaspoons oil
1 1/2 pounds ground chuck
8 ounces chorizo, cooked
1 to 2 canned chipotle chiles den adobo, finely minced, seeded if you wish
8 thick slices Monterey Jack cheese
4 hamburger buns, lightly toasted
Roast the poblanos over an open flame or 4 inches below a broiler, turning regularly until blistered and blackened all over, about 5 minutes for an open flame, 10 minutes for the broiler. Place in a bowl, cover with a kitchen towel and let cool. Rub off the blackened skin and pull out the stems and seed pods. Cut into 1/4-inch strips.
Heat the oil in a medium skillet over medium. Once the oil is hot, add the onions, stirring frequently until it begins to brown, 7 to 8 minutes. Stir in the garlic and poblano and cook for 2 minutes. Season with salt, usually about 1/2 teaspoon. Scrape the rajas into a bowl and cover to keep warm.
In a large bowl, combine the ground beef, cooked chorizo, chipotles and 1 1/2 teaspoon salt. Mix until well combined. Divide the meat into 4 equal portions and form the patties.
Heat a gas grill to medium-high, or light a charcoal fire and let it burn until the charcoal is covered with white ash (and about medium hot); bank the coals to one side.
Place the hamburger patties on the grill and cook for a total of 4 to 5 minutes for medium rare. Lay one piece of cheese on top of each burger, top with the warm rajas and then another piece of cheese. Close the lid and continue cooking until the cheese has melted about 1 minute. Remove from the grill and place on a toasted bun. Serve immediately.
*****
I used Anaheim chiles instead of poblanos because I had gotten some in the produce co-op I sometimes use. The onions, peppers, and garlic smelled amazing when it was cooking. Actually the burgers smelled fantastic too. I opted to just use my grill pan instead of heating up the grill and having to go back and forth, inside and out. We were watching a movie, and that would have just been a PITA.
We REALLY liked these burgers. The spice in them was fantastic, like "make your lips tingle" spicy. I love that!! I'd definitely make these again, although probably not for my kids. They do not like "make your lips tingle" spicy.
I went all out and used fancy plates...nothing but the best in paper plates for us!
Wednesday, June 8, 2011
Beef Bulgogi
Did I mention that we just moved Boy #2 from his crib into a big boy bed? I'm freakin' exhausted. He apparently thinks it means he can get up as many times as he wants at night and come wake me up and get up at the ass crack of dawn in the morning. *yawn* I'm a tired mama. Last night I got 6.5 hours of sleep, one of which was spent laying on the floor of his bedroom. Ugh. I know Boy #1 took awhile to adjust to not being confined when he slept, but I don't remember how long it took. I don't really feel capable of getting anything accomplished around my house today (I changed into jammies after my post-gym shower), so I'm going to update my blog.
By the way, I created a Facebook Page for my little blog here. There's a link over on the right sidebar where you can like it from here or come visit me on there. I don't really know what I'm going to do with it, I'd just been thinking about doing it for awhile and today seemed like a good day.
I've been in a bit of a funk lately, which I'm sure directly correlates to my lack of sleep, and meal planning just wasn't exciting for this week. I pulled a cookbook off my shelf that my mother-in-law had gotten me for Christmas a couple years ago and flipped through it hoping for ideas. She was a teacher at a Christian high school in San Antonio (she just retired!), and it was a fundraising project from the senior class I think. I love cookbooks where people submit their own recipes because who's going to submit something that sucks? This recipe called for flank steak, but London broil was on sale, so I thought it would be good. Bulgogi, according to the recipe intro, is a Korean treatment for steak that has very wide appeal to western palates and is remarkably easy to make. Also sometimes written as Pulgogi, Bulgogi literally means "fire meat" although this refers more to the cooking method than the spiciness of the dish. So there you go. I have no idea how to pronounce it. Bul-go-gee? Bul-gah-gee? Something else entirely?
Beef Bulgogi
2 lb flank steak or sirloin
1/2 c. packed dark brown sugar
3/4 c. soy sauce (preferably low salt)
1 Tbsp sesame oil
Dash of red pepper flakes or ground cayenne
5 or 6 green onions, sliced
2 Tbsp rice vinegar
3 cloves garlic, minced or crushed
For cooking:
3 Tbsp sesame oil
3 Tbsp peanut or vegetable oil
For thickening marinade/sauce:
1 Tbsp cornstarch dissolved in 1 Tbsp water
Trim any visible fat and sinuous tissue from the uncooked steak and wrap the meat in plastic wrap or a Ziploc bag and place in the freezer for half an hour to partially freeze meat. Remove meat from the freezer and slice as thinly as possible across the grain. Lay out meat slices in a single layer in a low, glass or ceramic casserole dish. As you cover the bottom once, crumble some of the brown sugar over the uncooked meat and continue layering meat and brown sugar until all the steak is sliced and the sugar used.
Marinade: In a bowl, mix soy sauce, 1 tablespoon sesame oil, red pepper, onions, rice vinegar, and garlic. Pour marinade over sugared meat and cover to marinate in the refrigerator for at least 2 hours. Can be marinated all day or even overnight if using low sat soy sauce.
Heat a large skillet on medium high heat and mix the remaining sesame oil with the peanut or vegetable oil. Working in small batches to preserve the heat of the pan, use a little of the mixed oils and quickly fry the steak until just cooked medium rare. Remove cooked slices to a warm serving platter and repeat the process until the whole batch of meat is cooked. use more oil if necessary. After meat is cooked, reduce heat to medium and add leftover marinade to skillet. Bring to gentle simmer and stir in cornstarch/water mixture. Stir while thickening and pour over cooked meat.
*****
The marinade smelled fantastic. I love the smell of sesame oil. As I was cooking the meat Boy #1 kept saying, "Mommy dinner smells so yummy!" It ended up being super tasty. I think our meat ended up being more on the medium or medium well side because I wasn't really sure how long to let it cook before flipping it, but it was still good. The sauce on top was really good, too. Since it had raw meat marinating in it, I heated it to boiling just to be safe. We all really liked this. Boy #1 complained at one point that he was getting full and asked if he could just eat half of what was left on his plate. I said sure, but then a couple minutes later he and I realized he'd eaten all of it! We just had the meat with some frozen Asian blend vegetables, but I think the meat would be really good in lettuce wrap form, too. I'll definitely make this again!
Sadly, none of the pictures I took of the cooked meat turned out. :(
By the way, I created a Facebook Page for my little blog here. There's a link over on the right sidebar where you can like it from here or come visit me on there. I don't really know what I'm going to do with it, I'd just been thinking about doing it for awhile and today seemed like a good day.
I've been in a bit of a funk lately, which I'm sure directly correlates to my lack of sleep, and meal planning just wasn't exciting for this week. I pulled a cookbook off my shelf that my mother-in-law had gotten me for Christmas a couple years ago and flipped through it hoping for ideas. She was a teacher at a Christian high school in San Antonio (she just retired!), and it was a fundraising project from the senior class I think. I love cookbooks where people submit their own recipes because who's going to submit something that sucks? This recipe called for flank steak, but London broil was on sale, so I thought it would be good. Bulgogi, according to the recipe intro, is a Korean treatment for steak that has very wide appeal to western palates and is remarkably easy to make. Also sometimes written as Pulgogi, Bulgogi literally means "fire meat" although this refers more to the cooking method than the spiciness of the dish. So there you go. I have no idea how to pronounce it. Bul-go-gee? Bul-gah-gee? Something else entirely?
Beef Bulgogi
2 lb flank steak or sirloin
1/2 c. packed dark brown sugar
3/4 c. soy sauce (preferably low salt)
1 Tbsp sesame oil
Dash of red pepper flakes or ground cayenne
5 or 6 green onions, sliced
2 Tbsp rice vinegar
3 cloves garlic, minced or crushed
For cooking:
3 Tbsp sesame oil
3 Tbsp peanut or vegetable oil
For thickening marinade/sauce:
1 Tbsp cornstarch dissolved in 1 Tbsp water
Trim any visible fat and sinuous tissue from the uncooked steak and wrap the meat in plastic wrap or a Ziploc bag and place in the freezer for half an hour to partially freeze meat. Remove meat from the freezer and slice as thinly as possible across the grain. Lay out meat slices in a single layer in a low, glass or ceramic casserole dish. As you cover the bottom once, crumble some of the brown sugar over the uncooked meat and continue layering meat and brown sugar until all the steak is sliced and the sugar used.
Marinade: In a bowl, mix soy sauce, 1 tablespoon sesame oil, red pepper, onions, rice vinegar, and garlic. Pour marinade over sugared meat and cover to marinate in the refrigerator for at least 2 hours. Can be marinated all day or even overnight if using low sat soy sauce.
Heat a large skillet on medium high heat and mix the remaining sesame oil with the peanut or vegetable oil. Working in small batches to preserve the heat of the pan, use a little of the mixed oils and quickly fry the steak until just cooked medium rare. Remove cooked slices to a warm serving platter and repeat the process until the whole batch of meat is cooked. use more oil if necessary. After meat is cooked, reduce heat to medium and add leftover marinade to skillet. Bring to gentle simmer and stir in cornstarch/water mixture. Stir while thickening and pour over cooked meat.
*****
The marinade smelled fantastic. I love the smell of sesame oil. As I was cooking the meat Boy #1 kept saying, "Mommy dinner smells so yummy!" It ended up being super tasty. I think our meat ended up being more on the medium or medium well side because I wasn't really sure how long to let it cook before flipping it, but it was still good. The sauce on top was really good, too. Since it had raw meat marinating in it, I heated it to boiling just to be safe. We all really liked this. Boy #1 complained at one point that he was getting full and asked if he could just eat half of what was left on his plate. I said sure, but then a couple minutes later he and I realized he'd eaten all of it! We just had the meat with some frozen Asian blend vegetables, but I think the meat would be really good in lettuce wrap form, too. I'll definitely make this again!
Sadly, none of the pictures I took of the cooked meat turned out. :(
Labels:
beef,
brown sugar,
garlic,
green onions,
marinade,
sesame oil,
soy sauce,
steak
Tuesday, June 7, 2011
Lasagna Cupcakes
I'm still not caught up on older posts, but we had these last night and they were so yummy I had to post them right away. A friend of mine posted a link on Facebook to the recipe, and I thought they looked so cute and tasty. Plus I love lasagna, but I hate making it because it takes forever and makes a ton. We're pretty much eating lasagna for a week straight when I do make it. This seemed like a clever way to have lasagna, and all I needed to buy for it were the won ton wrappers.
Lasagna Cupcakes
Source: CruftBox.com via my friend Callista on Facebook
24 won ton or gyoza wrappers
Marinara sauce
1 lb. Italian sausage or ground beef
Ricotta cheese
Mozzarella cheese
Spray or wipe a cupcake/muffin tin with olive oil. Place one wrapper in the tin form it into a cup shape. Add a small dollop of pasta sauce then some sausage. Add a spoonful of ricotta cheese. Once you filled in the first layer, gently press another wrapper on top of the ricotta layer, forming another cup. Repeat the filling and top each with shredded mozzarella.
Bake at 375 for 20 minutes.
*****
Isn't that clever? Boy #1 claimed he didn't like ricotta, but the rest of us gobbled them up. I had really wanted to use gyoza wrappers for their round shape, but my grocery store only had won ton wrappers. It wasn't that big a deal except that there were corners on each of the cupcakes. I made my own marinara by heating up a can of crushed tomatoes with some seasonings added in, so I had my muffin tin on the counter next to the stove. I put the first layer of won ton wrappers in each spot/hole/whatever-you-want-to-call-it then put a spoonful of sauce in each. Then I added a spoonful of sausage, then a spoonful of ricotta. I kind of squished each layer down as I went with the back of a spoon. Then I repeated. It all came together really fast.
I'll definitely make these again. Easy, relatively inexpensive, pretty quick...all pluses in my book!
Lasagna Cupcakes
Source: CruftBox.com via my friend Callista on Facebook
24 won ton or gyoza wrappers
Marinara sauce
1 lb. Italian sausage or ground beef
Ricotta cheese
Mozzarella cheese
Spray or wipe a cupcake/muffin tin with olive oil. Place one wrapper in the tin form it into a cup shape. Add a small dollop of pasta sauce then some sausage. Add a spoonful of ricotta cheese. Once you filled in the first layer, gently press another wrapper on top of the ricotta layer, forming another cup. Repeat the filling and top each with shredded mozzarella.
Bake at 375 for 20 minutes.
*****
Isn't that clever? Boy #1 claimed he didn't like ricotta, but the rest of us gobbled them up. I had really wanted to use gyoza wrappers for their round shape, but my grocery store only had won ton wrappers. It wasn't that big a deal except that there were corners on each of the cupcakes. I made my own marinara by heating up a can of crushed tomatoes with some seasonings added in, so I had my muffin tin on the counter next to the stove. I put the first layer of won ton wrappers in each spot/hole/whatever-you-want-to-call-it then put a spoonful of sauce in each. Then I added a spoonful of sausage, then a spoonful of ricotta. I kind of squished each layer down as I went with the back of a spoon. Then I repeated. It all came together really fast.
I'll definitely make these again. Easy, relatively inexpensive, pretty quick...all pluses in my book!
Labels:
lasagna,
marinara,
mozzarella,
ricotta,
sausage
Saturday, June 4, 2011
Grilled Mac and Cheese with Pulled Pork Panini
I know, crazy huh?! I've mentioned my love of the Panini Happy blog before. Awhile back I was at the grocery store and saw the Food Network magazine at the checkout stand. On the cover was a panini with macaroni and cheese and pulled pork. Holy yummy, Batman!! I made a mental note to look up the recipe online. Then a couple days later I got an email from the Panini Happy blog that this recipe was her latest post!! It was meant to be. Recently pork loin roasts were on sale, so I grabbed one with the sole intention of making this sandwich for the husband and me to try. We had pulled pork for dinner on a Thursday, Friday night I made Pioneer Woman's mac and cheese for my kiddos then after they went to bed the husband and I had these sandwiches. Efficient use of food, huh?
Grilled Mac and Cheese with Pulled Pork Panini
Source: Food Network magazine and PaniniHappy.com
4 tablespoons unsalted butter, divided
4 cups prepared macaroni and cheese, warmed
2 onions, thinly sliced
Kosher salt and freshly ground pepper
1 cup barbecue sauce
2 cups prepared pulled pork
8 slices sourdough bread
12 slices sharp cheddar cheese (about 6 ounces)
Spread the macaroni and cheese in an 8-inch-square baking dish to about 3/4 inch thick. Cover with plastic wrap and chill until firm, about 45 minutes. Cut the macaroni and cheese into squares that are slightly smaller than the bread slices.
Meanwhile, melt 2 tablespoons butter in a skillet over medium heat. Add the onions and cook, stirring, until caramelized, about 20 minutes. Season with salt and pepper.
Combine the barbecue sauce and pulled pork in a saucepan over low heat and cook until warmed through, about 5 minutes.
Preheat the panini grill to medium-high heat.
Melt the remaining 2 tablespoons butter and brush on one side of each bread slice. Flip over half of the bread slices; layer 1 slice of cheddar, 1 macaroni-and-cheese square and another slice of cheddar on each. Top each with one-quarter of the pulled pork and caramelized onions and another slice of cheddar. Top with the remaining bread slices, buttered-side up.
Working in batches, cook the sandwiches until the cheese melts and the bread is golden, about 5 minutes.
*****
This sandwich was FILLING. I couldn't even eat half of mine. My only complaint was that my pork could have been saucier, but that was my fault, not the recipe's. This was awesome cheesy yummy goodness. A diet buster for sure, but awesome. If you make it, make sure you use a sturdy bread because this is a monster sandwich. And it's not for the carb-shy. Decadent for sure. Mmmm...now I want to make it again saucier and see if it really does make a difference.
I could only fit one on my panini press at a time.
Look at that gooey cheesy macaroni goodness spilling out...
See, definitely needs more sauce.
Grilled Mac and Cheese with Pulled Pork Panini
Source: Food Network magazine and PaniniHappy.com
4 tablespoons unsalted butter, divided
4 cups prepared macaroni and cheese, warmed
2 onions, thinly sliced
Kosher salt and freshly ground pepper
1 cup barbecue sauce
2 cups prepared pulled pork
8 slices sourdough bread
12 slices sharp cheddar cheese (about 6 ounces)
Spread the macaroni and cheese in an 8-inch-square baking dish to about 3/4 inch thick. Cover with plastic wrap and chill until firm, about 45 minutes. Cut the macaroni and cheese into squares that are slightly smaller than the bread slices.
Meanwhile, melt 2 tablespoons butter in a skillet over medium heat. Add the onions and cook, stirring, until caramelized, about 20 minutes. Season with salt and pepper.
Combine the barbecue sauce and pulled pork in a saucepan over low heat and cook until warmed through, about 5 minutes.
Preheat the panini grill to medium-high heat.
Melt the remaining 2 tablespoons butter and brush on one side of each bread slice. Flip over half of the bread slices; layer 1 slice of cheddar, 1 macaroni-and-cheese square and another slice of cheddar on each. Top each with one-quarter of the pulled pork and caramelized onions and another slice of cheddar. Top with the remaining bread slices, buttered-side up.
Working in batches, cook the sandwiches until the cheese melts and the bread is golden, about 5 minutes.
*****
This sandwich was FILLING. I couldn't even eat half of mine. My only complaint was that my pork could have been saucier, but that was my fault, not the recipe's. This was awesome cheesy yummy goodness. A diet buster for sure, but awesome. If you make it, make sure you use a sturdy bread because this is a monster sandwich. And it's not for the carb-shy. Decadent for sure. Mmmm...now I want to make it again saucier and see if it really does make a difference.
I could only fit one on my panini press at a time.
Look at that gooey cheesy macaroni goodness spilling out...
See, definitely needs more sauce.
Labels:
barbecue sauce,
macaroni,
onion,
panini,
pork
Broccoli with Garlic Butter and Cashews
I know I've mentioned the parenting message board I'm a member of before, The Mamasphere. This recipe was posted by one of the members and got rave reviews from everyone that's tried it. The member's username is AmRo, so it was dubbed AmRo's Broccoli Cashew Yumminess by someone else. We've actually had this several times as a side dish and as a main dish by adding chicken and serving it over quinoa. See, I wasn't kidding about incorporating quinoa more often! I love the flavors of the sauce and the crunch the cashews add to it. Really I'm just a sucker for anything with cashews.
Broccoli with Garlic Butter and Cashews
1 lb of broccoli, cut into bite sized pieces
1/3 cup of butter (I cut this to about 1/4 cup)
1 teaspoon brown sugar
2 tablespoons soy sauce
Several twists of black pepper (to taste)
2 cloves garlic, minced
Chopped cashews, as few or as many as you'd like, but probably no more than 1/3 cup.
1. Steam the broccoli until tender/crisp.
2. Melt the butter in a small saucepan over medium heat. Add the garlic and saute for a minute or so. Mix in the soy sauce, brown sugar, and pepper. Bring to bubbling, then reduce heat to low and simmer for a few minutes to thicken a smidge. Add the cashews, pour the sauce over the broccoli and stir to coat.
*****
Super easy and super tasty!! I've made it with fresh and frozen broccoli and had good results both times. It really comes together quickly, and it's so good. I've toasted the cashews each time I've made it. Plus the ingredients are things I normally have on hand. Well, not always the cashews but everything else.
I forgot to take a picture before I was packing up the leftovers.
Broccoli with Garlic Butter and Cashews
1 lb of broccoli, cut into bite sized pieces
1/3 cup of butter (I cut this to about 1/4 cup)
1 teaspoon brown sugar
2 tablespoons soy sauce
Several twists of black pepper (to taste)
2 cloves garlic, minced
Chopped cashews, as few or as many as you'd like, but probably no more than 1/3 cup.
1. Steam the broccoli until tender/crisp.
2. Melt the butter in a small saucepan over medium heat. Add the garlic and saute for a minute or so. Mix in the soy sauce, brown sugar, and pepper. Bring to bubbling, then reduce heat to low and simmer for a few minutes to thicken a smidge. Add the cashews, pour the sauce over the broccoli and stir to coat.
*****
Super easy and super tasty!! I've made it with fresh and frozen broccoli and had good results both times. It really comes together quickly, and it's so good. I've toasted the cashews each time I've made it. Plus the ingredients are things I normally have on hand. Well, not always the cashews but everything else.
I forgot to take a picture before I was packing up the leftovers.
Herbed Chicken Breasts with Tomatillo Salsa and Queso Fresco
This was another from my new favorite cookbook, The Best of Cooking Light Everyday Favorites. I had queso fresco left from the yummy Roast Chicken Chimichangas and thought this sounded super tasty. It could also easily be made low carb by skipping the breading portion and just grilling the chicken instead.
Herbed Chicken Breasts with Tomatillo Salsa and Queso Fresco
Source: The Best of Cooking Light Everyday Favorites
Salsa:
2 quarts water
1/2 pound tomatillos (about 10 small), husks and stems removed
1 garlic clove
1/2 to 1 serrano chile
1/2 cup chopped fresh cilantro
1/4 cup coarsely chopped onion
1 teaspoon fresh lime juice
1/4 teaspoon salt
Chicken:
3 (1-ounce) slices white bread
4 (6-ounce) skinless, boneless chicken breast halves
1/2 teaspoon salt
1/2 teaspoon ground cumin
1/4 teaspoon ground red pepper
1 large egg, lightly beaten
1 tablespoon olive oil
1/2 cup (2 ounces) crumbled queso fresco cheese
Cilantro sprigs (optional)
Lime wedges (optional)
Preheat oven to 350°.
To prepare salsa, bring water to a boil. Add tomatillos, garlic, and chile; cook 7 minutes. Drain and rinse with cold water. Combine tomatillos, garlic, chile, chopped cilantro, onion, lime juice, and 1/4 teaspoon salt in a food processor or blender; pulse 4 to 5 times or until coarsely chopped. Set aside.
To prepare chicken, place bread in a food processor, and pulse 10 times or until coarse crumbs measure 1 1/2 cups. Arrange crumbs on a baking sheet; bake at 350° for 3 minutes or until lightly browned. Cool completely.
Place each chicken breast half between 2 sheets of heavy-duty plastic wrap; pound to 1/2-inch thickness using a meat mallet or rolling pin. Combine 1/2 teaspoon salt, cumin, and red pepper; sprinkle evenly over chicken.
Place breadcrumbs in a shallow dish. Place egg in another shallow dish. Dip chicken in egg; dredge in breadcrumbs.
Heat oil in a large nonstick skillet over medium-high heat. Add chicken; cook 4 minutes on each side or until done. Top chicken with salsa, and sprinkle with queso fresco cheese. Garnish with cilantro sprigs and lime wedges, if desired.
Nutritional Information
Amount per serving
Calories: 364
Calories from fat: 26%
Fat: 10.7g
Saturated fat: 3.2g
Monounsaturated fat: 4.5g
Polyunsaturated fat: 1.6g
Protein: 47.1g
Carbohydrate: 17.7g
Fiber: 2g
Cholesterol: 162mg
Iron: 3mg
Sodium: 770mg
Calcium: 169mg
*****
I used whole wheat bread for my breadcrumbs because that's what we had. The salsa was super tasty and smelled so good. I had looked up the recipe on the Cooking Light website and saw some people complained that they didn't like that the queso fresco didn't melt onto the chicken, but I really liked that about it. This was super tasty and pretty easy. The salsa could easily be made ahead of time, too. I heated up a can of black beans as our side and sprinkled some queso fresco on top of them when I plated. Mmmmm...tasty!!
Herbed Chicken Breasts with Tomatillo Salsa and Queso Fresco
Source: The Best of Cooking Light Everyday Favorites
Salsa:
2 quarts water
1/2 pound tomatillos (about 10 small), husks and stems removed
1 garlic clove
1/2 to 1 serrano chile
1/2 cup chopped fresh cilantro
1/4 cup coarsely chopped onion
1 teaspoon fresh lime juice
1/4 teaspoon salt
Chicken:
3 (1-ounce) slices white bread
4 (6-ounce) skinless, boneless chicken breast halves
1/2 teaspoon salt
1/2 teaspoon ground cumin
1/4 teaspoon ground red pepper
1 large egg, lightly beaten
1 tablespoon olive oil
1/2 cup (2 ounces) crumbled queso fresco cheese
Cilantro sprigs (optional)
Lime wedges (optional)
Preheat oven to 350°.
To prepare salsa, bring water to a boil. Add tomatillos, garlic, and chile; cook 7 minutes. Drain and rinse with cold water. Combine tomatillos, garlic, chile, chopped cilantro, onion, lime juice, and 1/4 teaspoon salt in a food processor or blender; pulse 4 to 5 times or until coarsely chopped. Set aside.
To prepare chicken, place bread in a food processor, and pulse 10 times or until coarse crumbs measure 1 1/2 cups. Arrange crumbs on a baking sheet; bake at 350° for 3 minutes or until lightly browned. Cool completely.
Place each chicken breast half between 2 sheets of heavy-duty plastic wrap; pound to 1/2-inch thickness using a meat mallet or rolling pin. Combine 1/2 teaspoon salt, cumin, and red pepper; sprinkle evenly over chicken.
Place breadcrumbs in a shallow dish. Place egg in another shallow dish. Dip chicken in egg; dredge in breadcrumbs.
Heat oil in a large nonstick skillet over medium-high heat. Add chicken; cook 4 minutes on each side or until done. Top chicken with salsa, and sprinkle with queso fresco cheese. Garnish with cilantro sprigs and lime wedges, if desired.
Nutritional Information
Amount per serving
Calories: 364
Calories from fat: 26%
Fat: 10.7g
Saturated fat: 3.2g
Monounsaturated fat: 4.5g
Polyunsaturated fat: 1.6g
Protein: 47.1g
Carbohydrate: 17.7g
Fiber: 2g
Cholesterol: 162mg
Iron: 3mg
Sodium: 770mg
Calcium: 169mg
*****
I used whole wheat bread for my breadcrumbs because that's what we had. The salsa was super tasty and smelled so good. I had looked up the recipe on the Cooking Light website and saw some people complained that they didn't like that the queso fresco didn't melt onto the chicken, but I really liked that about it. This was super tasty and pretty easy. The salsa could easily be made ahead of time, too. I heated up a can of black beans as our side and sprinkled some queso fresco on top of them when I plated. Mmmmm...tasty!!
Spiced Cod with Broccoli Quinoa Pilaf
I felt like I was on such a roll there for awhile getting my blog updated and caught up on back posts. Then things got crazy. This past week I was completely overwhelmed getting Boy #2's bedroom switched from baby room to big boy room. I never painted when we moved into our house a year ago, and I wanted to get his room painted before his new furniture came, so I spent literally every free moment this past week working on his room. I decided a striped accent wall would be a good idea. It wasn't. His room in our old house had tone on tone stripes (flat and glossy paint in the same color) and it was a BITCH. I knew stripes would be bad, but kind of like childbirth, I'd forgotten just how bad they were. Ugh. I was up until midnight Thursday night measuring and taping. Of course it didn't help that I measured the length of the room wrong the first time. Double ugh. But it's done and looks fantastic and he is now the proud owner of a bunk bed. No more crib for my little guy! Anyway, every aspect of my life was neglected this past week as I got his room ready. Plus my oldest has had swim lessons the past two weeks, so things have been nutty.
I told the husband that one of the things I want to do this weekend is get caught up on my blogs. I have seven posts I want to do for just this blog, so we'll see how far I get. I turned on some cartoons for my kiddos this morning (do you have Boomerang network where you are? Oh my gosh, I love it!! I love letting my kids watch the cartoons I watched on Saturday mornings when I was little.) and it's mostly keeping them entertained, except that they're boys and fight a lot, so I have to keep intervening.
Anyway, I don't even remember when we had this it's been so long ago, but it was tasty and pretty easy, so it's worth posting. I received it in a recipe email I get from Real Simple magazine. I had some cod in the freezer and thought it would be a tasty way to fix it instead of fish and chips. That's all I know to do with cod. Did you know that cod are actually a really mean fish? I had no idea. The husband and I were watching a show on octopus awhile ago, and apparently cod fish eat octopus. Crazy, huh? I tell ya, I'm a wealth of knowledge.
Spiced Cod with Broccoli Quinoa Pilaf
Source: RealSimple.com
3 teaspoons olive oil
1/2 small onion, chopped
kosher salt and black pepper
1 cup quinoa, rinsed well
2 cups chopped broccoli
1/4 cup raisins
1/2 cup roasted almonds, coarsely chopped
2 scallions, sliced
4 6-ounce pieces skinless cod, halibut, or striped bass fillet
1/2 teaspoon paprika
Heat 1 teaspoon of the oil in a medium saucepan over medium-high heat. Add the onion and season with ¾ teaspoon salt and ¼ teaspoon pepper. Cook, stirring occasionally, until softened and starting to brown, 3 to 4 minutes.
Add the quinoa and 1½ cups water to the saucepan and bring to a boil; reduce heat to low, cover, and simmer gently until almost all the water has evaporated, 10 to 12 minutes. Fold the broccoli and raisins into the quinoa, cover, and cook until the quinoa and broccoli are tender, 8 to 10 minutes more. Remove from heat and fold in the almonds, scallions, ½ teaspoon salt, and ¼ teaspoon pepper.
Meanwhile, heat the remaining 2 teaspoons of oil in a large non-stick skillet over medium-high heat. Season the cod with the paprika, ¼ teaspoon salt, and ¼ teaspoon pepper and cook until opaque throughout, 3 to 4 minutes per side. Serve with the pilaf.
Nutritional Information
Per Serving
Calories 464
Fat 16g
Sat Fat 2g
Cholesterol 65mg
Sodium 833mg
Protein 37g
Carbohydrate 44g
Sugar 7g
Fiber 6g
Iron 6mg
Calcium 109mg
*****
I haven't used quinoa very much, but I really liked it. Actually this may have been the first time. I tried to make quinoa stuffed peppers one time, but it didn't go over well, and I don't think they were ever eaten. This time we all really liked it. I love that it's high in protein. Did you know that technically it's a seed, not a grain? See, wealth of knowledge. I didn't have raisins in mine because for some strange reason we were out of them, but honestly raisins in it sounded kind of weird, so I wasn't that upset we skipped them. This dinner came together really quickly which was nice, too. This was a dinner I really liked and would readily make again. Note to self: find more ways to incorporate quinoa into our diet!
Sorry for the lame picture...the husband's iPhone camera was all I had available.
I told the husband that one of the things I want to do this weekend is get caught up on my blogs. I have seven posts I want to do for just this blog, so we'll see how far I get. I turned on some cartoons for my kiddos this morning (do you have Boomerang network where you are? Oh my gosh, I love it!! I love letting my kids watch the cartoons I watched on Saturday mornings when I was little.) and it's mostly keeping them entertained, except that they're boys and fight a lot, so I have to keep intervening.
Anyway, I don't even remember when we had this it's been so long ago, but it was tasty and pretty easy, so it's worth posting. I received it in a recipe email I get from Real Simple magazine. I had some cod in the freezer and thought it would be a tasty way to fix it instead of fish and chips. That's all I know to do with cod. Did you know that cod are actually a really mean fish? I had no idea. The husband and I were watching a show on octopus awhile ago, and apparently cod fish eat octopus. Crazy, huh? I tell ya, I'm a wealth of knowledge.
Spiced Cod with Broccoli Quinoa Pilaf
Source: RealSimple.com
3 teaspoons olive oil
1/2 small onion, chopped
kosher salt and black pepper
1 cup quinoa, rinsed well
2 cups chopped broccoli
1/4 cup raisins
1/2 cup roasted almonds, coarsely chopped
2 scallions, sliced
4 6-ounce pieces skinless cod, halibut, or striped bass fillet
1/2 teaspoon paprika
Heat 1 teaspoon of the oil in a medium saucepan over medium-high heat. Add the onion and season with ¾ teaspoon salt and ¼ teaspoon pepper. Cook, stirring occasionally, until softened and starting to brown, 3 to 4 minutes.
Add the quinoa and 1½ cups water to the saucepan and bring to a boil; reduce heat to low, cover, and simmer gently until almost all the water has evaporated, 10 to 12 minutes. Fold the broccoli and raisins into the quinoa, cover, and cook until the quinoa and broccoli are tender, 8 to 10 minutes more. Remove from heat and fold in the almonds, scallions, ½ teaspoon salt, and ¼ teaspoon pepper.
Meanwhile, heat the remaining 2 teaspoons of oil in a large non-stick skillet over medium-high heat. Season the cod with the paprika, ¼ teaspoon salt, and ¼ teaspoon pepper and cook until opaque throughout, 3 to 4 minutes per side. Serve with the pilaf.
Nutritional Information
Per Serving
Calories 464
Fat 16g
Sat Fat 2g
Cholesterol 65mg
Sodium 833mg
Protein 37g
Carbohydrate 44g
Sugar 7g
Fiber 6g
Iron 6mg
Calcium 109mg
*****
I haven't used quinoa very much, but I really liked it. Actually this may have been the first time. I tried to make quinoa stuffed peppers one time, but it didn't go over well, and I don't think they were ever eaten. This time we all really liked it. I love that it's high in protein. Did you know that technically it's a seed, not a grain? See, wealth of knowledge. I didn't have raisins in mine because for some strange reason we were out of them, but honestly raisins in it sounded kind of weird, so I wasn't that upset we skipped them. This dinner came together really quickly which was nice, too. This was a dinner I really liked and would readily make again. Note to self: find more ways to incorporate quinoa into our diet!
Sorry for the lame picture...the husband's iPhone camera was all I had available.
Saturday, May 21, 2011
Roast Chicken Chimichangas
I've rediscovered a fantastic Cooking Light cookbook I've owned for quite awhile...The Best of Cooking Light Everyday Favorites. Everything I've tried from it has been awesome.
I flipped through it back for Cinco de Mayo to find some kind of Mexican entrée we could have. This looked really easy and didn't require a lot of ingredients which are two automatic pluses in my book!
Roast Chicken Chimichangas
Source: The Best of Cooking Light Everyday Favorites
2 1/2 cups shredded roasted skinless, boneless chicken breasts
1 cup (4 ounces) crumbled queso fresco cheese
1/4 cup chopped green onions
1 teaspoon dried oregano
1/4 teaspoon ground cumin
1 garlic clove, minced
1 (4.5-ounce) can chopped green chiles, drained
1 (16-ounce) can fat-free refried beans
6 (8-inch) flour tortillas
Cooking spray
1/2 cup bottled green salsa
Preheat oven to 500°.
Combine first 7 ingredients in a large bowl; toss well.
Spread 1/4 cup beans down center of each tortilla. Top each tortilla with 2/3 cup chicken mixture; roll up. Place rolls, seam sides down, on a large baking sheet coated with cooking spray. Coat tops of chimichangas with cooking spray. Bake at 500° for 7 minutes. Serve with salsa.
Calories: 380
Calories from fat: 23%
Fat: 9.7g
Saturated fat: 3.1g
Monounsaturated fat: 4.1g
Polyunsaturated fat: 1.6g
Protein: 28.8g
Carbohydrate: 42.5g
Fiber: 6.5g
Cholesterol: 55mg
Iron: 3.8mg
Sodium: 728mg
Calcium: 157mg
*****
Instead of using some roasted chicken I threw a couple chicken breasts on the grill while my family was swimming then just shredded the meat once they were cooked (the chicken, not my family). These were so easy to make. Throw everything in a bowl, spread some beans on a tortilla, spoon some chicken mixture down the middle, fold, and bake. I was kind of surprised that the serving size was just one, but they were really filling.
We all really liked these. REALLY liked them. The husband actually asked if we could have weekly chimichanga night. I loved how easy these came together and that we all loved them. This will definitely be in regular rotation in our house.
I flipped through it back for Cinco de Mayo to find some kind of Mexican entrée we could have. This looked really easy and didn't require a lot of ingredients which are two automatic pluses in my book!
Roast Chicken Chimichangas
Source: The Best of Cooking Light Everyday Favorites
2 1/2 cups shredded roasted skinless, boneless chicken breasts
1 cup (4 ounces) crumbled queso fresco cheese
1/4 cup chopped green onions
1 teaspoon dried oregano
1/4 teaspoon ground cumin
1 garlic clove, minced
1 (4.5-ounce) can chopped green chiles, drained
1 (16-ounce) can fat-free refried beans
6 (8-inch) flour tortillas
Cooking spray
1/2 cup bottled green salsa
Preheat oven to 500°.
Combine first 7 ingredients in a large bowl; toss well.
Spread 1/4 cup beans down center of each tortilla. Top each tortilla with 2/3 cup chicken mixture; roll up. Place rolls, seam sides down, on a large baking sheet coated with cooking spray. Coat tops of chimichangas with cooking spray. Bake at 500° for 7 minutes. Serve with salsa.
Calories: 380
Calories from fat: 23%
Fat: 9.7g
Saturated fat: 3.1g
Monounsaturated fat: 4.1g
Polyunsaturated fat: 1.6g
Protein: 28.8g
Carbohydrate: 42.5g
Fiber: 6.5g
Cholesterol: 55mg
Iron: 3.8mg
Sodium: 728mg
Calcium: 157mg
*****
Instead of using some roasted chicken I threw a couple chicken breasts on the grill while my family was swimming then just shredded the meat once they were cooked (the chicken, not my family). These were so easy to make. Throw everything in a bowl, spread some beans on a tortilla, spoon some chicken mixture down the middle, fold, and bake. I was kind of surprised that the serving size was just one, but they were really filling.
We all really liked these. REALLY liked them. The husband actually asked if we could have weekly chimichanga night. I loved how easy these came together and that we all loved them. This will definitely be in regular rotation in our house.
Friday, May 20, 2011
Rocco's Chicken Picatta
A few weeks ago I decided to use Rocco DiSpirito's Now Eat This as my cookbook of the week. One of the dishes I made was his Chicken Picatta recipe. I've always liked picatta dishes...the tangy lemon and capers together...yum! I was excited to find a low cal version of this, and I figured I couldn't go wrong with Rocco.
Rocco's Chicken Picatta
Source: Now Eat This by Rocco DiSpirito
4 skinless, boneless chicken breasts (4 ounces each), pounded thin
Salt and freshly ground black pepper
1/2 cup plus 2 tablespoons whole-wheat flour
1 cup egg substitute
2 tablespoons unsalted butter
4 garlic cloves, minced
1/3 cup fresh lemon juice
2/3 cup water
3 tablespoons drained capers
1/3 cup chopped fresh flat-leaf parsley
1. Heat 2 large nonstick saute pans over medium heat.
2. While pans are heating, season the chicken with salt and pepper to taste. Put the ½ cup flour in one shallow dish and the egg substitute in another shallow dish. Dredge the chicken in the flour, then in the egg substitute, to coat completely.
3. When pans are hot, add ½ tablespoon of the butter to each pan. Allow the butter to melt completely and brown slightly. Then add 2 coated chicken breasts to each pan. Saute the chicken until it is golden brown and just cooked through, about 2 minutes per side. Transfer the chicken to a serving platter, and tent it with foil to keep the chicken warm.
4. Raise the heat under one of the saute pans to high. Add the remaining 1 tablespoon butter to the pan and allow it to melt. Add garlic and sweat for one minute. Whisk the remaining 2 tablespoons flour into the butter. Whisk in the lemon juice and the water; bring to a boil. Reduce the heat to low-and continue to cook the sauce, whisking constantly, until it has thickened, about 2 minutes. Stir in the capers and parsley. Season with salt and pepper to taste, if desired. Spoon the sauce over the chicken, and serve.
Fat 7.4g
Calories 241
Protein 31g
Carbohydrates 12g
Cholesterol 81mg
Fiber 2g
Sodium 459mg
*****
I left the sauce off my kids' pieces because I just didn't know if they'd like it, and I'm all about avoiding potential issues and fights at the dinner table. The husband and I loved it though. The crunchy breading, the lemons and capers...great combination! This is definitely something I'll make again, and since I don't use capers very often a jar lasts me awhile and I pretty much always have them in my fridge.
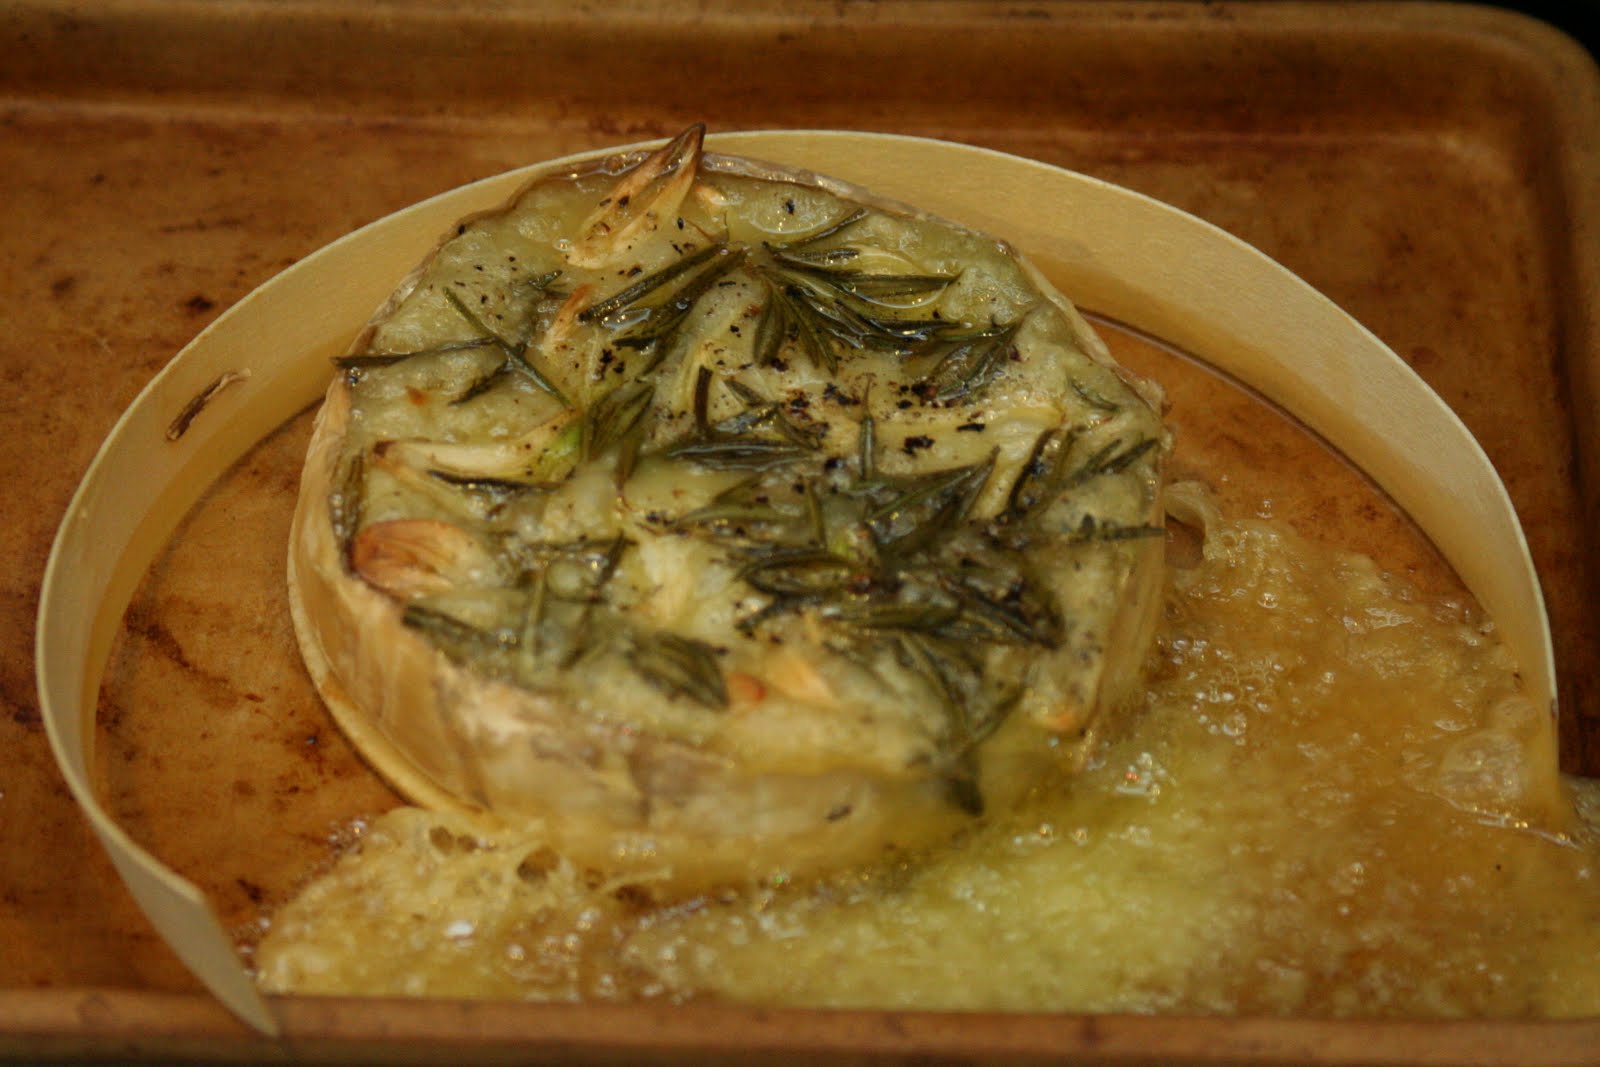
Rocco's Chicken Picatta
Source: Now Eat This by Rocco DiSpirito
4 skinless, boneless chicken breasts (4 ounces each), pounded thin
Salt and freshly ground black pepper
1/2 cup plus 2 tablespoons whole-wheat flour
1 cup egg substitute
2 tablespoons unsalted butter
4 garlic cloves, minced
1/3 cup fresh lemon juice
2/3 cup water
3 tablespoons drained capers
1/3 cup chopped fresh flat-leaf parsley
1. Heat 2 large nonstick saute pans over medium heat.
2. While pans are heating, season the chicken with salt and pepper to taste. Put the ½ cup flour in one shallow dish and the egg substitute in another shallow dish. Dredge the chicken in the flour, then in the egg substitute, to coat completely.
3. When pans are hot, add ½ tablespoon of the butter to each pan. Allow the butter to melt completely and brown slightly. Then add 2 coated chicken breasts to each pan. Saute the chicken until it is golden brown and just cooked through, about 2 minutes per side. Transfer the chicken to a serving platter, and tent it with foil to keep the chicken warm.
4. Raise the heat under one of the saute pans to high. Add the remaining 1 tablespoon butter to the pan and allow it to melt. Add garlic and sweat for one minute. Whisk the remaining 2 tablespoons flour into the butter. Whisk in the lemon juice and the water; bring to a boil. Reduce the heat to low-and continue to cook the sauce, whisking constantly, until it has thickened, about 2 minutes. Stir in the capers and parsley. Season with salt and pepper to taste, if desired. Spoon the sauce over the chicken, and serve.
Fat 7.4g
Calories 241
Protein 31g
Carbohydrates 12g
Cholesterol 81mg
Fiber 2g
Sodium 459mg
*****
I left the sauce off my kids' pieces because I just didn't know if they'd like it, and I'm all about avoiding potential issues and fights at the dinner table. The husband and I loved it though. The crunchy breading, the lemons and capers...great combination! This is definitely something I'll make again, and since I don't use capers very often a jar lasts me awhile and I pretty much always have them in my fridge.
Labels:
capers,
chicken,
lemon,
Rocco DiSpirito
Marinated Grilled Chicken Legs
I have to say, I'm on a roll with the new Cooking Light recipes I've been trying. So much so that the husband said we should have Cooking Light Month at our house. I gotta say, I'm not opposed to the idea. Three of the six recipes I still need to post about are CL recipes and were all tasty. I don't remember how I came across this one. I think it was an article on their website about 101 ways to cook chicken or something. Boy #1 LOVES chicken legs, and they were on sale last week, so I thought this would be good. It's pretty funny because he calls them "chicken bones." Let me tell you, it took awhile to figure out what he meant when he was asking for chicken bones.
Marinated Grilled Chicken Legs
Source: Cooking Light website
1 cup fresh orange juice
2 tablespoons fresh lemon juice
4 teaspoons low-sodium soy sauce
1 tablespoon dry sherry
1 1/2 teaspoons bottled minced garlic
1 1/2 teaspoons balsamic vinegar
1 1/2 teaspoons basil oil
1 teaspoon onion powder
1 teaspoon dark sesame oil
1/2 teaspoon salt
1/4 teaspoon hot pepper sauce
8 chicken drumsticks (about 2 1/4 pounds), skinned
Cooking spray
Green onion strips (optional)
Combine the first 11 ingredients in a large zip-top plastic bag. Add chicken to bag; seal. Marinate in refrigerator 2 hours, turning bag occasionally.
Prepare grill.
Remove chicken from bag, reserving marinade. Place reserved marinade in a small saucepan; cook over medium heat 3 minutes. Place chicken on grill coated with cooking spray; grill 30 minutes or until chicken is done, turning and basting occasionally with reserved marinade. Garnish with green onion strips, if desired.
Amount per serving (2 drumsticks)
Calories: 215
Calories from fat: 31%
Fat: 7.5g
Saturated fat: 1.8g
Monounsaturated fat: 2.8g
Polyunsaturated fat: 1.8g
Protein: 30g
Carbohydrate: 4.4g
Fiber: 0.1g
Cholesterol: 97mg
Iron: 1.5mg
Sodium: 339mg
Calcium: 18mg
*****
I figure since the nutritional info was there I might as well include in case anyone else is counting calories like we are.
This chicken was REALLY good. The only thing I left out was the basil oil because I don't have any and didn't really want to buy any for the small amount that is used. Although in hindsight I probably could have just bought some fresh basil and made my own. Oh well. I used sriracha for the hot sauce and was worried I'd added too much, but it wasn't spicy at all. Dodged a bullet there because Boy #1 does not like spicy and would have been very disappointed if he couldn't eat the chicken bones.
We all really liked this. I wished I'd thrown a few more legs into the marinade so I could have had another and/or some leftovers. This will definitely be a go to recipe for chicken bones in the future!
Marinated Grilled Chicken Legs
Source: Cooking Light website
1 cup fresh orange juice
2 tablespoons fresh lemon juice
4 teaspoons low-sodium soy sauce
1 tablespoon dry sherry
1 1/2 teaspoons bottled minced garlic
1 1/2 teaspoons balsamic vinegar
1 1/2 teaspoons basil oil
1 teaspoon onion powder
1 teaspoon dark sesame oil
1/2 teaspoon salt
1/4 teaspoon hot pepper sauce
8 chicken drumsticks (about 2 1/4 pounds), skinned
Cooking spray
Green onion strips (optional)
Combine the first 11 ingredients in a large zip-top plastic bag. Add chicken to bag; seal. Marinate in refrigerator 2 hours, turning bag occasionally.
Prepare grill.
Remove chicken from bag, reserving marinade. Place reserved marinade in a small saucepan; cook over medium heat 3 minutes. Place chicken on grill coated with cooking spray; grill 30 minutes or until chicken is done, turning and basting occasionally with reserved marinade. Garnish with green onion strips, if desired.
Amount per serving (2 drumsticks)
Calories: 215
Calories from fat: 31%
Fat: 7.5g
Saturated fat: 1.8g
Monounsaturated fat: 2.8g
Polyunsaturated fat: 1.8g
Protein: 30g
Carbohydrate: 4.4g
Fiber: 0.1g
Cholesterol: 97mg
Iron: 1.5mg
Sodium: 339mg
Calcium: 18mg
*****
I figure since the nutritional info was there I might as well include in case anyone else is counting calories like we are.
This chicken was REALLY good. The only thing I left out was the basil oil because I don't have any and didn't really want to buy any for the small amount that is used. Although in hindsight I probably could have just bought some fresh basil and made my own. Oh well. I used sriracha for the hot sauce and was worried I'd added too much, but it wasn't spicy at all. Dodged a bullet there because Boy #1 does not like spicy and would have been very disappointed if he couldn't eat the chicken bones.
We all really liked this. I wished I'd thrown a few more legs into the marinade so I could have had another and/or some leftovers. This will definitely be a go to recipe for chicken bones in the future!
Wednesday, May 18, 2011
Baked Camembert Pasta
I happened to be grocery shopping with my friend Jen recently and saw a marked down package of camembert cheese in the deli section. I turned to her and said, "Didn't you use camembert for something recently?" To which she replied, "Why yes I most certainly did." Or something along those lines in the way of an affirmative answer. She said it was like a decadent, grown-up mac and cheese. Sold! That was all I needed to hear to throw the package in my cart. I know I've professed my love for mac and cheese before, so I won't bore you with the details of it again.
I'm copying the recipe from Jen's blog but she found it from a Jamie Oliver cookbook.
Baked Camembert Pasta
Source: Food Revolution by Jamie Oliver
a box of Camembert Cheese (250g)
2 cloves of garlic, peeled and finely sliced
1 sprig of fresh rosemary, pick the leaves off the woody stalk
sea salt and freshly ground black pepper
extra virgin olive oil
100g grated Parmesan cheese
400g dried rigatoni
150g fresh spinach
Directions:
1. Open the box of cheese and unwrap it. Place it back to the wooden container.
2. Score a circle into the top of the skin, then lift it off and discard.
3. Lay the garlic slices on top of the cheese, sprinkle some pepper and drizzle a little extra virgin olive oil.
4. Scatter the rosemary leaves over the top and gently pat with your fingers to coat them in the oil.
5. Bake the cheese in a preheated oven of 180C (350F) for about 25 minutes, until golden and melted. (***May take a little longer until the cheese is melted***)
6. When the cheese has 10 minutes left to cook, add the pasta to the pan and cook according to packet instructions.
7. When the pasta is cooked, add the spinach to the pan – it only needs cooking for 10 seconds or so.
8. Drain the pasta and spinach to the pan and let it wilt.
9. Drizzle with a couple of good lugs of extra virgin olive oil and add the grated Parmesan. If the sauce is too thick for you, add a splash of reserved cooking water to thin out a bit. Season with salt and pepper and give it a good stir.
10. Remove the cheese from the oven. Divide the pasta between your serving bowls. Either drizzle the melted Camembert on top or pop cheese on the table and let everyone help themselves to a lovely, gooey spoonful.
*****
I forgot the spinach when I was getting the other ingredients I needed. Oops. And I used whole wheat rotini instead of rigatoni. This was indeed a decadent, grown-up mac and cheese. So much so that I tried to ration the amount of cheese I gave my kids on their pasta so that the husband and I could have more. When I pulled the cheese out of the oven it smelled AMAZING. And the cheese was all gooey and melty with yummy slices of garlic and bits of rosemary on top. Oh man. I seriously could have stood there and eaten it with a spoon.
I don't know how often I'd make this just because camembert is not an inexpensive cheese, so it would have to be a special occasion. Or if I happened to find it marked down again. But if it's in your grocery budget, I say give this a try. But only if you look gooey, melty, awesomeness.
I would advise putting your cheese on a baking sheet of some sort. Just in case something like this happens. It would 1) be a shame to lose the cheese and 2) suck to have to clean that mess up from the bottom of your oven.
I'm copying the recipe from Jen's blog but she found it from a Jamie Oliver cookbook.
Baked Camembert Pasta
Source: Food Revolution by Jamie Oliver
a box of Camembert Cheese (250g)
2 cloves of garlic, peeled and finely sliced
1 sprig of fresh rosemary, pick the leaves off the woody stalk
sea salt and freshly ground black pepper
extra virgin olive oil
100g grated Parmesan cheese
400g dried rigatoni
150g fresh spinach
Directions:
1. Open the box of cheese and unwrap it. Place it back to the wooden container.
2. Score a circle into the top of the skin, then lift it off and discard.
3. Lay the garlic slices on top of the cheese, sprinkle some pepper and drizzle a little extra virgin olive oil.
4. Scatter the rosemary leaves over the top and gently pat with your fingers to coat them in the oil.
5. Bake the cheese in a preheated oven of 180C (350F) for about 25 minutes, until golden and melted. (***May take a little longer until the cheese is melted***)
6. When the cheese has 10 minutes left to cook, add the pasta to the pan and cook according to packet instructions.
7. When the pasta is cooked, add the spinach to the pan – it only needs cooking for 10 seconds or so.
8. Drain the pasta and spinach to the pan and let it wilt.
9. Drizzle with a couple of good lugs of extra virgin olive oil and add the grated Parmesan. If the sauce is too thick for you, add a splash of reserved cooking water to thin out a bit. Season with salt and pepper and give it a good stir.
10. Remove the cheese from the oven. Divide the pasta between your serving bowls. Either drizzle the melted Camembert on top or pop cheese on the table and let everyone help themselves to a lovely, gooey spoonful.
*****
I forgot the spinach when I was getting the other ingredients I needed. Oops. And I used whole wheat rotini instead of rigatoni. This was indeed a decadent, grown-up mac and cheese. So much so that I tried to ration the amount of cheese I gave my kids on their pasta so that the husband and I could have more. When I pulled the cheese out of the oven it smelled AMAZING. And the cheese was all gooey and melty with yummy slices of garlic and bits of rosemary on top. Oh man. I seriously could have stood there and eaten it with a spoon.
I don't know how often I'd make this just because camembert is not an inexpensive cheese, so it would have to be a special occasion. Or if I happened to find it marked down again. But if it's in your grocery budget, I say give this a try. But only if you look gooey, melty, awesomeness.
I would advise putting your cheese on a baking sheet of some sort. Just in case something like this happens. It would 1) be a shame to lose the cheese and 2) suck to have to clean that mess up from the bottom of your oven.
Subscribe to:
Posts (Atom)